THE NEW AND IMPROVED POWER CART JUMP BOX
A senior project to our list of devices that we've made from over the years, The Power Cart has been one of the items that helped get things started. Between making for usable material on here and providing a product for us to sell in the form of an instruction manual to construct one of these devices, The Power Cart has been around for a long time. Now the Power Cart that we have here has not been used in over 7 years so it's sat in the back room, where the battery eventually fizzled out. In the time that it was active the device did serve us during brief power outages and even as a power supply for powering tools deeper in the field away from any mains power.
Once we started getting and using battery power tools and managed to get our generator game down pat, there really wasn't any need for The Power Cart. We have a small tailgate genny that's good for powering a couple of tools in the field where needed. Two larger gennies we have are able to power everything we would typically need to run in the house even during a power outage, singly, with both, we could run everything. Soon enough we'll be upgrading to a whole house propane powered genny that will be able to handle the whole house by itself so even the regular gasoline gennies will be rendered unneeded at that point.
With that the question arose about what to do with The Power Cart. At the same time I also came across a defunct portable jump box from a friend. The jump box is one of those small units that allows you to crank a dead car over a couple of times but with the small batteries typically used within, a couple of good cranks is all one can hope for with one of these things. A replacement lead acid battery for this jump box would be $40, about the cost of a new unit. The idea then was to combine the dead portable jump box with the dead Power Cart and make a new and improved Power Cart/Jump Box.
The concept behind this is to basically modify The Power Cart to have jumper cables to allow for hard cranking of a dead car from a whole car battery versus a dinky sealed lead acid battery like in the portable jump box. In addition to the jumping ability the improved Power Cart will still retain the power inverter and 12v receptacle ability so the Power Cart can serve as a power supply and jump box. Now one thing I did want to do was not retain the original appearance of The Power Cart. I wanted to streamline everything, pushing the hardware to inside the battery box to make a nice and neat package that still does the same job. I also wanted to retain some of the features of the portable jump box as well. The portable jump box has a little panel that has a main high amperage switch for turning power on to the jumper cables along with a single 12v receptacle and a state of charge indicator. I also wanted to add USB charging/power ability to the package since now we plug up all manner of devices to USB chargers. The power inverter that was used on the original Power Cart was obviously an older model, nowadays inverters have integrated USB ports to provide this feature.
The first thing I had to do was strip the old Power Cart and the jump box. From the jump box I retained the panel I mentioned previously and the short jumper cables. From the Power Cart I kept the battery box, charger and the cart along with some fasteners. I planned on upgrading to one of the newer inverters, which we happen to have on hand and I wasn't going to keep the outlet box or the 12v receptacles since the jump box panel has a 12v receptacle on it.
I started the conversion by installing the jump box panel. To do this I cut a hole in the battery box lid and trimmed it to fit the panel nicely enough to not have any large gaps. I then hot glued the panel in place. The next thing I did was add some cable to the jumper cables. I added a few feet of extra cable to each jumper cable using some heavy duty cable couplings. On the negative cable I attached the battery terminal to the end of the extra long jumper cable and attached a loop terminal to the end of the ground wire on the panel and secured it to the battery terminal on the jumper cable.
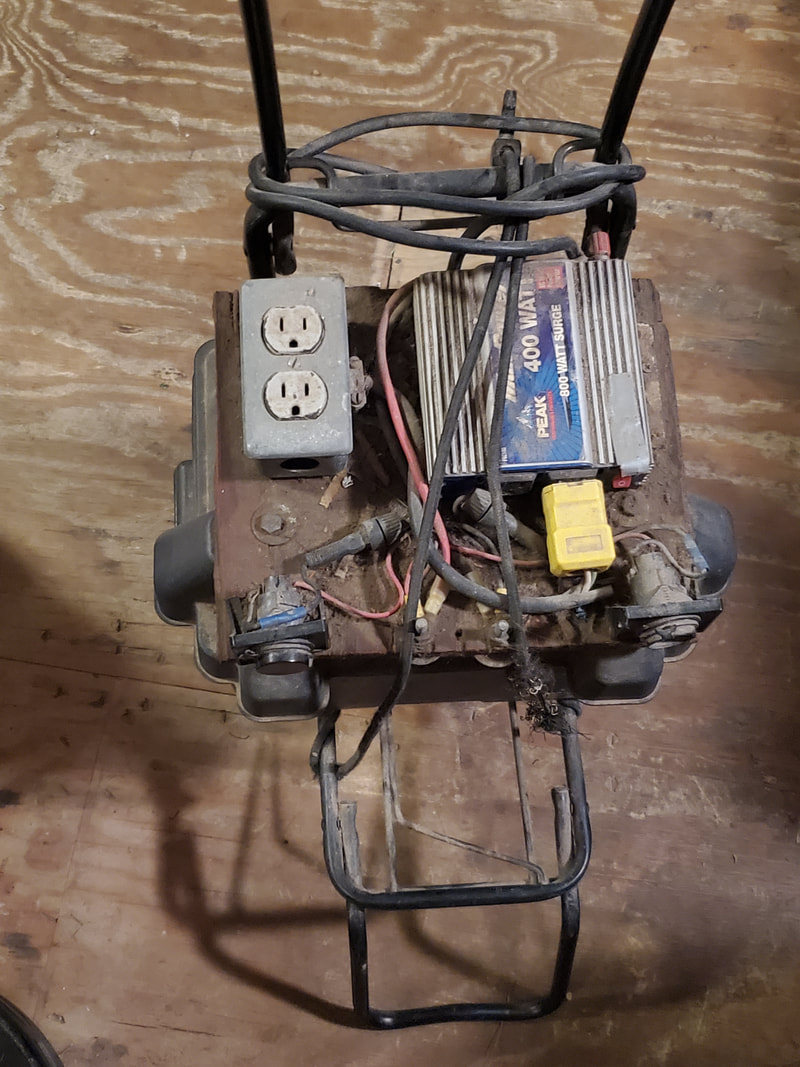
The original Power Cart with all of the hardware mounted on a piece of plywood secured to the top of the battery box. All of this will be gone in the new conversion.

The old jump box, after removing the jumper cables and panel from box.
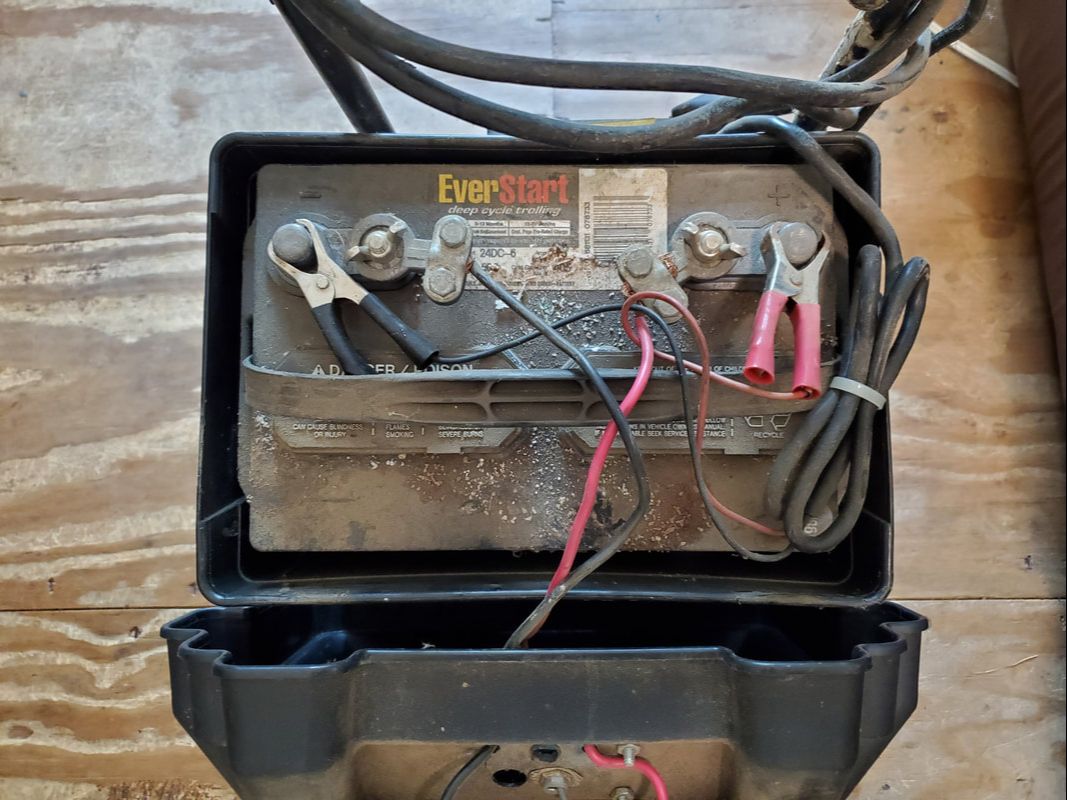
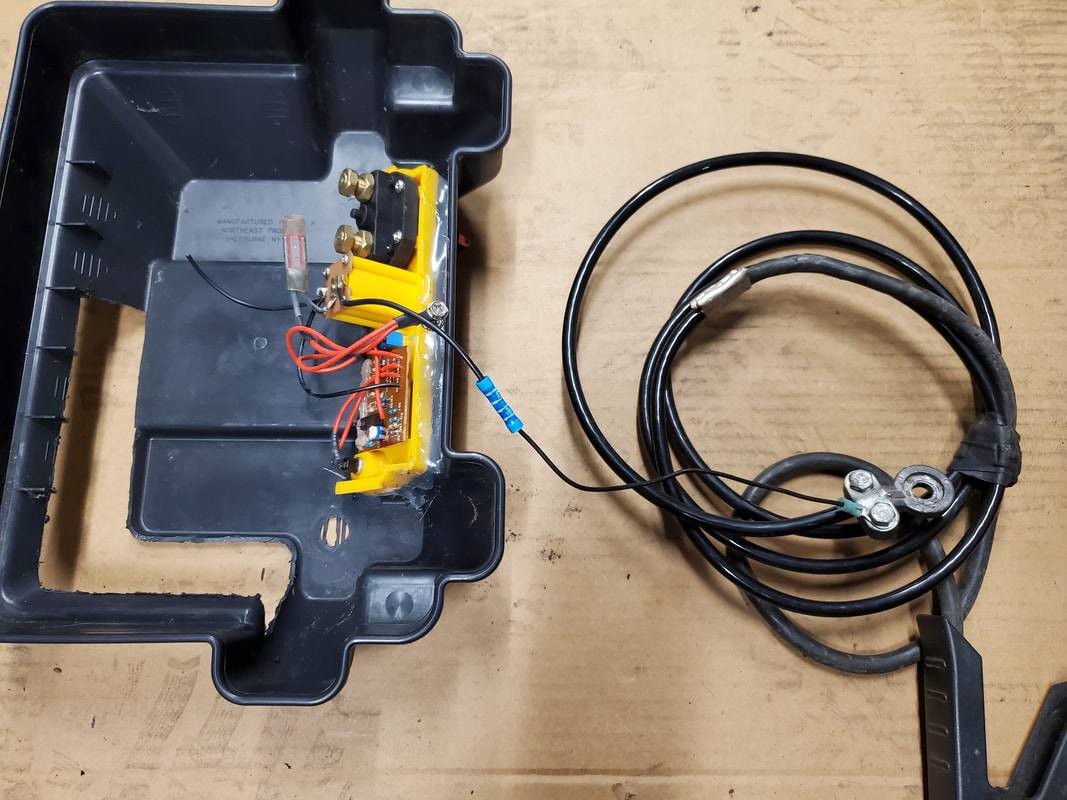
Battery box of original Power Cart showing simple hookup of charger cables and power cables that went to inverter and other receptacles.
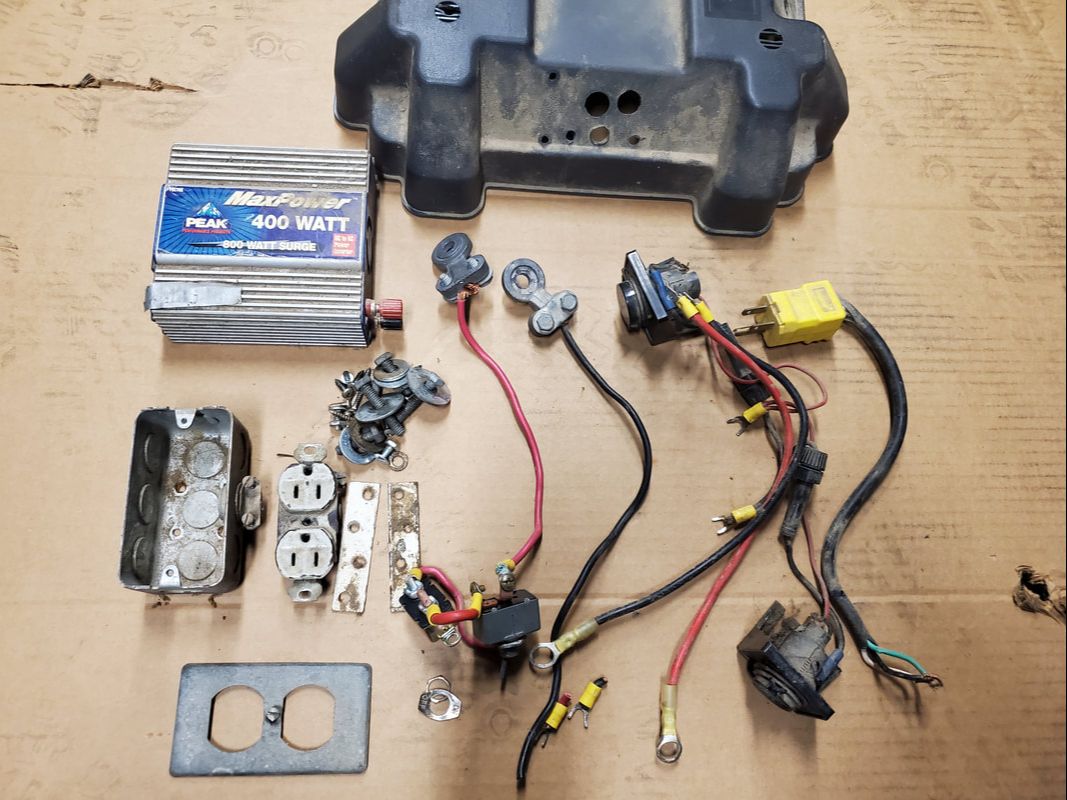
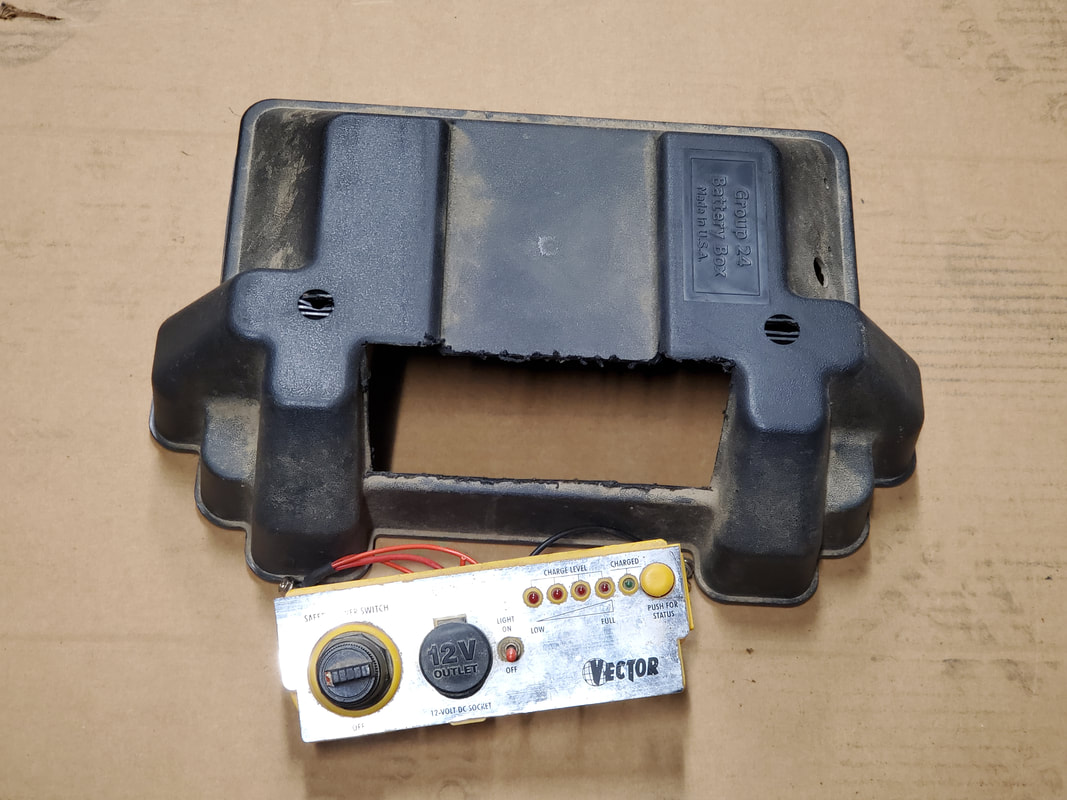
Stripped down hardware from original Power Cart, along with lid to battery box. Most of this hardware will not be saved for the reincarnation of this device.
Battery box lid after cutting out hole to accommodate the power panel from the jump box.
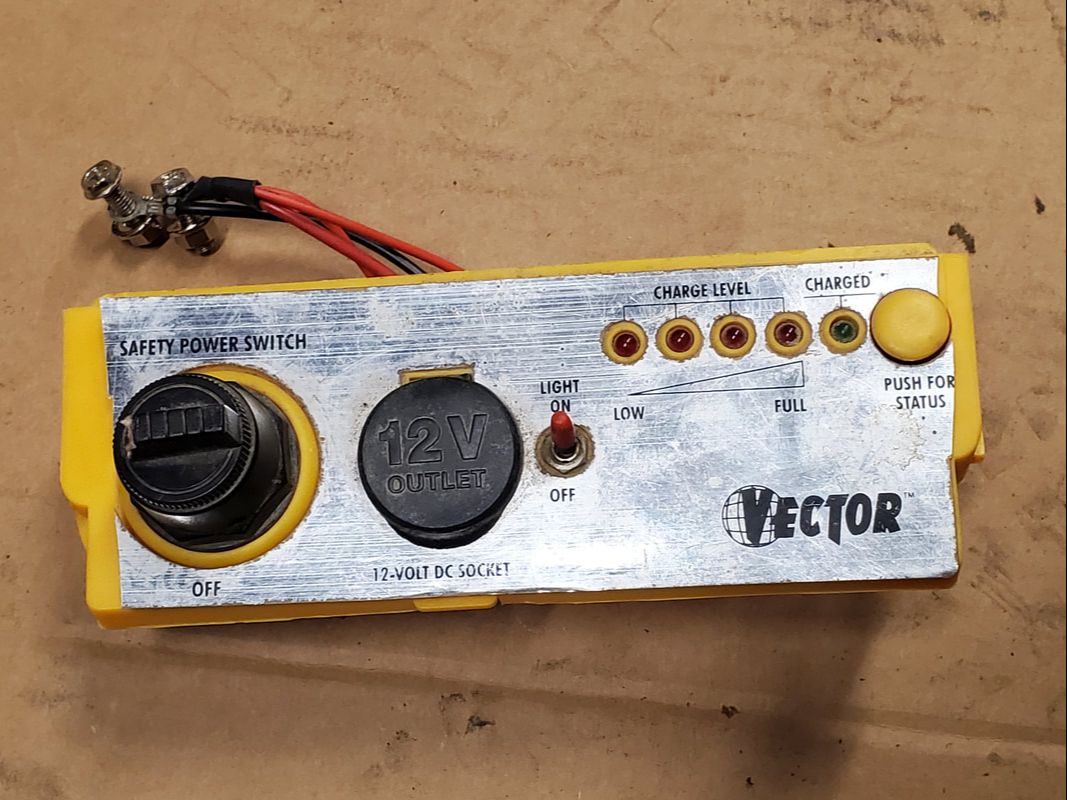
Power panel removed from the old jump box. Positive cable bundle meets together in one terminal that will be connected to one end of the main switch so when the switch is turned on it'll feed power to both the jumper cables and the 12v receptacle.
Battery box lid with power panel staged in front of it to show size comparisons. Panel will be installed from the inside of the lid and hot glued in place on both the inside and outside of the lid.
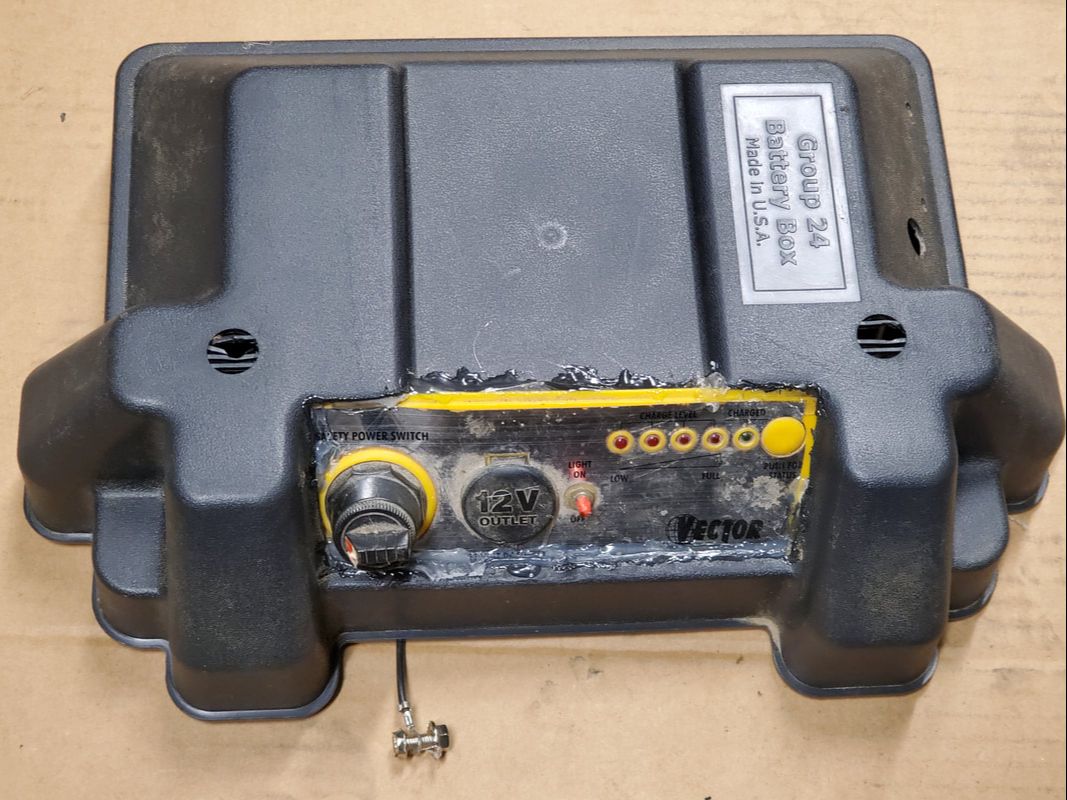
Power panel glued in place from the inside of the battery box lid.
Inside of power panel and battery box lid showing layer of glue around edges of panel.
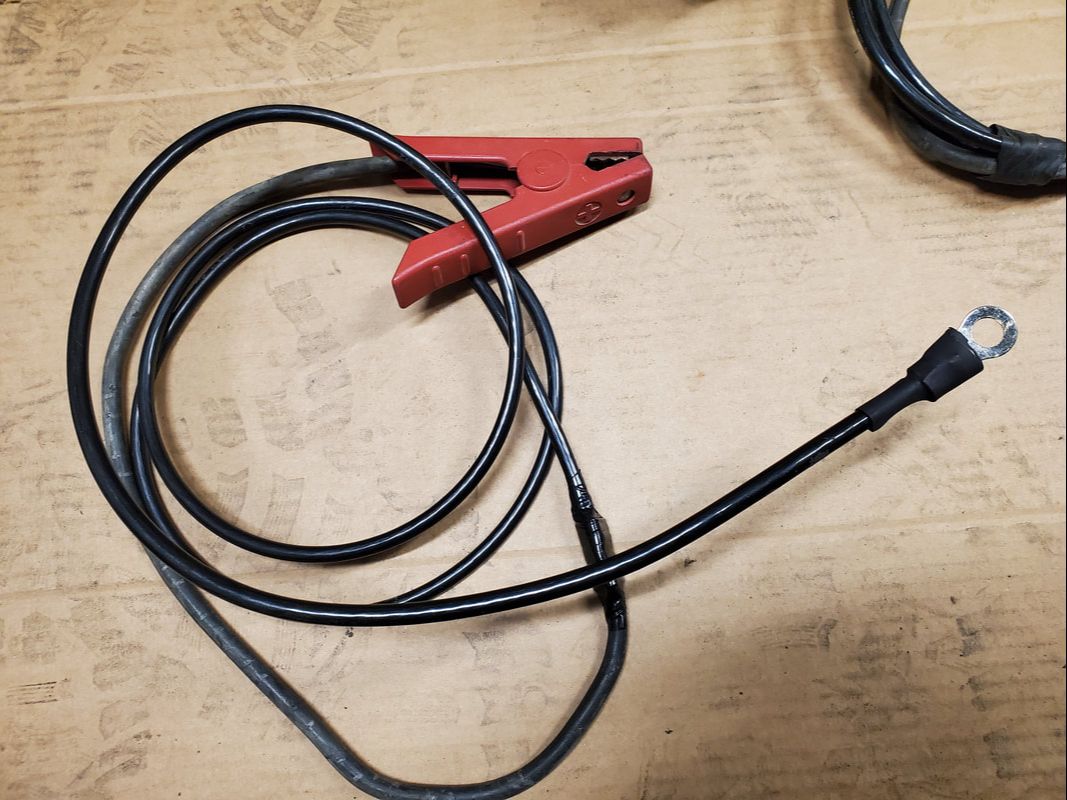
Extra long jumper cable with ground wire hooked up to battery terminal which is also attached to end of extra long jumper cable.
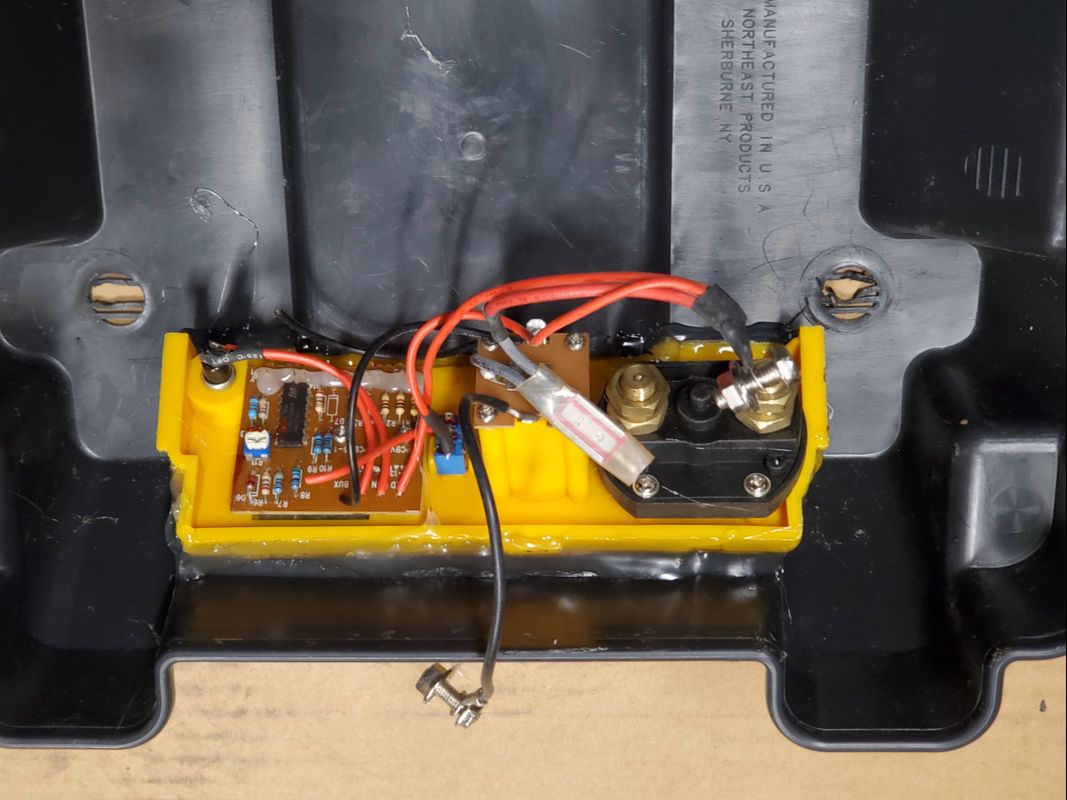
From this point I took the positive jumper cable and added a large loop terminal to the end. This terminal will go on one end of the main switch. I then took an old positive battery cable and cut off the end with the loop terminal on it, keeping a few inches of cable. The loop end went on the other end of the main switch while the battery terminal from the old Power Cart went on the other end of this short cable. This will of course go to the positive end of the battery that'll be in the battery box. I still need to get some large loop terminals so I can make the short cables that'll be used to hook up the power inverter to the rest of this mess but in the meantime I mounted the new power inverter into the box.
To do this I cut another large hole in the side of the battery box lid, at a corner opposite from where the power panel went. I then took a newer used inverter that has mounting feet on it and inserted the unit into the hole of the lid. One slot of the mounting foot actually slotted against the box lid skin. With the inverter locked in place against the slot I drilled a hole for the other slot and used one of the screw/nuts salvaged from the old Power Cart to hold the mounting foot in place. The inverter still wasn't fully secured on the inside of the lid so I took a heavy duty zip tie to secure the other end of the inverter to the inside of the box lid, running it through the vent hole on the lid. With the inverter fully secured, I moved on to securing the box itself to the luggage cart.
To do this I drilled six sets of two holes in the bottom of the box where they are lined up with the frame of the cart. This then allowed me to run smaller zip ties through one hole, over the cart frame and through the other hole to secure the zip tie around both the cart frame and the battery box body. Two of the holes are situated perpendicular to the other four so with all the zip ties in place the battery box can't move in any direction on top of the luggage cart. This method of securing the battery box was an improvement over the bungee cords used originally, especially since the bungee cords were dry rotted and frayed.
With the loop terminals in hand plus a battery, I was able to make the cables to hook the power inverter up to the main switch and the ground/negative terminal as well as install the battery in order to get this project into the home stretch. The next move was to take a piece of pallet board and secure it across the lower part of the cart's handle to serve as an anchor point for the jumper cable clamps so they won't possibly short out on the cart's metal body.
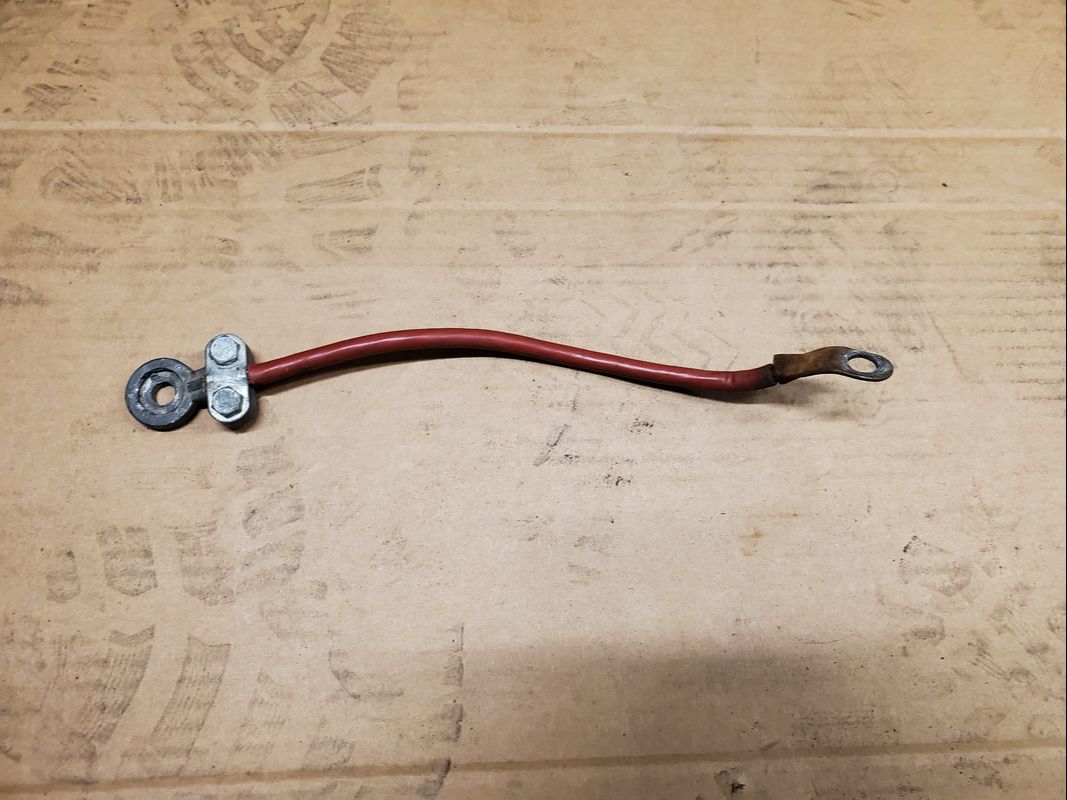
Short positive cable made up from old battery cable.
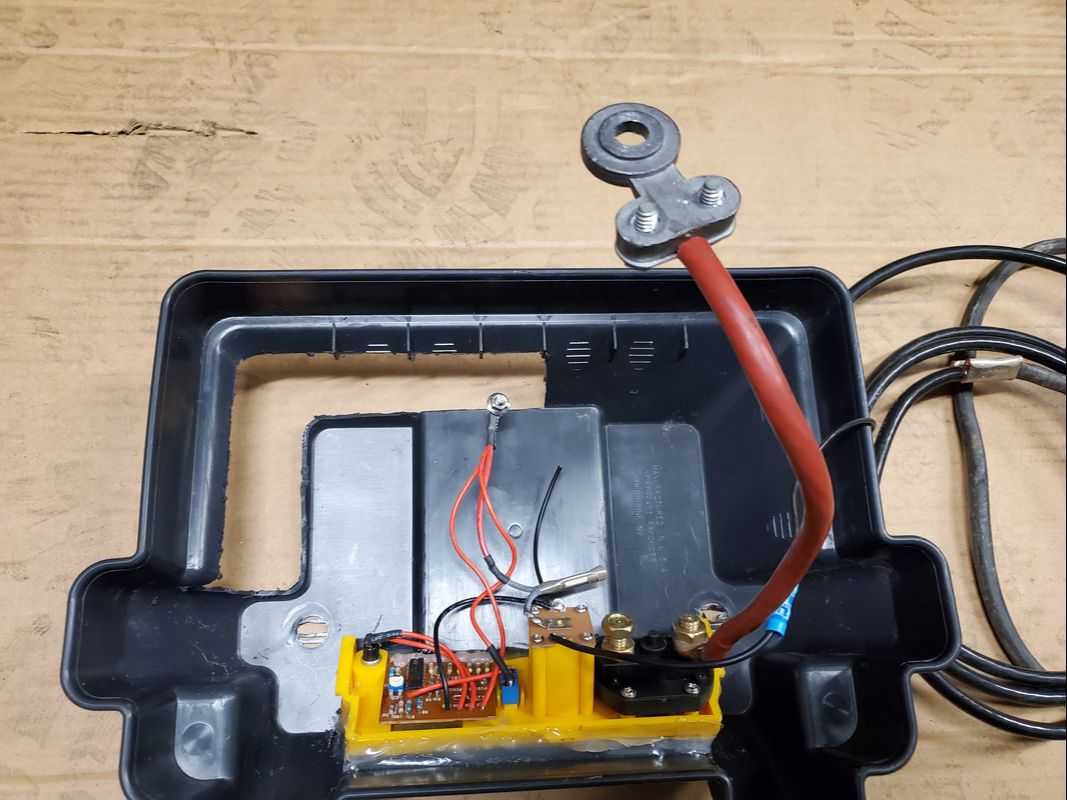
Short positive cable hooked up to one end of the main switch. This cable will hook up to the positive post of the battery.
Positive jumper cable with large loop terminal connected in place and heat shrink tubing over end to protect crimp and bare conductor of cable. Also note electrical tape over coupling that connected short jumper cable to extra length of cable.

Loop terminal on positive cable hooked up to other end of main switch.
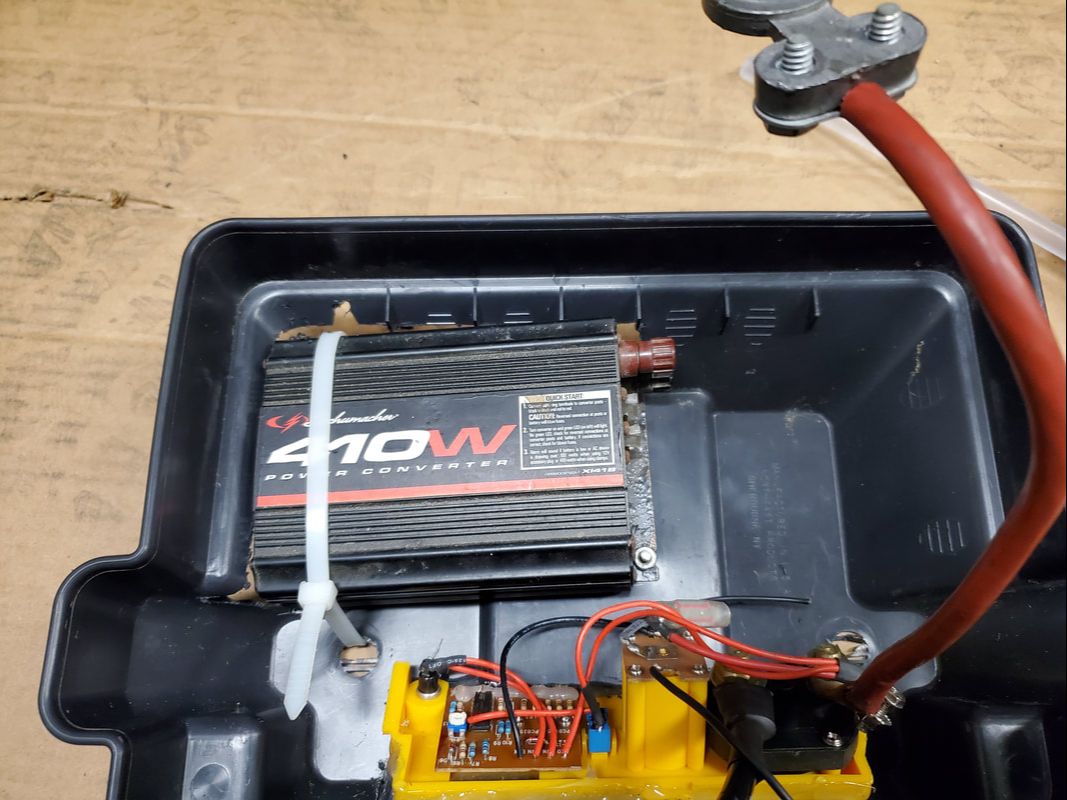
Power inverter secured to inside of battery lid. Note single screw/nut holding mounting tab on bottom right corner of inverter. Slot of mounting tab is locked against lid body just under inverter's power terminals. Note large zip tie holding other end of inverter to lid.
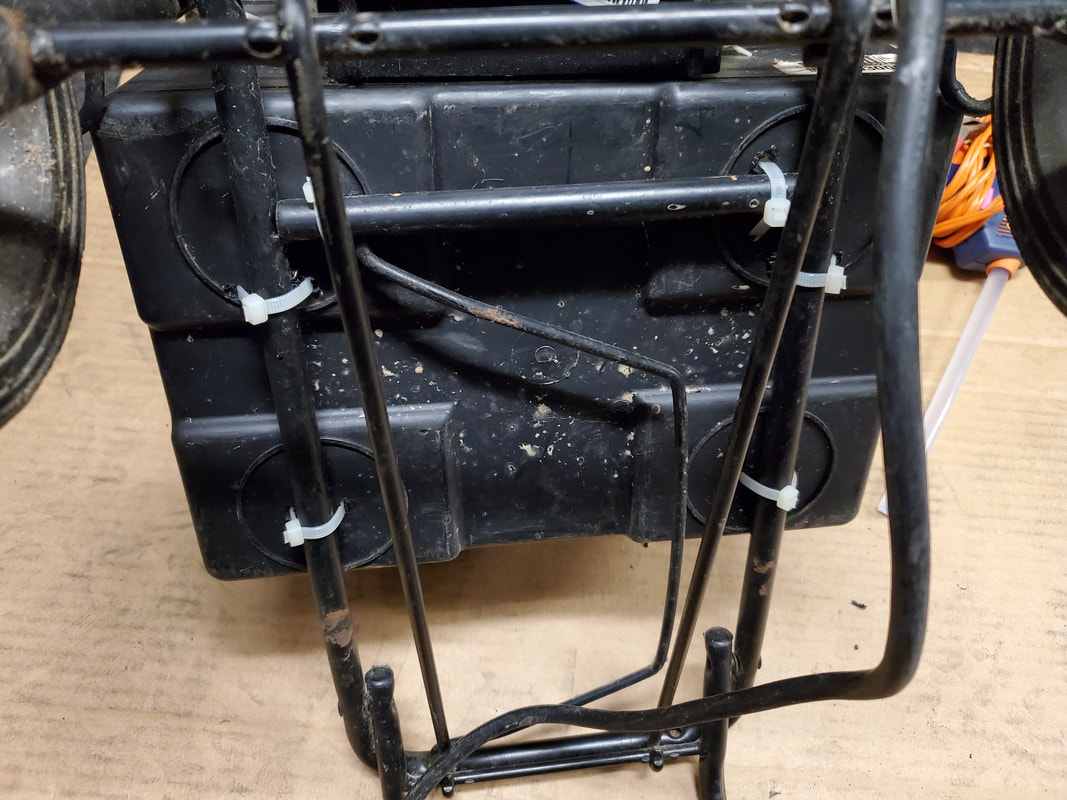
Bottom of battery box showing zip ties securing box to luggage cart frame at six different points.
Shot of inside of battery box showing how zip ties are looped through holes in box to secure it to the cart frame.
With extra fittings in hand for the inverter wiring and a decent battery (freed up after getting the right battery for the vehicle using the donor battery) I was able to wrap things up with the updated Power Cart. I made the ground and positive connections for the inverter to their respective spots on the main switch and battery terminal then put the battery in, hooking up the side post terminals to the unit. Even though the battery box is for a top post battery, I was able to squeeze the battery in without much issue. Of course in the future I'll use a regular top post group 24 marine battery but for now I just wanted to get the Power Cart into service. With the battery in and all connections made, I routed the jumper cables out from the box in a way where the lid will allow for the cables to pass through and out. I used a bungee cord to hold the lid to the box since things weren't a perfect fit at this moment. I had to manipulate the cables to allow for the lid to sit as best as it could. I may trim a cable or two once I put the right battery in the box but for now we just have to work with what we have. The last thing I did was install a piece of pallet board to serve as a clamp base for the alligator clamps. Since the frame of the luggage cart was smaller than the conduit clamps I had available, I just cut a couple of pieces of heater hose then cut those pieces the long way to allow me to wrap the pieces around the frame tubes of the luggage cart before putting the conduit clamp over each one. Wood screws secured the conduit clamps to the pallet board. With that I'm able to coil up the jumper cables and hang them on the ends of the pallet board while clamping the alligator clamps to the ends as well to make a nice and neat package, ready to go.
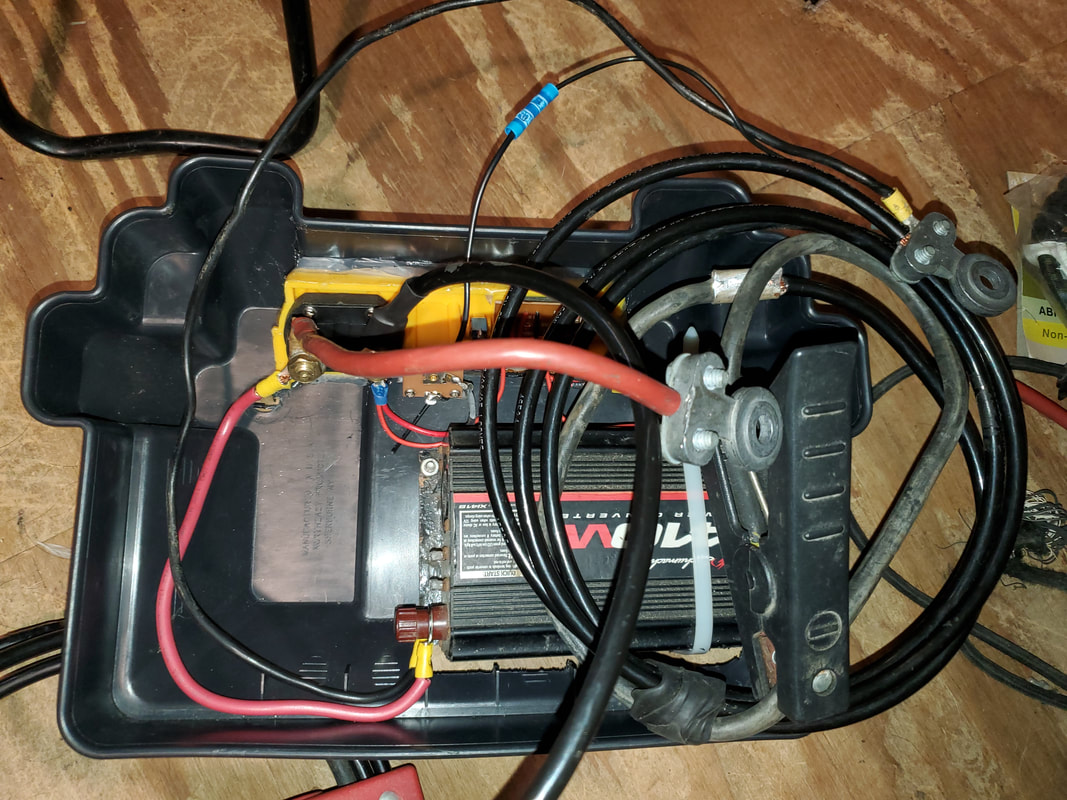
Power cables attached to inverter and routed neatly in battery box lid. Note how cables attach to main switch and battery terminal at ground point.
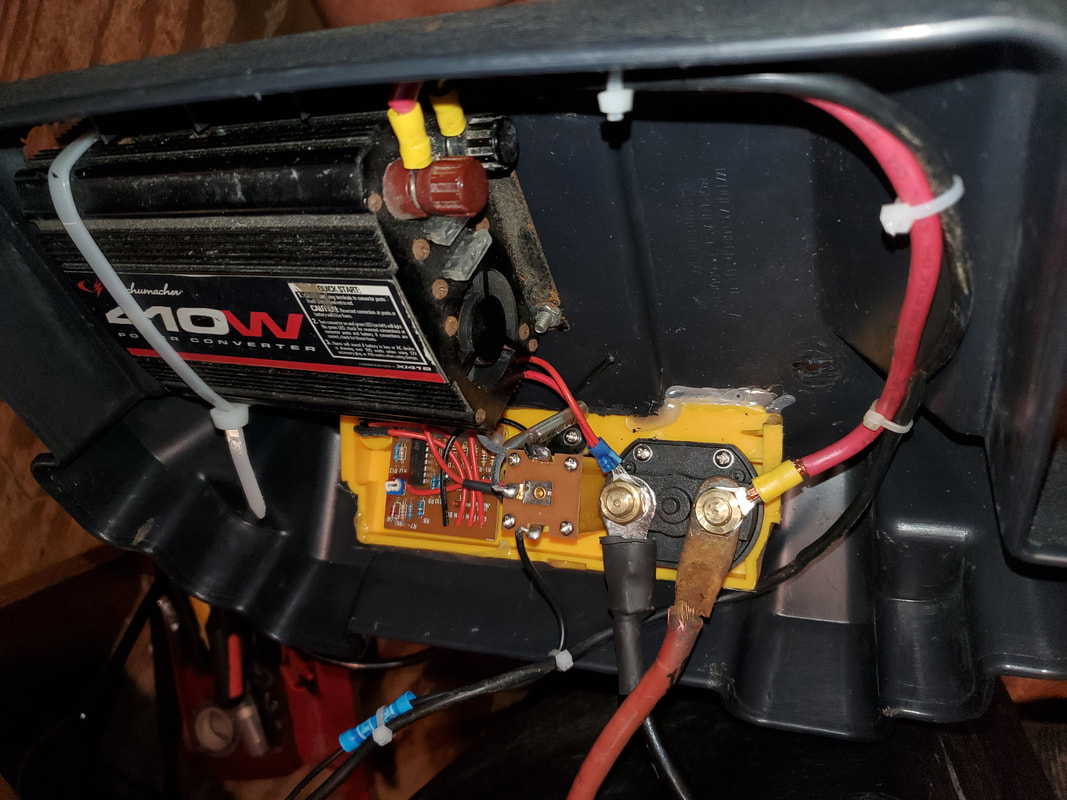
Another shot of inside of battery box lid showing where cables are routed and how things are secured, note the zip ties.
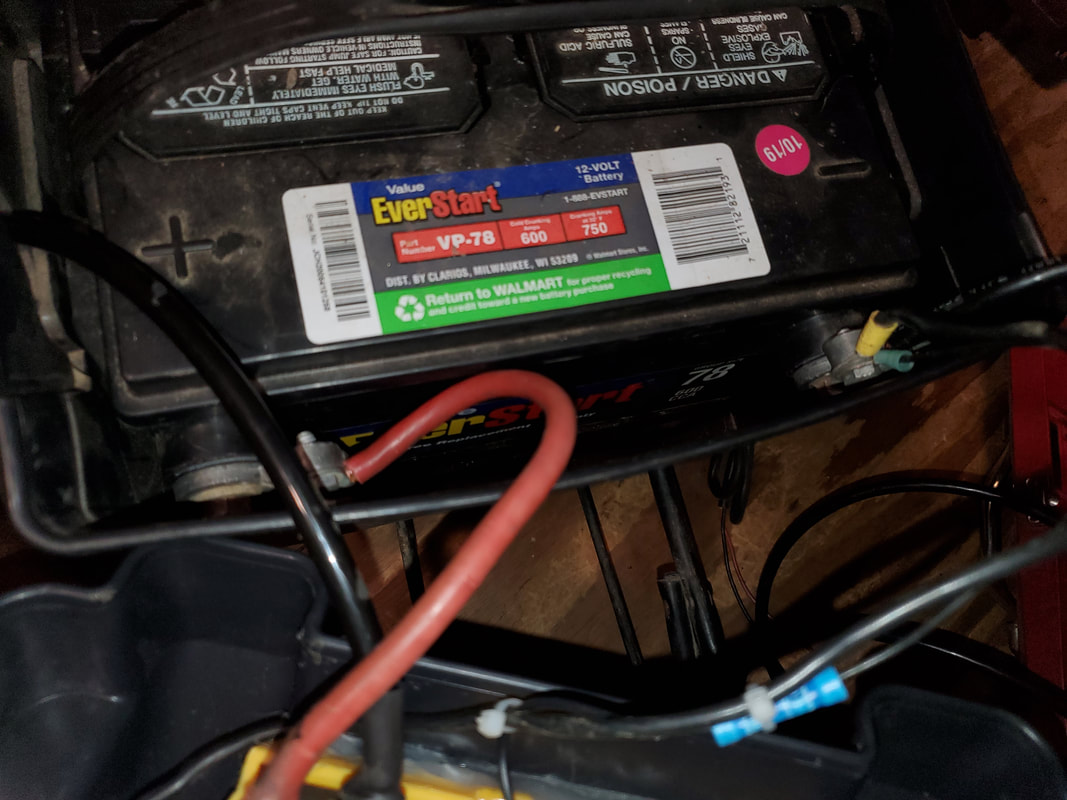
Side post battery mounted in box with terminals hooked up. Note slight bulge of box due to terminals pushing against it. This will be corrected at some point.
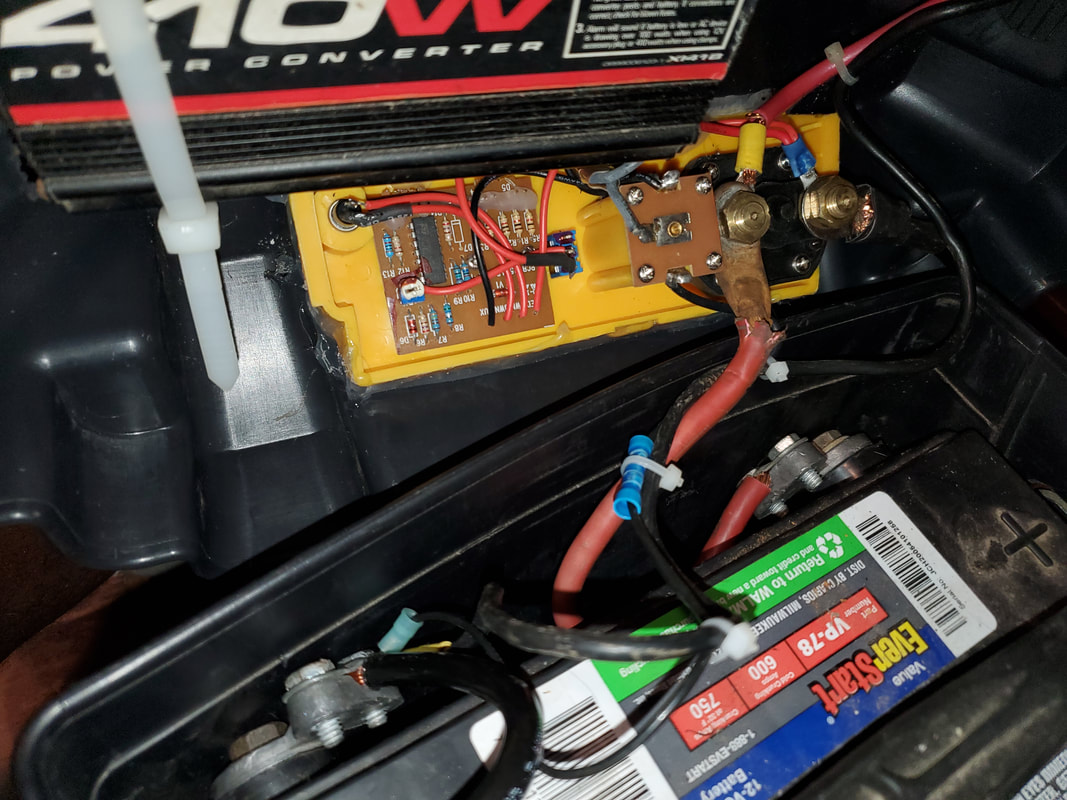
Another angle showing the cables where they connect to the side posts of the batter and the terminals on the battery box lid, feeding power to the devices on the lid.
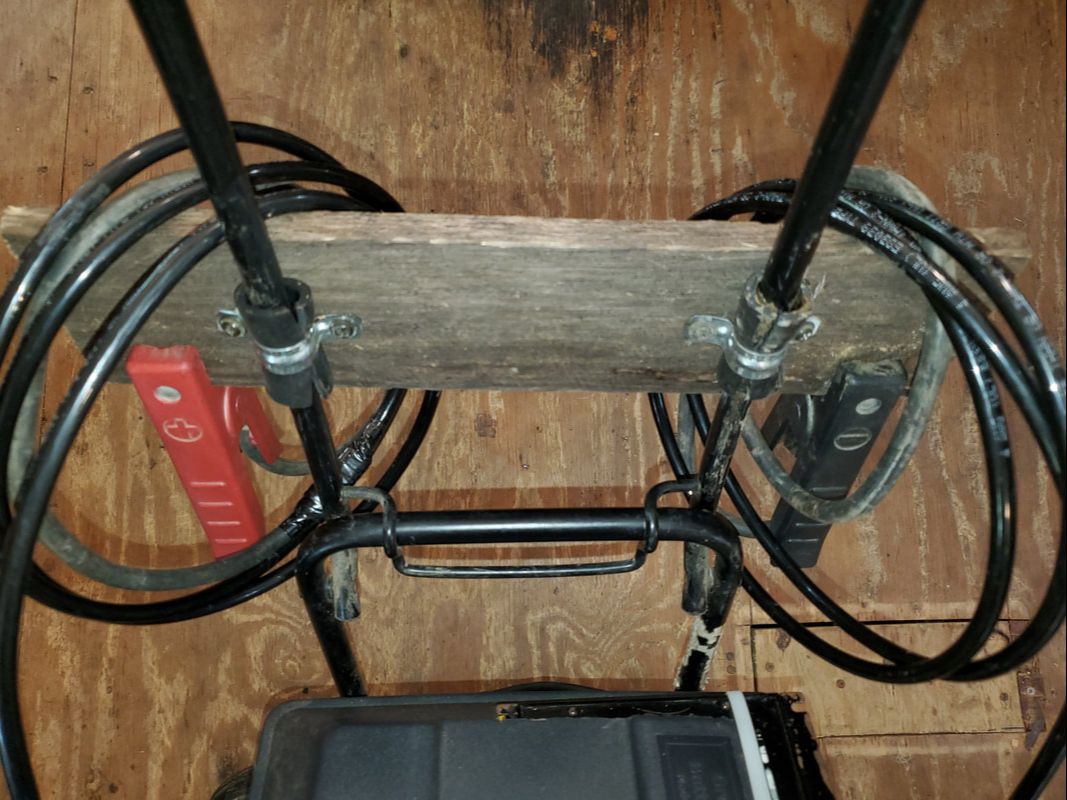
Pallet board anchored to luggage cart frame handle with conduit straps over hose to hold the whole thing together. Note the jumper cables coiled and secured via alligator clamps to ends of board.
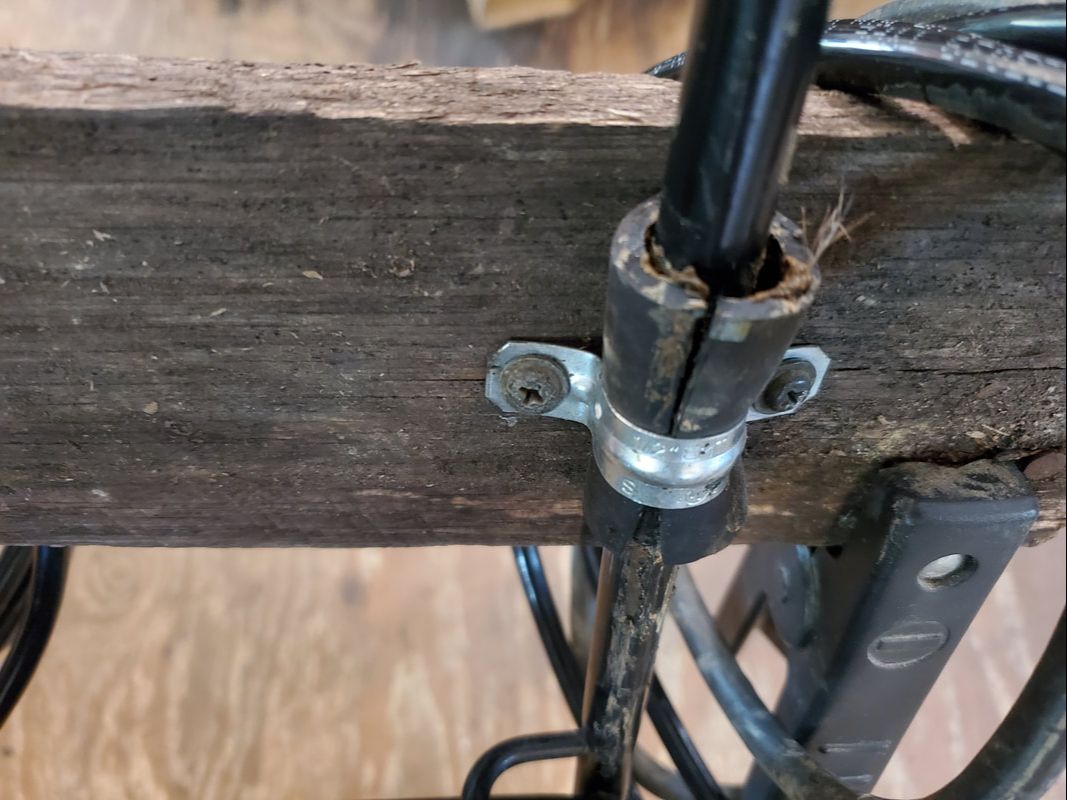
Closeup of hose bushing used with conduit strap to ensure a tight fit with the clamps around luggage cart frame.
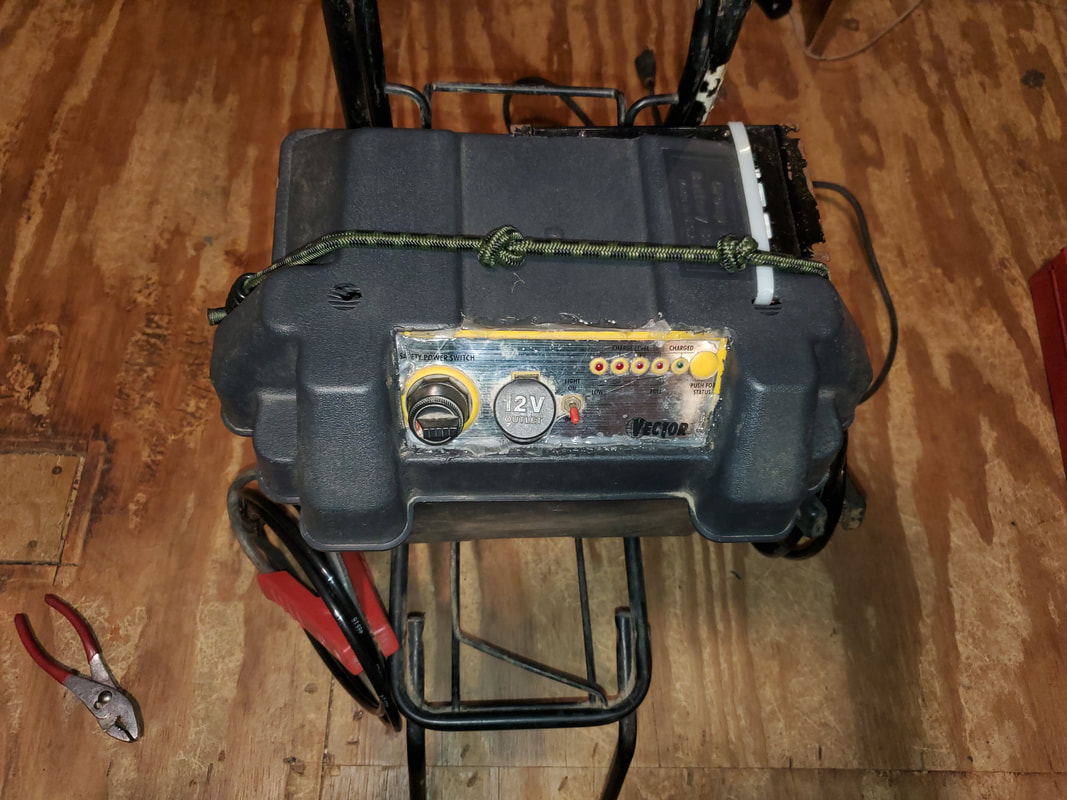
Shot of Updated Power Cart with lid in place prior to hanging jumper cables to pallet board.
