THE NEW STORAGE SHED
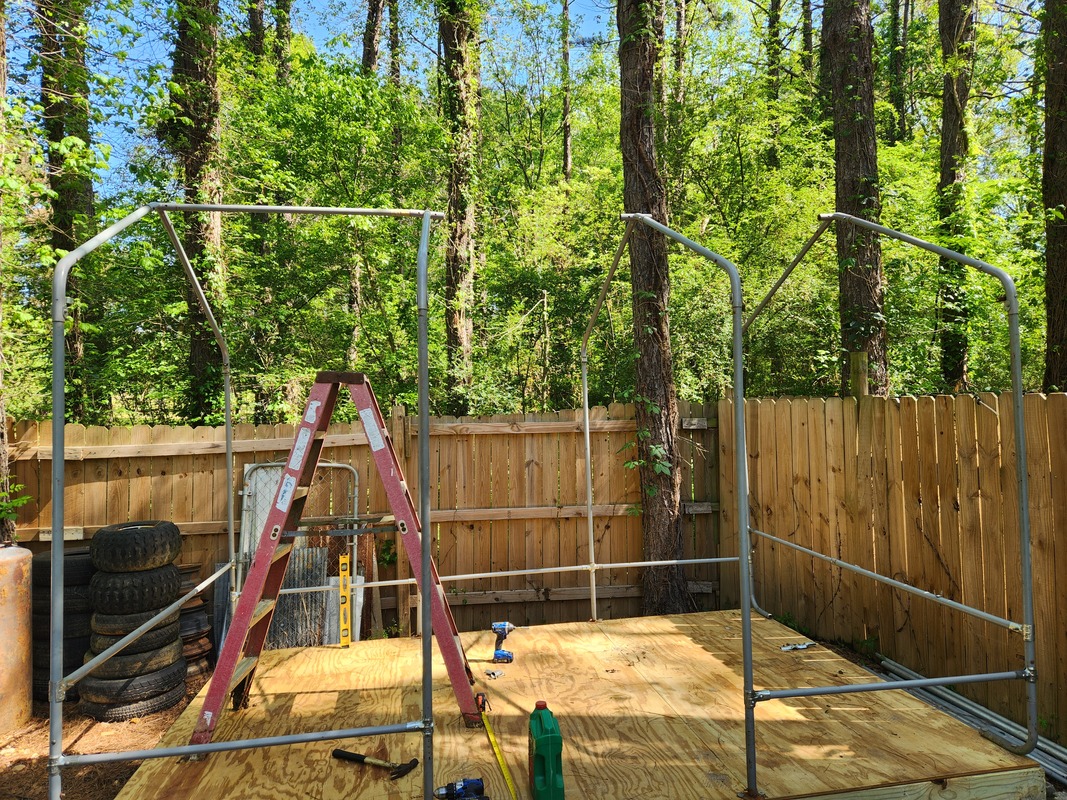
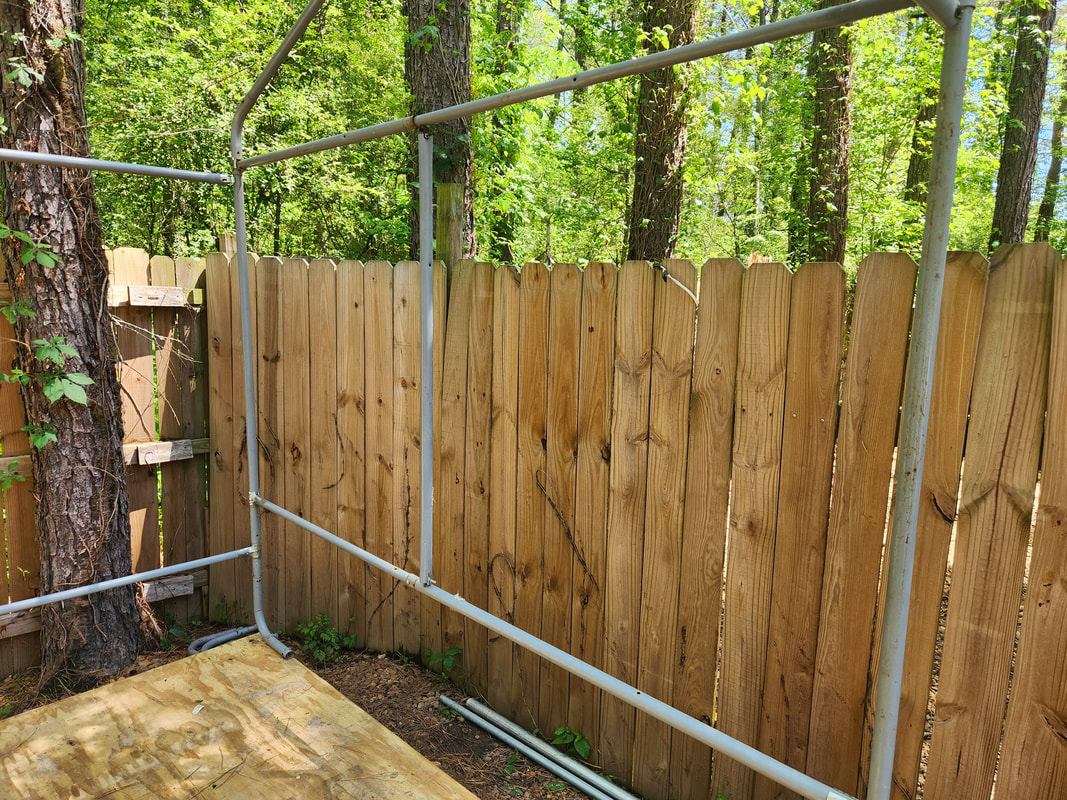
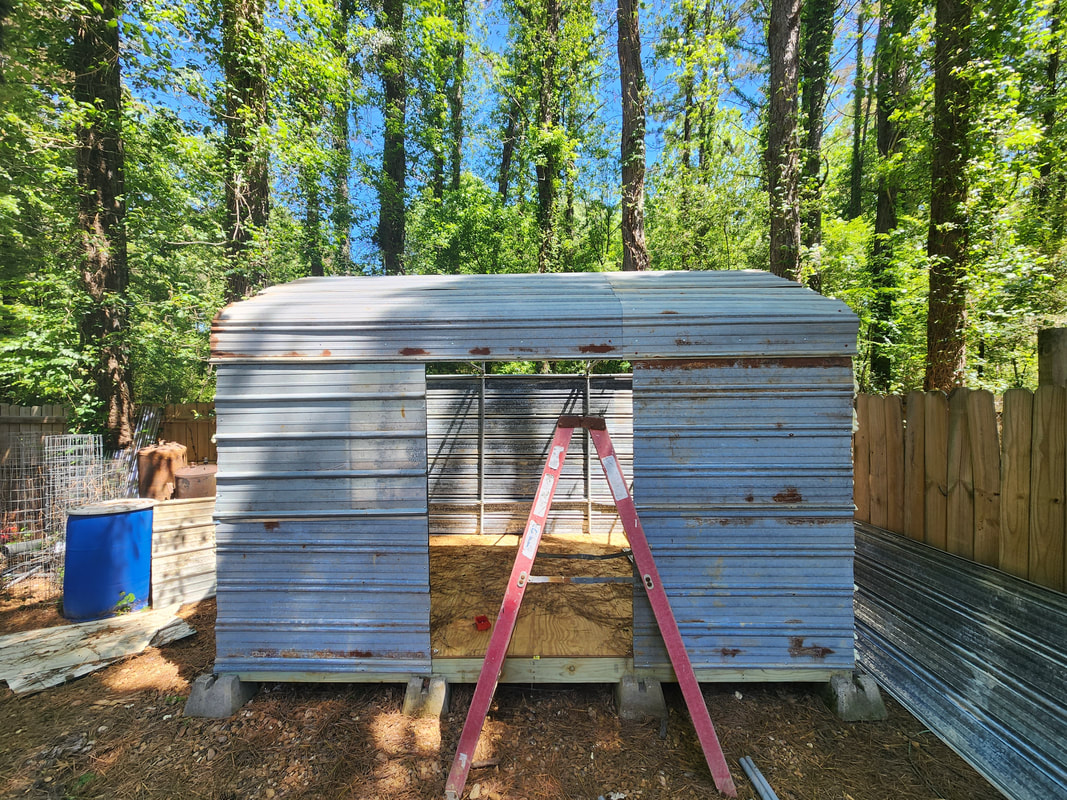
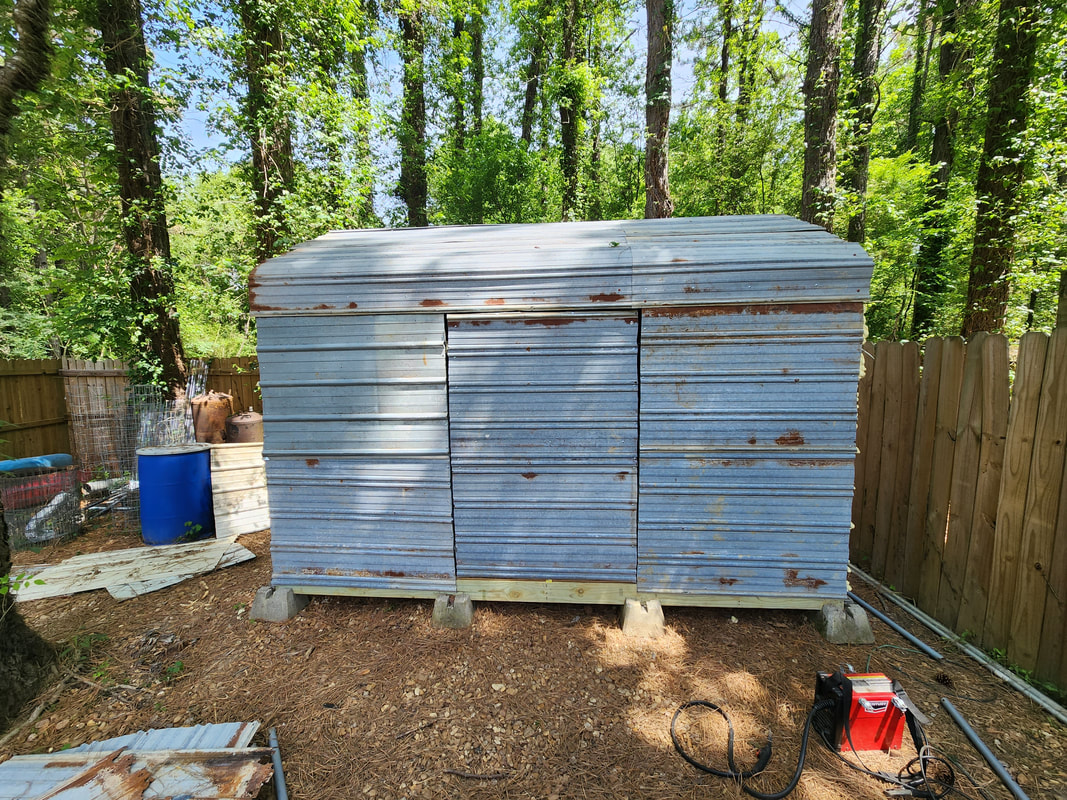
Even though we've been using the Storage Trailer for several years now to contain a lot of our parts and equipment, there is still something missing. We have a lot of larger equipment that still needs a better place to be contained that would put all those items in one good place. This is where the New Storage Shed idea comes into play. Part of this stems from the batch of portable garage tubing parts that I still have laying around. There's more than enough pieces to throw together a frame, but I would have to do some things to make this a viable structure that will do what I ask of it. I plan on storing most of the larger hardware, like the air compressor, cement mixer, the large batch of power tools, Go Karts, even the electric ATV when I do build it. There's a couple generators I want to store in here too, especially after I do get the whole house genny hooked up. Garden tools will go in here. First thing I will have to do is build a foundation out of 2x6 lumber and 4x8 plywood, all pressure treated of course. From here I threw together the frame, using the vertical pieces that would be anchored to the ground, along with connecting pieces of tubing to keep everything stable and plumb. The roof frames went on top of the vertical pieces, and were further connected with more tubing, then a second row of connecting tubing as put in place along the top of the "walls". Lastly I added a couple extra pieces of vertical tubing along the two end walls to split the opening up so instead of a large 8ft opening, its split into 4ft sections. This will make it a little easier to attach the corrugated sheet metal that will clad the walls and roof.
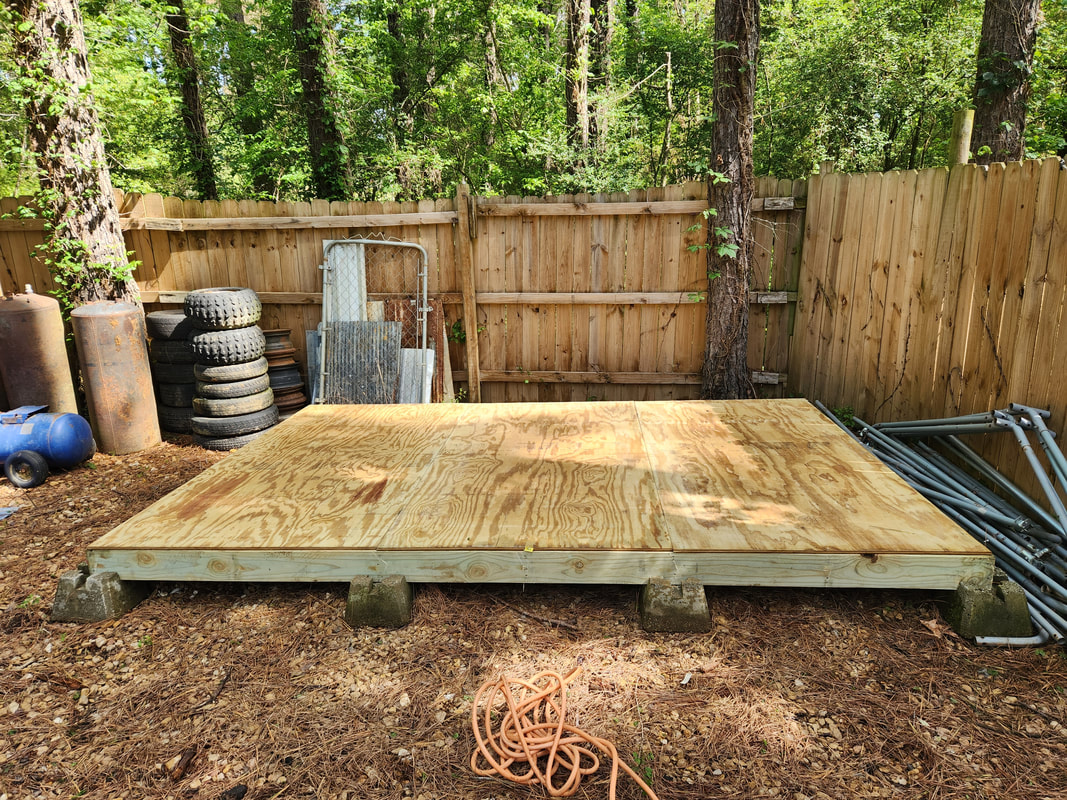
The foundation, measuring 8x12, is made with 2x6 boards and using concrete blocks with slots intended to hold wood frames like this. 4'x8'x1/2" pressure treated plywood covers the frame completely with no waste.
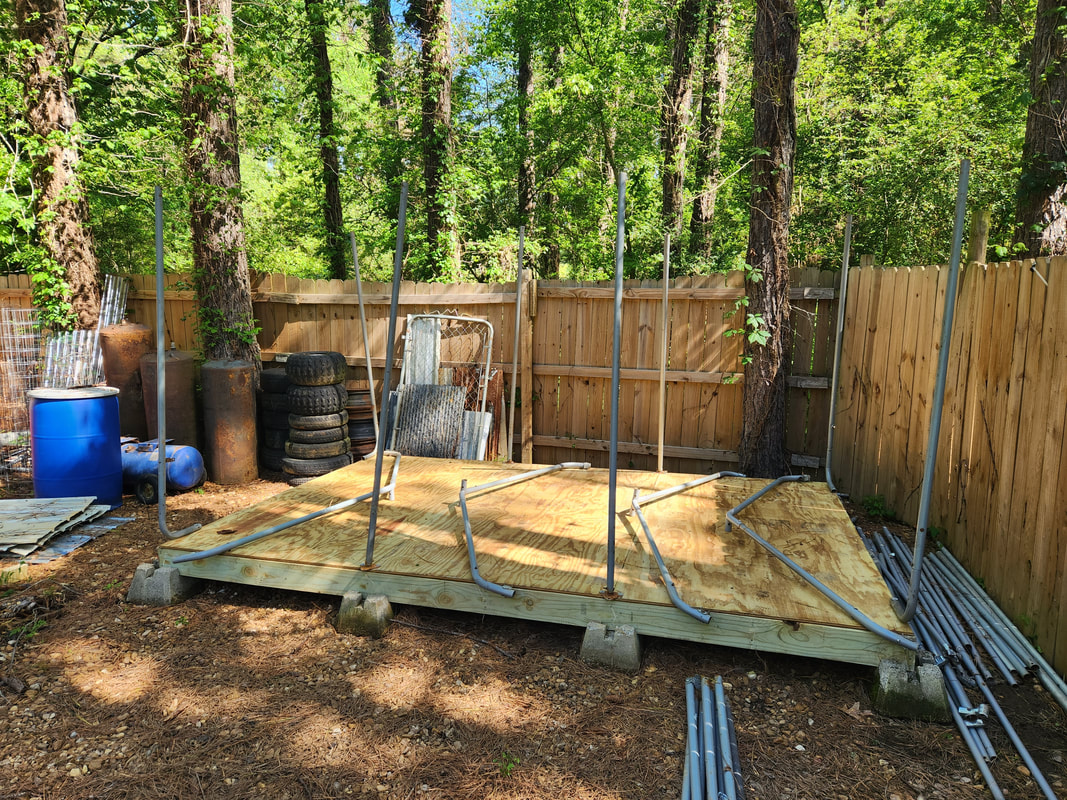
The vertical posts used for the portable garage are secured in place on the frame with deck screws and washers. The spacing coincides with the plywood, with spacing being 4t between the posts.
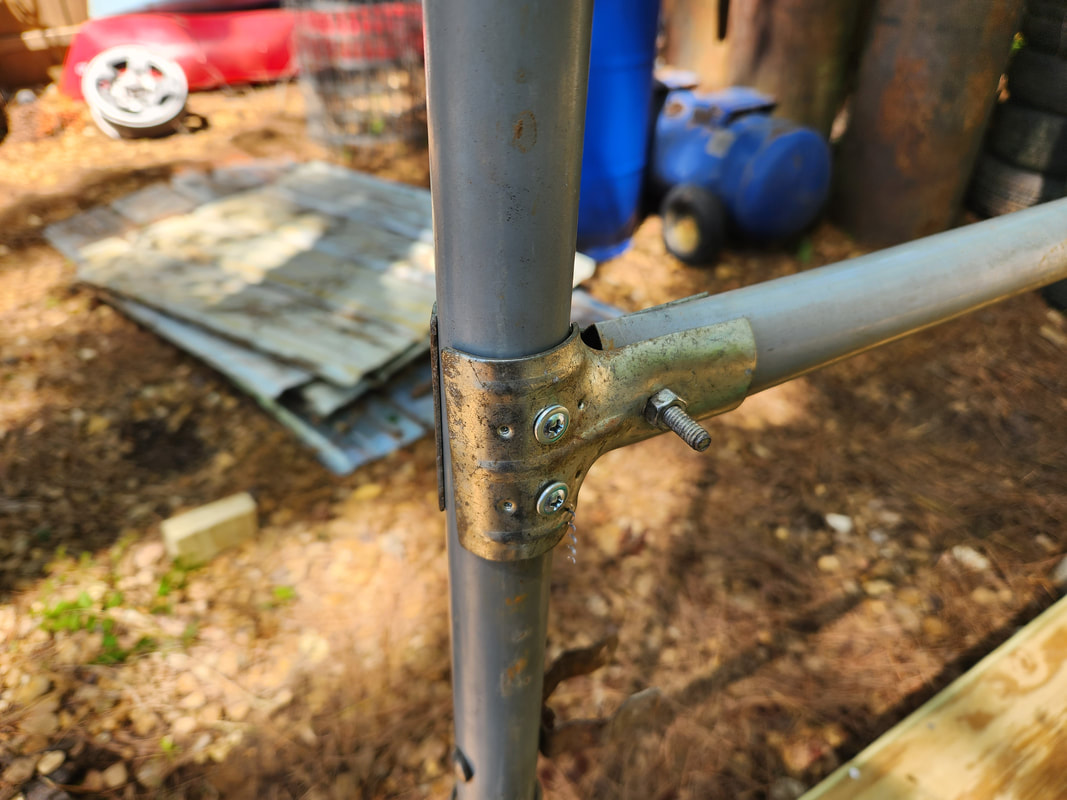
Connecting posts are connected to the vertical posts a little less than 2ft from the floor. The connecting brackets were from the garage kit. Since some of the tubes were larger than what the brackets would cover, the brackets wouldn't fully grip the vertical posts. Self tapping screws through the brackets and vertical tubes ensure everything is held in place. The middle section at the front will be where the door goes.
A closeup of the retaining brackets and how the self tapping screws are used to hold them tightly against the vertical posts.
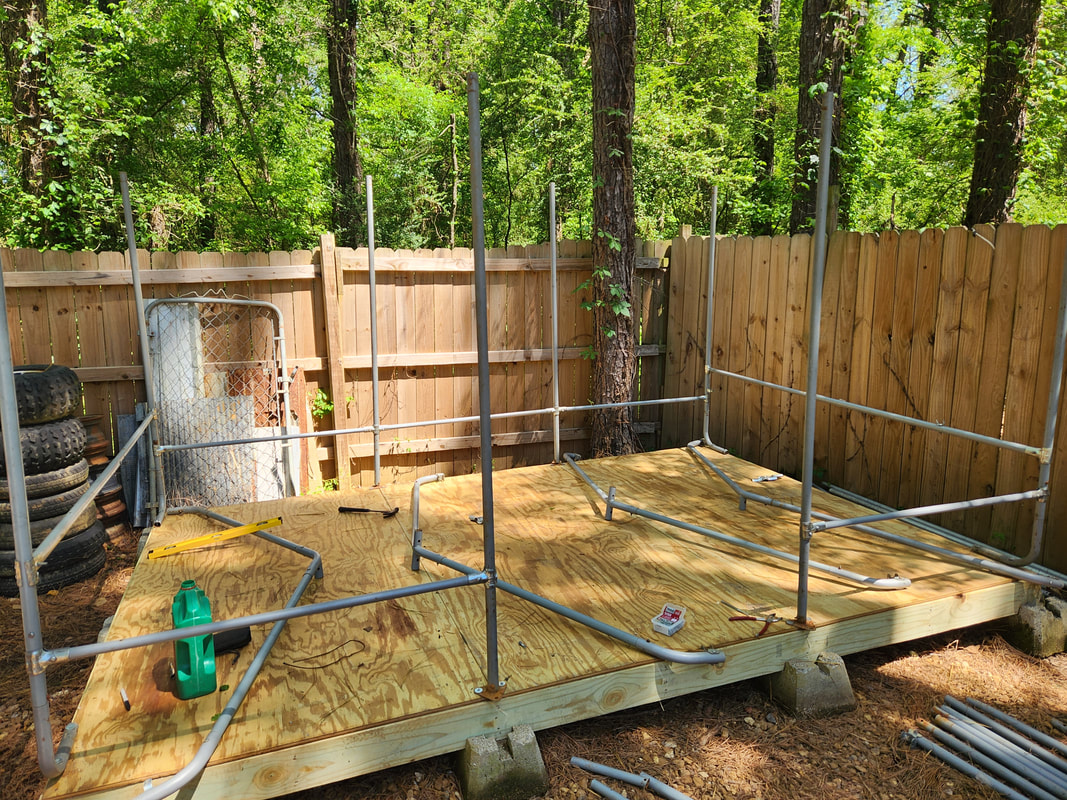
Here the roof frames are anchored in place, with the first of the three connecting posts secured between the end frame and the middle frame.
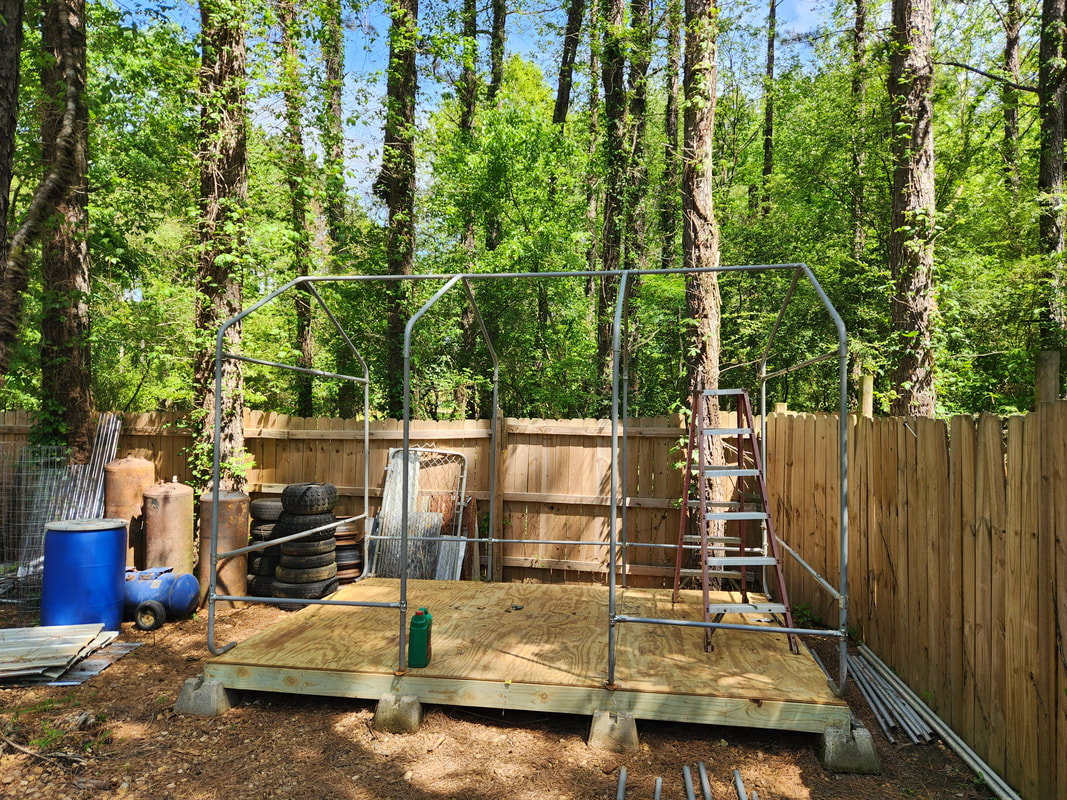
Roof frame sections are fully connected at the top and the first of the top connecting posts are in place on the ends.
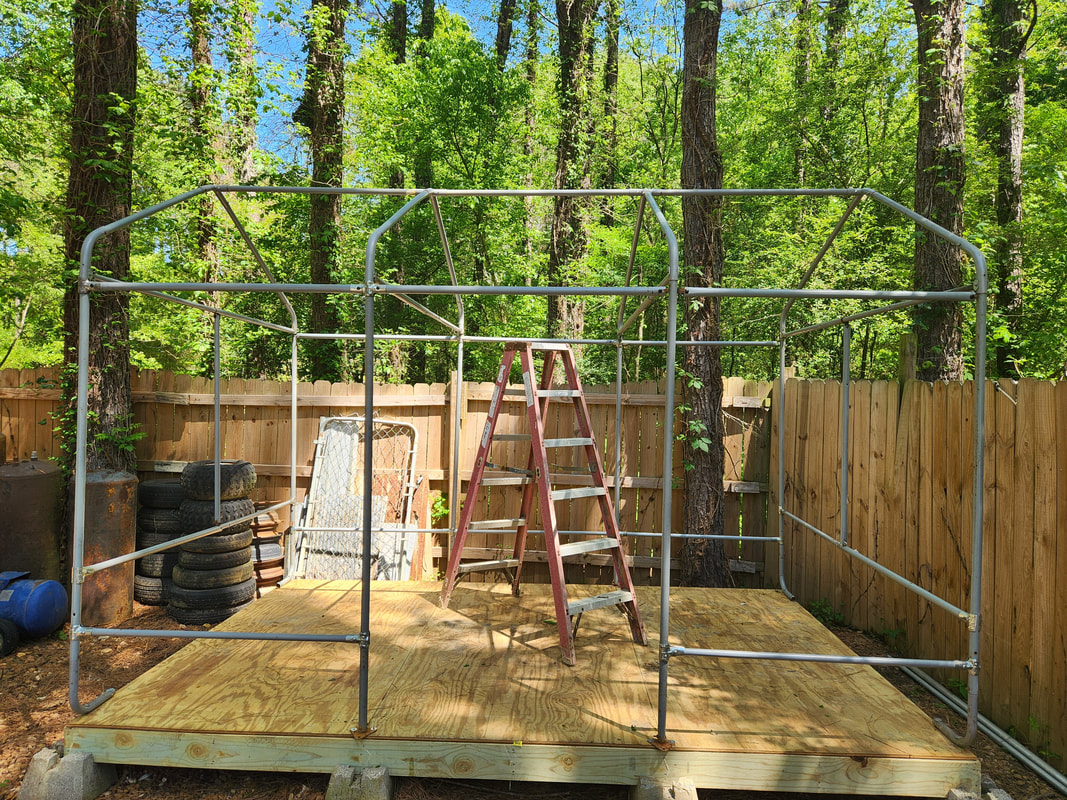
The rest of the connecting posts secured along the top of the walls, just below the roof frames. I ran out of connecting brackets and had to use conduit braces with self tapping screws and carriage bolts to finish connecting the posts together.
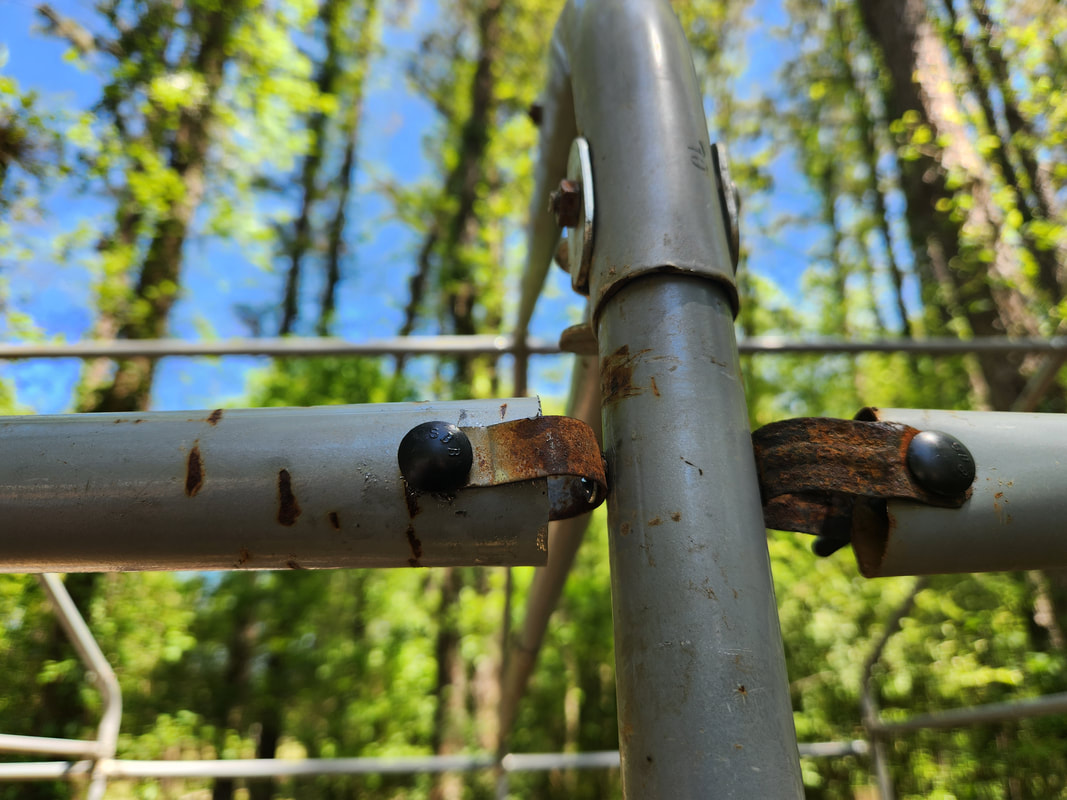
A closeup of the conduit brackets used in place of the garage frame brackets to connect the tubes together. A self tapping screw holds the bracket to the vertical post via a hole drilled in the middle and the holed tabs are bent straight to accommodate the carriage bolts that hold the brackets to the end of the posts.
An extra set of posts were added to the end walls to divide the walls into 4ft sections to provide extra anchoring points for the sheet metal panels that will be attached to the walls.
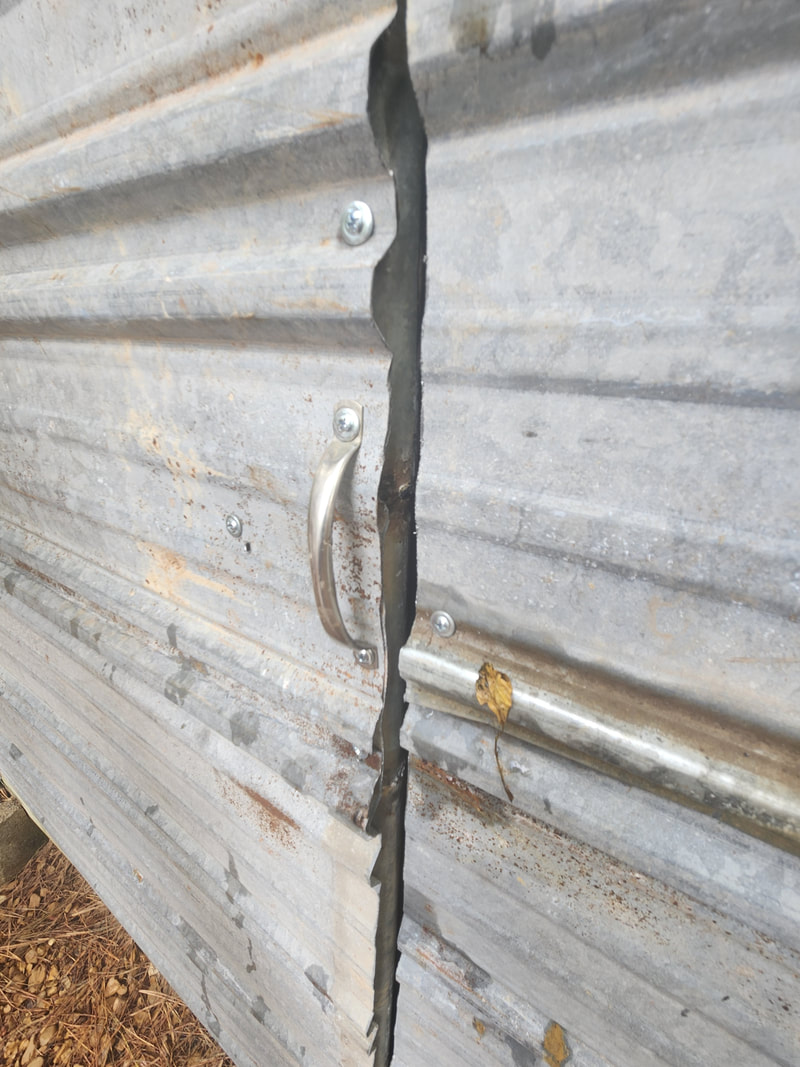
With the frame done, the next move was to source a batch of corrugated sheet metal to clad the frame with. Luckily, this was accomplished, with a local guy having a large batch of metal we got for a good price. With the metal in hand, we were able to get to work. I had to trim some rusty ends off the large sheets, but otherwise, hanging the panels was a matter of lining them up then drilling in self-tapping screws to hold the panels up. There would be a row of long panels and a row of shorter panels, with the longer panels being around 10ft and the others around 4ft. Some overlap was expected and even necessary to ensure full coverage of the walls. When it came to covering the roof, we were pleasantly surprised with the idea that we didn't need a fifth set of panels to cover the middle/peak of the roof. Two rows were enough on each side to cover both halves of the roof with plenty of overlap. As for the bookend walls on the top third that makes up the roof frame section, I had to take measurements to allow me to cut a rough triangular panel out of a large piece of metal, then trim the panel down to make it fit while securing it with self-tapping screws. The other side will be done the same way.
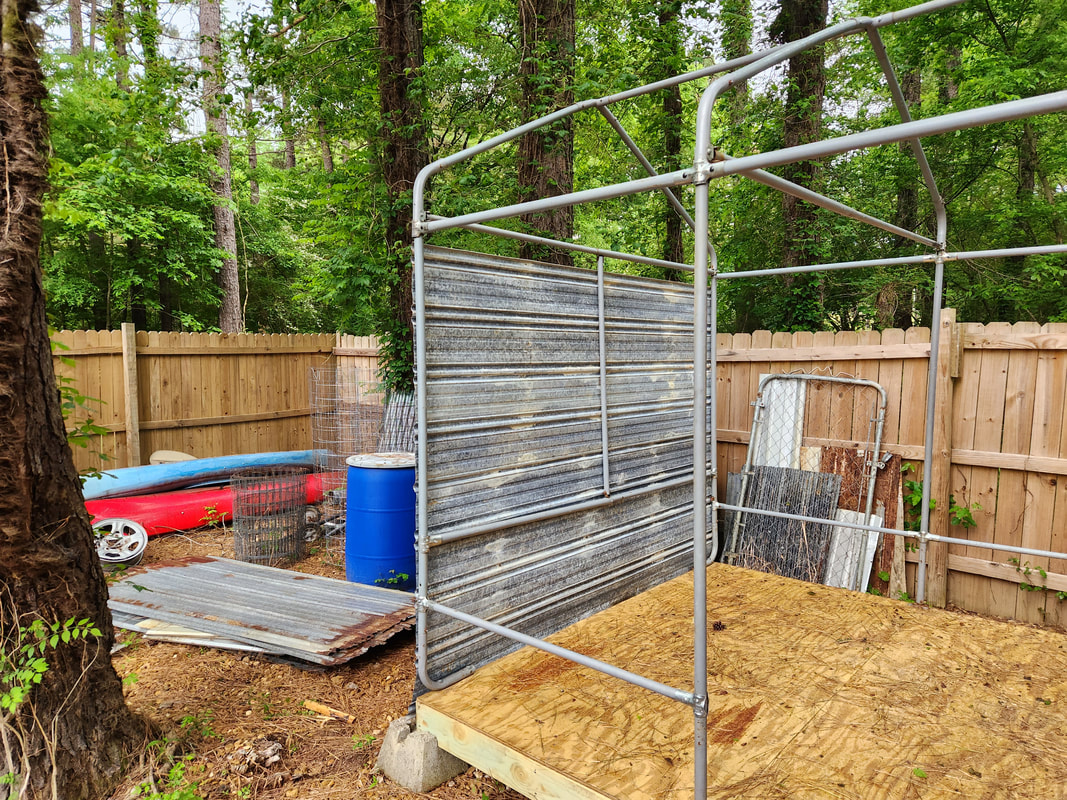
The first set of panels hung on one of the bookend walls. Only two panels were needed as they were 3ft wide and being almost 10ft long, gave plenty of overlap for me to trim down.
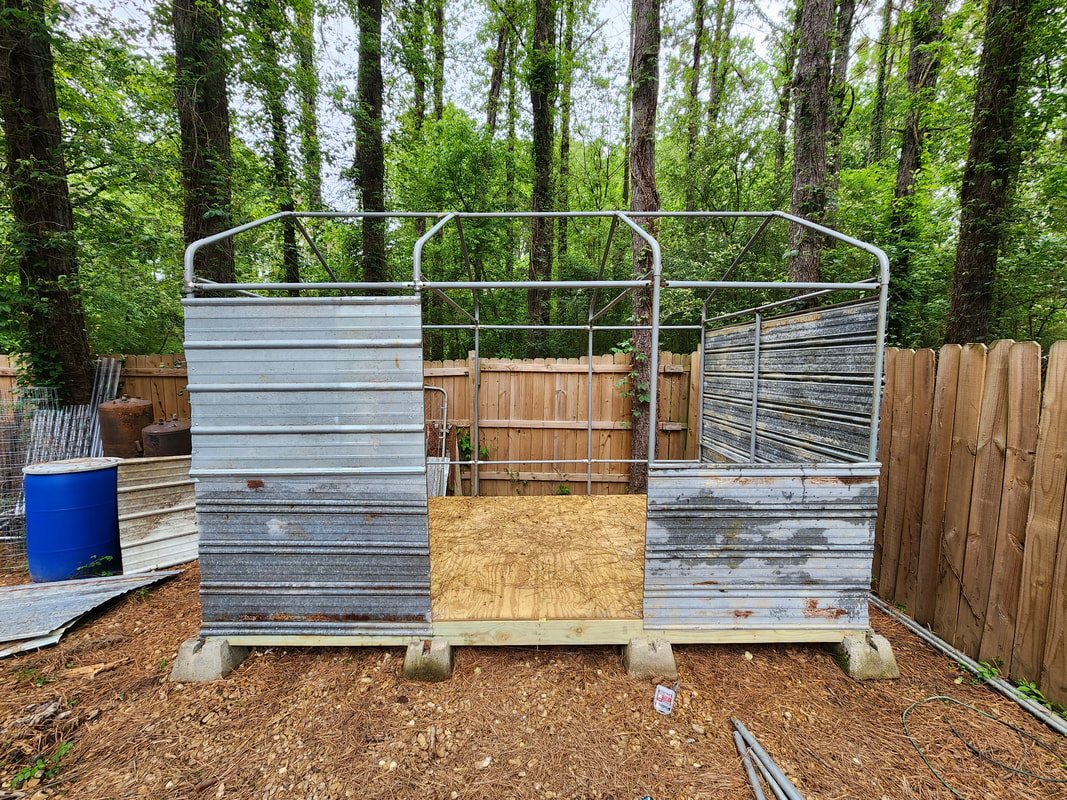
With both bookends done, the front wall gets covered, leaving the opening for the door. These panels were 4ft panels cut to cover the 1/3 sections on either side of the door.
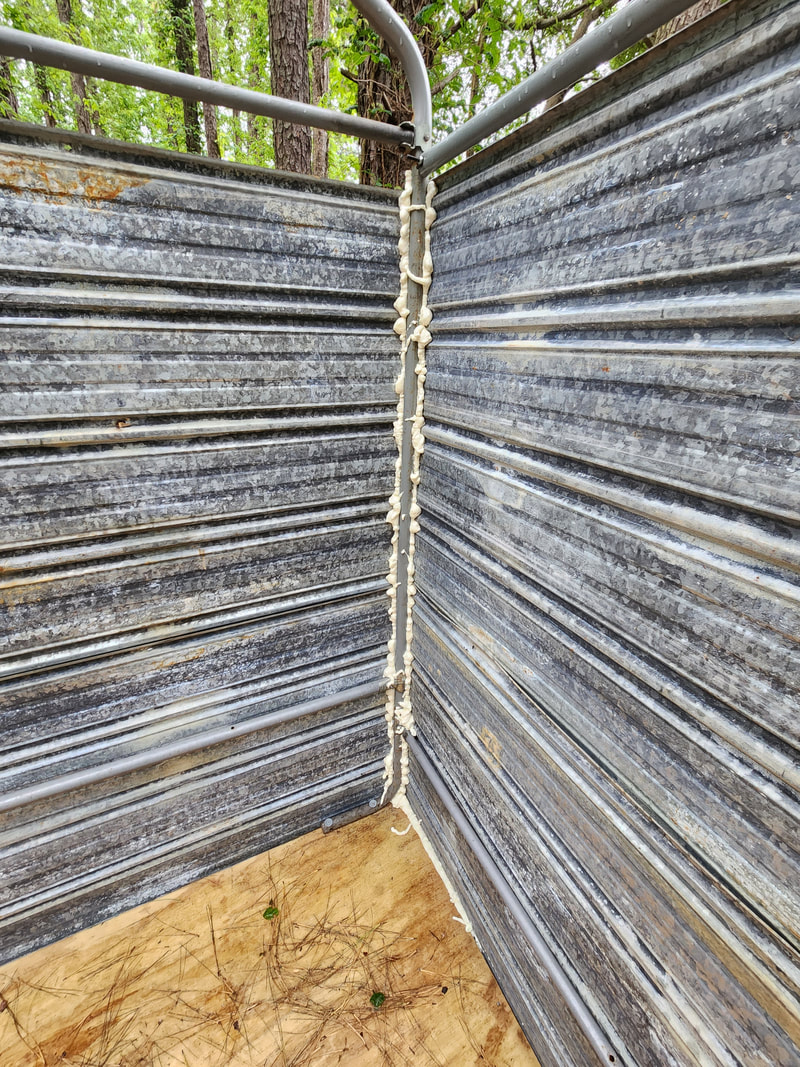
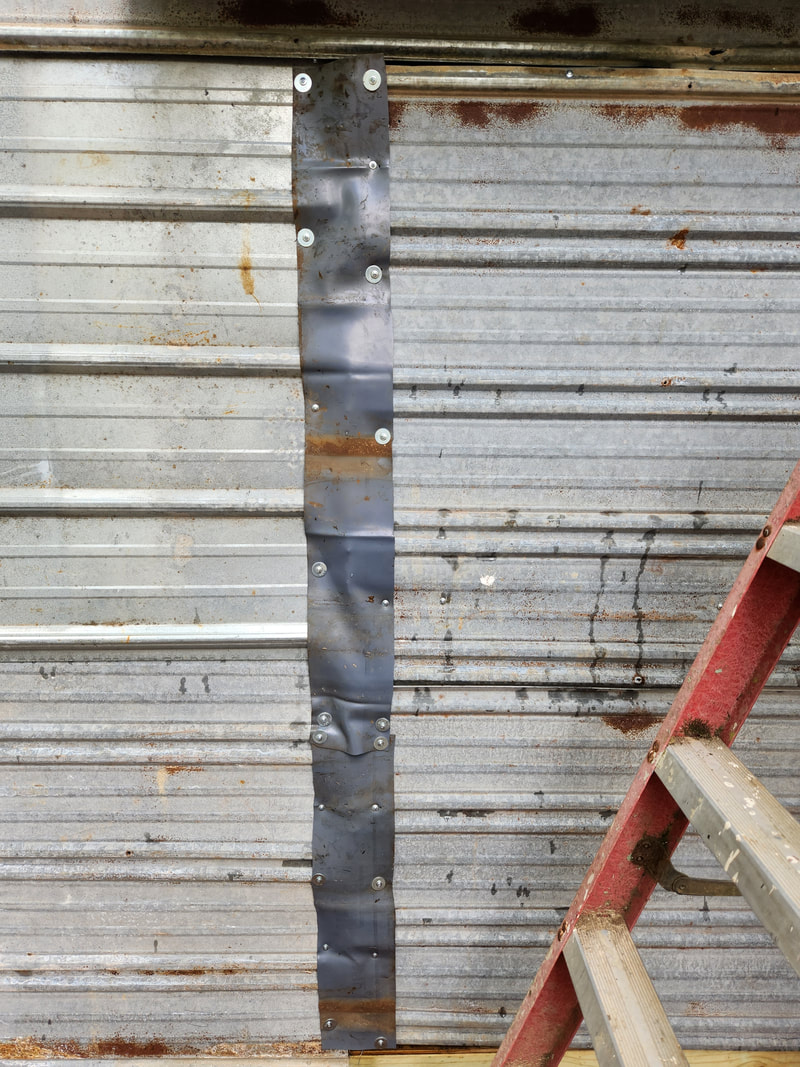
Putting the cart before the horse. I used some leftover can foam to seal one of the corners on the bookend wall meeting the front wall.
With the back wall done, which consisted of a 10ft panel with a 4t panel overlapping, the first half of the roof is also hung in place. These panels too were done the same way with two 10ft panels and two 4ft panels overlapping.
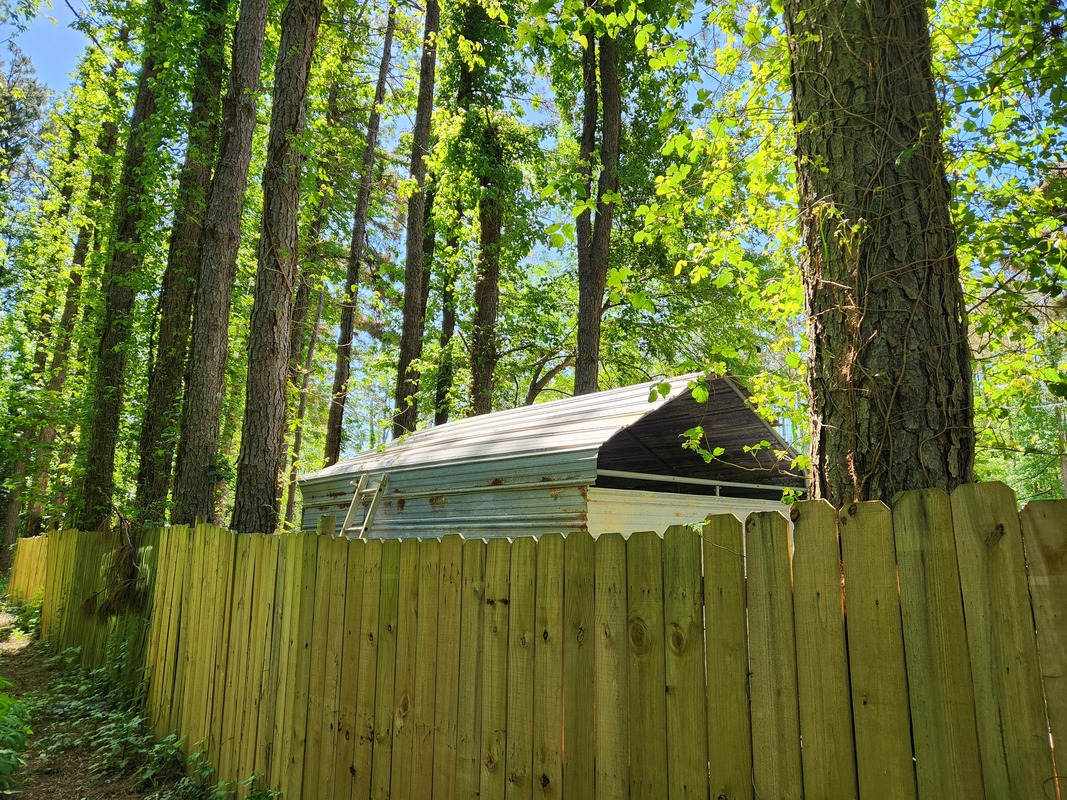
A shot from the outside of the perimeter fence showing the other half of the roof installed, fully covering the roof.
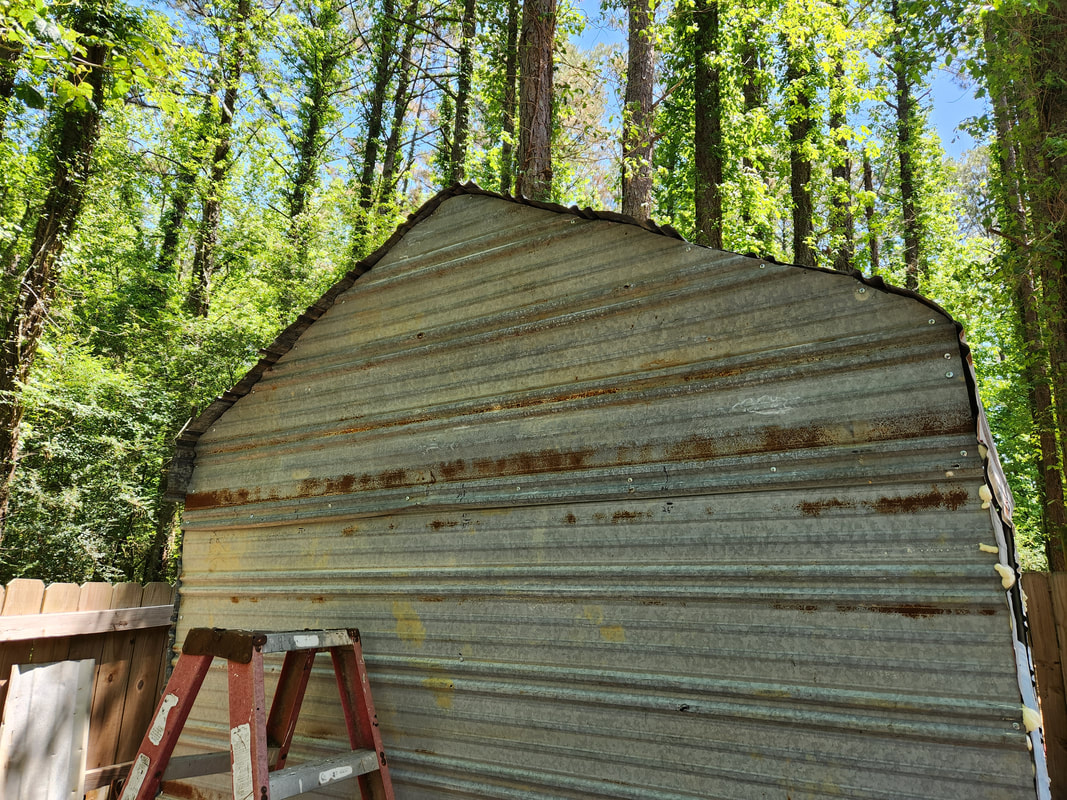
To make this panel, I took four measurements. First was 8ft for the length of the panel from front to back. The other three were at 2, 4, and 6ft. The 4ft measurement was the middle/peak of the roof. The 2 and 6 ft measurements were made to the top of the roof at those points and from there those measurements were marked on the fresh panel. Lines were drawn from the peak point on the triangle down past the 2 and 6ft marks and to the edges of the panel. These lines made up the rough triangular panel. After hanging the panel with one screw, an angle grinder was used to trim the panel down to fit it in place where it was fully secured with self-tapping screws.

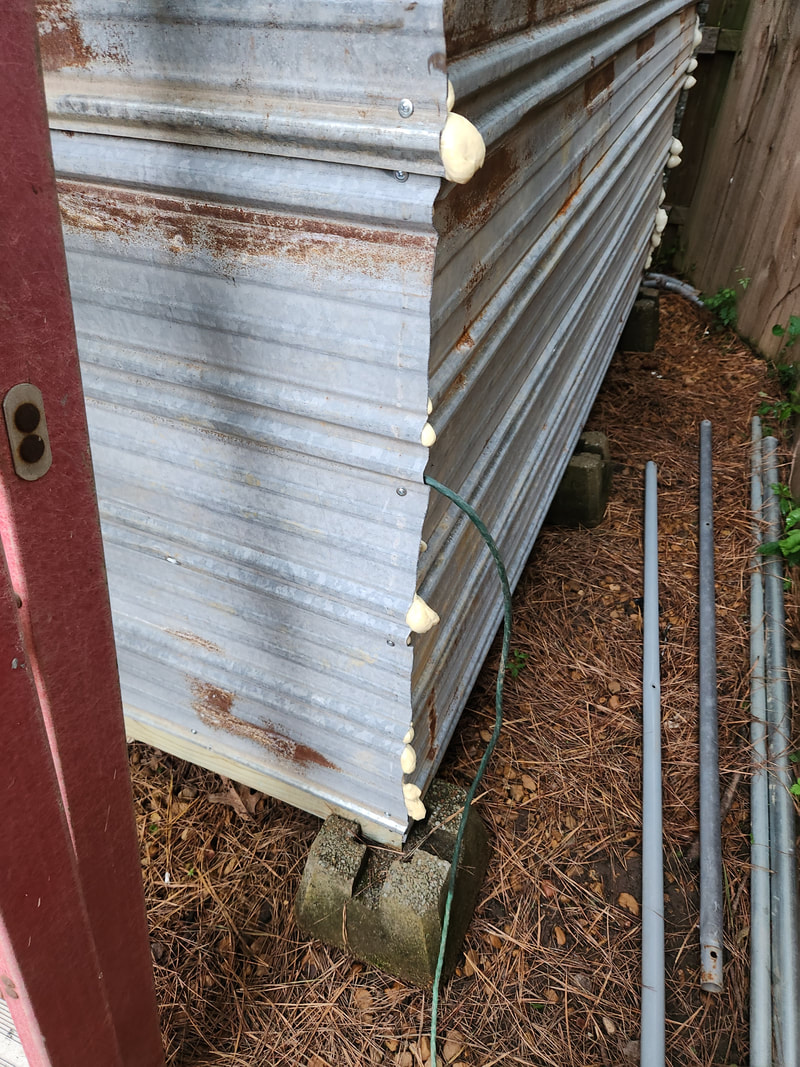
A shot from the inside of the shed showing how the panels all sit, the roof and bookend wall panels, along with the front and back panels. All of these corners/edges will be covered with can foam while the seams and overlapping points will be caulked to seal them.
At this point the next move is adding the door. As can be seen in the last picture, that gate will be the basis for our door. After removing the chain link, the frame was cut in four places and extended with some extra tubing to make it match up to the door opening on the shed. From there an extra piece of tubing was added in the middle for reinforcement for the sheet metal. Two sheets measuring a little less than 4ft were applied and trimmed to allow the door to open and close properly. It is expected that there will be some gapping around the door so a way of sealing the door had to be devised. That was achieved with some rubberized PVC strips along the hinged side of the door. The hinges were regular chain link gate hinges. A small awning made from scrap metal was attached above the door to aid in shedding water just as well. A hinge and latch were added for the door. Next on the list was the electrical system. This was made using a salvaged extension cord cable, hardwired into the electrical box feeding the chicken yard and the power run going to the Storage Trailer.. The cable was buried where it passes the Chicken Yard gate and routed along the fence over to the shed. The cable goes into the corner of the shed where it feeds into a junction box. That cable is connected to a Romex cable routed up to the corner of the door where another box is attached. In that box an outlet that is connected to an adjacent switch is installed. Another cable is connected to the power cable and routed through a hole in the wall to the outside, where a base for an LED floodlight is installed. A T8 shop light is hung from the middle roof frame and equipped with LED bulbs. The fixture is plugged to the outlet, to be switched on and off via the switch. With that all done, our shed has interior light as well as an exterior light. We also took time to caulk a lot of the seams where the panels meet, as well as applied can foam to the interior corners of the frame where the sheet metal meets.
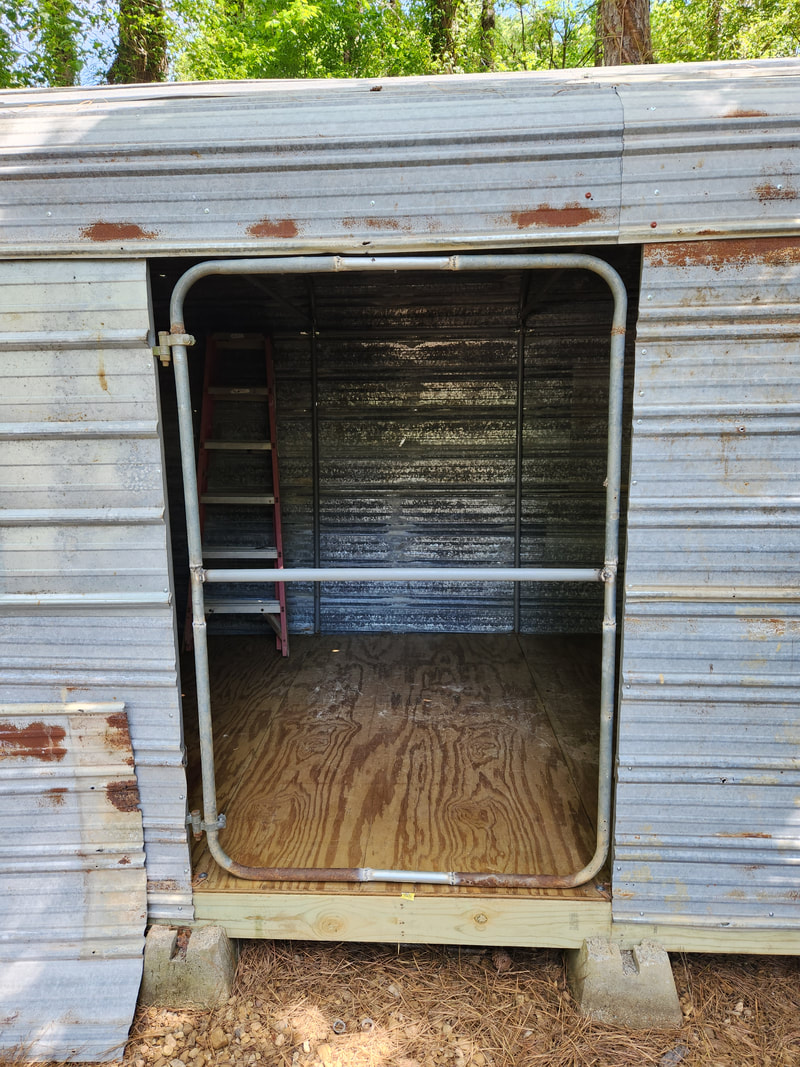
The door frame, made from a chain link gate, is hung in the doorway. The gate hinges are two female hinges, held together with a large bolt, since only the female side is of a narrower diameter to accommodate the tubes of the gate frame and the shed frame. The frame was cut in four places, as the pic shows, with tubing slipped inside the tubes and welded up to extend the dimensions of the frame to cover the doorway.
After a lot of sizing up and trimming, the door frame and the sheet metal are all adjusted to allow the door to open and close smoothly with only minimum gaping around the door.
Rubberized PVC sheeting for shower pads, cut into narrow strips, is attached along the hinge side of the door to cover the gap. When the door opens and closes the strips fold and stretch, maintaining the covering of this side of the door.
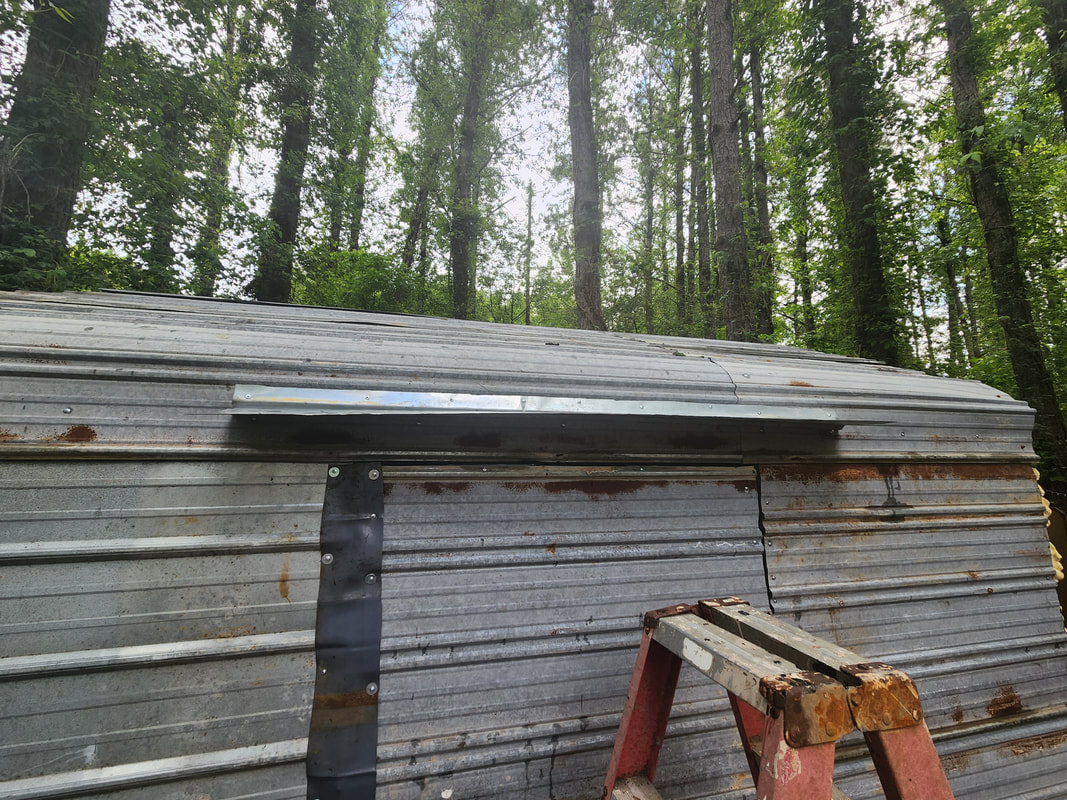
A salvaged strip of sheet metal is hung over the door to help in shedding water. As water runs down the roof it'll hit the awning and run harmlessly off the sides and not into the gaps of the door.
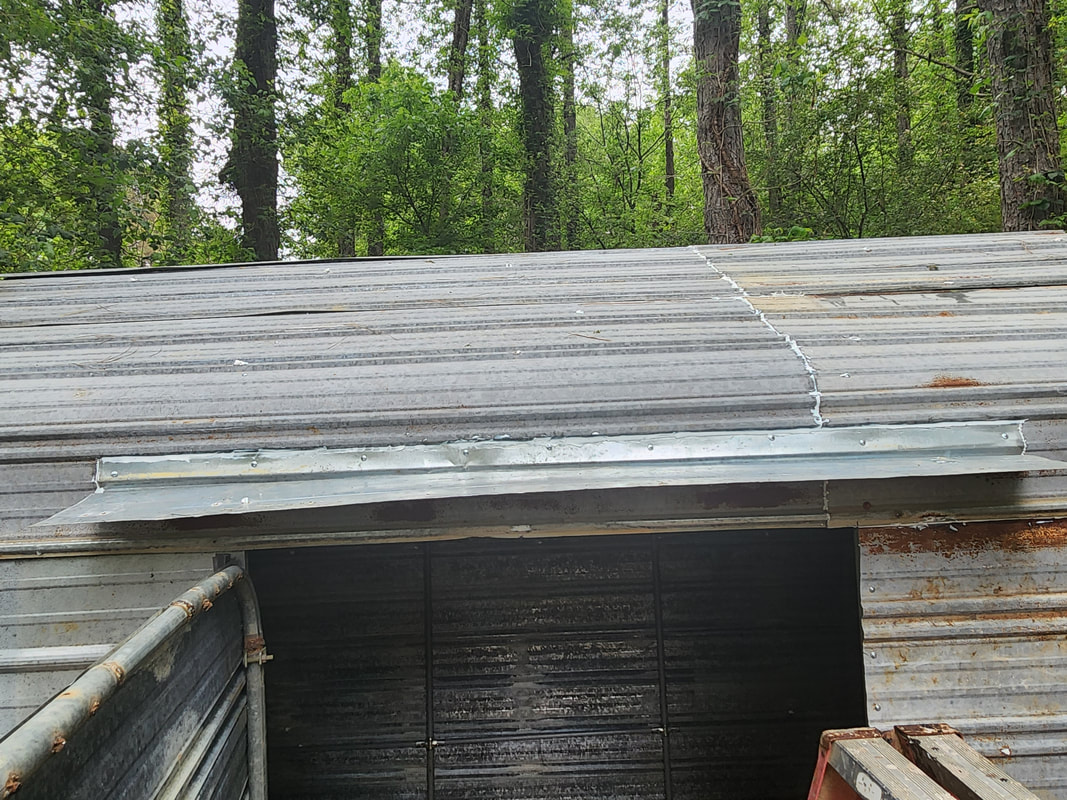
The awning, pinholes around the sheet metal panels, and the seams where the short and long pieces meet are caulked up to seal the skin of the shed from water intrusion.
As an added bonus, a hinge sourced from our stock is attached to allow the door to be opened safely.
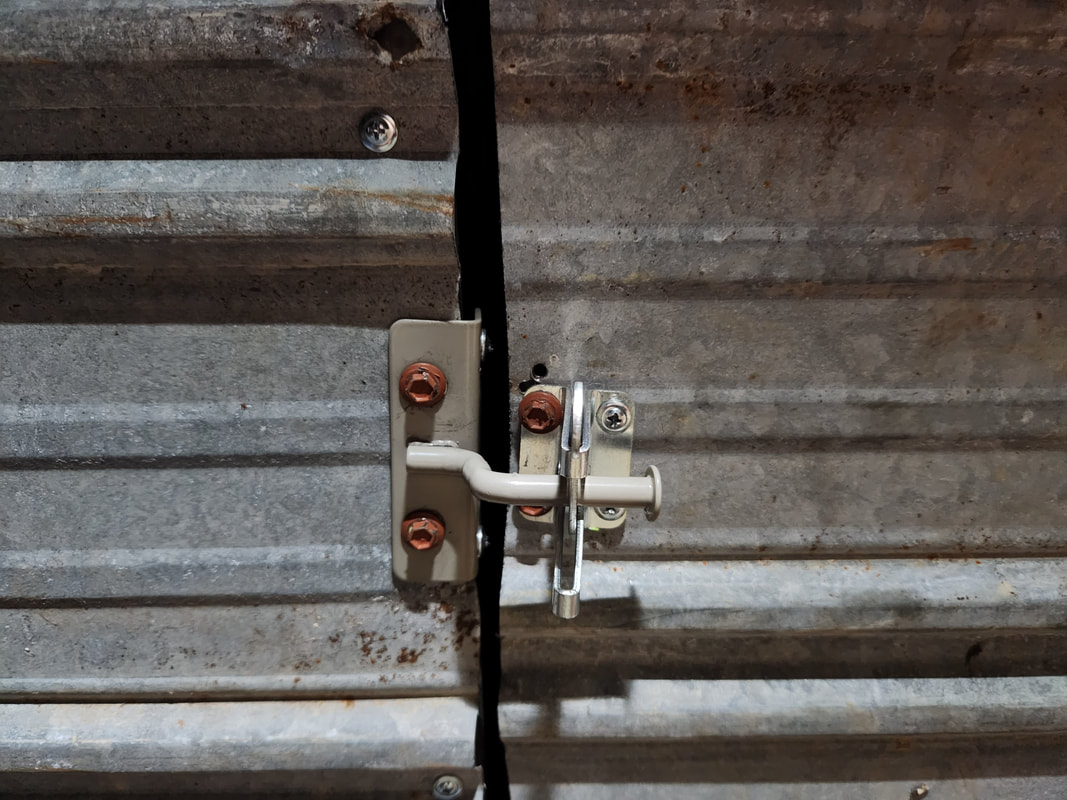
This latch, an extra from one of the fence gate kits, is installed on the shed door. Hex head self tapping screws are used for both pieces for added security as its less likely one will have a hex head driver versus a Phillips screw driver to remove the screws from a latch. The Phillips screws that are used are going through just sheet metal and the hex screws are going through tube frame. This latch can be secured with a padlock.
A salvaged extension cord with both ends cut off, is hardwired to an outlet box at the power pole and the cable partially buried and routed along the Chicken yard fence, then routed up the corner of the shed and pressed through a gap in the sheet metal where it goes through the foam to the inside.
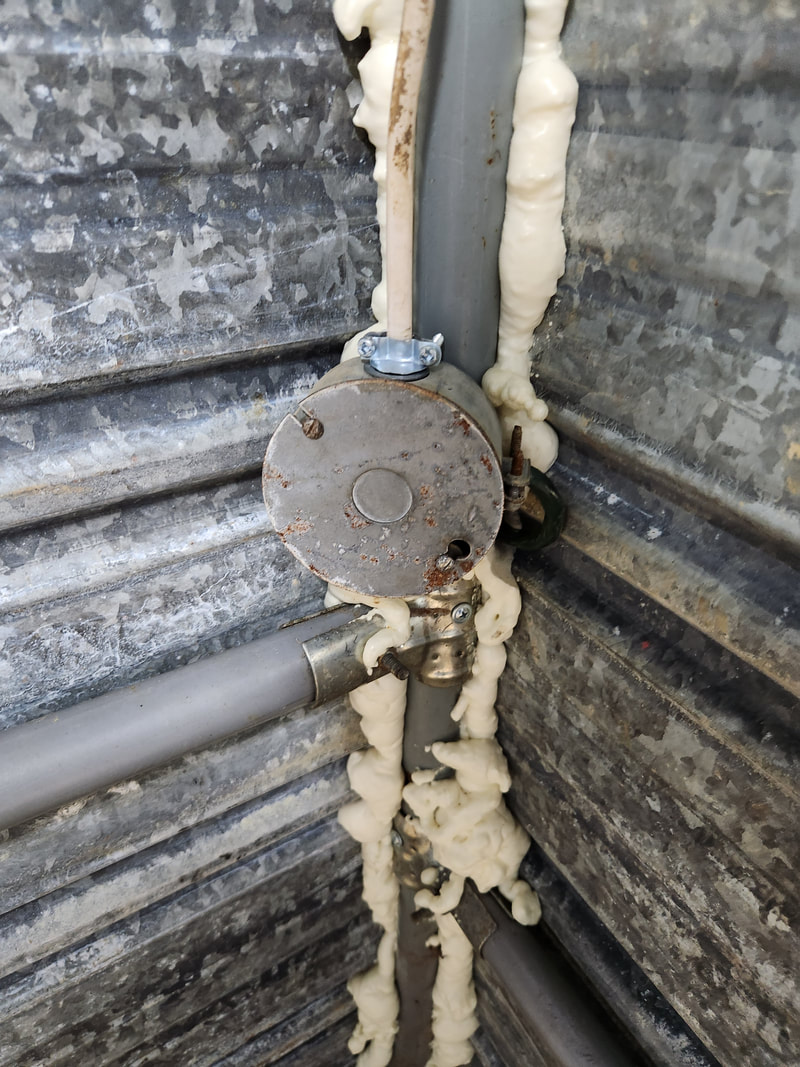
The cord is routed into this junction box where its tied to a Romex cable that is routed up along the shed tube frame to the spot of the second junction box.
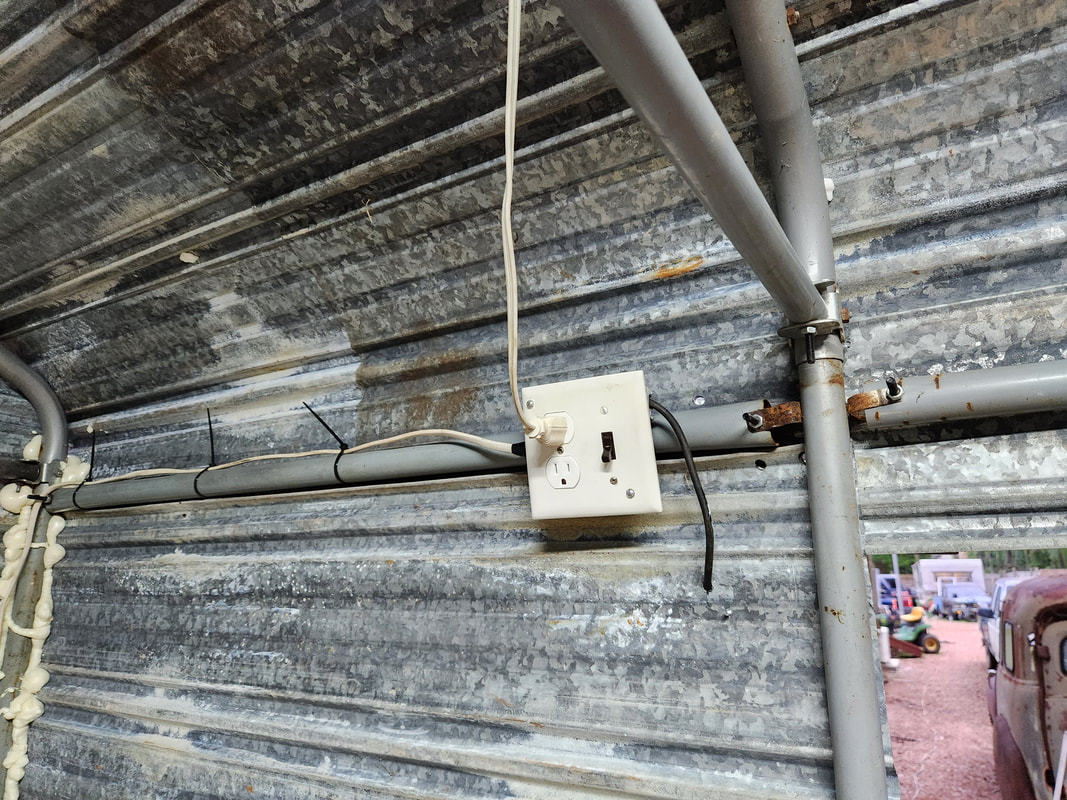
The Romex cable is zip tied along the horizontal frame tube where it terminates at this junction box. An outlet, controlled by the adjacent switch, has the cord from our T8 shop light plugged in. Note the black cable also routed from the box and to the outside of the shed through a small hole where the base for our LED flood light is secured. Also note how the lid has two screws in place due to the lid being mismatched to this junction box. The switch and outlet are secured to the lid while the lid is secured via the two screws to the box.
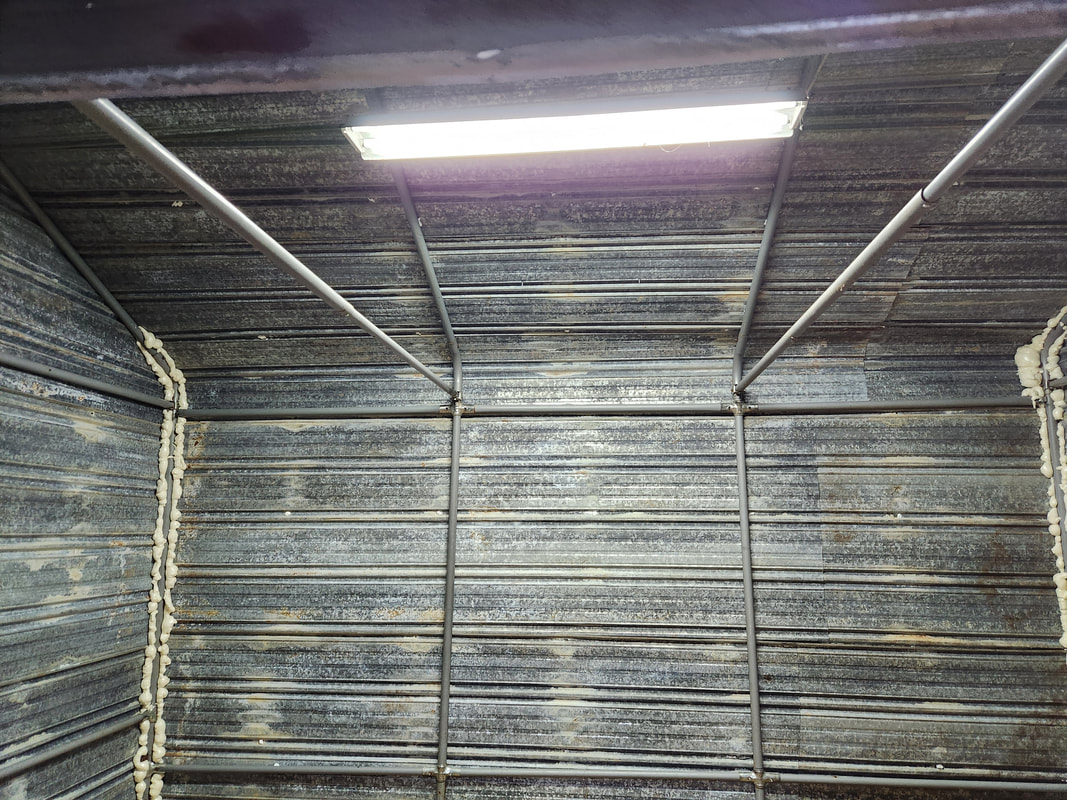
Besides the can foam on the corners of the wall, note the shop light hung from the center of the roof frame via two small chains. The power cord is zip tied along the roof frame where it is plugged to the outlet by the door.
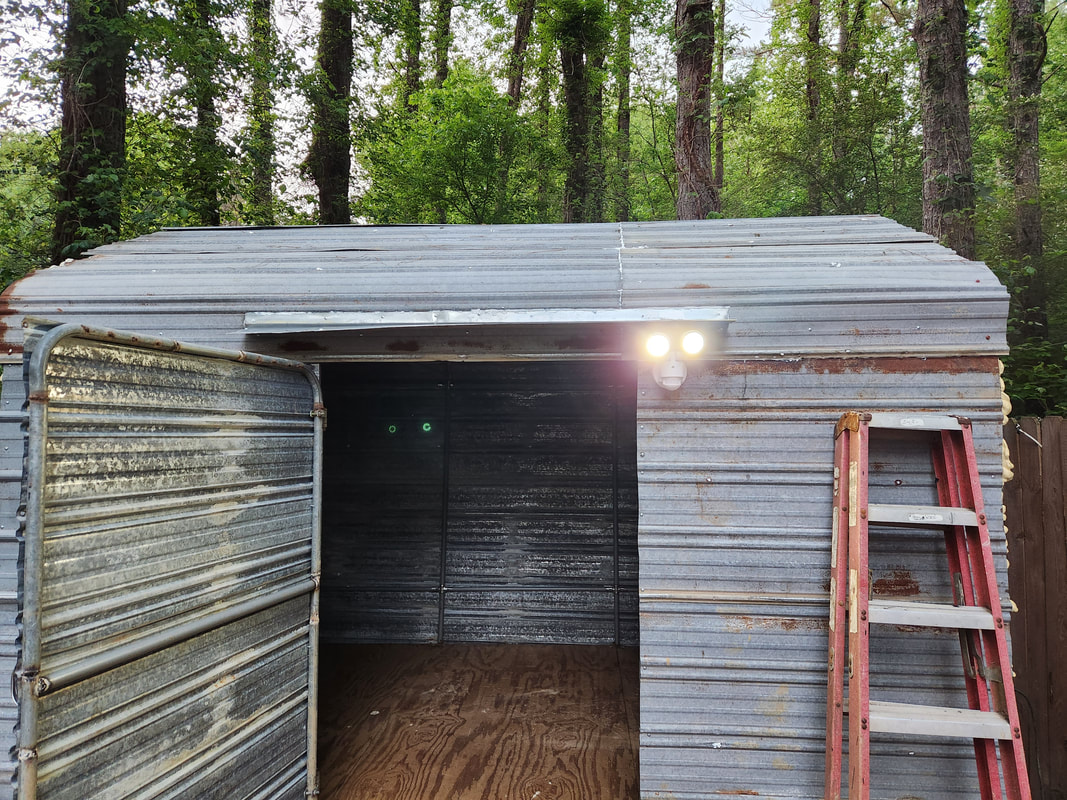
With power applied to the line feeding the shed, our LED flood light has power. This light is a motion/dusk/dawn light. It is currently set to dusk/dawn to illuminate the back area so we can make our way to the shed with minimum use of extra light.
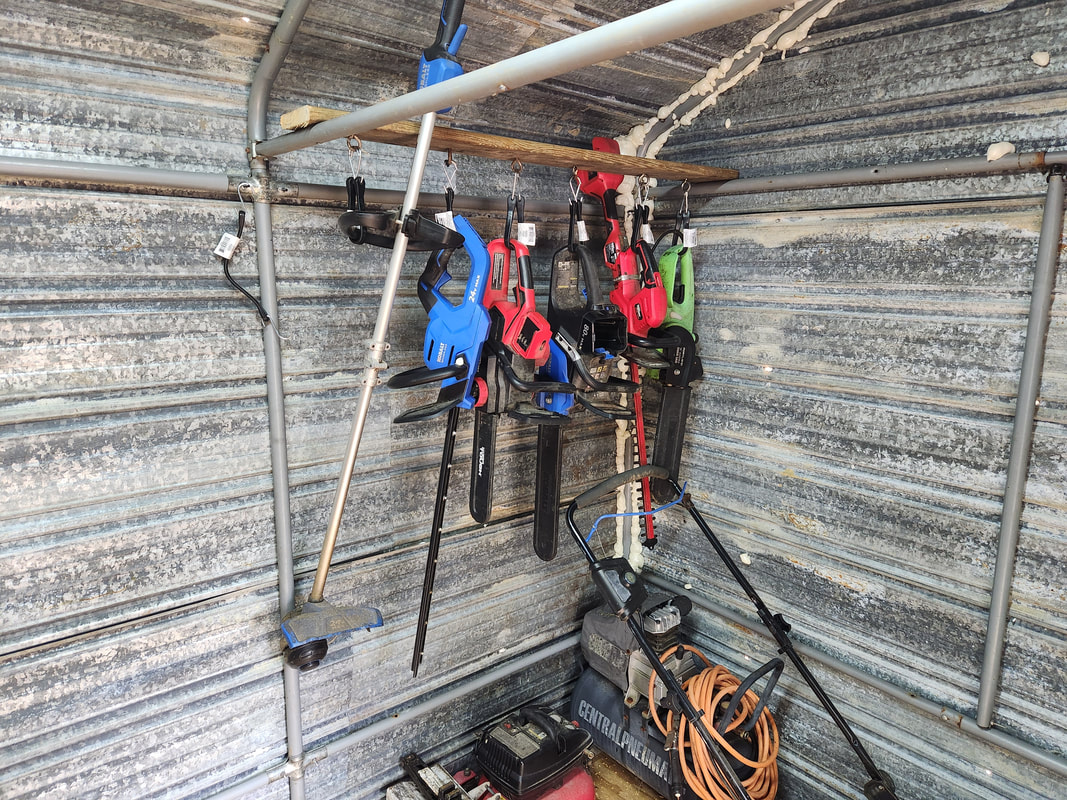
A 2x4 board was attached between one of the overhead frame tubes and the end of the wall. A hole was drilled through the tubes on either side to allow a wood screw to be put through to the board. This board has hook bolts in place, along with bungee cords used to hold the larger power garden tools vertically instead of leaving the tools on the floor or propped against the wall. Note the compressors and push mower stored below the hanging tools.
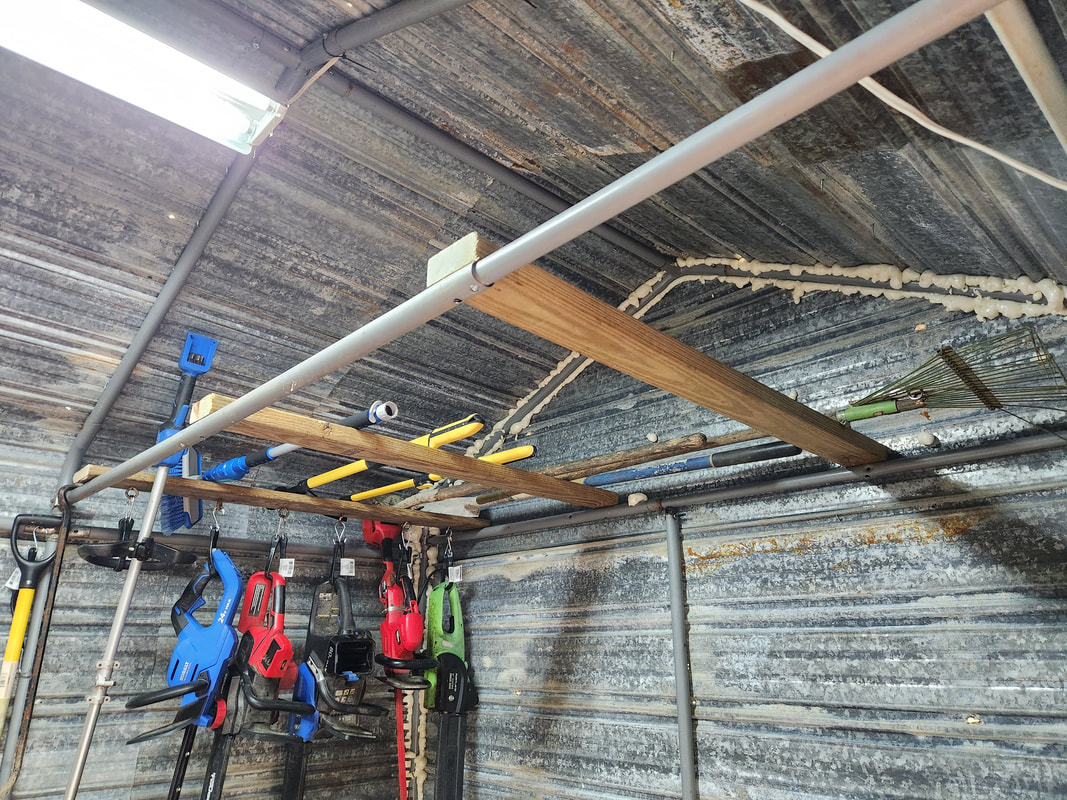
With the aid of a 2x4x8 cut in half, two more boards are secured to the overhead frame tubes to provide a makeshift storage area for manual garden tools as can be seen here.
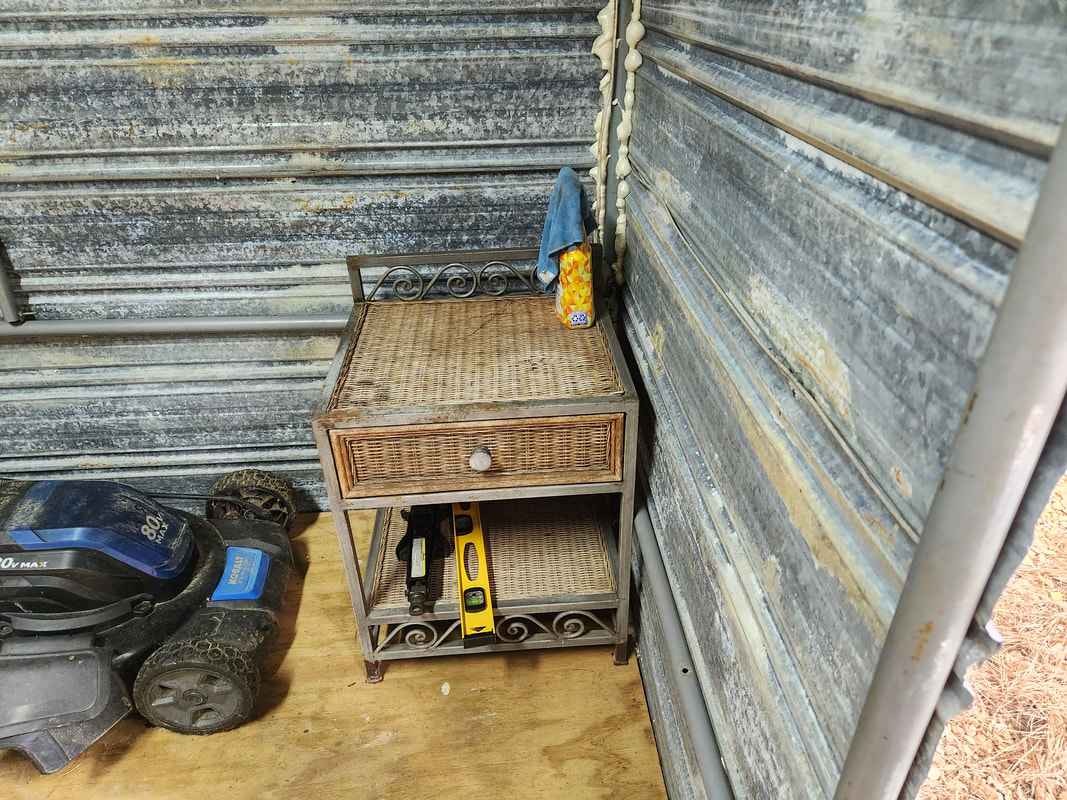
This little end table found in the trash was cleaned up and staged in the corner for use storing small items like weed trimmer string and even a manual jack. There's more room for holding any other small stuff I might deem relevant to be used with the other contents of the shed. Note the push mower to the left.
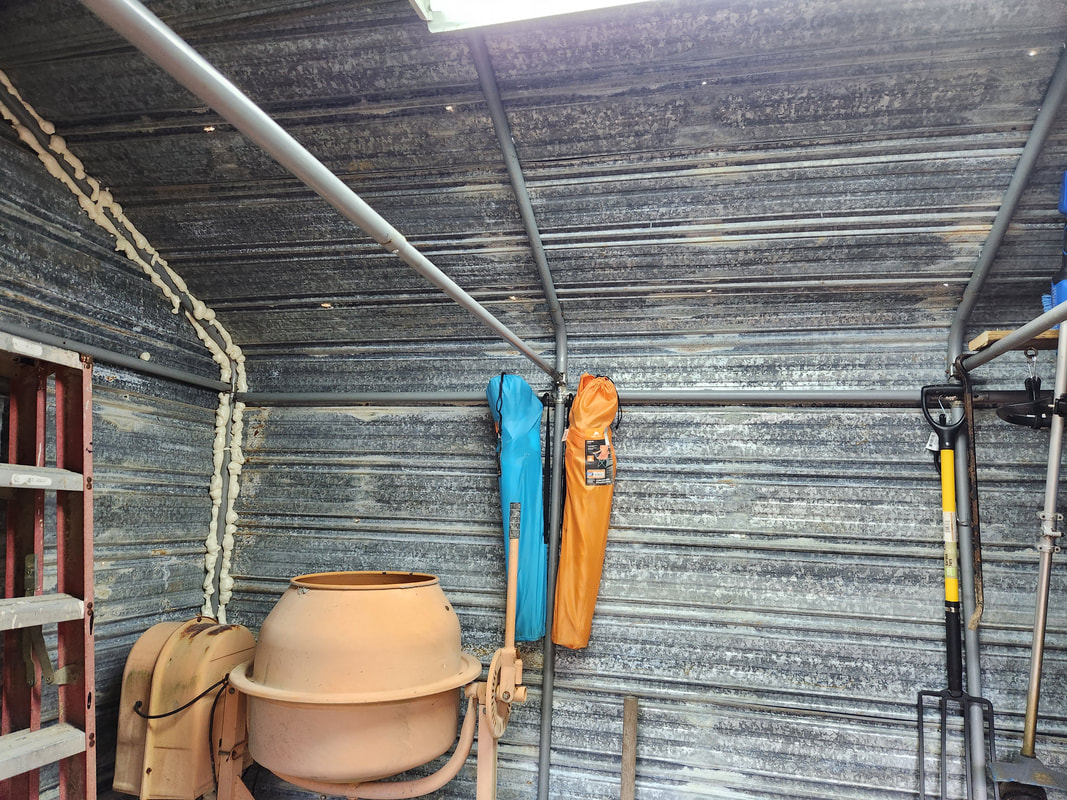
Even these bag chairs and a pitchfork are hung on the extra long carriage bolts that were used to hold the brackets that hold the shed's frame together. Note the ladder and cement mixer to the left.
