THE TOYOTA CHICKEN TRUCK
After having a good success with the Mustang Chicken Coupe despite a few small hurdles, I decided it was time for another car coop project to be brought into existence. Since we had more baby birds growing up in the brooding section of the Mustang Chicken Coupe and some grown chickens in a commercially made flimsy coop that was starting to fall apart, it was time for another car coop to be made.
In the search for a suitable donor vehicle I wanted to try to stick to a few requirements. One, the vehicle has to be old, no newer cars, nothing modern with a bunch of plastic panels and parts. Secondly it would be preferable it the car was partially disassembled, such as what would be known as a parts car. It would be something that someone was already pulling parts from and got to a point where they didn't want to mess with it anymore and would see if they can get something for the rest of the body before sending it to the junkyard. Thirdly, I would prefer if the vehicle had no title. Reason being is a no title vehicle here is pretty much a parts car, it can't be titled in this state under most circumstances so I wouldn't even be tempted if I found an older car that was titled to try and resurrect it. Lastly, a vehicle with some accident damage would make it more suitable for this duty since having some body and possible frame damage would further disqualify it for being brought back to life. I don't want a car that looks like a boomerang but just some crinkling somewhere and a few busted components. That is where this Toyota truck came into play.
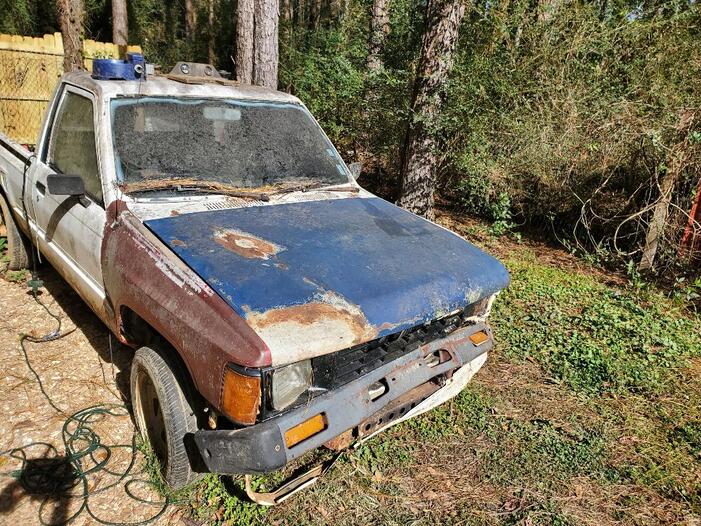
We managed to get our hands on a 1986 Toyota pickup that had some accident damage, had no title and was partially disassembled as the owner pulled the engine from it for another truck. This one did come with a bunch of parts including their old engine that was all sitting in the bed of the truck loose. It had minor accident damage on the front left side that made it a little unsightly but not unable to be used for the task I would have for it. $300 and a weekend day later we had the truck back at the house. Now obviously most of the usable loose parts are being put up for sale online to recover the initial investment in the truck. Other parts that I will pull from the truck will also be put up for sale.
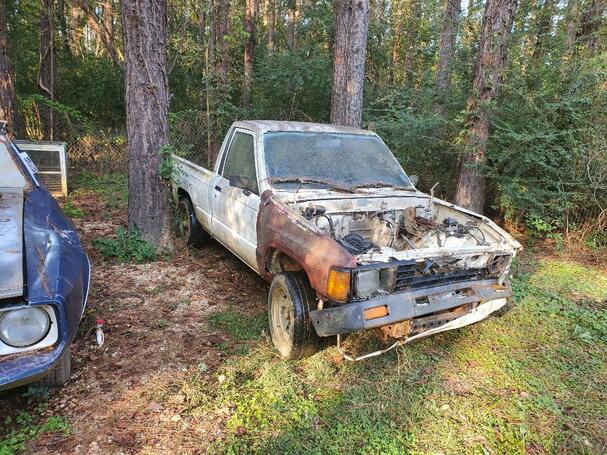
The 1986 Toyota Pickup soon to be The Chicken Truck
Of course the clean out and strip out process took a little time. There was a fair amount of trash in the bed and cab that had to be cleaned out. After removing said garbage, we got the engine and all of the loose parts pulled from the bed and stashed elsewhere. From there we moved the truck into its resting place as is seen in the above picture before I started removing parts from the engine bay. After a short time I managed to remove a bunch of usable parts from the engine bay that I can resell on ebay or elsewhere.
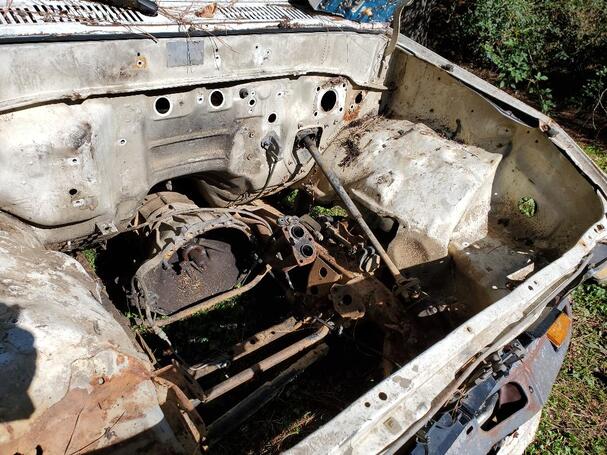
Gutted engine bay with just the transmission and exhaust manifold remaining.
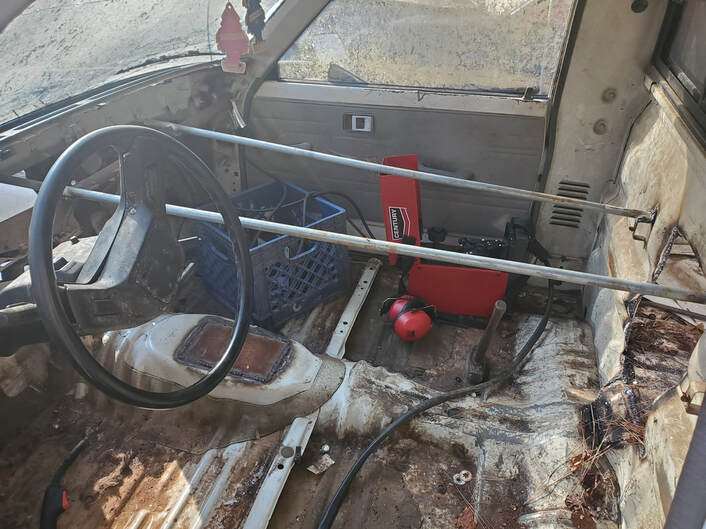
Next I turned my attention to the cab. I had the seats, belts, dash, cables and wiring to remove. The seats were another thing that I could sell along with the complete seatbelt sets. Of course the dash has the gauge cluster and a few other electronic components. All these parts were pulled and stored in a safe spot pending selling. With time I managed to get everything pulled from the truck, stripping it down to the bare floor and just the support bar under the dash that holds the steering column. I even removed the pedal assemblies and the different cables that operate things outside of the cab. These things wouldn't be needed so why keep them in place. The doors remained along with their internal mechanisms since the doors will need to be able to be opened and closed and the windows will need to be able to be operated as well.
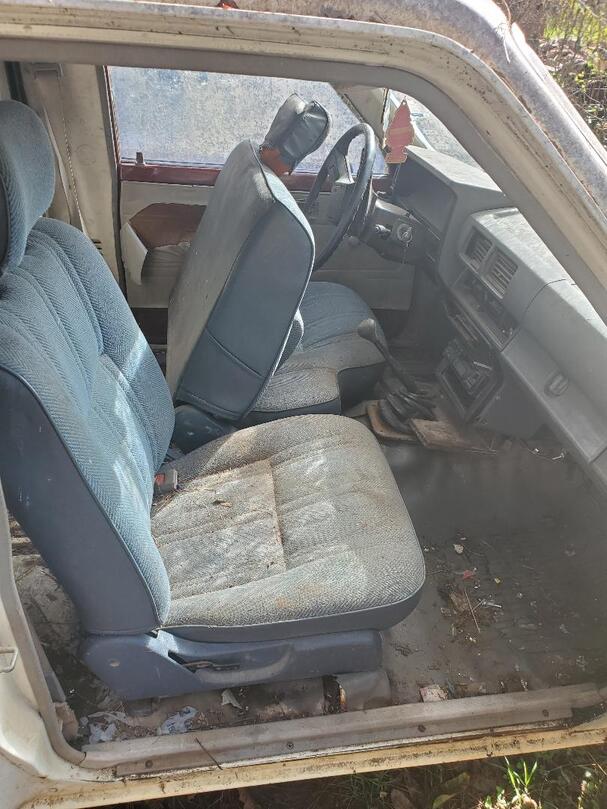
Interior prior to gutting
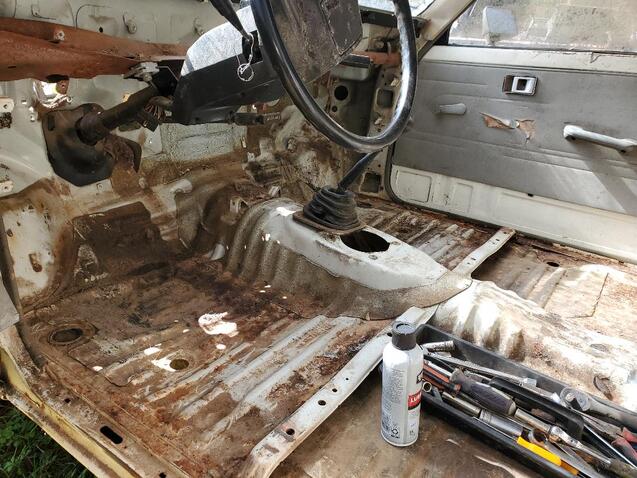
Interior after gutting
Now with the interior and wiring removed it was time to go under the truck and remove the transmission, exhaust, driveshaft and fuel tank. Luckily the ground was dry which allowed me to get the jack safely under the truck to hold it up while I pulled these components out. After removing everything I was able to start making my plans as to how to start turning this thing into The Chicken Truck.
My first area was the engine bay. This area would be the nesting box area as its nice and enclosed and the hood would allow for easy removal of eggs and cleaning of the area when need be. I had to do some welding to the right fender apron as it was rusted enough to be broken free and flopping around. After welding that back up I cut a couple of conduit pipes and welded them across the frame at the front and in the middle of the engine bay. These pipes would support the large pieces of sheet metal I will weld in place next.
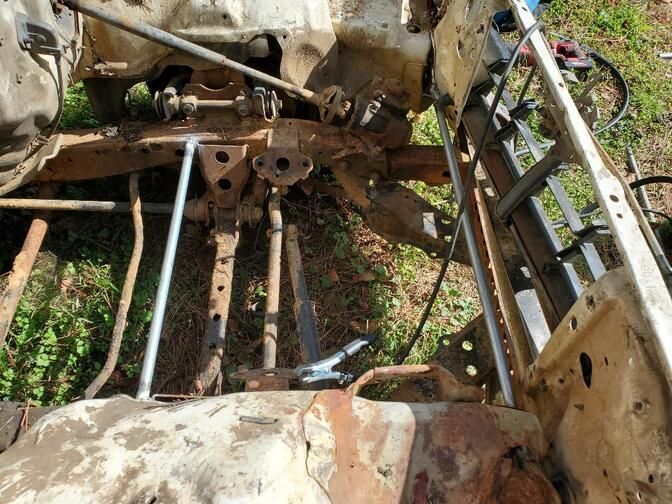
Pipes welded in place across the frame to support sheet metal that will make up the floor to the nesting area.
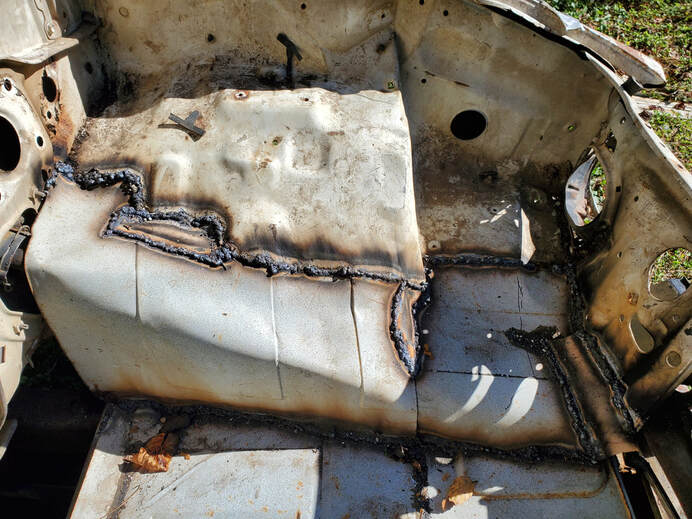
I had a large amount of scrap metal that I pulled materials from for this project. I had some large sections of sheet metal that were suitable for this duty so I cut the panels and started welding metal in place. After getting the floor done I welded smaller pieces in place to connect the fender aprons to the floor section, further closing things in. This left the firewall area and the radiator support panel area to be addressed.
Sheet metal floor panel welded in place.
Left fender apron with metal welded in place to connect to floor panels, note the multiple weld joints.
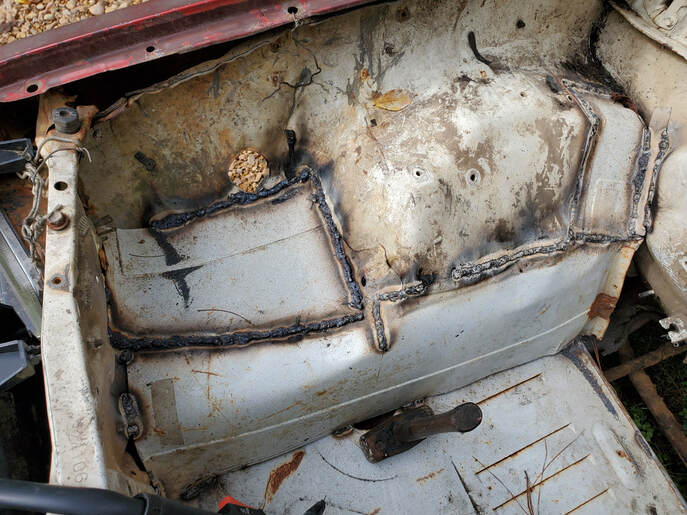
Right fender apron patched and welded up to floor.
It was at this time I cut the hole in the firewall going into the cab. I cut a hole high enough for the largest chicken to pass through without scraping the edges and wide enough for the same reason. The metal that was cut for the opening wasn't cut at the bottom in order for me to bend the piece down to serve as a ramp for the chickens to use for entry/exit. Next I had to cut small pieces of sheet metal and shape them to fit against the firewall and match the bends and contours of the fender aprons. Even after I started welding on one side of the metal I had to further trim excess metal from the panels before I could do the final welding.
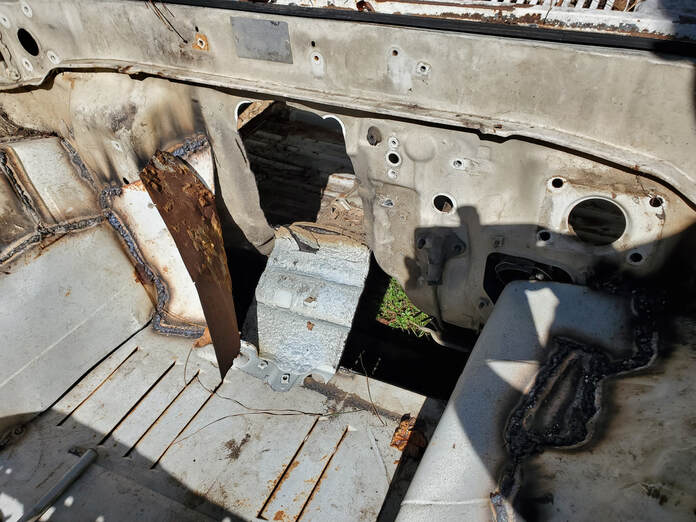
Opening cut in firewall with some starting metal welded on the right side of hole up to firewall.
After trimming up the metal I was able to get everything welded up to where the firewall was nicely closed up from the underside of the truck. There were a couple of small areas I welded patches on to further close them up, such as the left headlight bucket and the lower part around the radiator mount panel. But with the firewall done, it was time to figure out a setup for the radiator panel, since I wanted this to be an easy access spot for cleaning out the nesting area.
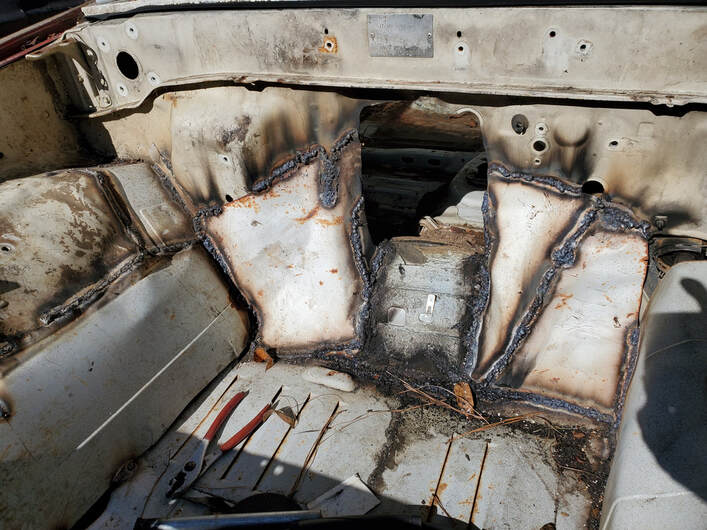
Completed firewall with opening for entry/exit.
Just like on the Mustang Chicken Coupe, I wanted to have a sliding panel at the front to allow me to be able to remove mulch easily without having to scoop it out. The floor of the nesting area was made from some appliance sheet metal that already had vent slots in it for the machinery that it covered, which was perfect for drainage when hosing out the nesting area. Since the radiator panel was flat, compared to the Mustang's, I had to figure out what I could put on either side of the opening to hold a sliding panel. What I came up with was to take a couple of fence post pieces cut from an old post that was in the scrap pile, and make a cut the entire length of each pipe, then weld these pipes to either side of the opening on the radiator panel. Cutting along the length of the two fence post pipes made them open up some since all these posts and pipes are is sheet metal rolled into a tube and welded together. After welding the pipes in place I managed to find a piece of sheet metal from the scrap pile that was actually perfect for this application. I didn't have to trim it or otherwise modify it in any way. I was able to slide the panel right in. Lastly I put the hood back on to complete the nesting area. Since there is no need to latch the hood, it didn't matter about keeping the hood release cable or even the latch mechanism for that matter.
Cut fence post pipes welded in place on either side of the radiator support panel opening.
Sliding panel in place between the pipes.
Hood installed back on truck. Note pronounced accident damage on left front.
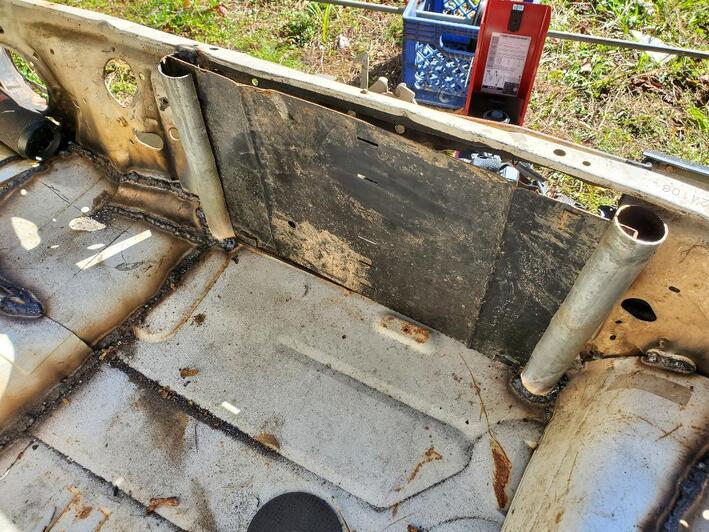
Next area is the cab. Before I would do any other work I wanted to patch the opening where the shifter poked up through the floor. This was taken care of quickly with a cut piece of sheet metal welded right to the floor over the hole. From there I cut the hole to the bed. Since this truck is not going to house baby birds separately, I can afford to give grown birds free range throughout the whole truck. A hole would need to be cut from the back of the cab to the bed. This was done rather easy with the power tools. After cutting the hole I pulled the metal panels together to weld around the sharp edges to "seal" the opening so if any rain water runs down the back of the cab it won't just run down over the opening. It'll also slow down insect intrusion from the gaps between the bed and the cab.
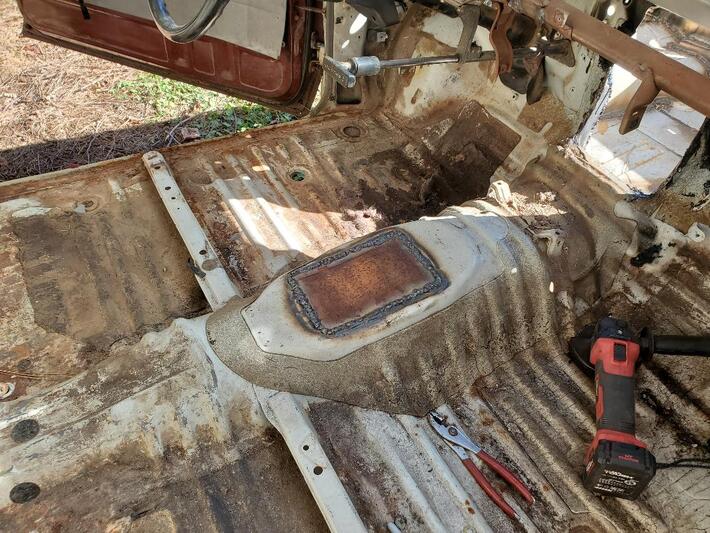
Covered shifter opening on cab floor.
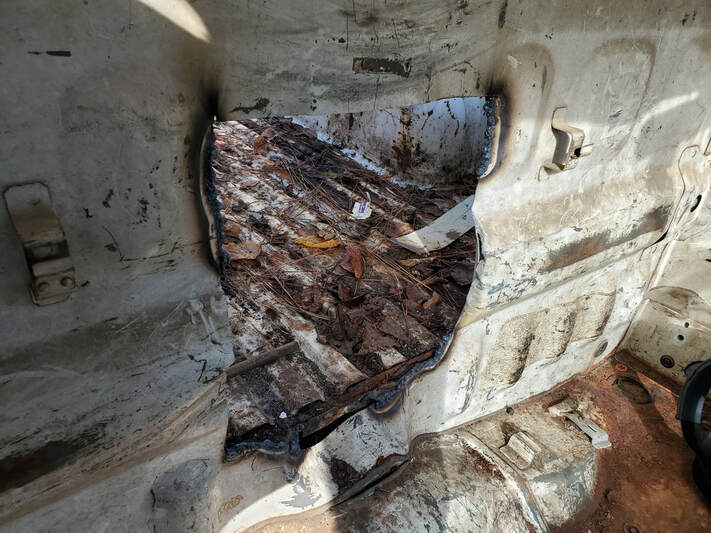
Opening cut from cab to the bed, note welds around edges to bring the two metal panels together.
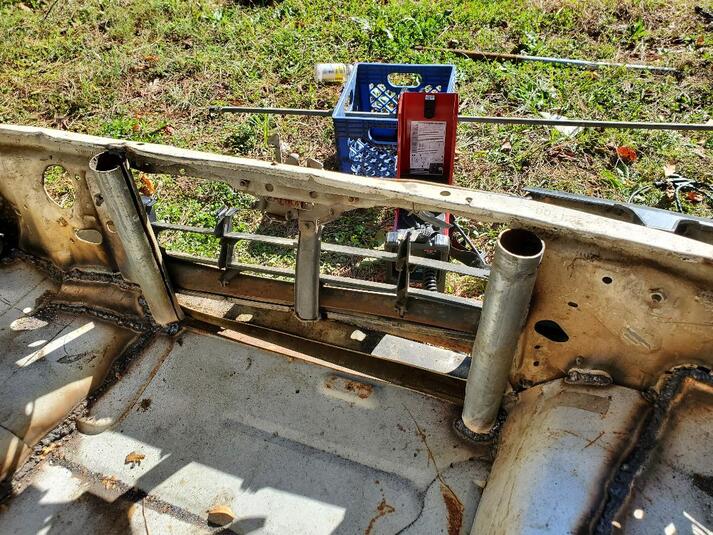
The next thing was the roosting posts. These posts were just a couple of lengths of conduit cut to fit. I welded them from a couple of metal mounts on the back panel of the cab and to the support bar at the front where the dash was. I did it this way since the doors will be kept functional so that obviously eliminates welding pipes across from left to right. These pipes are 3/4" conduit, plenty strong enough to support a few fat ass chickens roosting on them.
Roosting posts welded in place.
Next thing was the electrical components. This would consist of two electrical boxes, one for an outlet and one for a pair of switches. The light socket is a standalone ceramic light socket, something kind of old school, that will be wired in to the system. The two switches will control the light socket in the cab and another light socket in the bed area. I started off by attaching two junction boxes to the back panel of the cab, one over the opening and one to the right of the roosting posts. Instead of poking more holes in the metal I just took a couple of knockouts from the backs of the boxes and welded around the holes to attach the boxes to the back panel of the cab.
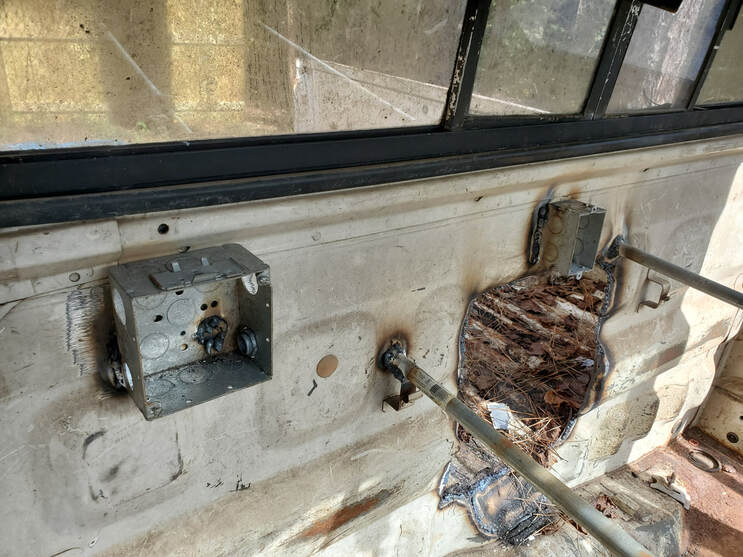
Electrical boxes welded to back panel of cab.
I took some surplus wire from my wire pile and ran a multi-conductor cable between the boxes and wired that to the outlet and to the switches. I then took a power plug cable that was salvaged from an old vacuum and ran that up through a plug hole in the floor and wired it in to the switches which in turn wired up to the cable going to the outlet. Lastly I secured the light socket to the rear pillar on the passenger side and ran a two conductor cable up to it, wiring it to one of the switches. The plug runs out from under the passenger side of the truck.
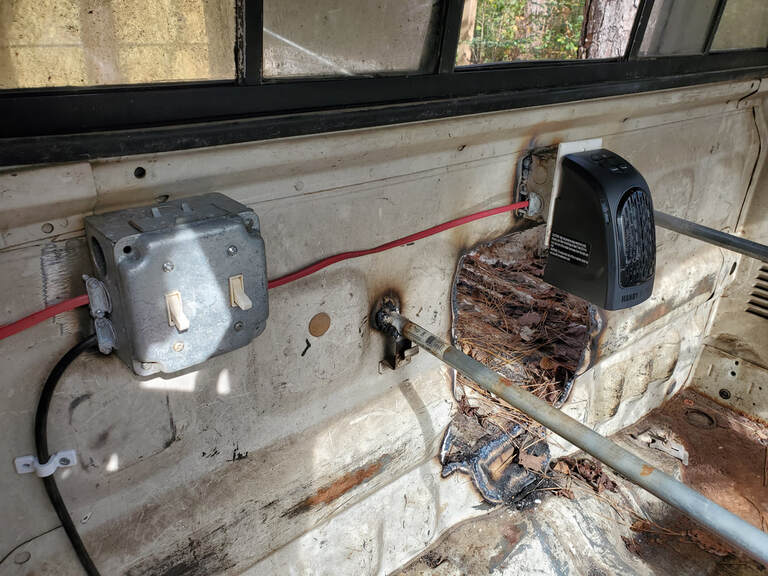
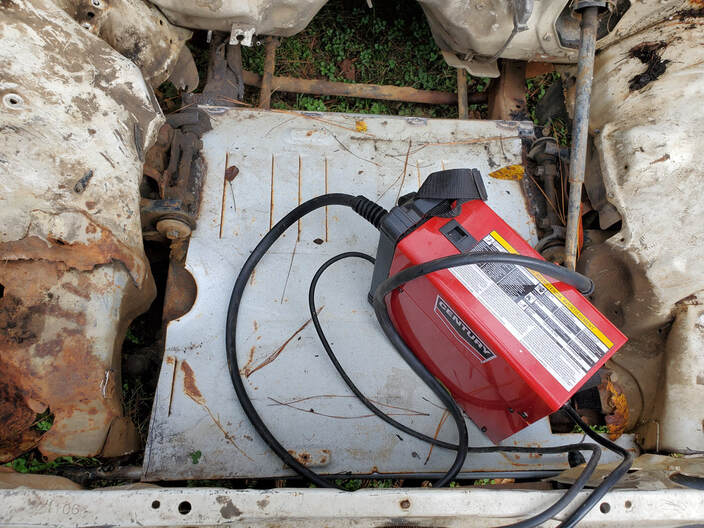
Boxes with switches and outlet installed. Heater is plugged up to outlet for testing.
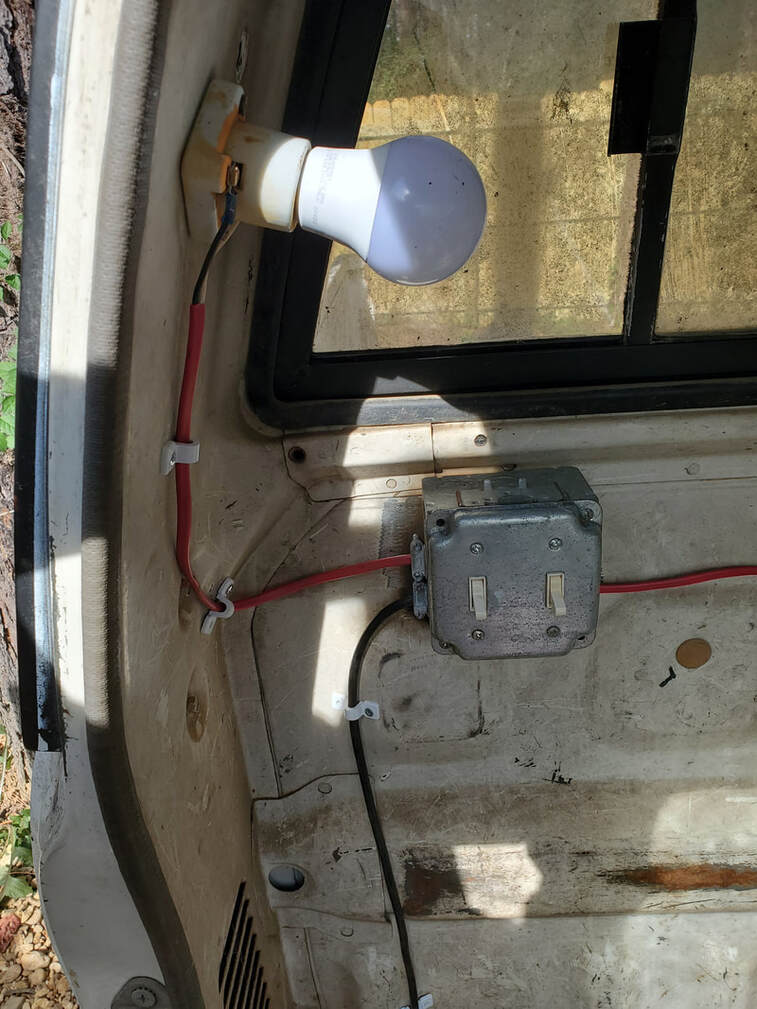
Light socket secured to rear pillar. Note straps to secure cables to metal panel.
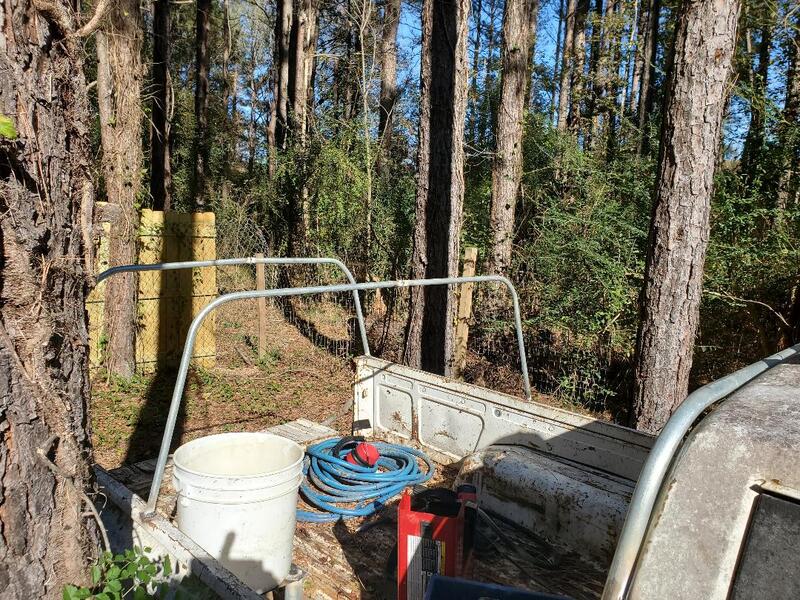
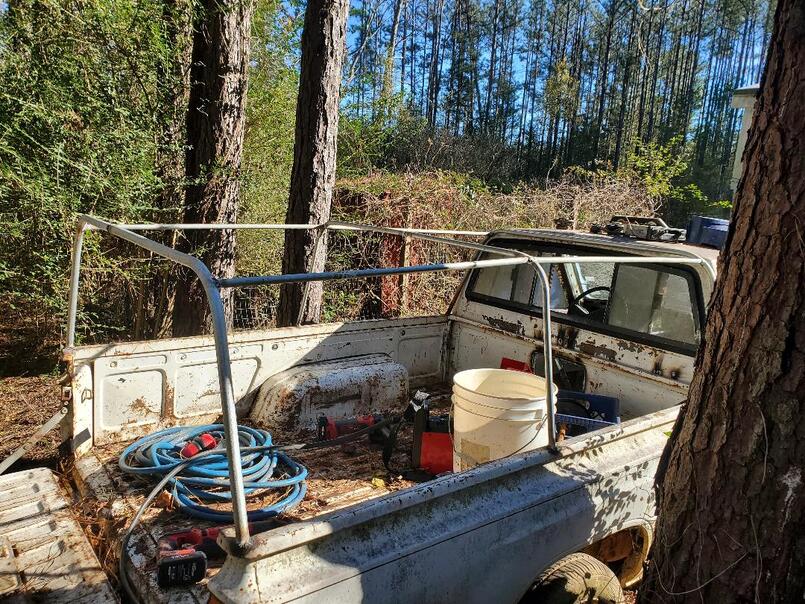
With the cab done I moved on to the bed. I wanted to get the watering apparatus put together and tested before moving on. The watering setup is similar to the Mustang's except that it would utilize a gravity feed setup like the temporary watering setups I did for the chicken coops. The bucket reservoir would then be automatically refilled via a float valve, like a toilet bowl. This would be fed from a hose hooked up permanently to the fixture.
I started off by assembling the drinker cup assembly with the necessary fittings and attaching it to the side panel at the right rear of the bed, near the tailgate, making it easier to service if need be. From there I welded up a platform that would extend out from the right fender which will support the bucket that will gravity feed the water to the drinker cups. The platform consisted of a piece of thicker sheet metal with two pipe posts cut to fit to support the sheet metal panel.
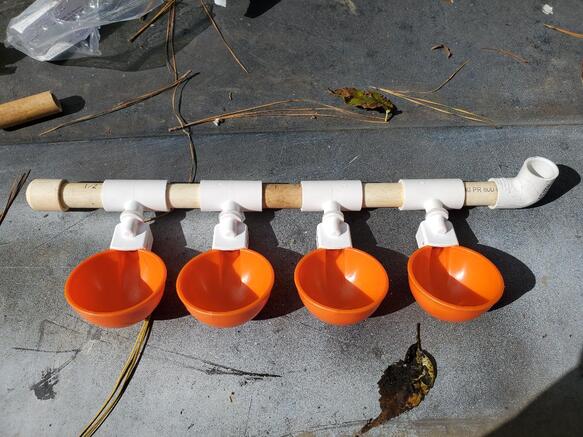
Drinker cup assembly put together, awaiting mounting.
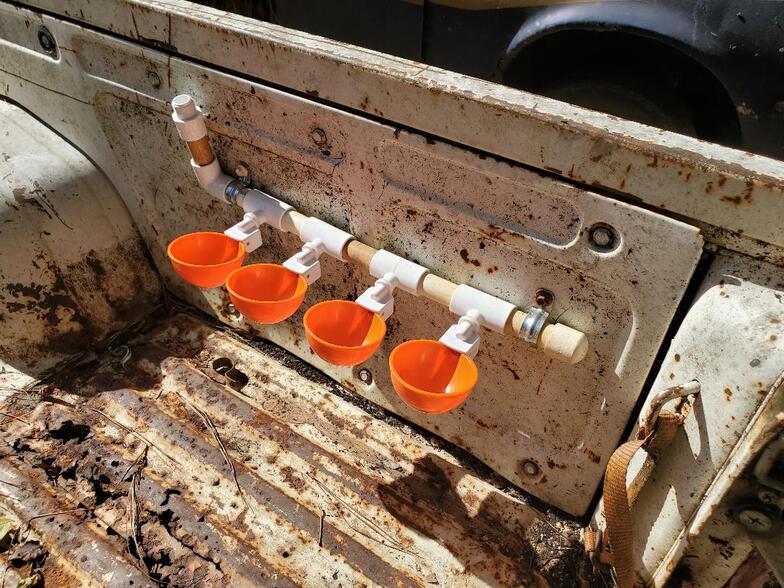
Drinker cup assembly secured to panel with conduit straps.
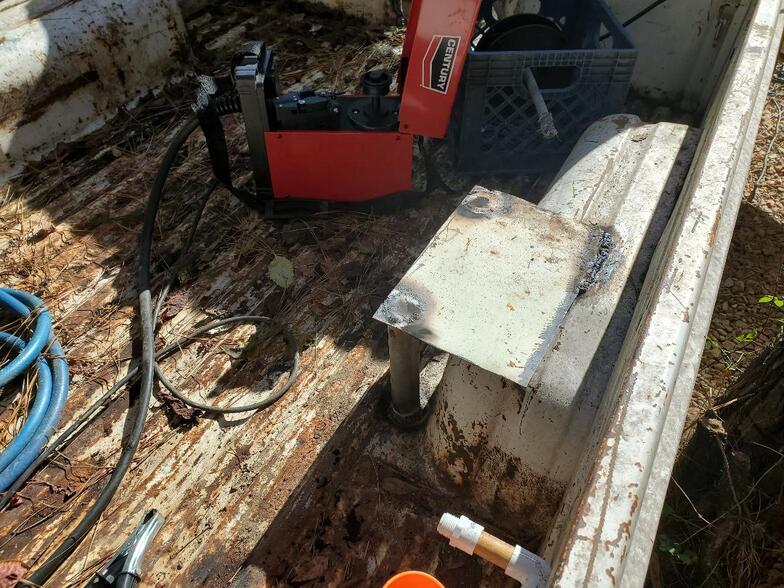
Platform for water bucket in place.
What's kind of funny is the idea that the area of the bed right under the drinker cup assembly is rusted out enough to have multiple holes present. While this may appear to be a problem to some, it was actually a blessing to me because of the idea that any leakage would run right out through these holes to the ground. The lateral ridges of the bed floor also allow for channeling any water straight to those holes instead of allowing any water to spread across the bed onto all of the mulch. Anyway, the next order of business was to prepare the bucket.
I had to take the bucket and drill a couple of holes. One hole was drilled at the bottom for a hose barb fitting to be screwed in place. This fitting would have a hose connecting it to another hose barb fitting on the end of the drinker cup assembly. Water will flow from the bucket through these fittings and hose into the drinker cups at a low enough pressure as to not rupture the fragile drinker cup assembly. The other hole was drilled near the top. This was for the float valve to be secured in. I didn't want the float valve too far up so there would be some wiggle room in case the valve doesn't shut off right away, there will be no overflow.
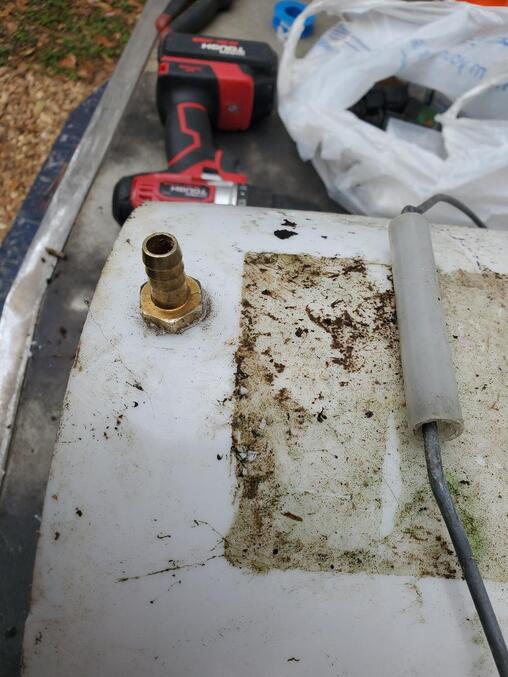
Hose barb fitting secured in hole in bucket.

Float valve secured inside bucket through hole.

Fitting for float valve where a 1/8" NPT pipe will screw in place.
Now since the float valve may not be able to handle the higher pressure of a typical house water line either, I wanted to add an in line water pressure regulator to cut that pressure down to a reasonable level before going into the float valve. I got an inline regulator used for the same micro irrigation systems like I installed in the garden this past summer. This regulator cuts the pressure down to 25 psi. I used some fittings on one side of the regulator to attach a 1/8" NPT pipe nipple to the output side of the regulator and a garden hose can be direct screwed to the input side of the regulator.
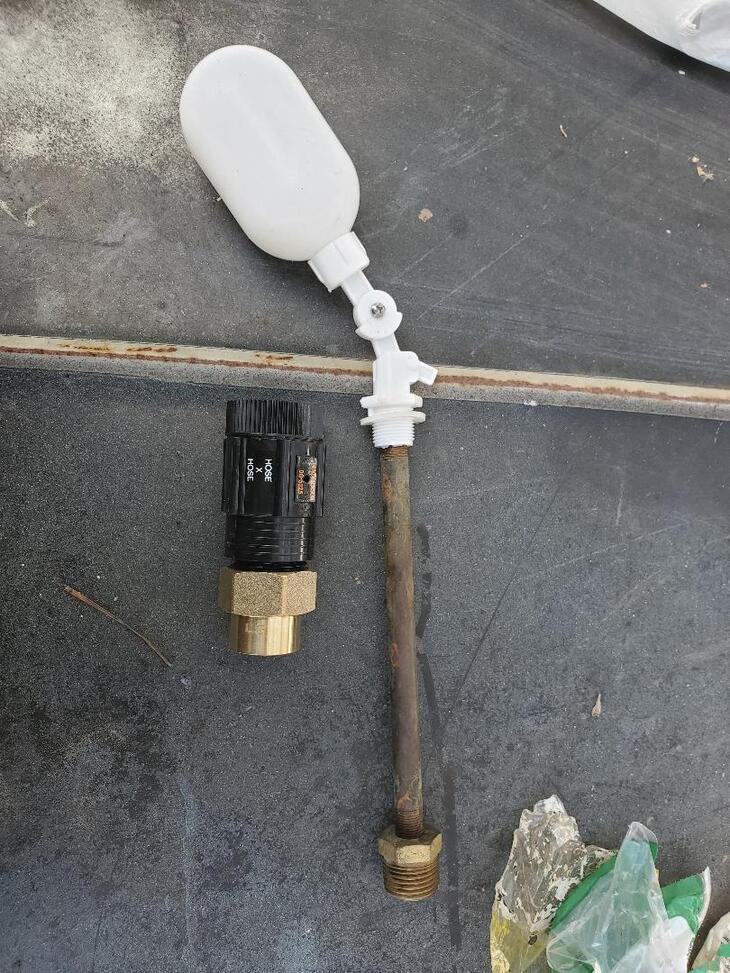
Pressure regulator with float valve and pipe nipple. Note hose adapter on end of regulator to allow for NPT thread fitting on end of pipe nipple to be screwed in place.
Next on the list is the bed cover. Since I didn't have access to a camper shell that would fit over this bed I had to improvise. This actually worked out as it allowed me to utilize more of the excess scrap metal I had laying around. I made a frame from conduit first then I would cover it with corrugated sheet metal to finish it up. I started off with the frame. Using my pipe bender I made the necessary bends, having to measure and measure again to try and get the second bend lined up where this "rib" would be even with the contours of the cab so when I attach the sheet metal it would all lay smoothly over both the edge of the cab and the ribs of the frame. I did three ribs on this frame, one at the very front of the bed, one midways and one at the very back. I connected the three ribs with pieces of pipe between the sides. This used four separate pieces of pipe to complete the overall frame.

First rib of bed cover welded to top of bed and to back of cab. Note how bends and angles match those of the cab.
Middle and rear ribs secured to bed with same bends and angles.
Support pipes welded between rib sections to complete the overall frame.
With the frame in place lastly was applying the corrugated sheet metal covering. I had some nice long sections of metal that I salvaged from some past structures that I long since torn down that were longer than the bed so all I had to do was secure them to the frame then cut the excess off. Using self tapping screws I was able to secure the sheet metal to the frame with a minimum of distortion to the bending of the metal over the frame. I will have to come back over this later with some caulk if it proves to be too leaky during a rain storm as I don't want the mulch to be messed up from excessive leakage. After getting the excess metal cut free I had a complete bed cover done. Before I moved on to the hatch I did want to get the water hooked up to the bucket for the drinker cups. I had to line up the fitting of the bucket to a spot on the sheet metal so I could drill a hole through the metal to put the pipe nipple through to meet the fitting in the bucket.
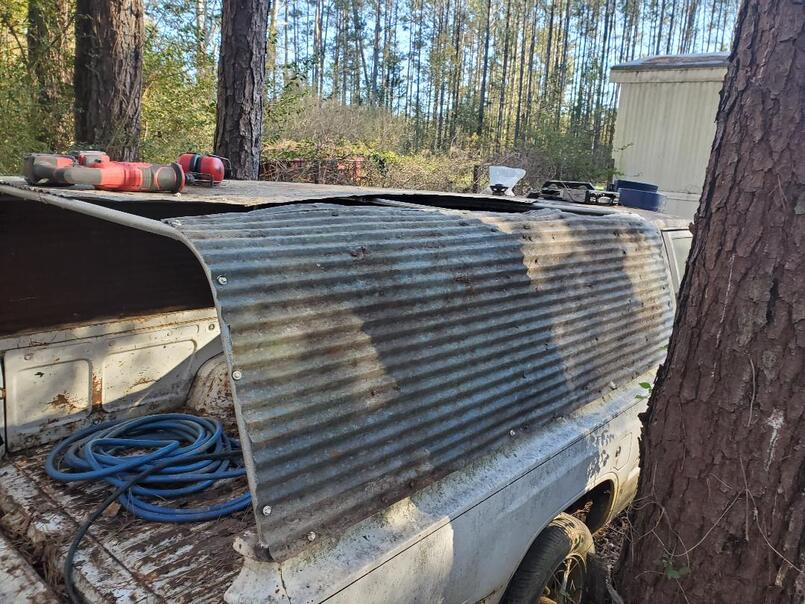
Corrugated sheet metal attached to frame.
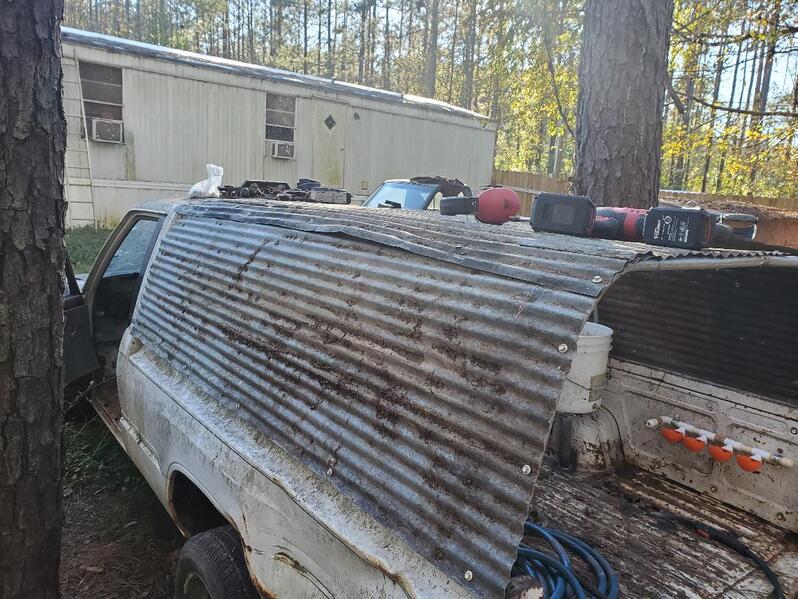
Left side shot of corrugated metal covering.
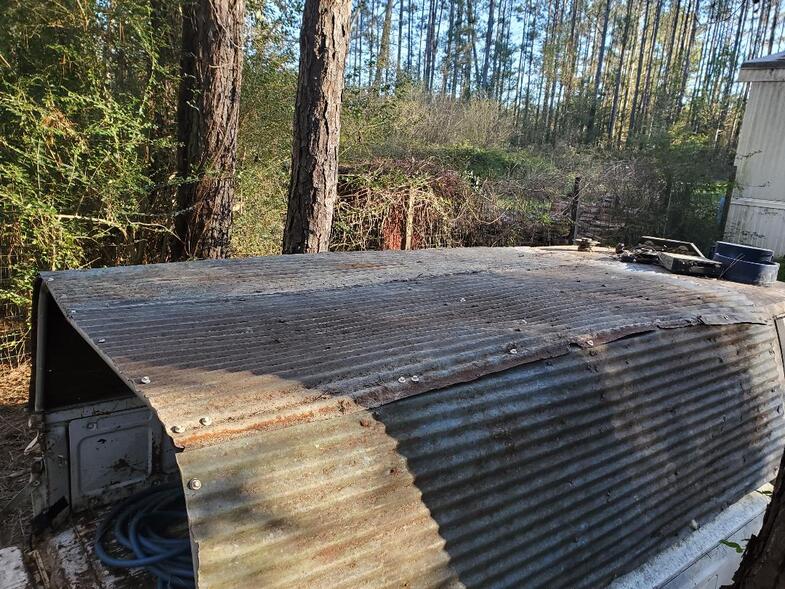
Top shot of corrugated metal covering.
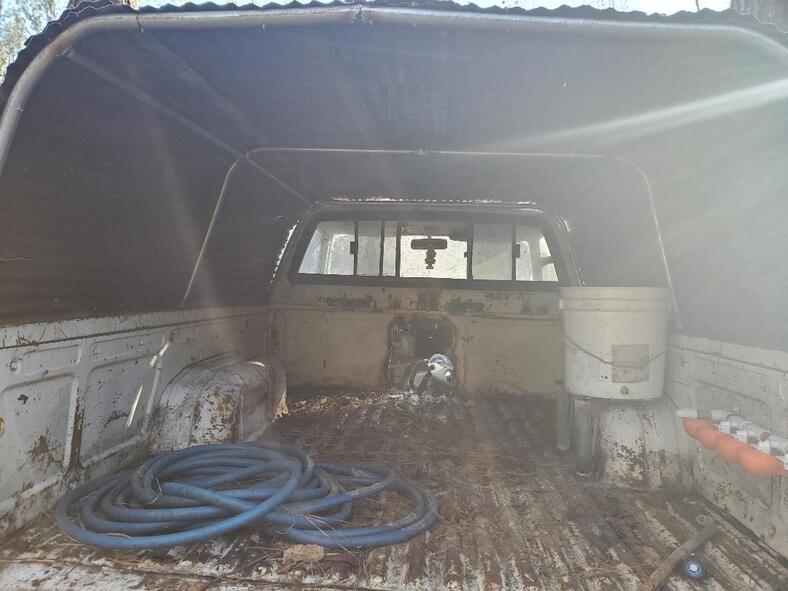
View inside bed with covering in place.
It took multiple measurements but I was able to get a good enough spot lined up for me to drill through the corrugated metal for the pipe fitting to go through to meet right up with the bucket. After getting the pipe installed I had to make a short length of garden hose to mate up the regulator to the Y fitting at the spigot under the Mustang Chicken Coupe. I had some old hose that was damaged in some unknown spot so I did a rough measurement of how much hose I'd need and cut that length from the female end of the hose then attached a repair male end fitting to the other end of the hose. With that I was able to get the bucket hooked up to water. After making an adjustment of the float I turned the water on and the float valve worked perfectly, slowly filling up the bucket while at the same time feeding water slowly to the drinker cups. Once the water level reached the float it smoothly shut off the water where the system would sit at rest, ready for use.
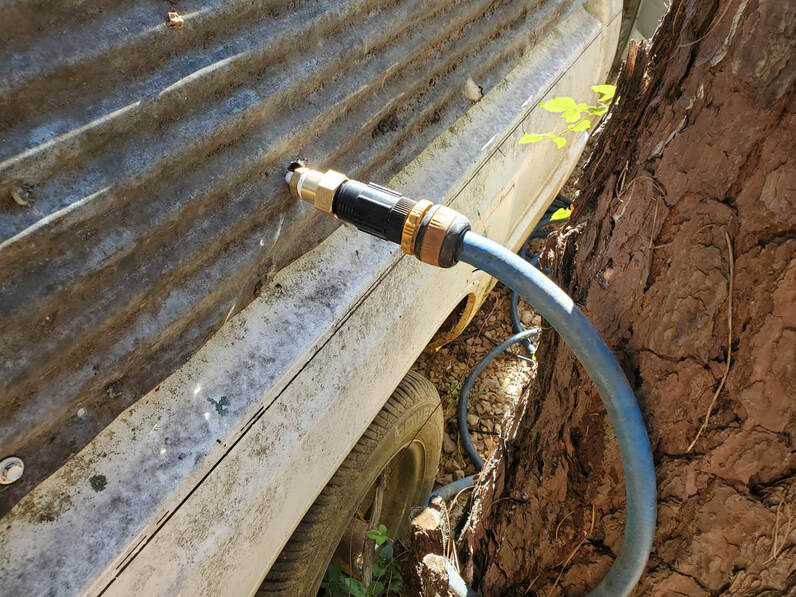
Fitting going through sheet metal to bucket on inside of bed. Note repair fitting on garden hose.
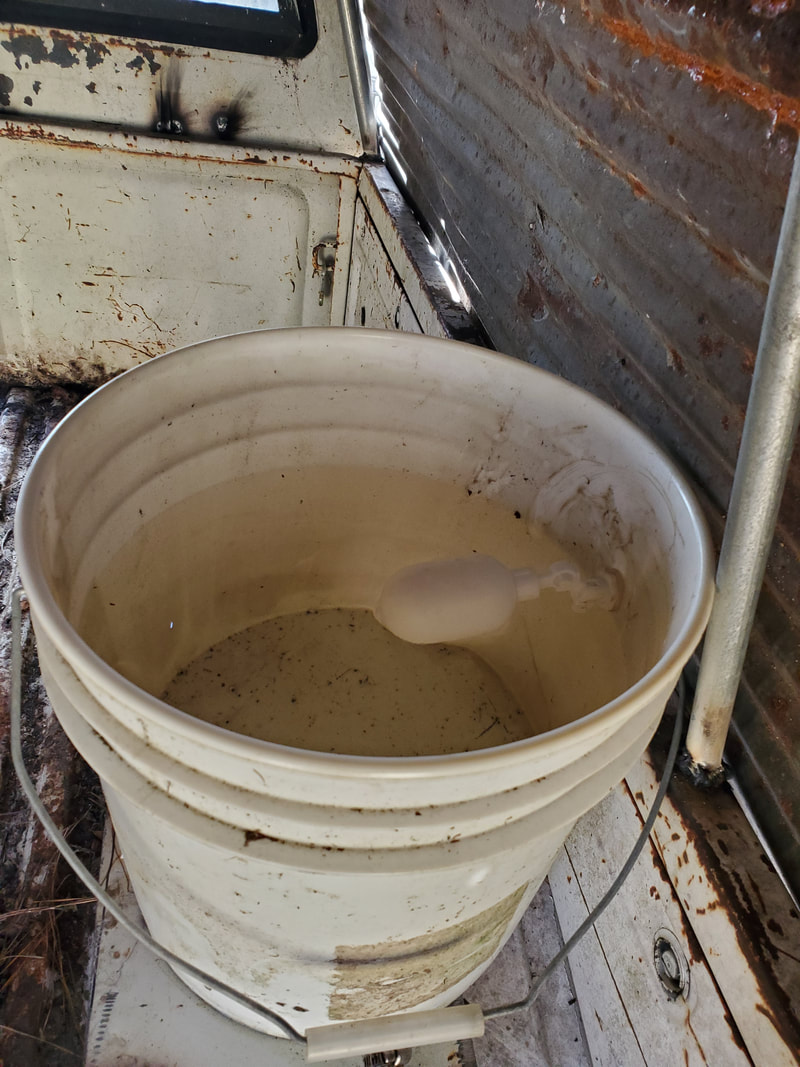
Float valve having done its job of allowing the water to fill up to the point where the float closed off the flow of water.
As for the hatch, the hatch was made in the same way as the frame for the bed cover - out of conduit. I took some measurements of the top and bottom of the opening then the sides and cut four pieces of pipe to meet these dimensions. I laid the pipe out on the ground to give me the shape of the hatch as it would be on the back of the bed covering. After welding the pipes together and test fitting the frame to confirm all was well I then welded on a couple of hinges to the top of the frame. I used self tapping screws later to secure the other ends of the hinges to the frame of the bed cover. I then cut out some scrap chicken wire I had laying around and wire tied the wire to the hatch frame, trimming off the excess afterward. What I was left with was a straight frame that fit just fine with a covering that would keep the birds contained. After securing the hinges to the bed frame, I found that when I closed the tailgate, the hatch would have to be slightly wedged over the lip of the tailgate to fully close it, which is good. This means the birds will not be able to push the hatch open to escape nor will any animal be able to work the hatch open as it will require forcing the bottom of the hatch over the lip of the tailgate. I would've had to use a latch to secure the hatch otherwise if this didn't work out the way it did.
Frame with chicken wire cover wire tied to pipes, note wire ties all around.
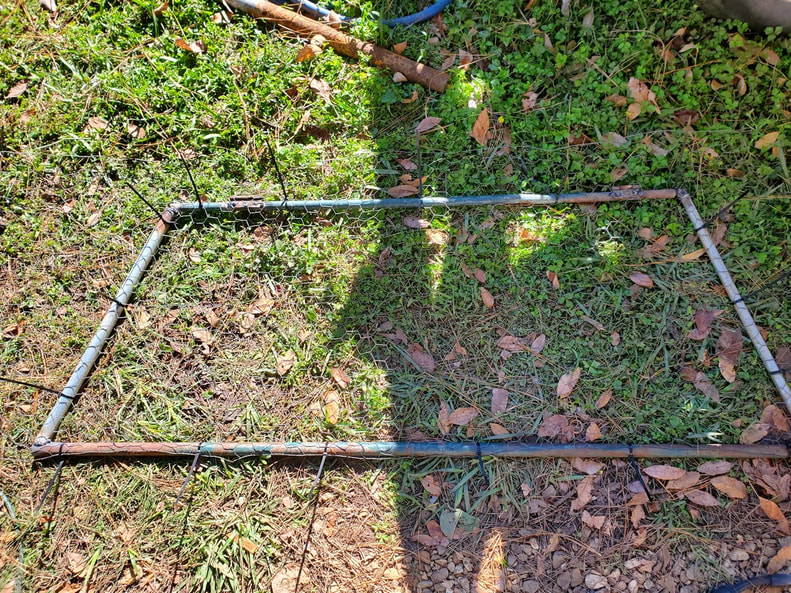
The last thing I had to do prior to loading the truck up with live chickens was get the power drop set up for this truck. Since I already had an extension cord run through a trench over to the Mustang Chicken Coupe, I had to tap off of that power feed. I went ahead and bolted up an outlet box to the tree that was between the two vehicles and took a short extension cord to use to bridge the gap between the trenched power cord and the outlet box. I cut the end off of the cord and fed the cable into the outlet box, hooking it up then plugging the other end to the plug coming up out of the ground. From there I took the plugs from both the Mustang Chicken Coupe and the Chicken Truck and plugged them to the outlet box. With that, both vehicles had full power and water and were ready to rock and roll.
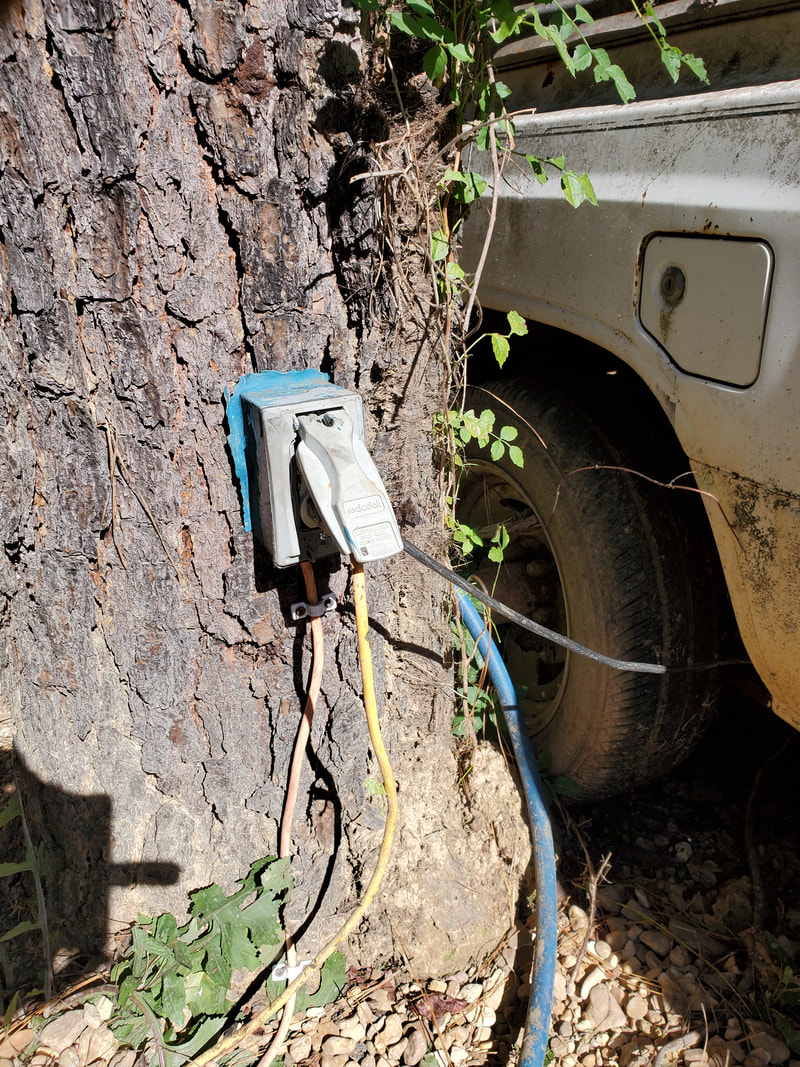
Outlet box secured to tree, note extension cord secured to tree under box feeding power to unit as well as cords going out to vehicles.
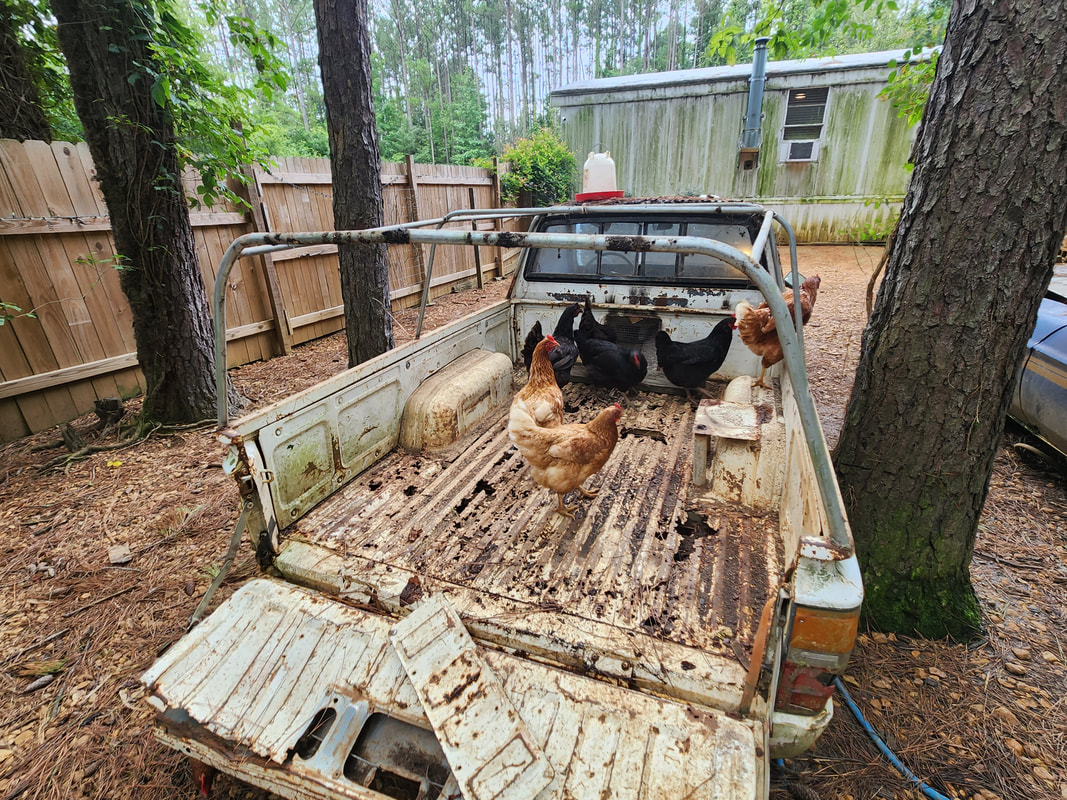
With that we put the adolescent chickens from the Mustang's brooder section into the truck as well as the 5 full sized Rhode Island Reds from the broken chicken coop. With that the Chicken Truck was brought fully online.
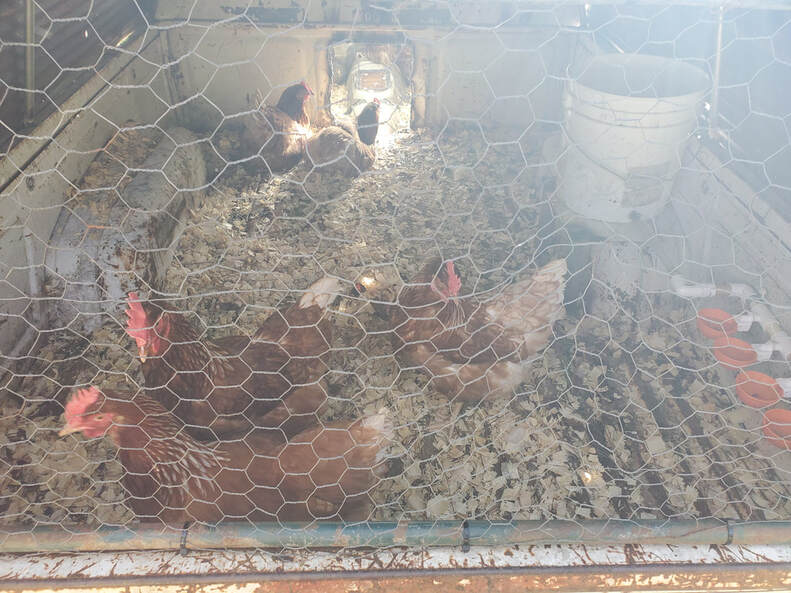
Shot through the hatch of chickens in their new home.
|
|
|
|
|
|
|
|
|
|
|
|
|
|
|
|
|
|
|
|
|
|
|
|
|
|
|
UPDATE:
After quite some time using this chicken coop, there were some things that were visited in the automotive world. First of all, I found out that the wheelbase of the Toyota's frame is the same as that of the Chevy LUV. Also, compared to several years ago, parts for the LUV's suspension and brakes are getting harder to come by, to the point that some of the stuff is nonexistent. What this means is if I want to have any chance of getting the LUV put back together, I will have to make some serious changes to the suspension. Since I don't have the money to buy the components to install an aftermarket suspension for this truck, the next best thing is to install the LUV body on another frame. And since the Toyota's frame is the same, and its in my hands, what better candidate to use than this one. Also the 80's Toyota trucks are common enough that parts are widely available, even custom/performance parts for those that want to make offroad versions of those trucks. At the same time, I don't want to just fully abort the whole project by doing away with the thing in order to get the frame from the truck. I came up with a plan to use the cab as a standalone chicken coop, independent of the frame and installed on a foundation like a small shed. Currently the cab of the truck is used as a brooder box, with the access hatch on the rear of the cab blocked off with some screen. Since the bed is heavily rusted I just closed up the bed from further access to the chickens. The bed would be scrapped anyway while the cab is turned into a chicken coop afterward. I have this plan with another cab, the one that is currently mounted to a Ranger frame we recently picked up. I also have plans to turn the Mustang Chicken Coupe back into a viable car just as well, so once that's moved out of the chicken yard, the Ranger cab will also be used as its own standalone coop along with the Toyota cab. First thing I had to do was get rid of the bed on the truck.
The first step in this process was removing the sheet metal from the homemade camper shell. Now the chickens decide to want to use the damned thing.
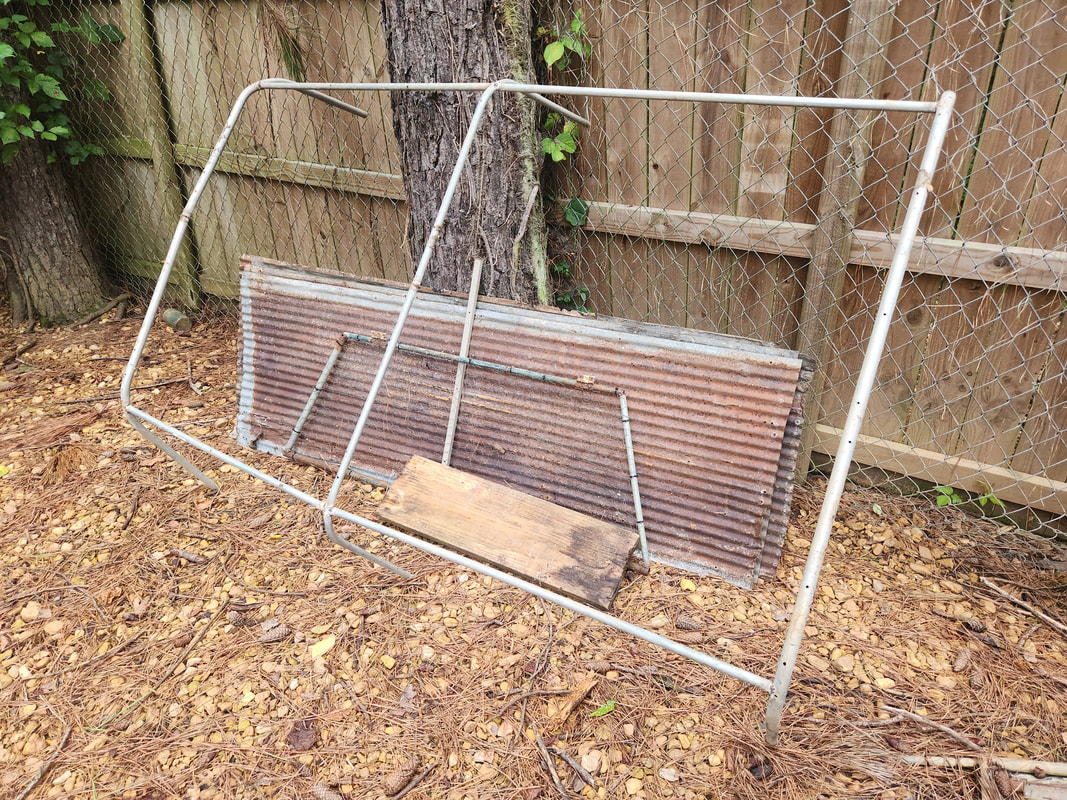
The conduit shell has been cut off and staged along with the sheet metal and the homemade hatch.
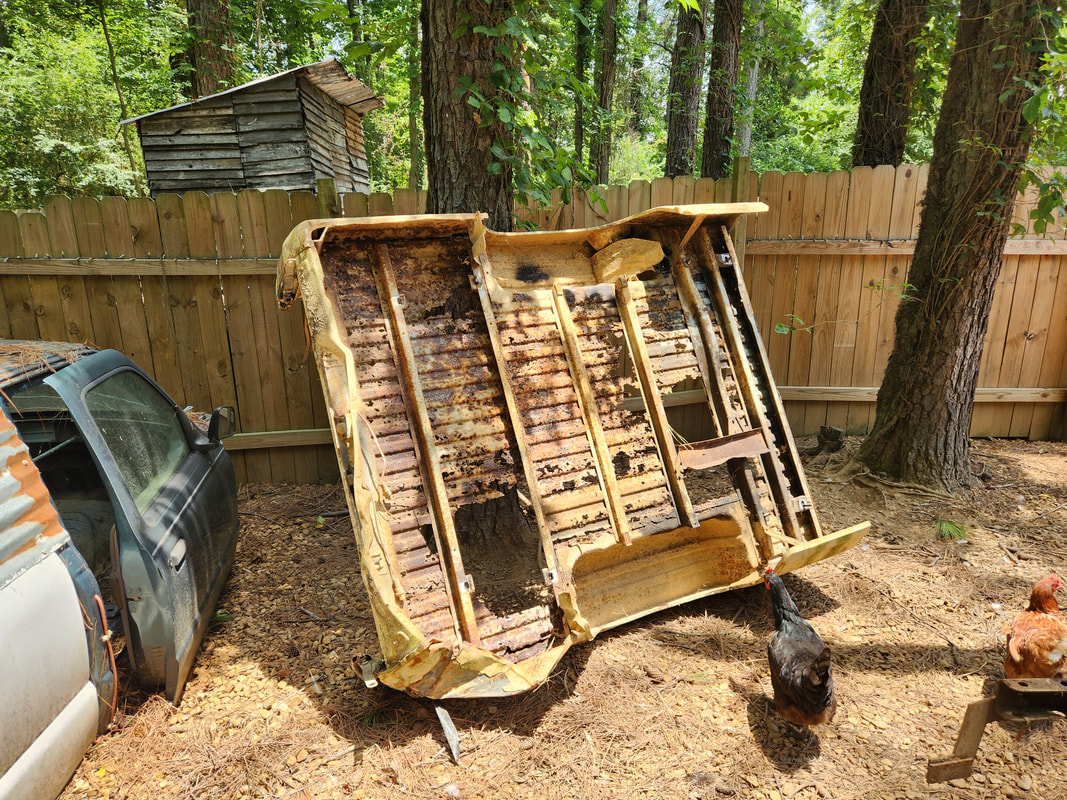
The bed has been removed after removing the nuts from the eight body mount studs. The studs have wings on them that catch inside the mount box so the nuts can be spun off with ease. Each stud had two nuts on them.
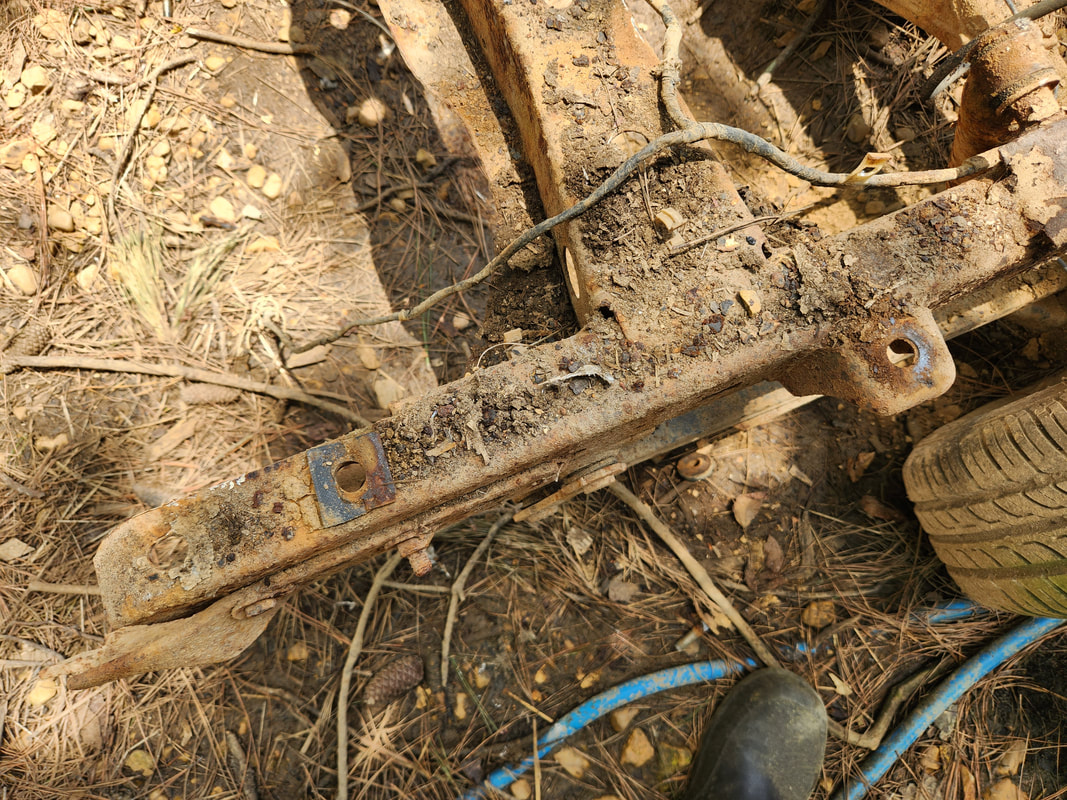
Behind the axle were two sets of body mounts, one on a bracket and the other inside the frame rail itself with an access hole at the bottom of the frame rail for a long socket to reach into.
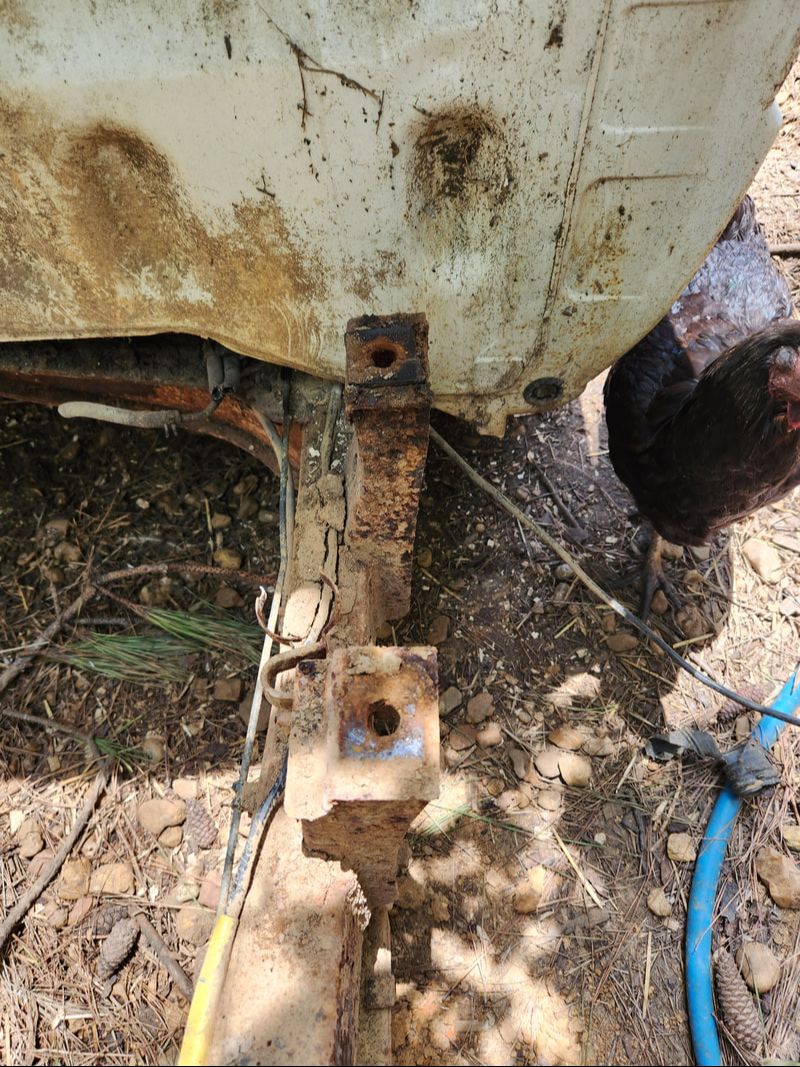
The mounts in front of the axle came in two pairs as well but both are on brackets, all easily reachable without having to go far under the truck.
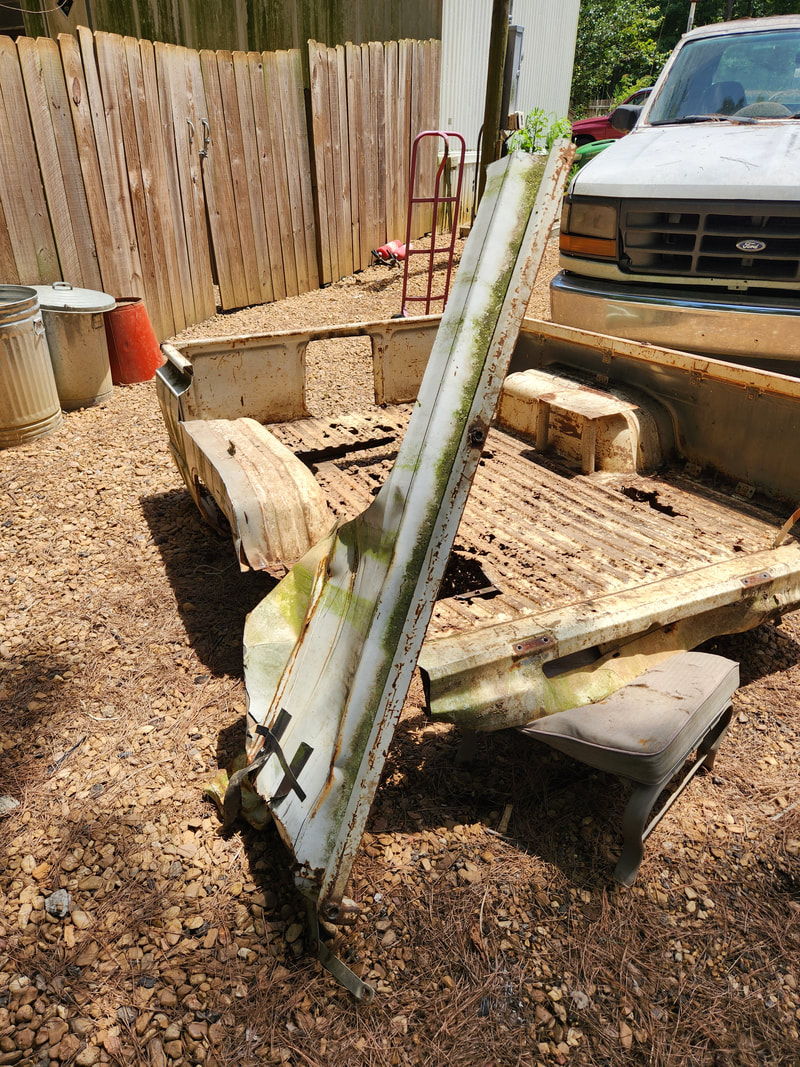
The bed after moving outside of the chicken yard in order to start cutting the thing up. I salvaged the inner fenders for use later on in a future project. The bed was chopped into pieces with the use of an angle grinder and reciprocating saw.
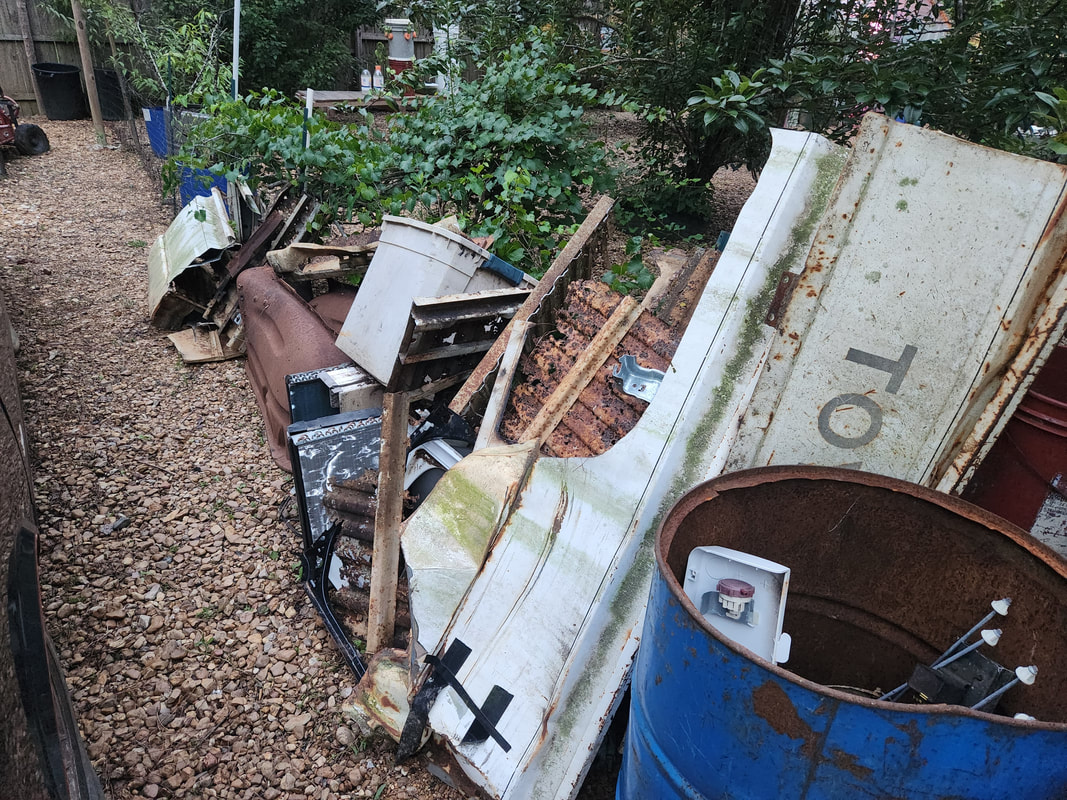
The pieces from the cut up bed are staged with the outgoing scrap.
