THE NEW PANTRY
Here we go again with yet another project, but hey, ain't that the whole premise behind The Improvisation Center? To build new projects? Anyway, this project centers around the idea that we currently have a large shelf that we built a couple years ago to hold our food stores, mostly canned goods and other non perishable items. We plan on eventually installing one of those wall mounted HVAC units where the evaporator part (the one with the coil and fan to blow air into the room) mounts up on the wall and two refrigerant hoses go through the wall outside to the compressor. The whole unit is supposed to be pretty easy to install, from what I can see it'll be pretty easy. Thing is I need some wall space to mount the hardware. I figured if I can delete the large shelf from its current spot in the middle of the kitchen/living room wall, I can slide the china cabinet over that is currently next to the shelf and near the window where our window mounted AC unit currently resides. Moving the china cabinet over will also free up room near the wood stove also, so the heat will be better able to spread through the central living space of the house. In order to delete the large shelf I have to find a new place to put all of the canned food racks and #10 cans that are currently stacked on the shelf.
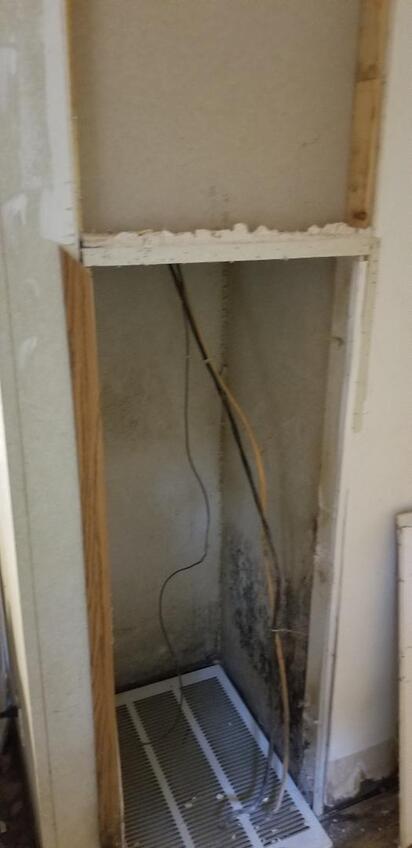
In comes the nook where the central HVAC system sits. This system began to malfunction a few years after the house was set up, with the AC pulling so much moisture from the air and off the coil that the drainage system couldn't handle it and water ended up on the floor making the plywood around the area weak in spots. The heater portion was also tripping circuit breakers after only a few minutes of running so we pulled the plug on this thing for safety reasons. We didn't wanna shell any more money in recharging the AC unit either as it was constantly needing repairs. We ended up going to window units but after seeing those new wall mounted units we figured these would be perfect for our application. I had been looking at using the nook where the HVAC unit sits as a pantry space since its centrally located and is almost perfect for a tucked out of the way pantry. It allows us to have everything stored out of the way and out of view for all intents, especially if I manage to make some type of door for the opening.
First thing I had to do was remove the old HVAC system. This ended up being easier than originally thought. The A-coil that makes up the evaporator portion of the AC system only had two copper refrigerant lines running down through an opening in the floor. One line was secured with a screw together compression fitting and the other one was sweated to a longer copper line going outside. After taking the compression fitting loose I cut the other line and pulled the drain tube free and removed the A-coil. The next thing was the furnace portion.
After verifying the power was off I disconnected all wires from the furnace then removed any and all retaining screws that held the unit in the nook. After a little wresting I managed to free the furnace from its nook. After setting it aside I had to clean up the area around the nook, vacuuming broken drywall and dust from around the floor around the duct opening. I also cut out the drywall that was mounted on the inside at the front wall that was right above the furnace unit. I wanted an opening that stretched all the way to the ceiling for optimum storage space.
First order of business was to cover the duct opening. I got a 2'x2' piece of 3/8" plywood and trimmed a few inches from one side so the board can fit in the nook and cover the duct opening and the opening where the refrigerant lines went through. After fitting this board down I cut two 2x4's and secured them to the back corners of the nook with wood screws. Shortly after I cut three pairs of 2' lengths of 2x4's to use for shelf rungs. After test fitting the first level I found that the back 2x4 in the right corner was sticking out enough that it wouldn't allow the shelf board to sit at a perpendicular position to the back wall. That board was removed so when the board was set against the right side it sat at a nice 90 degree angle to the back wall. I marked marks in all four corners 1' from the floor so I can put the two shelf rungs against the sides at those marks, securing them with wood screws. I did this two more times with the other two pairs of boards, spacing them a foot apart going up.
After removal of HVAC system, note outer cover on duct opening to keep stupid cat out of ductwork.
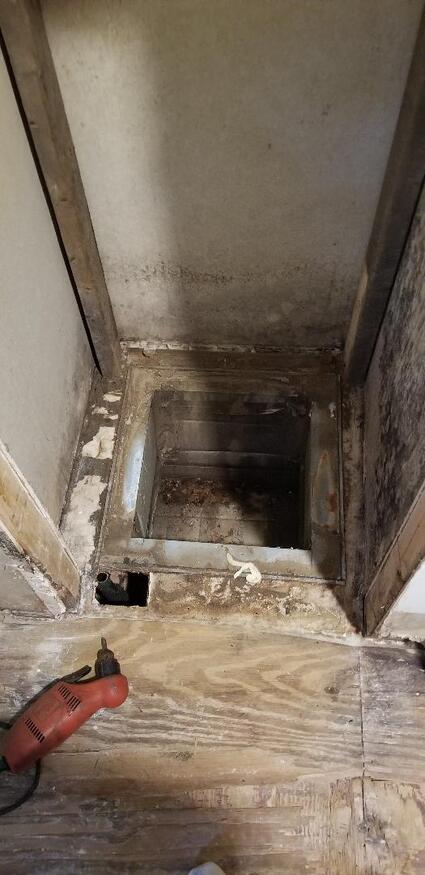
Open duct, note small opening in front where refrigerant lines ran through.
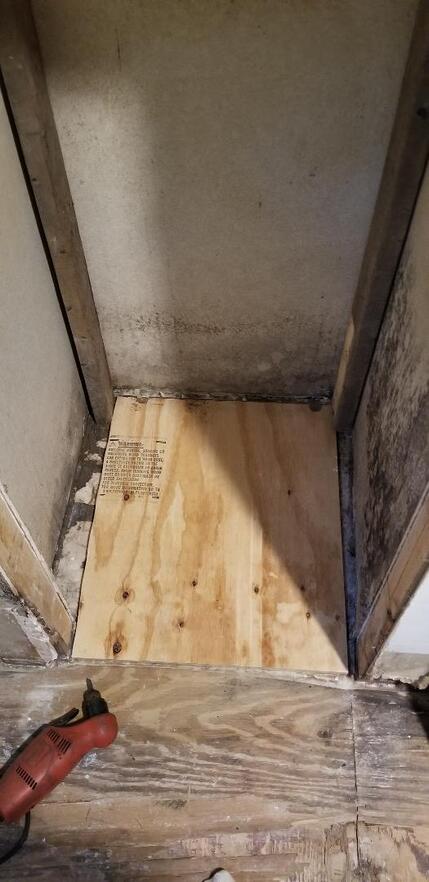
Test fitting duct cover, note two 2x4's against back corners of nook.
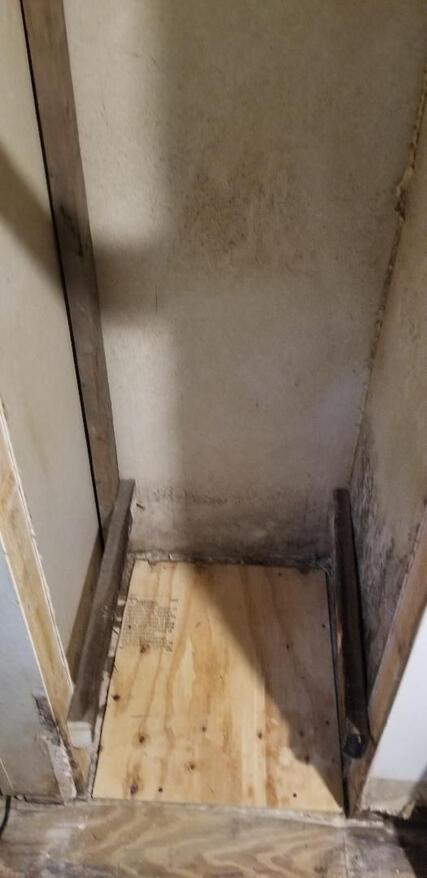
Secured duct cover and 1st tier shelf boards, note missing board to back right corner.
The next order of business was to bring in a bunch of pallet boards that I had stored on the storage rack that is used for all my salvage wood. I measured a span of 20 3/4" between the shelf rungs, which I marked on all the pallet boards. Some of the pallet boards allowed for two of these pieces to be cut from the one board. After cutting the boards down I fitted the pallet boards on the shelf rungs butting them all together on each level. These will be secured using the brad nail gun.
Afterwards I will need to cut some more 2' lengths of 2x4's to make some more shelves, two maybe three more levels before reaching the top. I will of course have to bring in some more pallet boards to make the shelves themselves as well. A little word on why I'm using wood screws instead of just driving everything with the nail gun like I did with the shed. Since this is inside the house, by using the screws I can always pull this apart if need be to make any modifications or outright changes. Who knows what my plans for the house might be later on down the road that might have me make changes like completely delete this section of the house.
Afterwards I will need to cut some more 2' lengths of 2x4's to make some more shelves, two maybe three more levels before reaching the top. I will of course have to bring in some more pallet boards to make the shelves themselves as well. A little word on why I'm using wood screws instead of just driving everything with the nail gun like I did with the shed. Since this is inside the house, by using the screws I can always pull this apart if need be to make any modifications or outright changes. Who knows what my plans for the house might be later on down the road that might have me make changes like completely delete this section of the house.
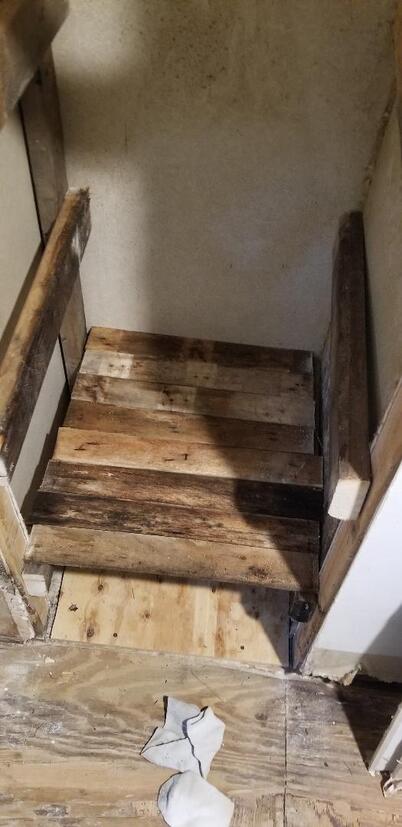
Test fitting pallet boards on first shelf. Note other shelf boards secured in place.
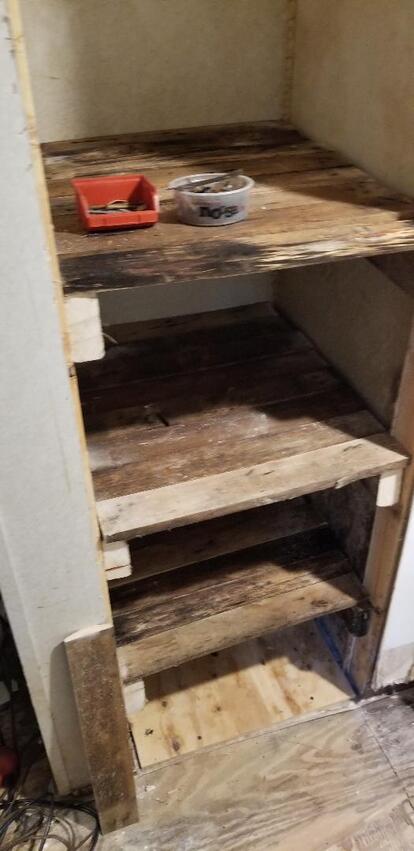
Test fitting pallet boards on the three shelves.
|
|
|
|
|
|
|
|
|
|
|
|
|
|
|
|
|
|
