THE NEW GENERATION RAISED BED
With my plans to revamp the garden I had to also incorporate the use of raised beds along side the hydroponic gardens that I've already made. Now I'm not talking about the raised beds like the ones we've made and still have a couple of before. Since I'm trying to redo the garden where maintenance is more painless and not as problematic for either of us as we get to the point where we don't want to be bending over all the time, I vowed not to build any more raised beds that are right on the ground. I would rather build smaller raised beds that are truly raised, high enough that I will never have to bend over hard to work the soil. I will be able to work on the new raised beds almost standing up.
I built a raised bed that was really a prototype for what I plan on replicating heavily in the garden when it comes to raised beds. This bed incorporates the use of oil drum halves, very similar to the very first raised beds I set up using some old beds that were originally intended to be worm beds. I welded some pipes to the bottoms of the drum halves to serve as legs. The new generation raised bed will have a base/cradle/table built from 2x4's that will hold the drum half at a height that will allow me to work the garden standing up. The other thing is I want the garden to be portable. Depending on my future plans, I want to be able to easily empty the dirt from the drum half and be able to move the whole unit wherever, even if moving is strapping the bulk of my raised beds to a trailer to relocate completely. This will allow me to set up shop in a new location almost immediately versus having to till and replant soil in a new spot. I could set up the raised beds along side a new house or in a back yard or wherever with minimum effort.
The first raised bed was pretty simple. I made a 2x4 base that cradles the drum half nicely. I used self tapping screws along the edges of the drum half to secure it to the 2x4 base. Next I cut four legs that are 3' long to ensure the height I seek. I secured all of the 2x4s using the air stud nailgun I used for some past projects. After building the cradle and securing the drum half I drilled a few holes along the middle of the bottom of the drum half to serve as drainage holes. With that I moved the raised bed into the garden, setting it up along side a newly added shop fan shell raised bed I set up along an imaginary line that will serve as the new fence line for the garden as I shrink the overall size of the garden. I used some bricks under the legs to help balance the bed frame. As for the medium I started with a layer of soiled wood mulch that came from our chicken brooder box, then added a bag of composted manure and two bags of topsoil then mixed it all together before planting the three squash plants I had sitting around waiting for a new home.

Cradle base and legs to make complete table for drum half.

Cradle with drum half secured within, note self tapping screws along top of drum half.
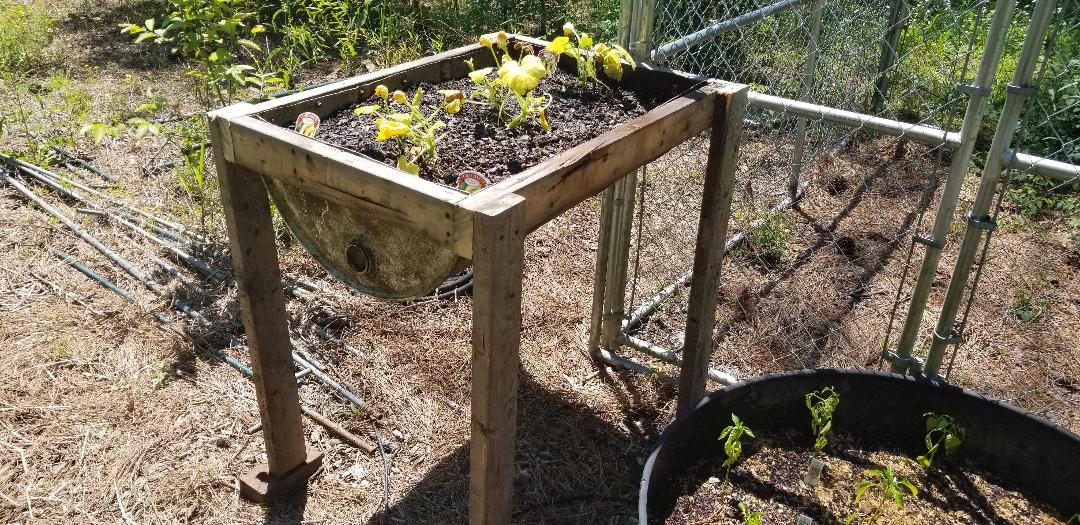
Raised bed set up next to shop fan drum raised bed in garden.
With this prototype raised bed done, set up and in service, I still had another drum half to use, as well as plenty of space for more raised beds. I had to think of what plants to put in this next raised bed since I already had the plants I planned on using already planted in other raised beds or the hydroponic gardens. When the ole lady went and picked up some herb plants, it pretty much solidified my fledgling decision to get herbs for my next raised bed anyway. So armed with the knowledge of how to build a fast and simple raised bed, I went ahead and started building the next unit for the garden.
This started off with me cutting the size and quantity of boards I needed to get the cradle base and legs done. I started off with the cradle, nailing the boards together around the top of the drum half. In the same process I even secured the sides of the drum half that had already been covered by the 2x4's of the cradle, using self tapping screws again. Once the cradle was done and completely secured to the top of the drum half I took the legs and nailed them to the four corners of the cradle. With the bed now technically done, I stood back and looked at the unit and was not satisfied. I figured I can add some extra boards to the legs for added support.
I measured and cut some more 2x4s and nailed them in place between the legs, first spanning the short sides between the legs then the long sides, also using the short side supports as added support for the long side boards. As with the first unit I used a step bit to drill some drainage holes into the bottom of the drum so the plants won't be overwatered. After setting up some bricks inside the garden, right next to the first generation new raised bed, we moved the 2nd raised bed into the garden and set it up. Just like with the first bed, I started with soiled wood mulch then a bag of composted manure and two bags of topsoil. In the soil we planted two basil, two oregano, two parsley, two thyme and one sage. Now we have our herb garden to go along with the other veggies we have already established.
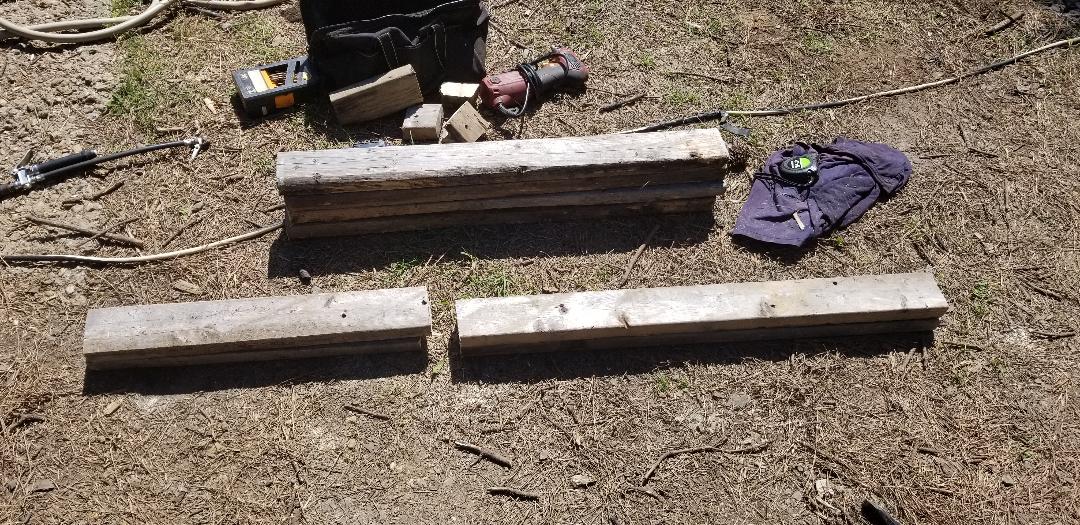
2x4 boards cut and ready to be made into another raised bed.
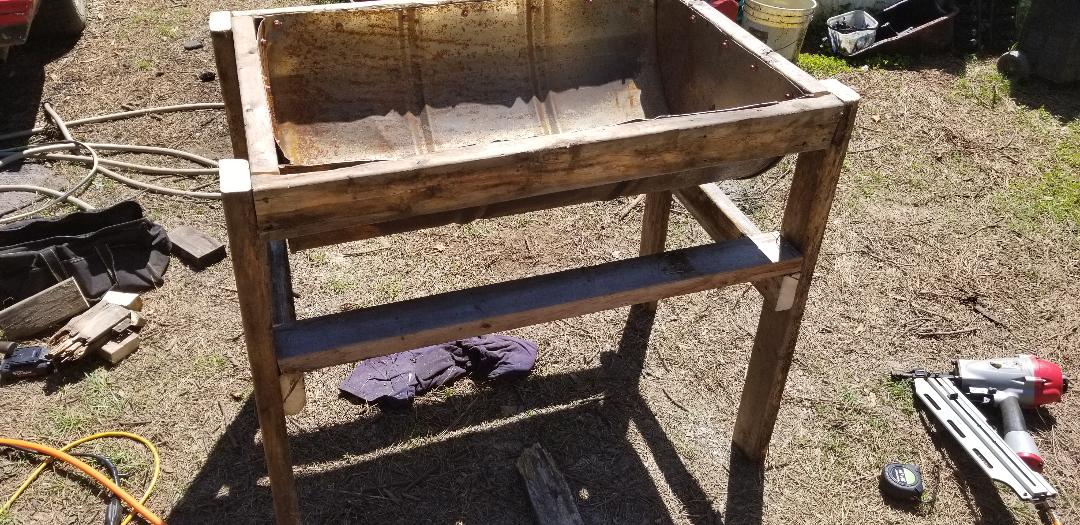
Raised bed frame assembled with drum half in place, note self tapping screws in place along top of drum half.
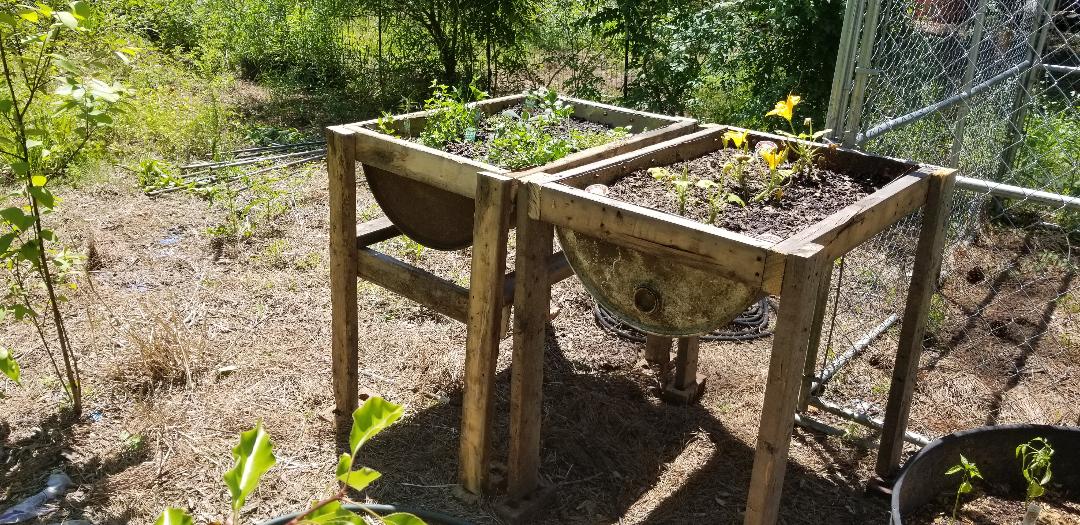
New raised bed set up next to first raised bed and planted full of herbs.
As previously stated, I plan on duplicating this latest design of raised bed in order to fill the garden up with beds so I can plant the veggies we typically enjoy. With multiples of beds, it would be no problem using each one to grow a few tomatoes or a couple of cucumbers or even melons, along with our herbs and peppers. Whatever the plant, with a lot of these beds established, there will be no need to cram plants into as small a footprint as possible. We can have plants spaced well enough to ensure proper growth while still having plenty of veggie plants in production.
|
|
|
|
|
|
|
|
|
|
|
|
