THE NEW DUCTLESS AIR CONDITIONING/HEATING SYSTEM
In this project we are taking on a new install project for the house. The item in question is what is called a ductless air conditioning system. This is a system that comes in two parts. The outdoor unit contains the compressor/condenser and is charged with refrigerant and the indoor unit is the evaporator, which mounts on the wall of the room to be cooled/heated. Both units are liked up via two copper hoses to carry refrigerant between the two units, along with some wiring to link the two units together on the electrical side of its operation. We decided on installing one of these units after seeing one at a B&B we stayed at on a trip a few years ago. After researching these units I decided this would be the perfect thing to replace the window units that we have scattered through the house. The main living space has two AC units, one large 10k BTU unit and a smaller 5k BTU unit. This unit is a 12k BTU unit, which if it does a good job of cooling, or at least does a good enough job of keeping the immediate area where we sit cool, then this will allow us to remove the two window units and free up those windows. The other problem too is the idea that with the window units in place it allows rain water to enter through the windows because no matter what I do to seal the side panels with the window AC's, water still manages to find a way through. I need to be able to get those units out of those windows so I can stop this problem from persisting and rotting the wood and the drywall around these windows.
I ordered the unit online for a pretty good price, one of the lower end units but still supposed to use Toshiba components. Upon getting the kit, I found that the unit only had one main power hookup versus the two I thought existed since there were the two units, one going inside and the other outside. I did make sure to get a 110vac unit so it can be plugged up to a standard wall outlet. I did not want to have to go through the extra hassle of having to install and wire up a 220vac outlet box just for this unit, plus being 110vac it allows me to instantly plug this thing up to a generator during a power outage so we can still have cooling or heating.
And speaking of heating, I did take time to get a unit that doubles as a heat pump. This means that using the same principles of thermodynamics, it allows the machine to heat the living space in the same way that it cools it, using the thermodynamic physics surrounding how refrigerant operates. This isn't a science lesson so we're just going to focus on installing this system and what I had to go through in order to do so.
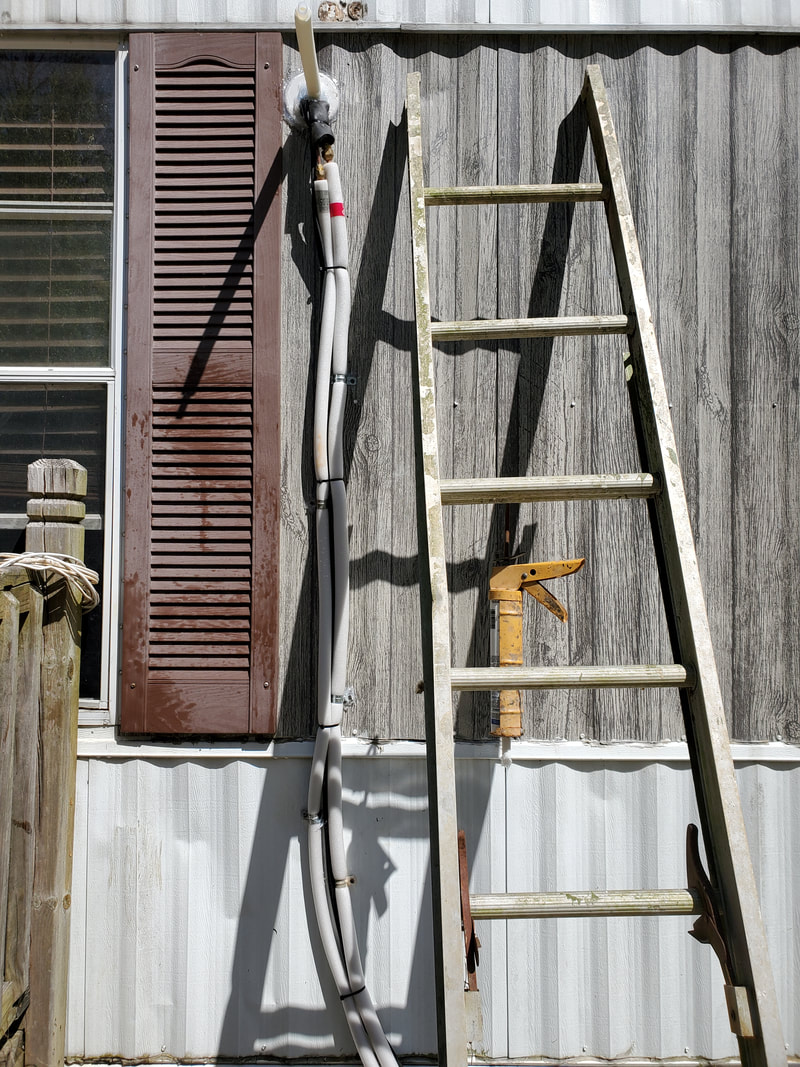
First thing I had to do was determine where I wanted to situate the unit. I ended up actually reusing the slab that the house's old AC unit rested on. I moved it from the chicken yard over to where our porch is at, just east of the entry door. The slab is actually a mix of heavy foam with a thin shell of concrete. Strong enough to hold the AC unit but not so heavy that it couldn't be moved into place, since this was part of a "free" system installed on the house when we first bought it. Anyway, I moved the slab in place and put the outdoor unit on top of that, taking time to make sure of where I wanted the hoses and wiring to go through the wall and where the indoor unit would be mounted so everything lines up properly.
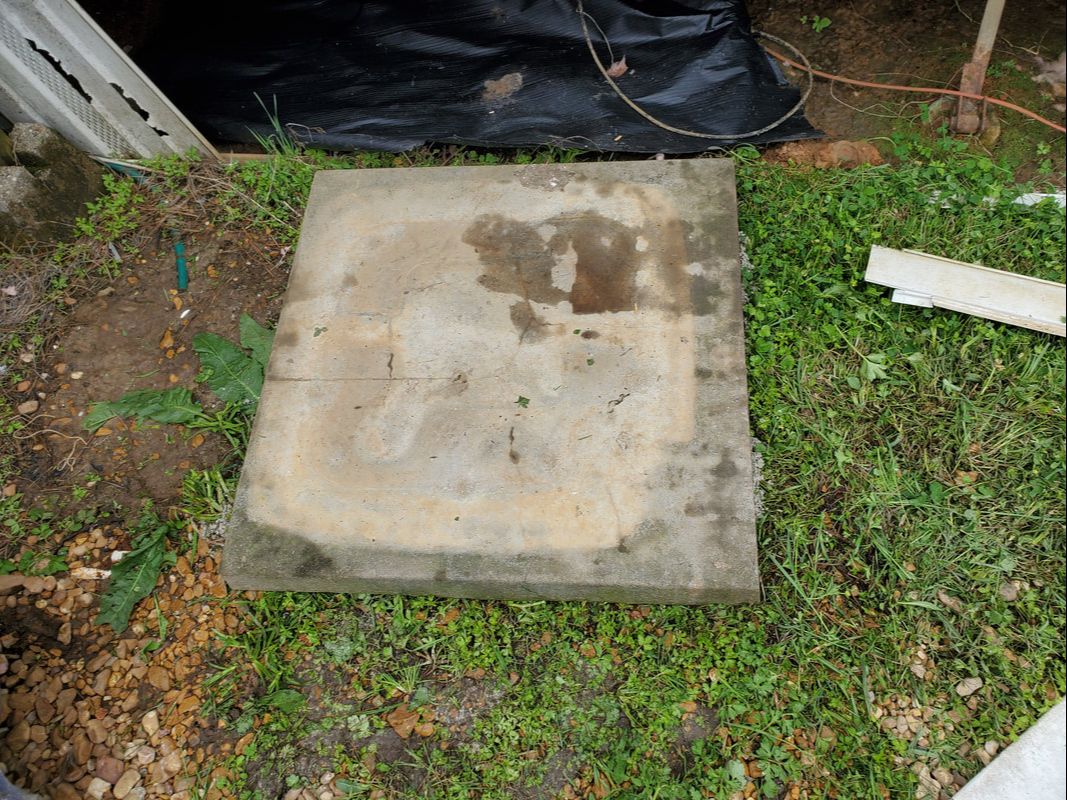
The slab sitting in its new spot, ready to accept AC unit.
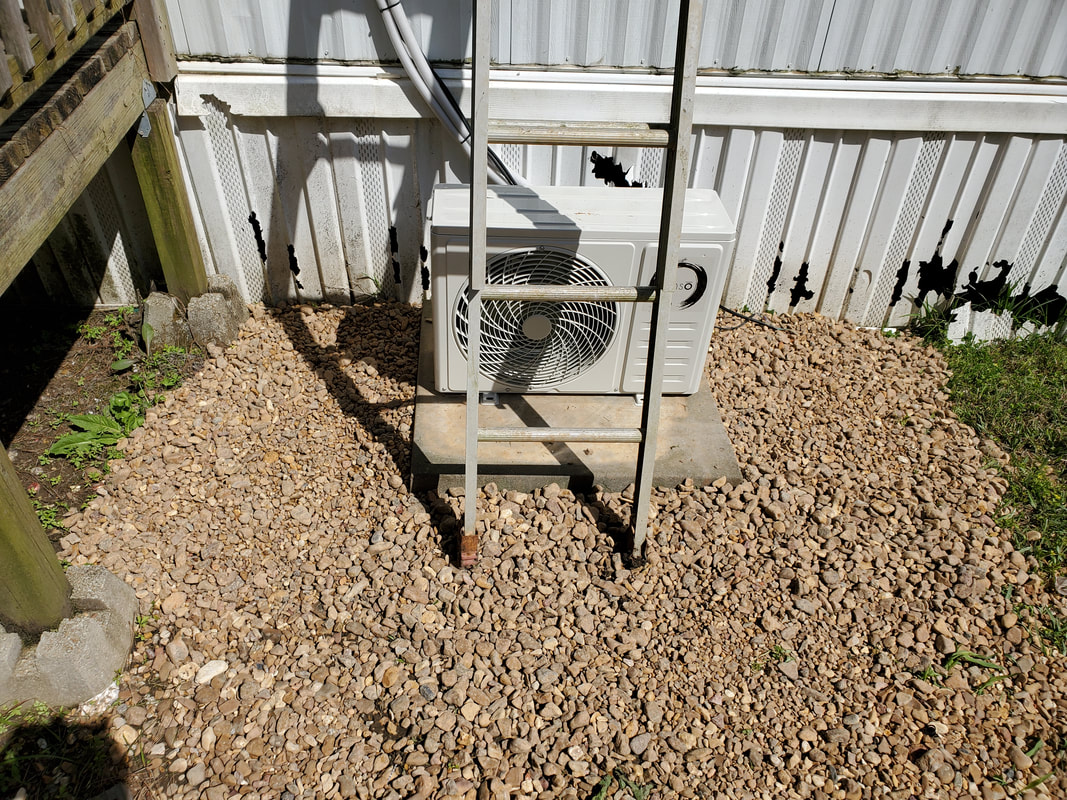
Outdoor unit setting on slab.
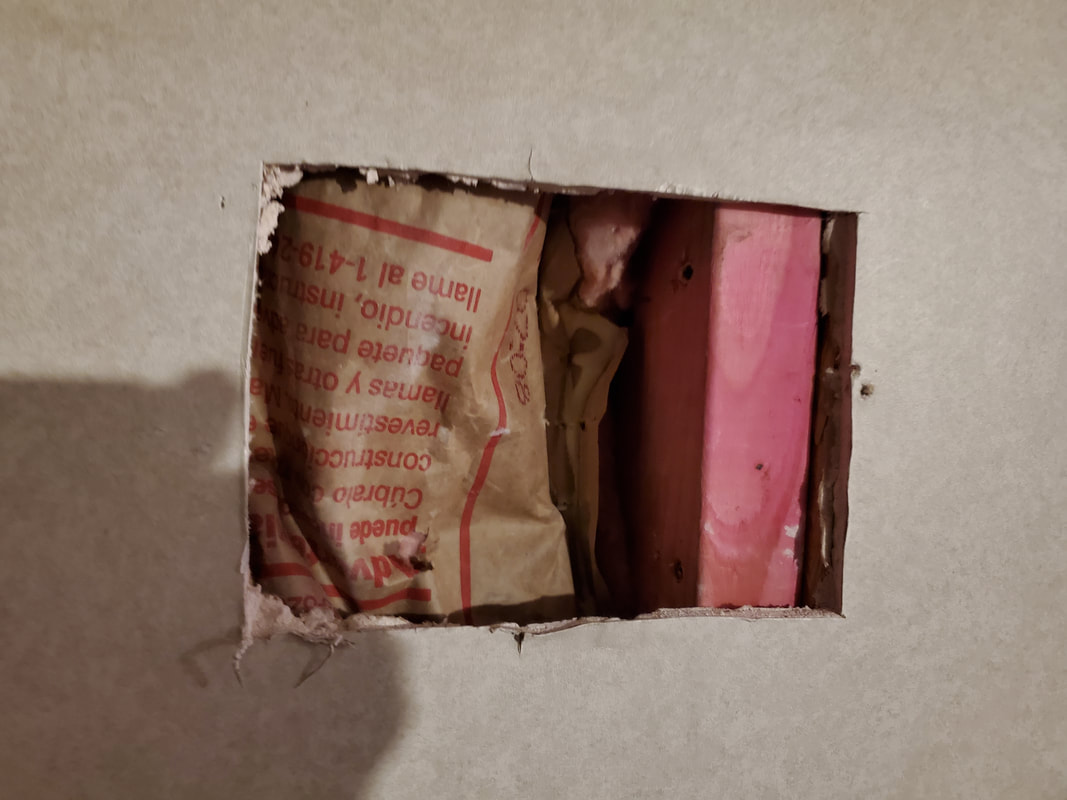
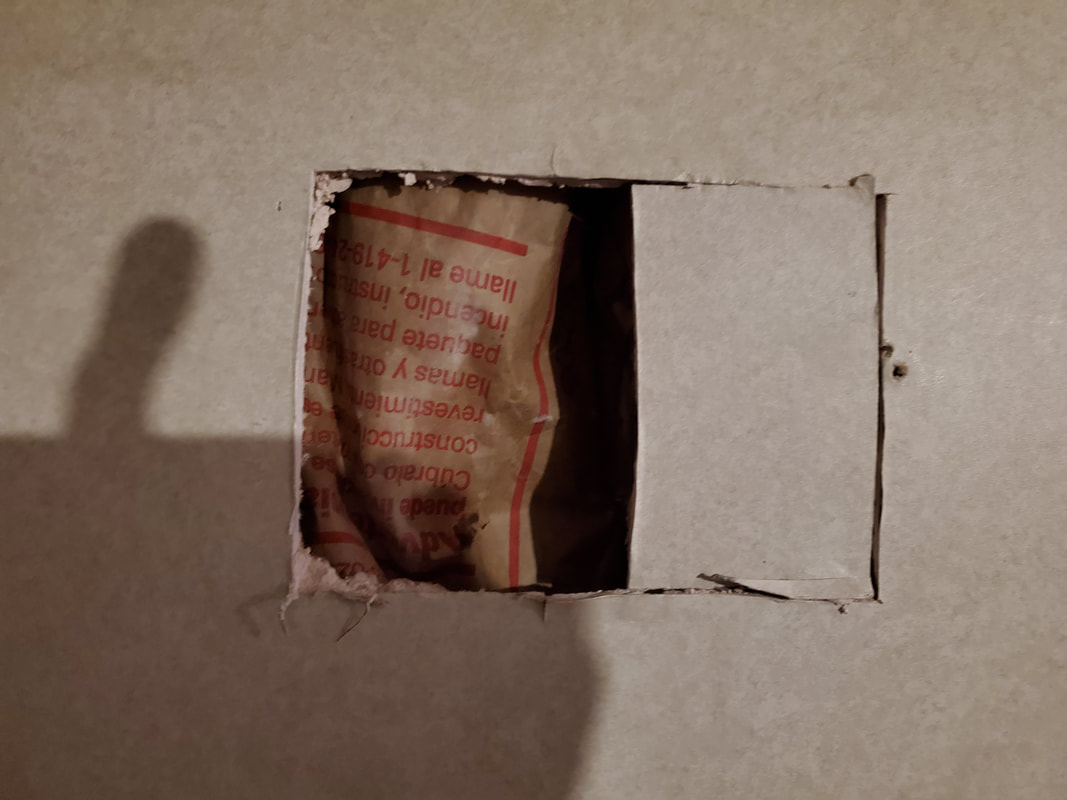
I had to get the wiring started on the inside unit first since I wanted to get it mounted on the wall in order to poke the necessary hole through the wall to get the wiring and refrigerant lines routed through to the outside. The schematics helped me determine where the wires had to go on the unit. There were two sets of cables, one with two wires and the other with three. After getting the wires hooked up I had to take the bracket and get it secured to the wall. Problem I ran into here was the idea that the studs on this house are not of the same dimensions as a regular house. I ended up having to cut a small hole in the wall next to one of the studs and add a piece of 2x4 to get the proper spacing to hang the bracket up. I used wood screws to hold the bracket up solidly to bear the weight of the indoor unit.
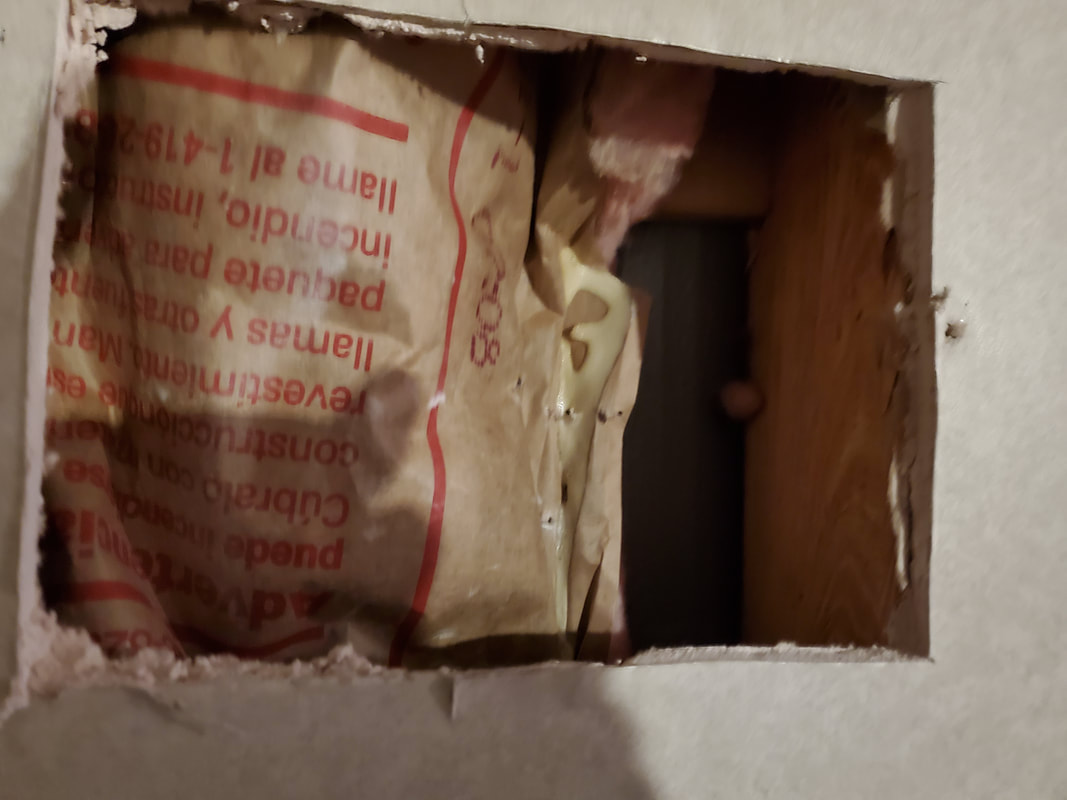
Hole cut in wall next to stud.
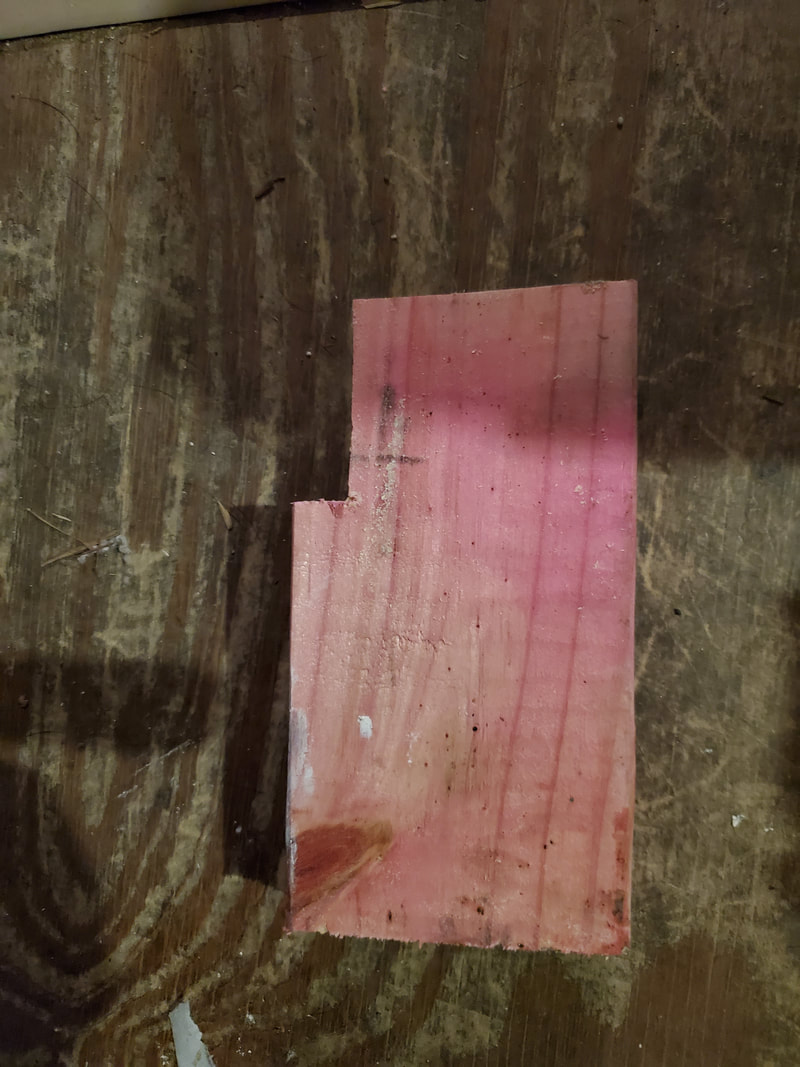
Notch cut in piece of 2x4 to mate it to stud and fit around cross board.
Piece of 2x4 secured to wall stud.
Replacing a small piece of drywall over hole after getting 2x4 installed.
With the platform made,I was able to get the bracket secured to the wall, which means the next move was determining where the hole through the wall will go. Now on the indoor unit there's a couple of short lengths of metal tubing with fittings for the copper lines to attach to. These short lines are not removable and caution needed to be exercised with these lines as they had all the refrigerant behind them. I routed the short lines in a way where I was able to bend the tubes 90 degrees out straight back from the indoor unit. With that I was able to determine where I needed to cut the hole in the wall. I ended up cutting another hole in the wall on the other side of the stud.
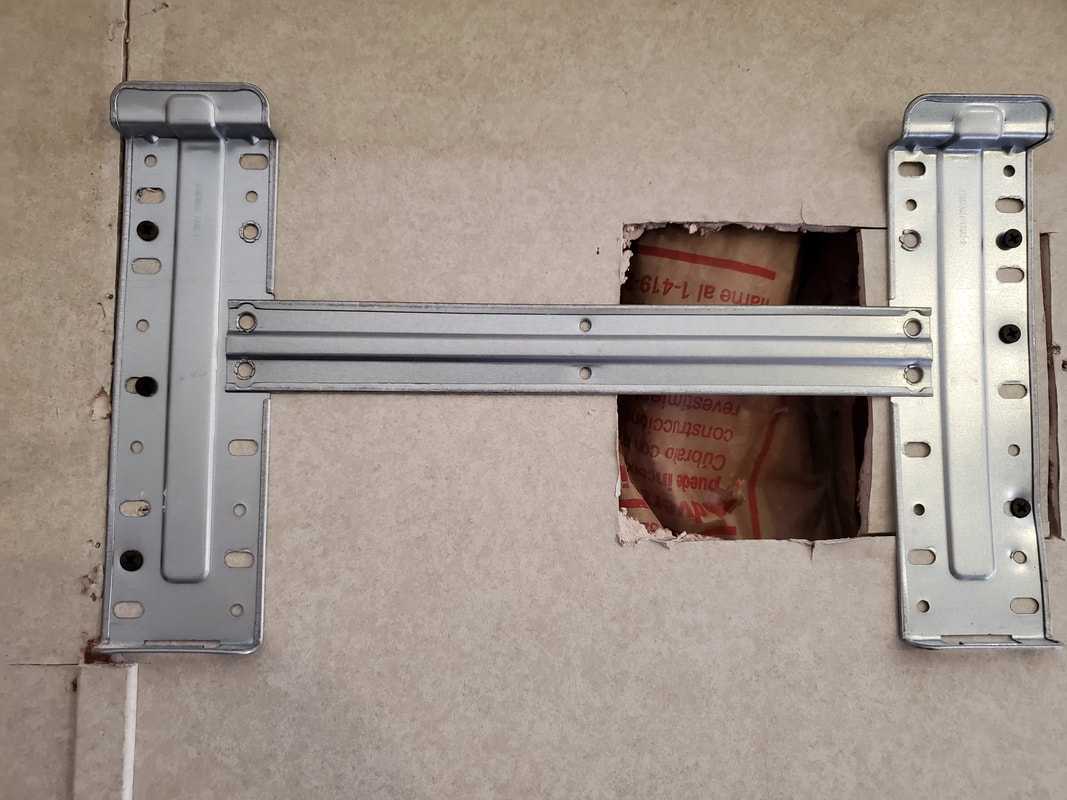
Indoor unit hanging bracket secured to wall after doing modifications....
I ended up using the reciprocating saw to cut the hole out of the outside wall to accommodate the wiring and pipe. The kit came with a plastic tube for routing the hoses and wires and an outside cap to stick over the tube and against the wall of the house. This is obviously to protect the fragile copper hoses from getting scraped and/or otherwise damaged.
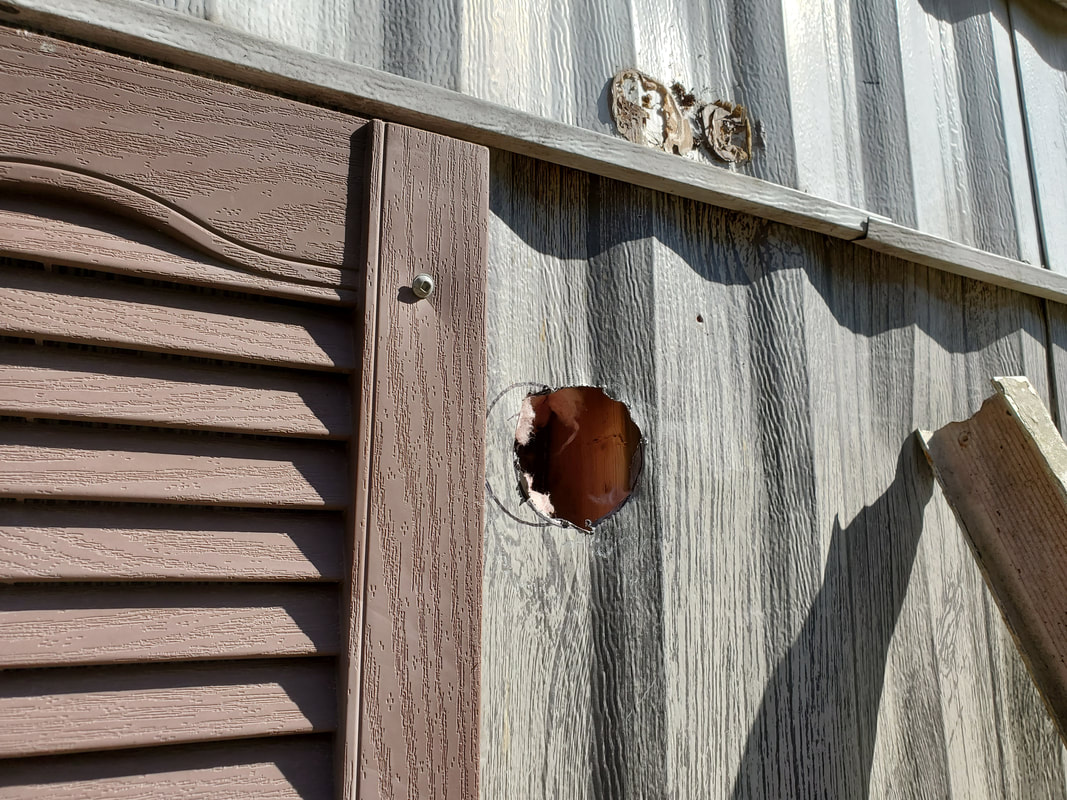
Hole cut in wall for hoses and wires.
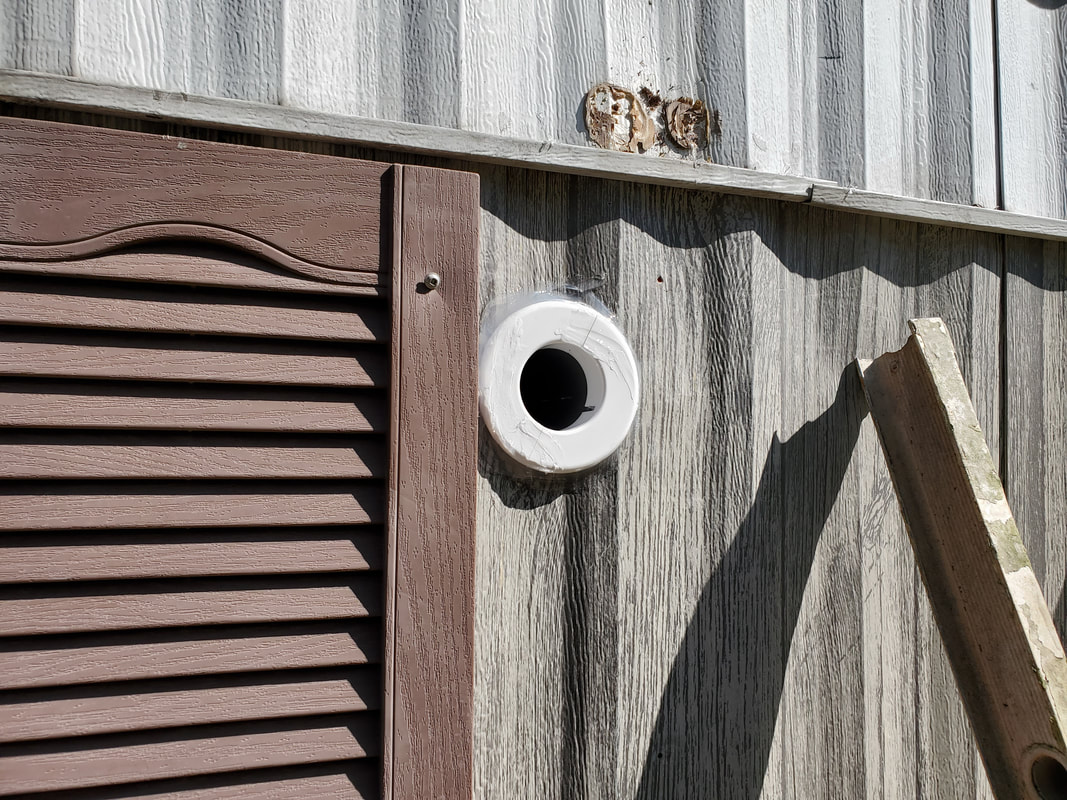
Outdoor flange secured in place to plastic pipe and gooped up with silicone caulk to ensure a proper seal.
With the hole in the wall and the bracket secured to the wall I was able to hang the indoor unit. It just snapped onto the bracket really, pretty simple on that part. I did have to work the two short lines and wire into the tube through the wall to ensure all that stuff is done before moving on. After getting the hoses and wires through the tube to the outside I slowly moved on to getting things hooked up to the outdoor unit.
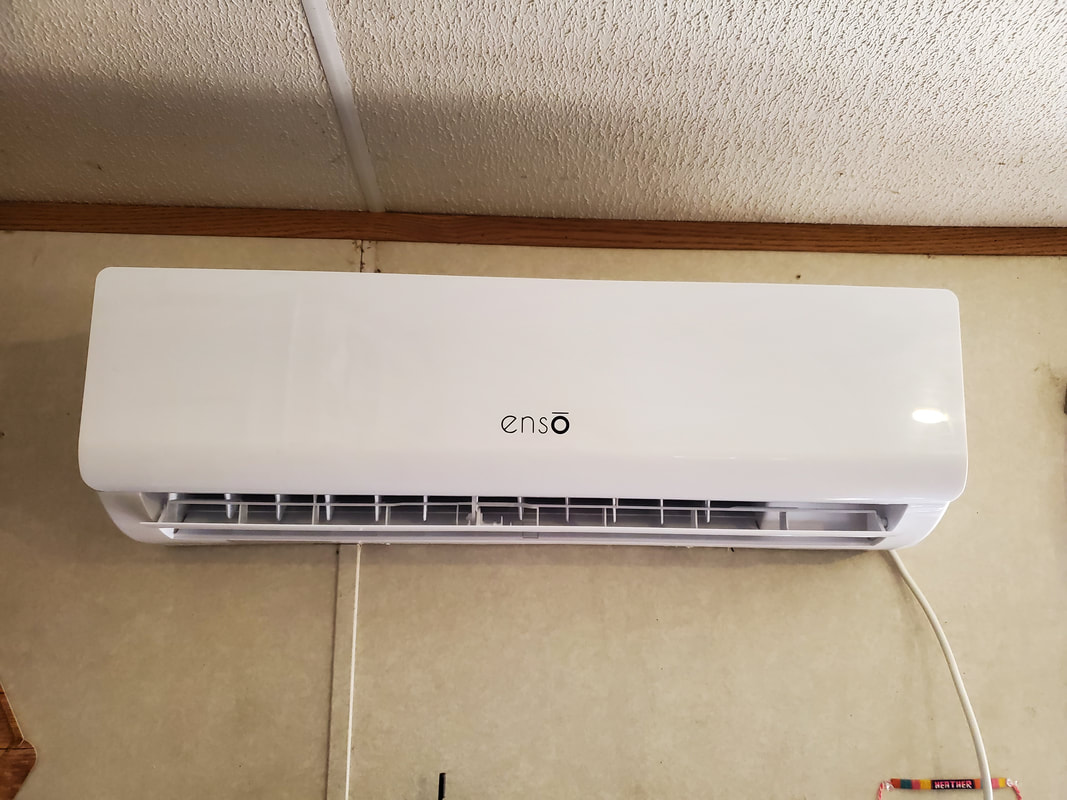
Indoor unit hung on wall with hoses and wiring already routed through tube going outside.
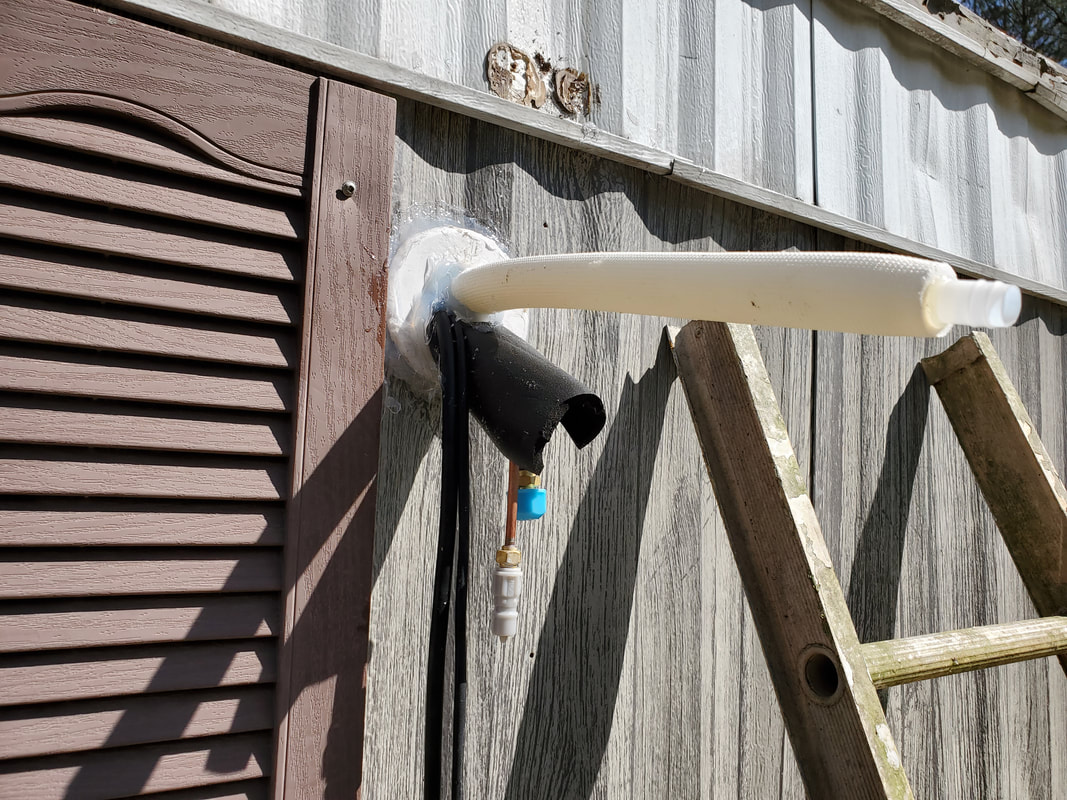
All hoses and wiring routed through tube to the outside. Everything at this point has been caulked to ensure total sealing.
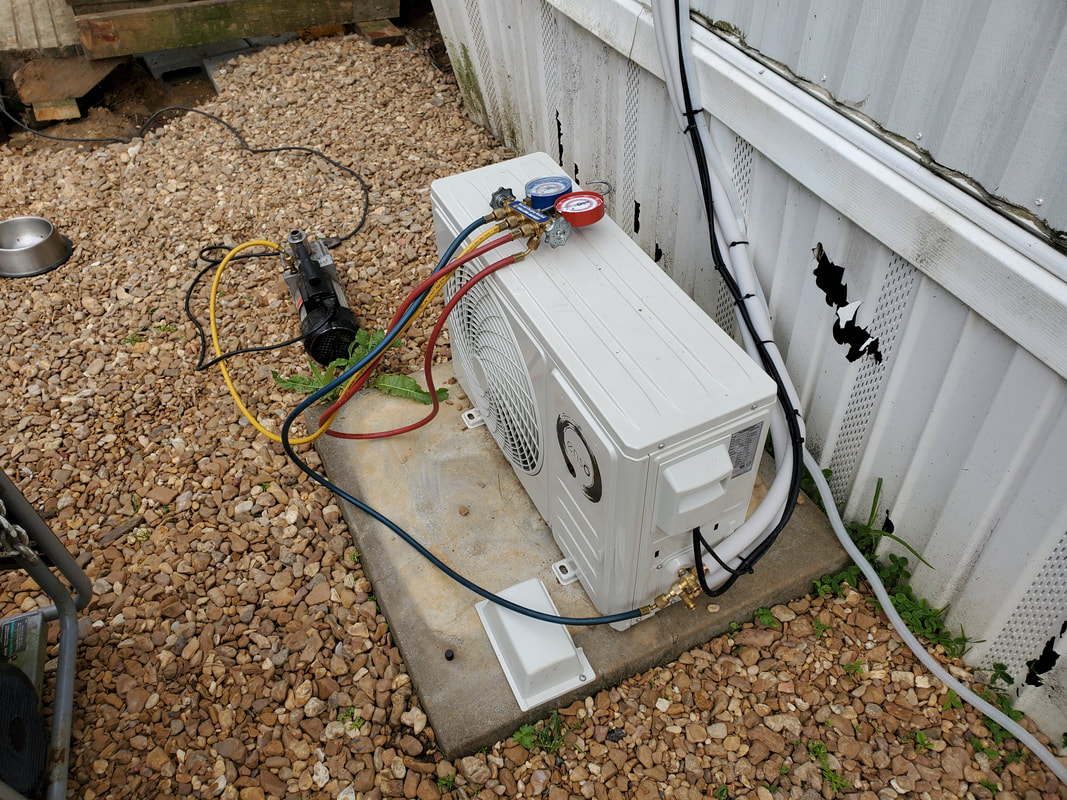
From here I hooked up the refrigerant hoses to the stubs coming from the house wall. I bent the tubes as needed to get them situated where they were running straight down the wall then curving horizontal towards the outdoor unit then bending out and straight away from the house to mate up to the ports on the outdoor unit. I got the hoses secured then did the same with the wiring. I routed the wiring the same path as the hoses, using zip ties to secure the wires to the hoses. The hoses have foam rubber insulation on them so they won't be affected by temperature extremes during its operation either. I got the wiring all hooked up to the outdoor unit, zip tying everything completely. I even got the condensate drainage hose hooked up from the indoor unit, having the tubing follow the same path down the wall and over and out away from the outdoor unit.
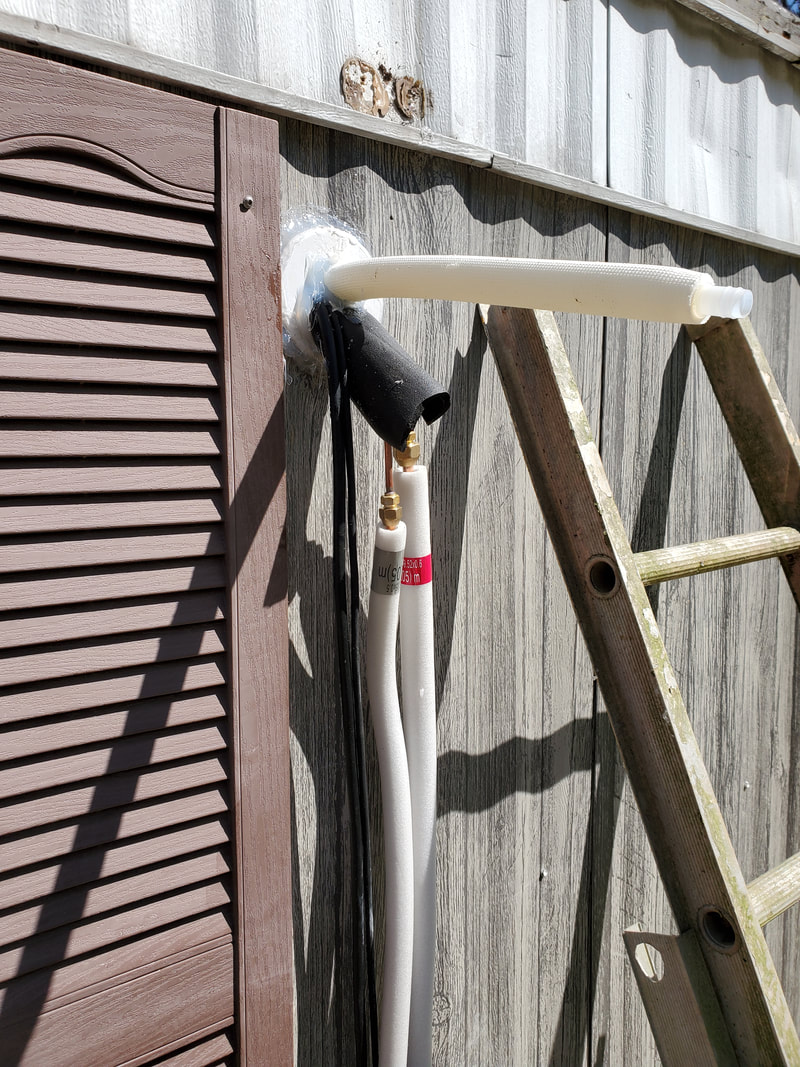
All hoses and wiring zip tied together to make things nice and neat.
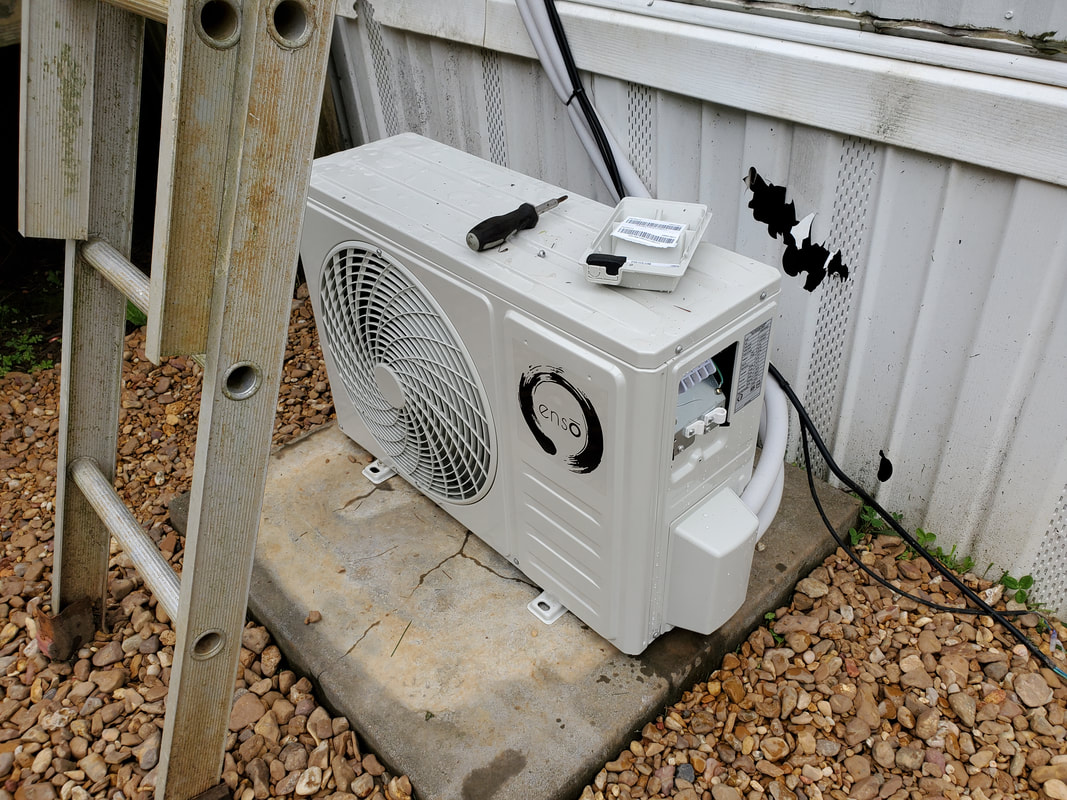
Hoses hooked up to bottom right side of outdoor unit, evident by white foam rubber curving around to side.
The next thing I had to do was pull vacuum on the unit. Since the unit came precharged with refrigerant, the manufacturer made the unit with two valves, one of them a three way, accommodating a bleeder valve for hooking up a vacuum pump to. I also had to get a special 1/4" to 5/16" adapter to allow me to hook up the AC manifold hose to the fitting on the outdoor unit. Once I had all that hooked up I pulled vacuum while hooking up the power plug to the power cable coming from the indoor unit.
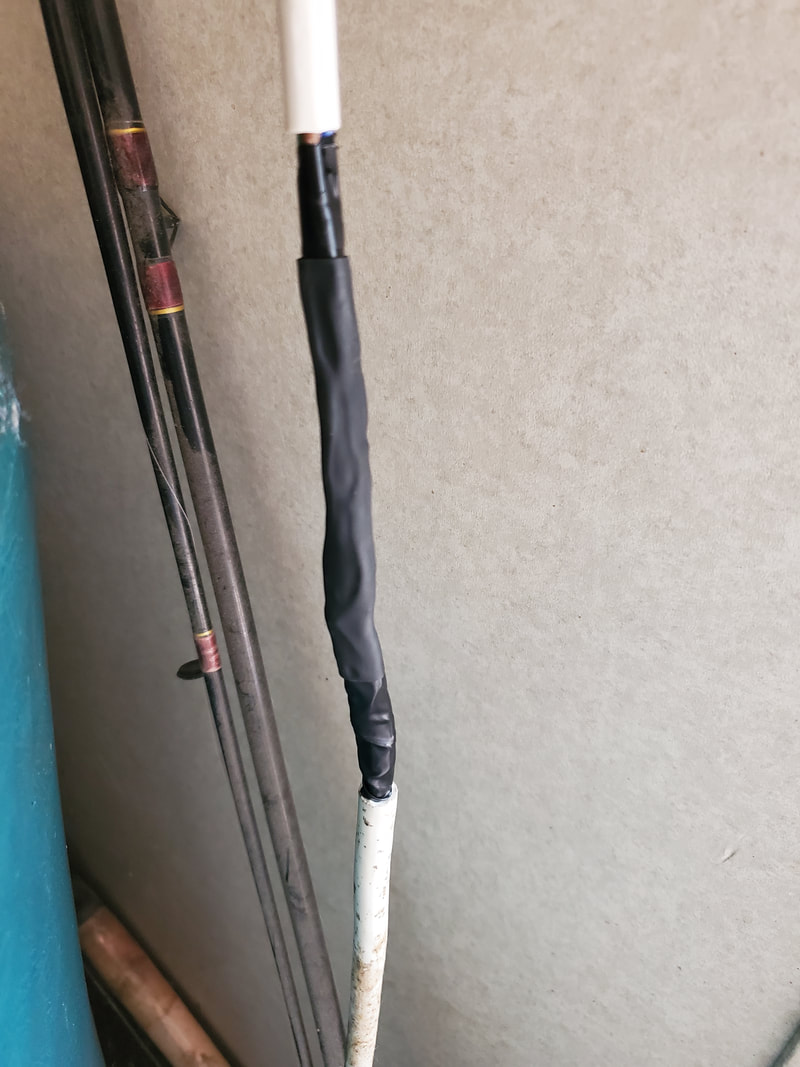
Connection point where ends of power cable and power plug were soldered together. Heat shrink tubing and electrical tape ensure that wires are insulated and safe from any chance of shortage.
With the power plug done and the vacuum pulled I followed the instructions to administer the refrigerant into the rest of the system. Once I had everything opened up, I went inside and did the first test of the system. I was pleasantly surprised as the system was nice and quiet and ran very well, spitting out freezing cold air and distributing it over enough of an area to ensure fast coverage. I even turned the heater setting on and it instantly started getting hot. With that, the system works flawlessly. Only thing I have to do is secure the power cable to the wall to make things nice and neat at that spot then I can consider this project completed.
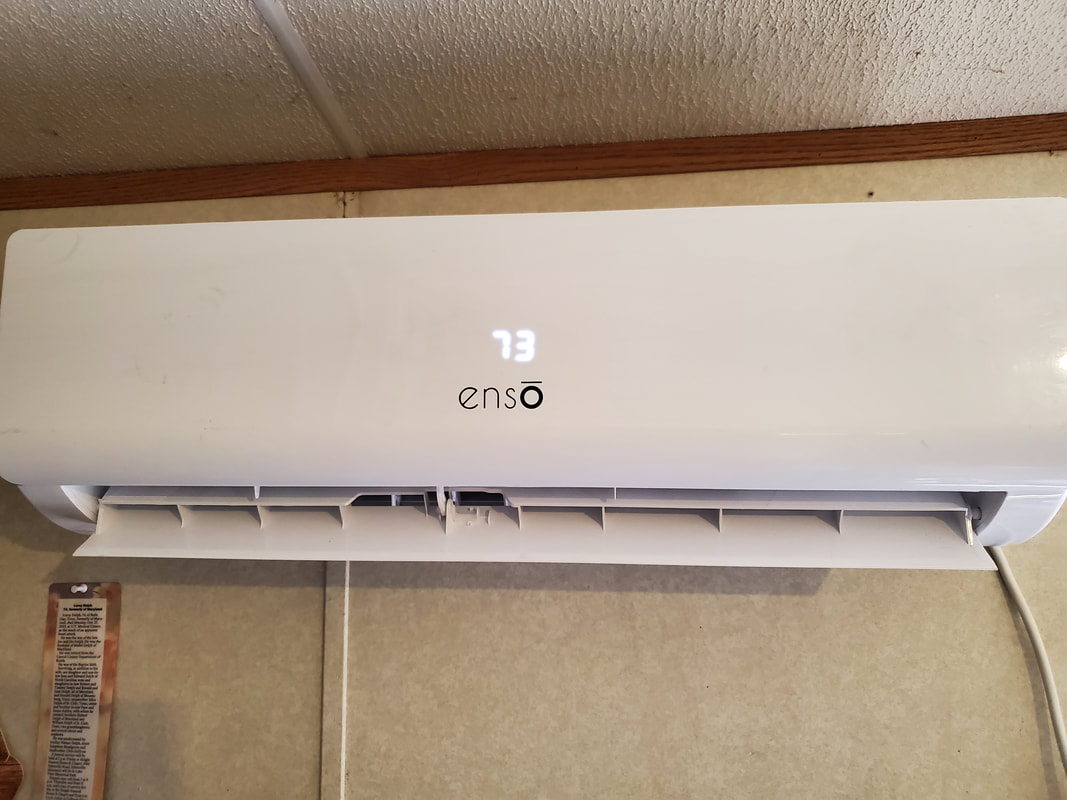
Unit in operation. Cover has display showing set point temperature. Vane opens at bottom to distribute air where desired.
Since this unit is remote controlled, we don't have to worry about ever having to get up to do anything and we can command the unit to do any number of things. The unit has an oscillator feature where vanes will move left and right to distribute air like an oscillating fan. It has other settings for dehumidifying as well as different timers. Overall this unit is very nice and I would definitely recommend it for any number of uses, whether in the house, in the garage or workshop or even in new construction where you don't have to worry about building a house around the idea of having to accommodate a central HVAC system. With the affordability of these systems, it don't make sense not to switch over to these.
|
|
|
|
|
|
