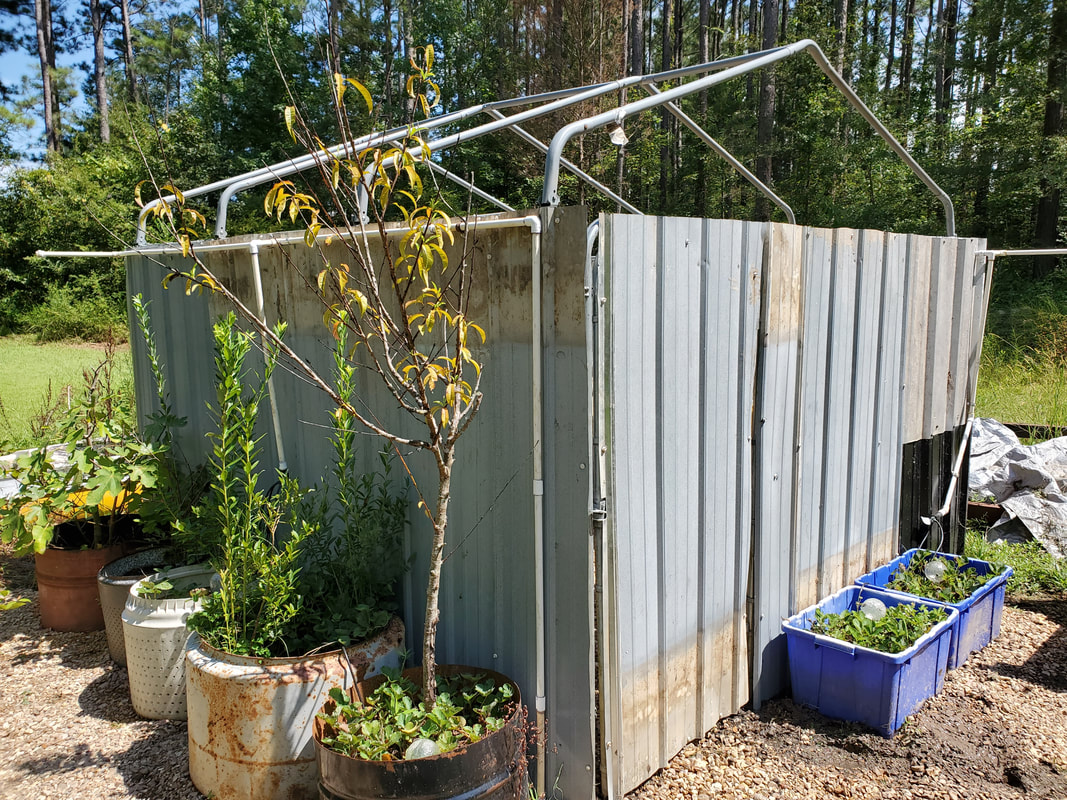
DOG KENNEL GREENHOUSE
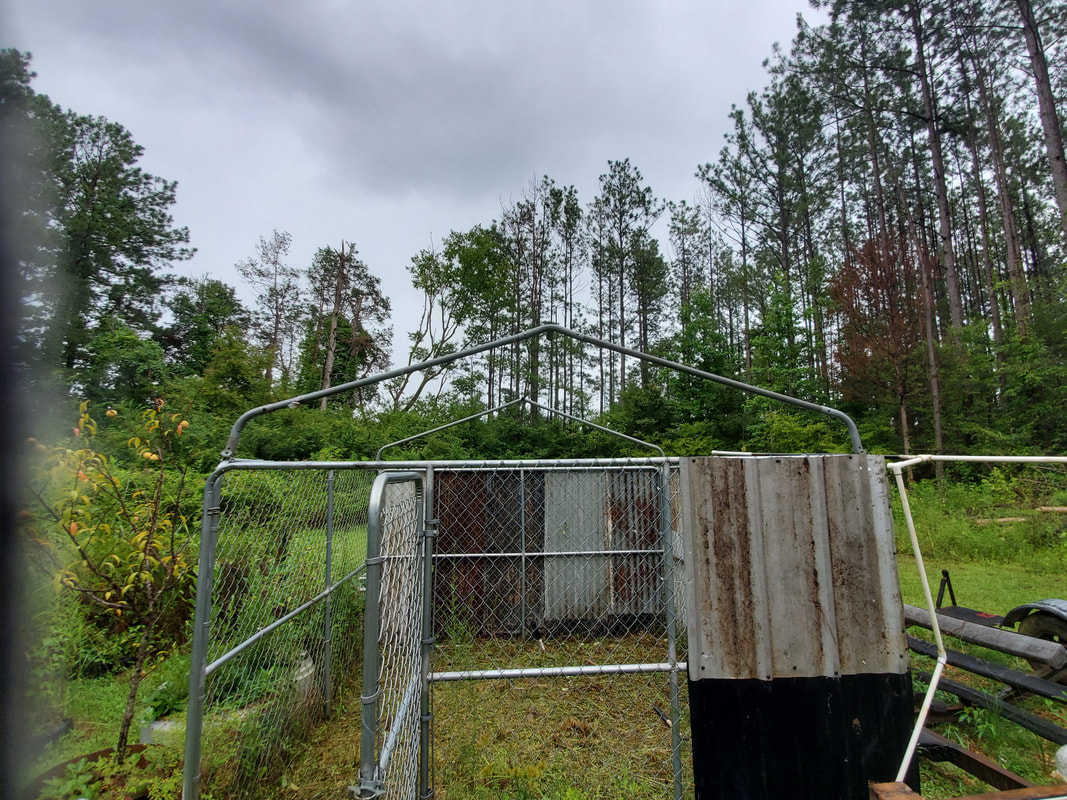
This is a new idea that I've been working on in my head ever since we stopped using this old chain link dog kennel. The problem was that the dog that we was trying to contain would tear her way through the chain link, making an opening to get free. After a while I decided that the dog kennel wasn't cutting it as far as containing this asshole was concerned. Now the question was what was I going to do with this dog kennel? I couldn't really sell it as it was partially damaged and I wasn't about to just give this thing away for pennies on the dollar. I figured I could use the kennel as the basis of a structure, a shed or mini workshop maybe? Well after setting up the camper trailer storage shed, there was no longer any need to build a storage shed and as far as a work shop is concerned I would need something a little bigger than a 10x10 structure. The only other thing I could think of that I could use this structure for a greenhouse.
I figured that I could build a roof framework that would go over the top of the kennel, then clad the sides and roof with clear corrugated plastic panels. Inside I would utilize hydroponic gardening along with shelves for starting seedlings. I may put a small raised bed in there as well for more "traditional" gardening. To help make the structure more versatile I planned on putting temperature controlled dampers and/or fans to move air out when it gets too hot and maybe putting grow lights in there for the winter when the sunlight may not be enough. Grow lights could even help grow the more sun hungry plants in the winter when they run all night while they get the limited daylight of the winter. As far as temperature in the winter, I could even install a small thermostatically controlled heater, nothing too serious in wattage, maybe something similar to what I used in the heated dog house I set up recently, just to take the chill out of the area.
Well to set this thing up I had to pick an area in the garden to set the kennel up. I picked a spot in the back corner of the garden right by the raised beds I had set up from the last growing season. Of course in the back part of the garden there was a lot of weed growth due to neglect on my part. This had to go. So first things first, I cleared more than enough old growth and dead material from the ground, piling it up away from the area in order to set up the kennel exactly where I wanted it. I had to remove sections of old dog yard fence to help make way for the kennel so I could get to the "rear" in order to set up the panels. Rather than try to keep the old fencing I just used the back of the dog kennel as part of the garden fence line. Some of the old chain link fencing from the old dog yard fence was used to line the main driveway for the sake of helping to set the muddy ground better. Gravel will eventually cover this further.
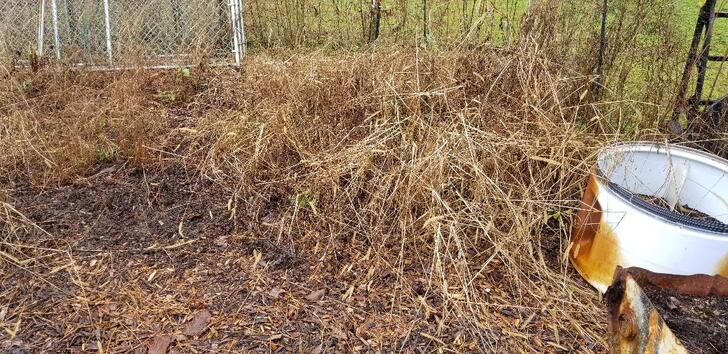
Corner of garden covered in old growth and dead weed plants, note raised beds in right foreground.
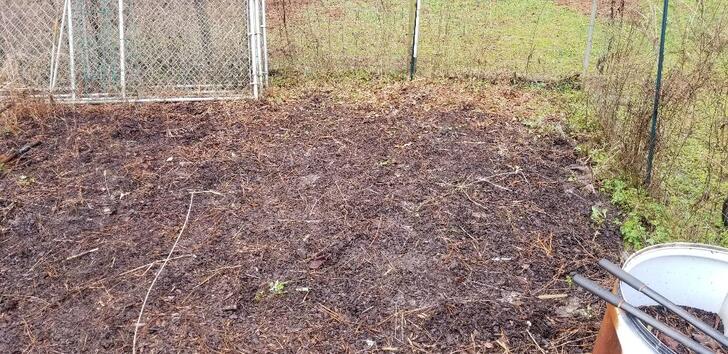
Corner of garden after clearing weed growth all the way to the fence line.
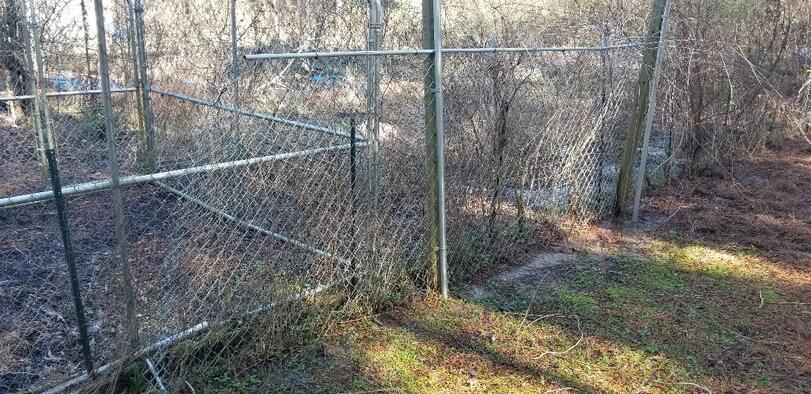
Chain link fencing laid on muddy ground to help reinforce the ground prior to laying gravel.
Back of kennel before clearing fencing. A lot of weed growth would have to be cleared to aid in removing the chicken wire and chain link fencing.
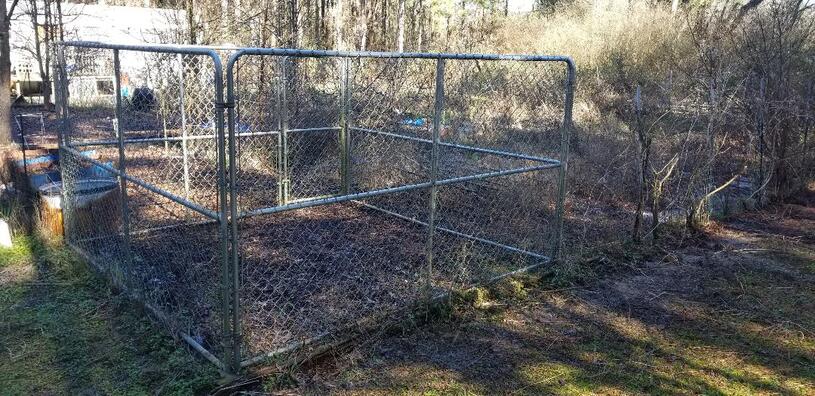
Back and side of kennel after clearing fencing, note absence of anything around sides of kennel.
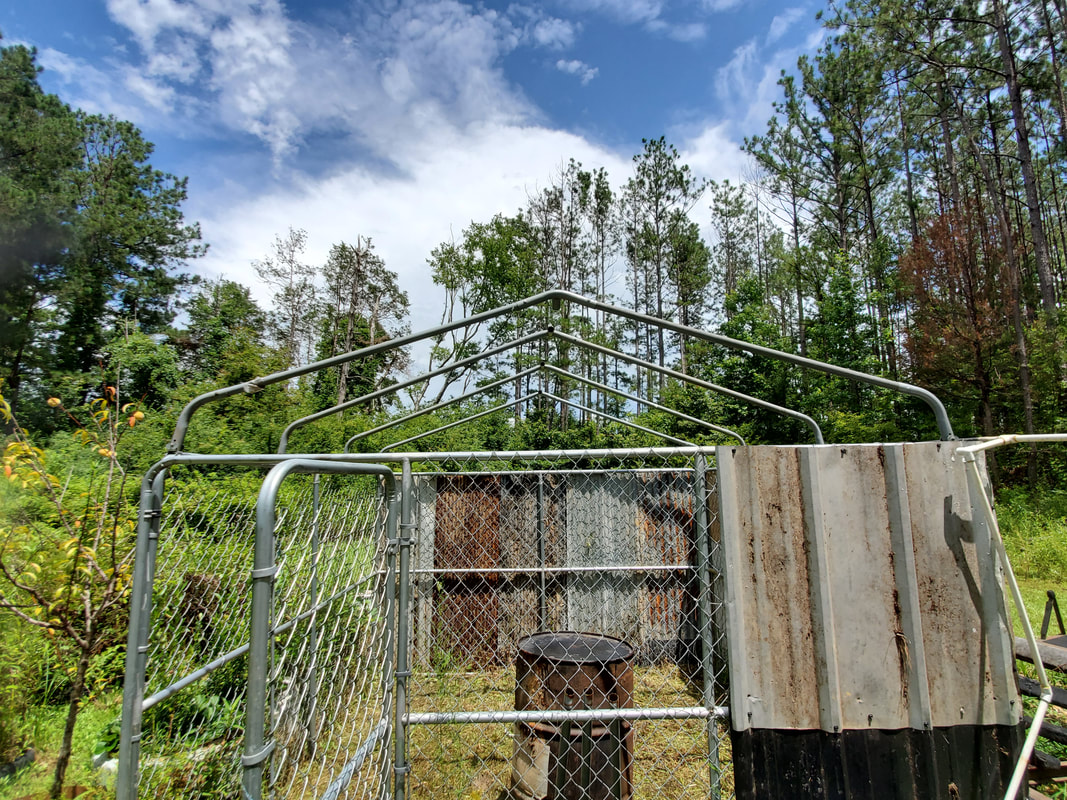
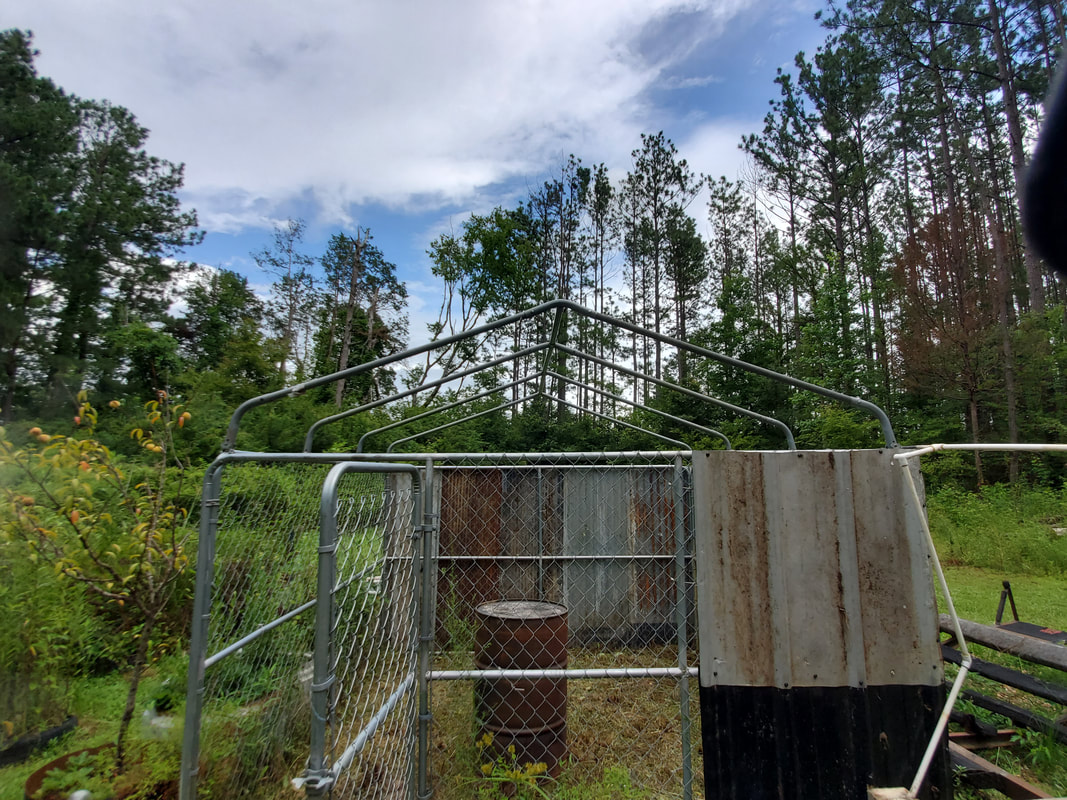
After having waited for so long to do more work on the dog kennel greenhouse, I decided to get back to work on the structure. I moved the structure from its previous spot in the southwest corner to the southeast corner of the garden. My updated plan is to clad the sides of the dog kennel with corrugated sheet metal, of which I had a large batch sitting on my scrap pile. From there the roof would be made from the frame pieces that came from a portable garage that would've normally had a plastic tarp like skin covering the frame. Since I broke down the portable garage, the roof sections would make perfect roof sections for the dog kennel greenhouse. Since its been a while from the last session on this thing, the first thing I had to do was clean up the area so I had to do some serious landscaping. Part of this involved having to hook a chain up to the old chicken wire fencing on the east fence line/east side wall of the kennel then hooking that up to the Tracker to pull the old fencing out of the ground and away from the dog kennel to open up the area so I can be able to work more easily.
Grass and weeds cut away from inside the kennel and around the outside of the kennel walls prior to wall panel installation.
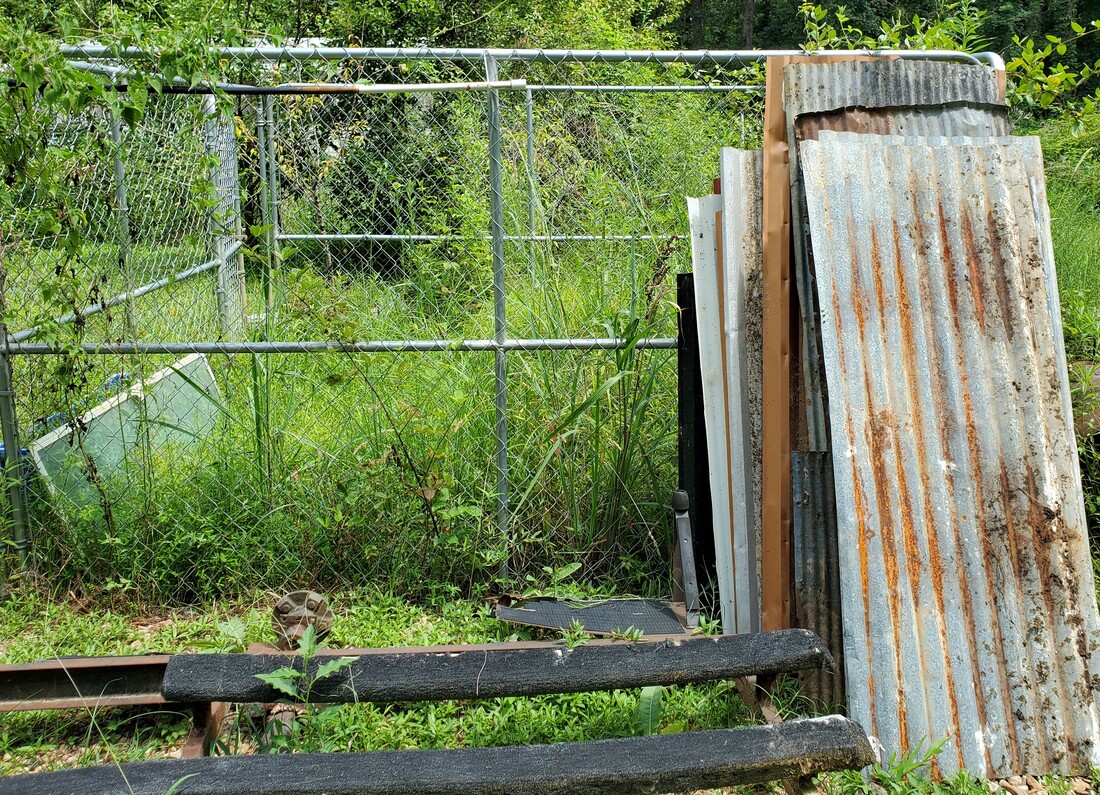
Corrugated sheet metal panels staged against dog kennel prior to panel installation.
East wall of dog kennel greenhouse with corrugated sheet metal panels hung. Note panels to right of wall are single piece panels. Other panels had to be overlapped to allow for rain runoff while making them long enough to reach from top to bottom. The impact driver put in some work and I burned through a lot of self tapping screws here.
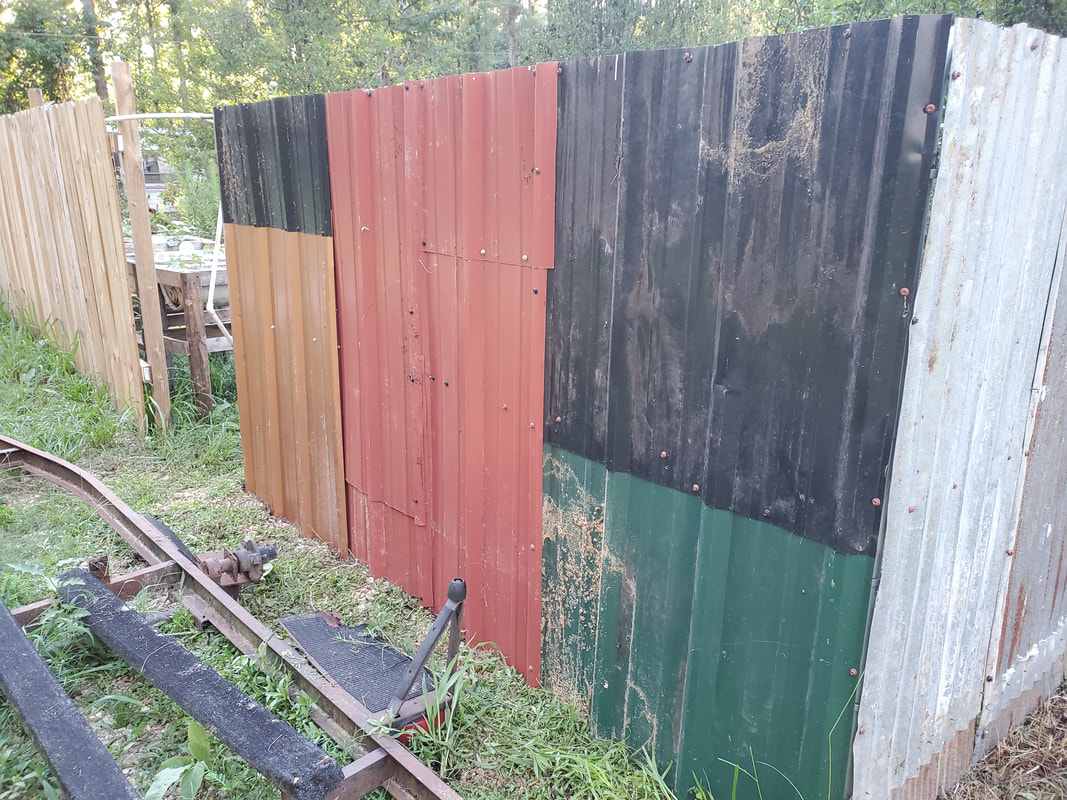
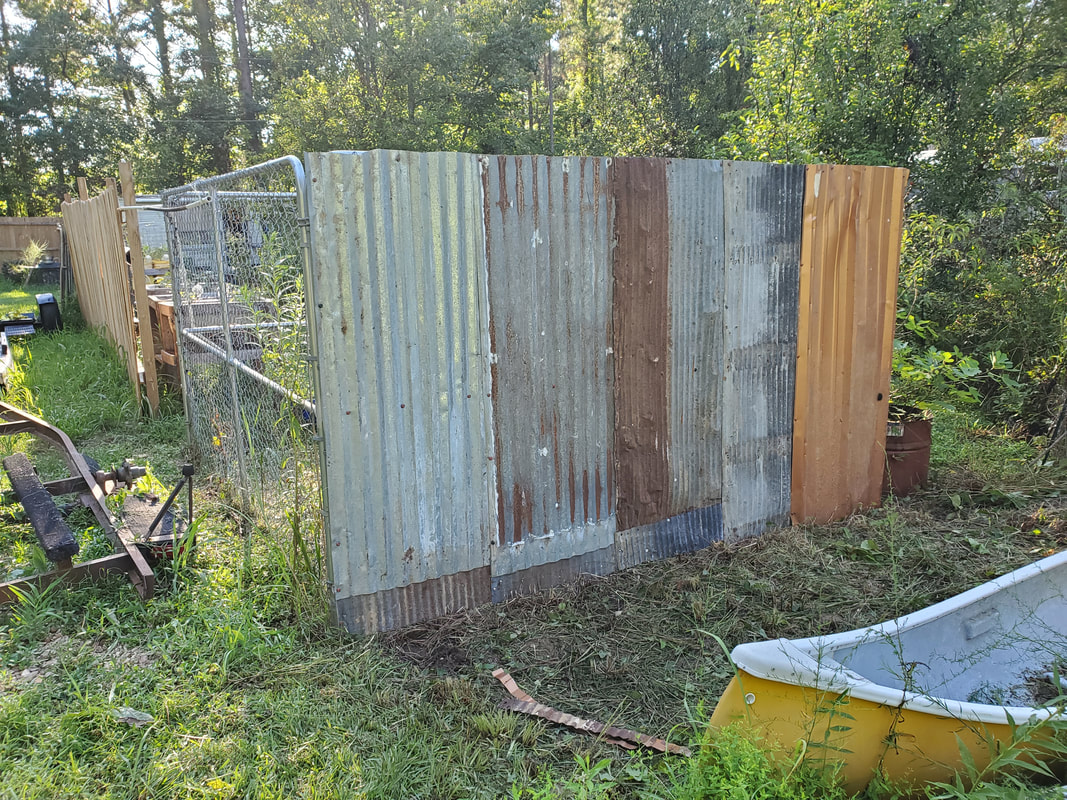
South wall covered in sheet metal panels of different colors.
Starting the west wall of the dog kennel greenhouse with the remaining sheet metal I had available.
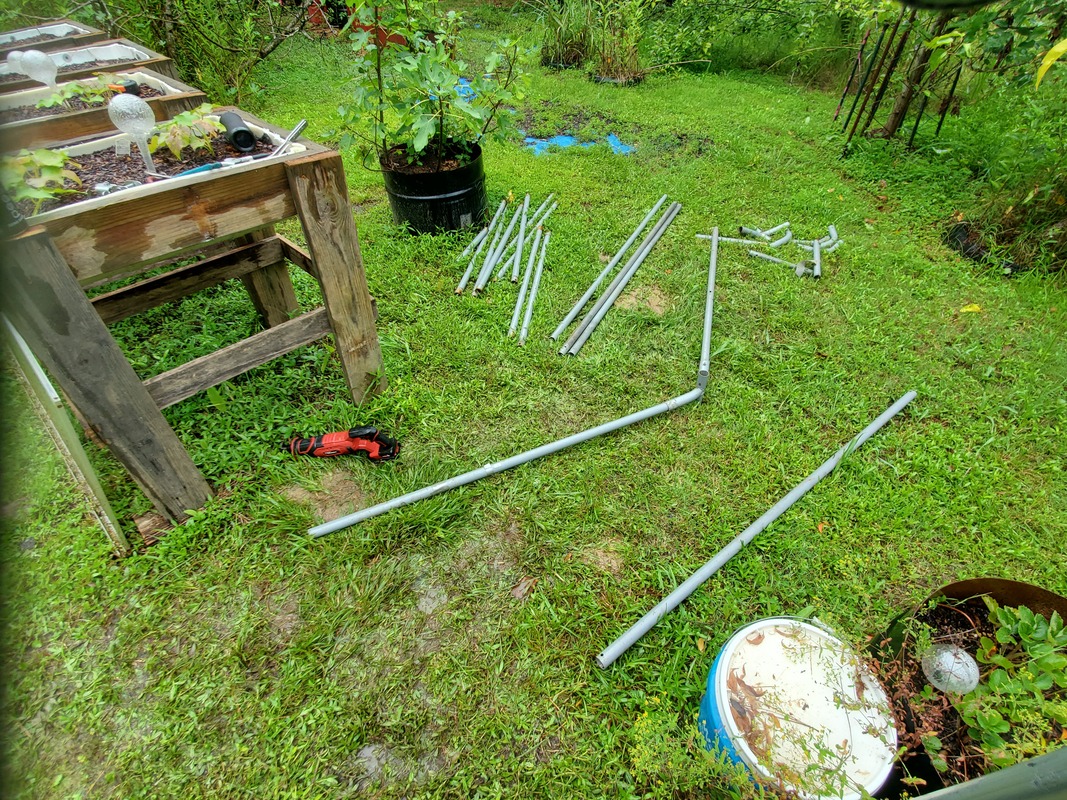
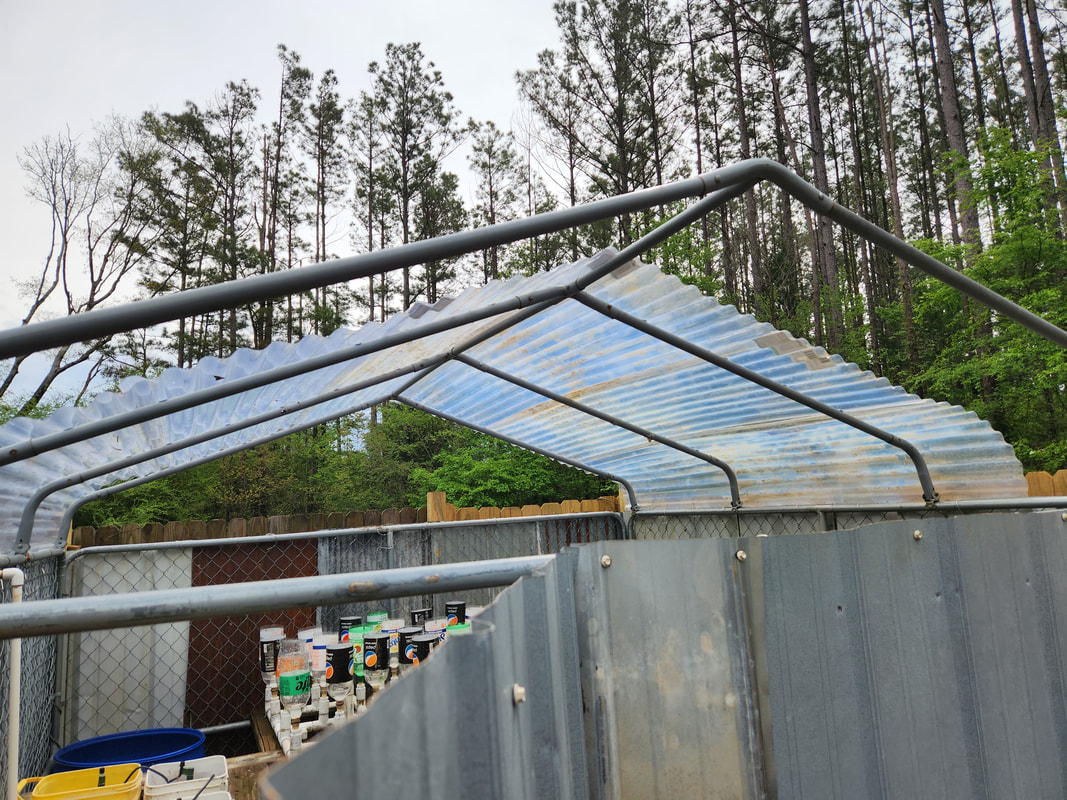
The next phase of the project is the installation of the roof frame. As stated this would involve the use of the sections of roof frame that came from the portable garage that I disassembled a long time ago. Now the problem I ran into with this is despite the garage being quoted as being a 10' x 20', since the sides of the garage angle in as it goes higher, the actual width at the roof frames is more like 8' - 9' wide. With that, I would have to remove the tubes that extend out from the junction that holds the roof frame together. I ended up taking some other tubes from the portable garage frame and installing them in the junctions for the roof peak then installing the fittings that hold the tubes together in the old garage. These fittings were secured to the top of the dog kennel wall frame to provide anchor points for the roof frame ends. I then installed the 100 degree bend pieces to the fittings then put the longer roof frame section for one end of the kennel and lined the frame up with the 100 degree bends in order to mark where I would have to cut the longer tubes so I could install the roof frame into the bend pieces at either side of the top of the dog kennel.
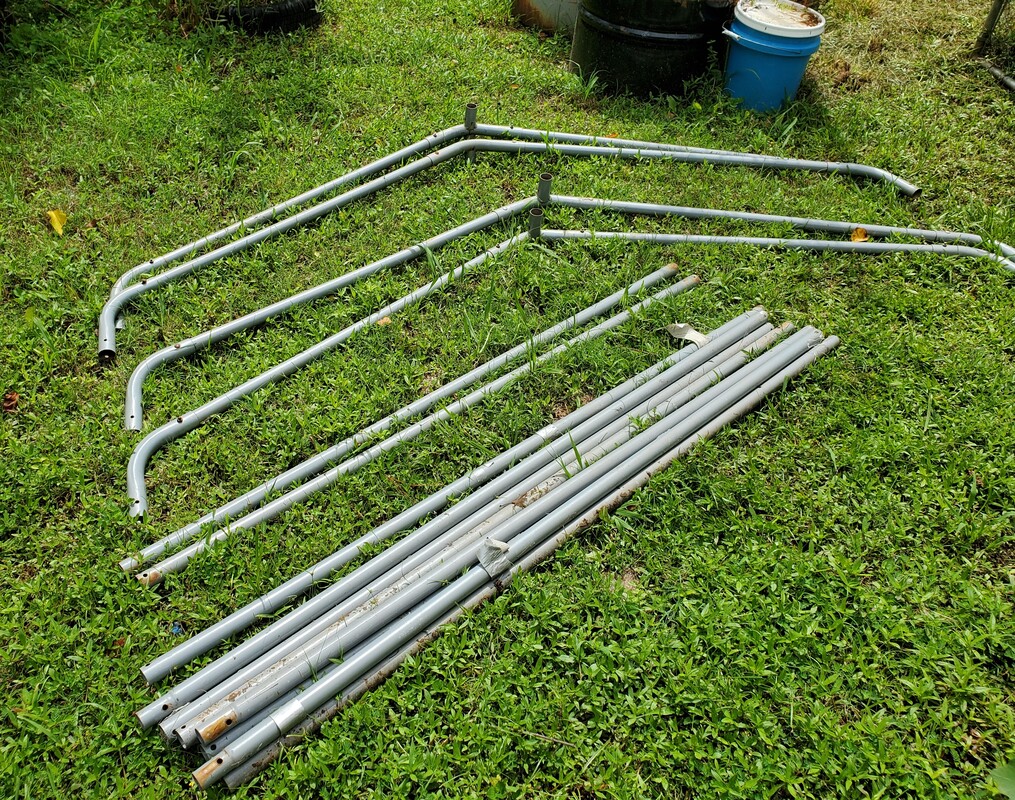
Portable garage frame pieces and roof frame sections staged by dog kennel prior to installation.
Roof frame junction with longer tubes installed.
End roof frame sections mounted in place. Extra holes had to be drilled into kennel frame to accept bolts to hold brackets for these frame pieces. Same will go for the two middle sections.
Two middle roof frame sections mounted with 40" spacing to take into account the 10ft span from one end of the kennel to the other.
Center beam installed along roof sections. I had to use a drum to stand on to reach the roof peak and had to measure the pipes in place before taking them down to cut them and drill new holes for the bolts to hold them in place on the roof sections.
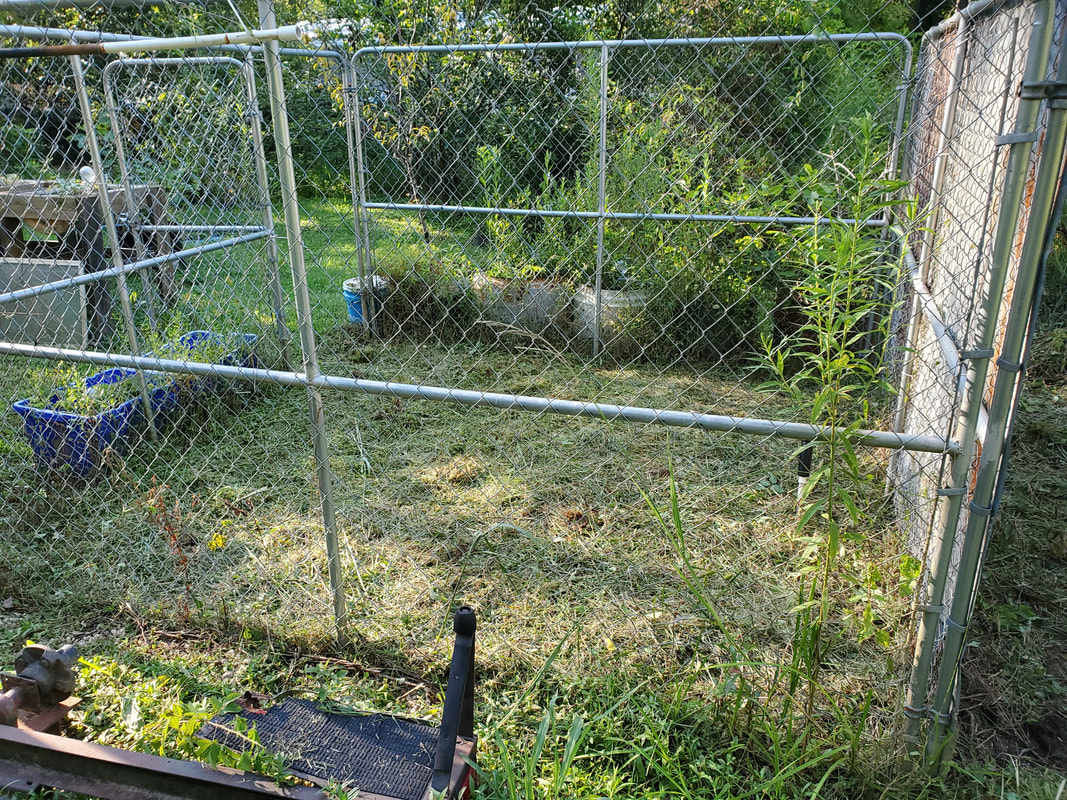
As for the roof I will like to make a fitted cover out of UV resistant clear plastic that can be removed in the warm weather and used when its cold. I'd probably have to cut sections and glue them together to make the covering and use grommets for securing the covering to the kennel roof. For now I move to the inside, starting with laying a floor made of an old tarp to better hold the gravel that'll go on top, with extra to go up the sides of the kennel wall to aid in stopping weeds from making it inside the greenhouse after the walls are up. Once the tarp is down it'll be covered in a thick layer of gravel.
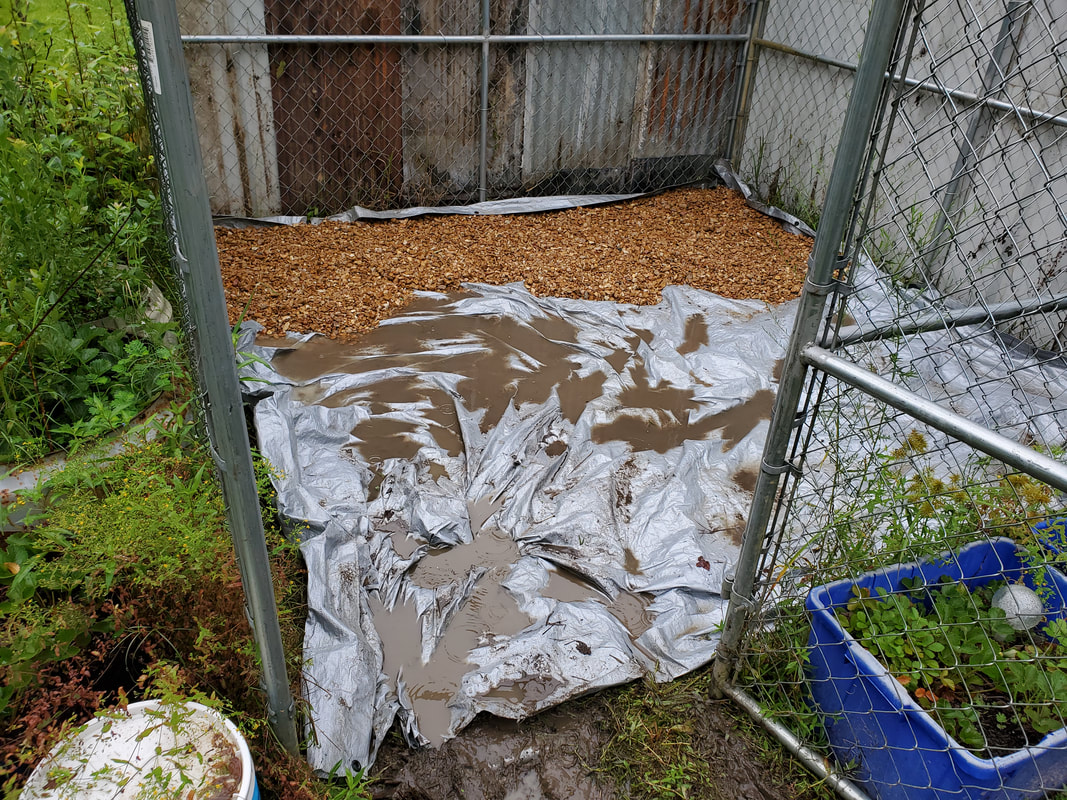
Tarp laid out in kennel greenhouse with partial gravel layout over plastic, note rainwater covering tarp. Tarp was salvaged from another abandoned idea before the sun has a chance to rot it away. Also note how excess tarp is laid against the sides of the kennel to aid in stopping weed intrusion once the panels are up.

Tarp in greenhouse fully covered with gravel out past gate, note muddy path leading up to gate.
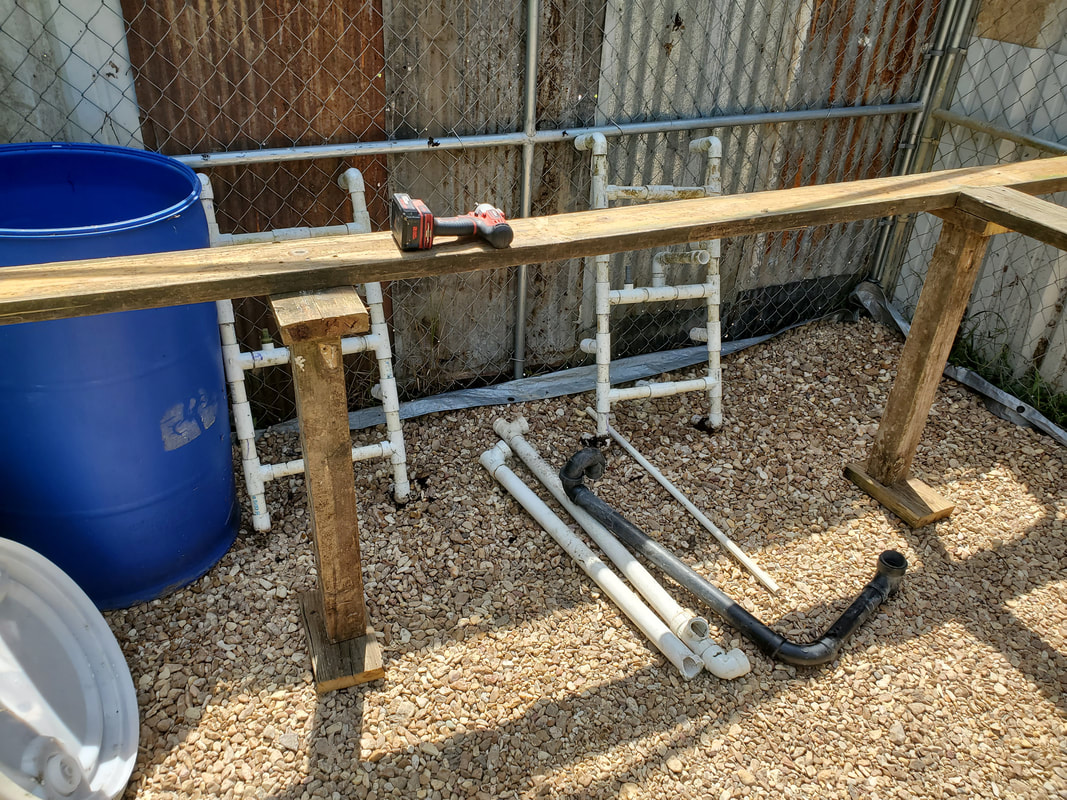
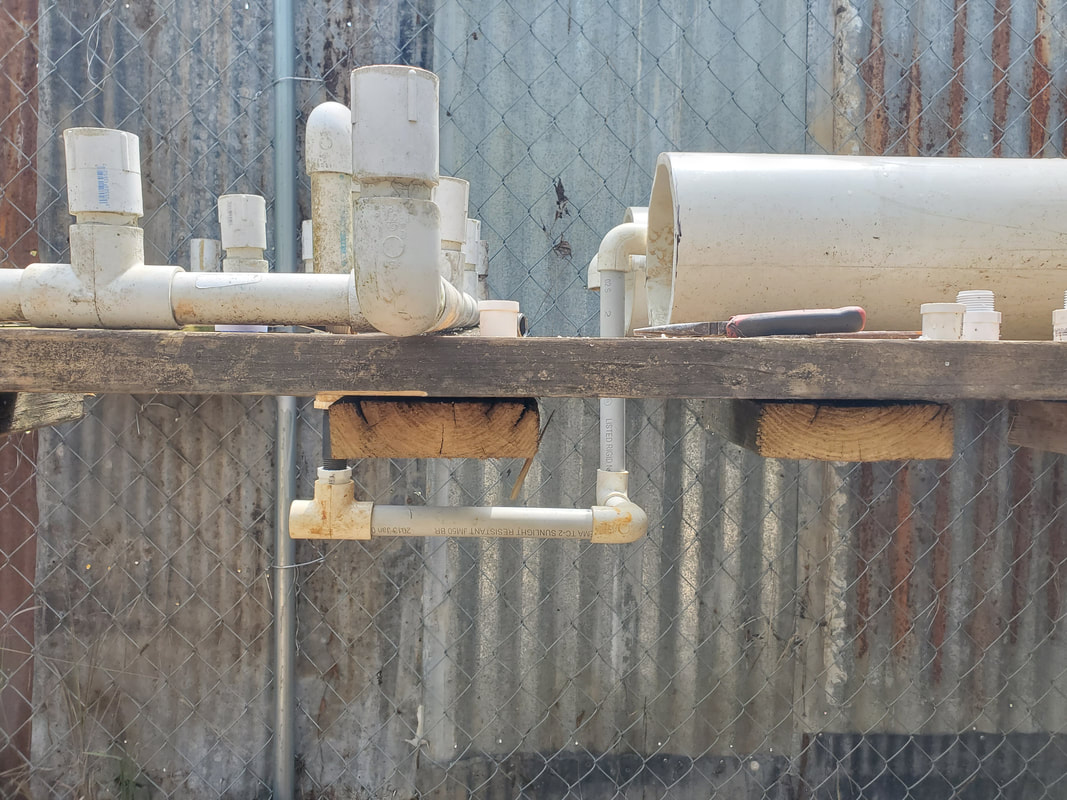
The next thing is the beds that will be growing stuff within the greenhouse. I started off by moving a 55 gallon plastic drum that will serve as the reservoir for the hydroponics. I will tap holes in the side of the drum for inlet and outlet PVC lines that will feed the hydroponic systems and hook up a pump to feed the system that will drain back into the drum. The raised beds and hydroponics will be mounted on an integrated series of shelves going around all four sides of the kennel greenhouse. Using scrap wood salvaged from our old porch and PVC pipe I'll be able to assemble the shelves/tables and make the plumbing for the hydroponics
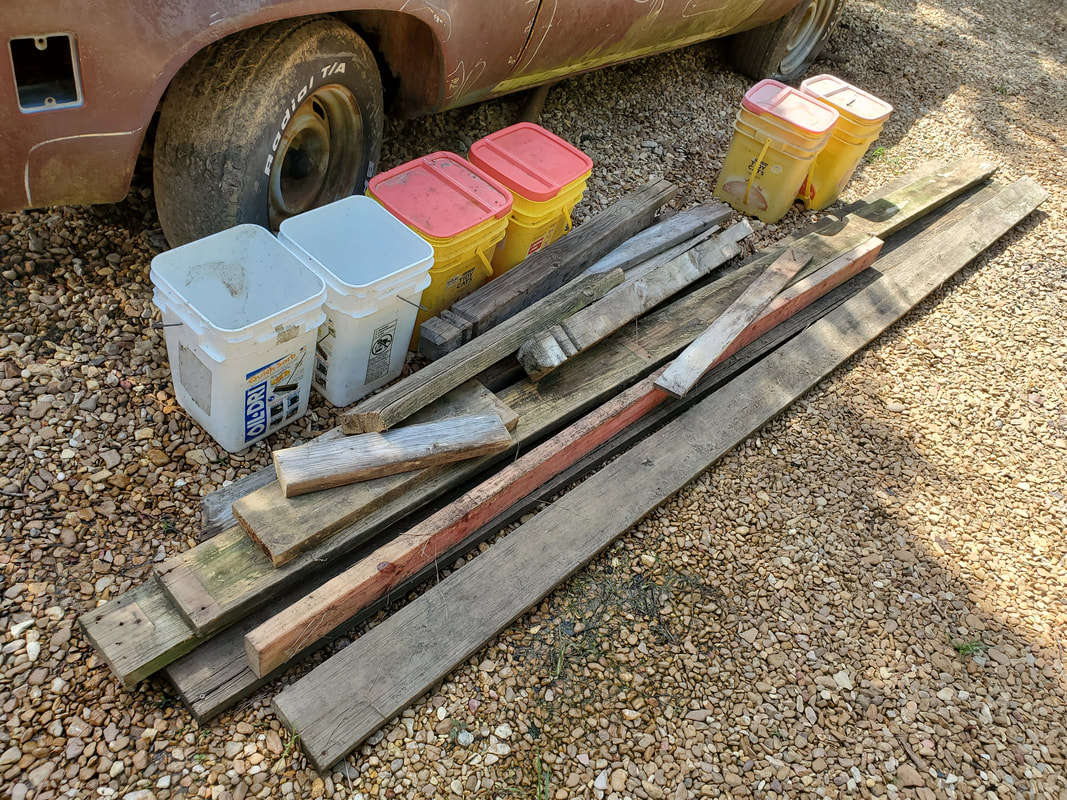
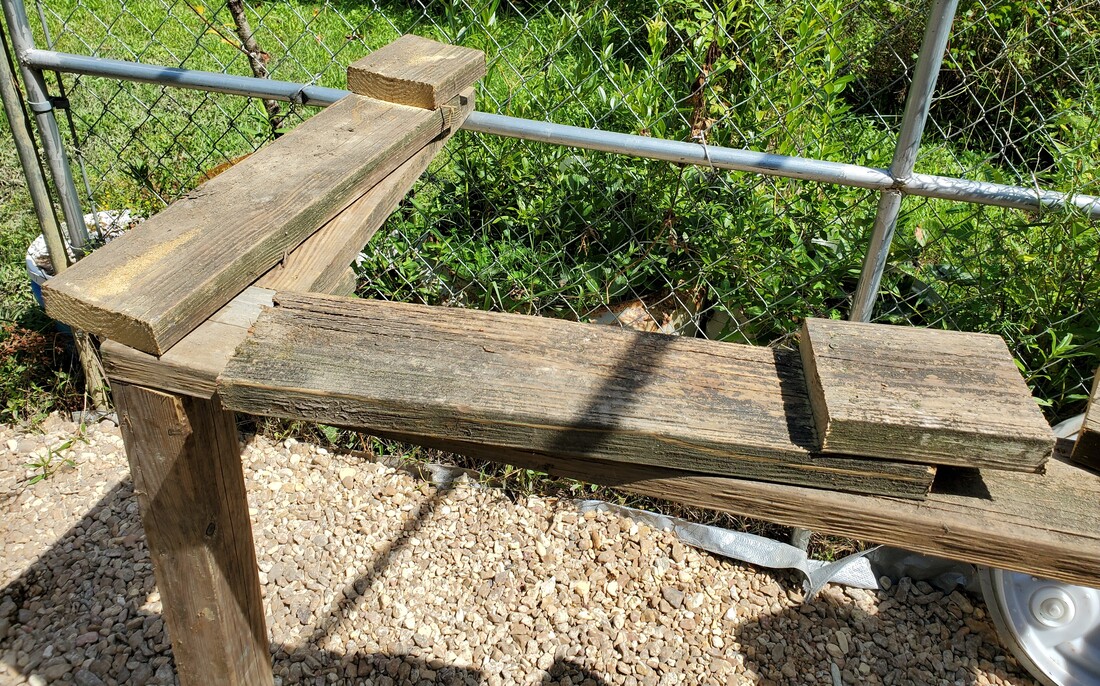
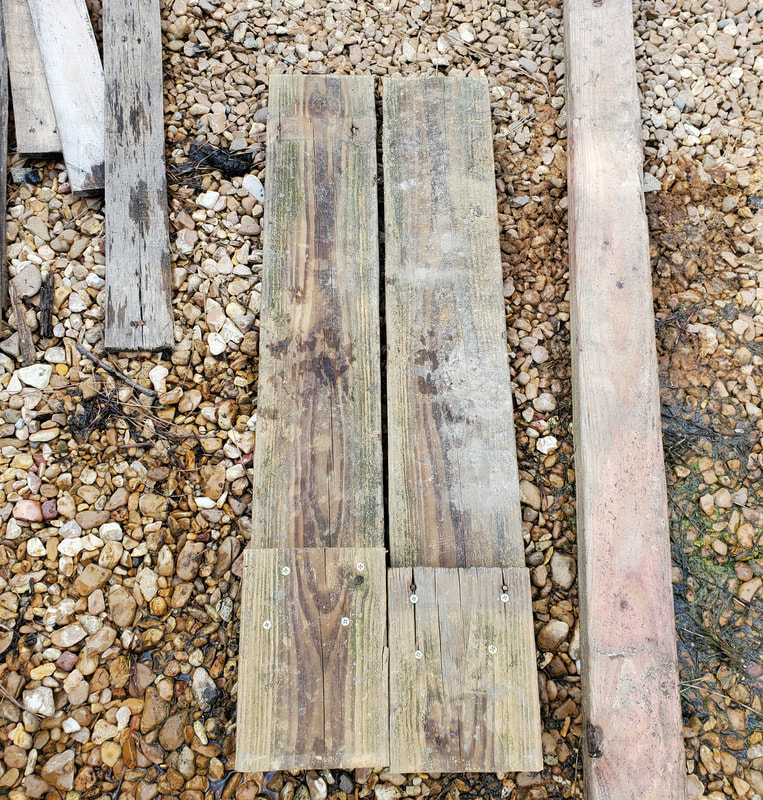
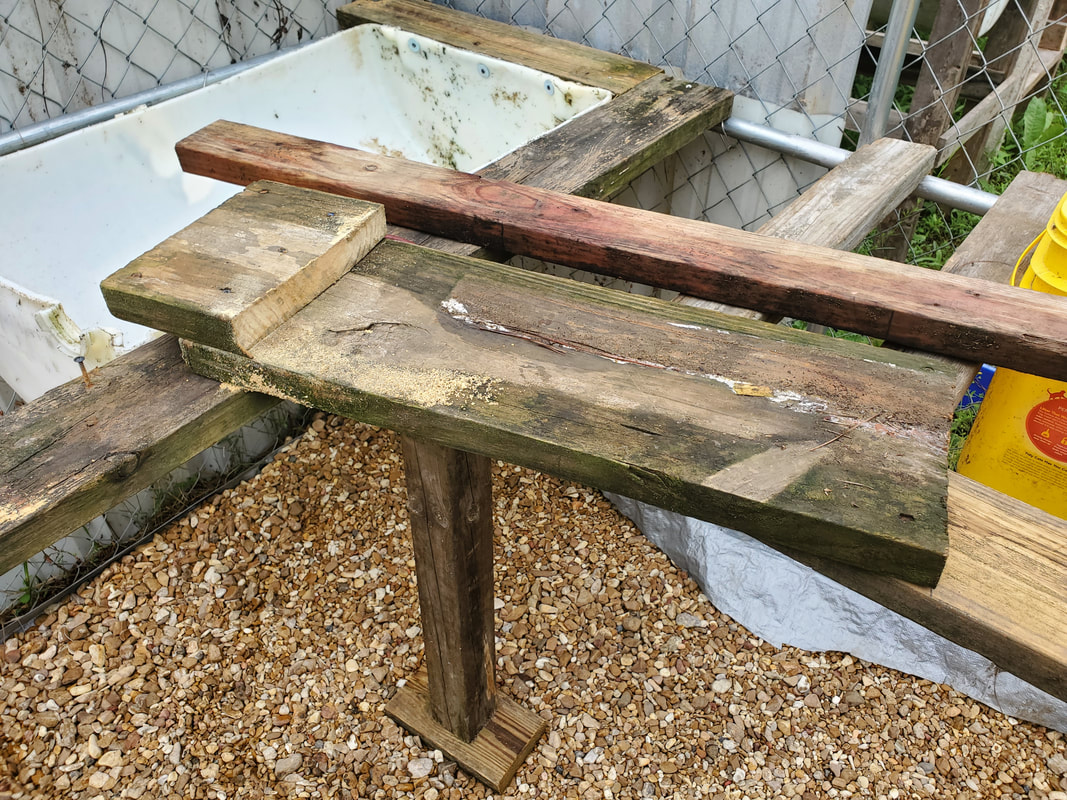
Batch of scrap wood gathered up for project. Most wood came from our old porch, consisting of 4x4 posts and 2x6 boards with some 2x4's mixed in.
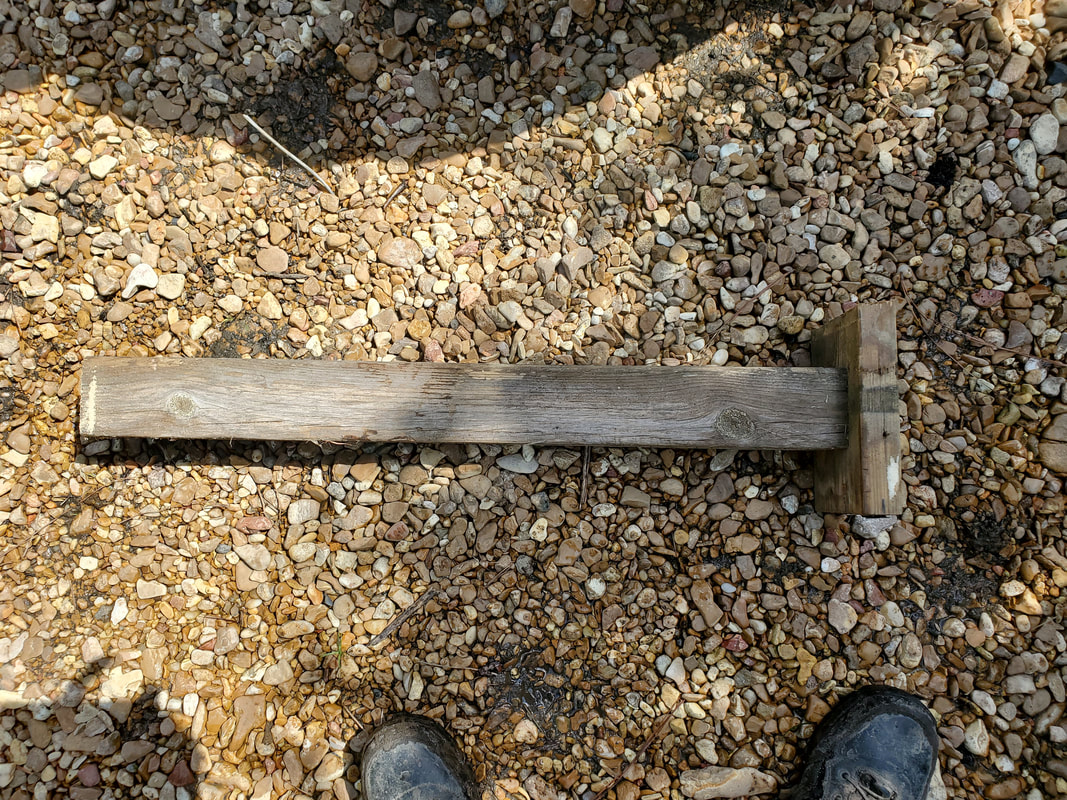
Post assembly put together for the shelving support. Base piece will be where 2x6's will sit on to create the junctions where the shelves turn to go along the other walls to create the wraparound shelves. The other end of the post will sit on another piece of 2x6.
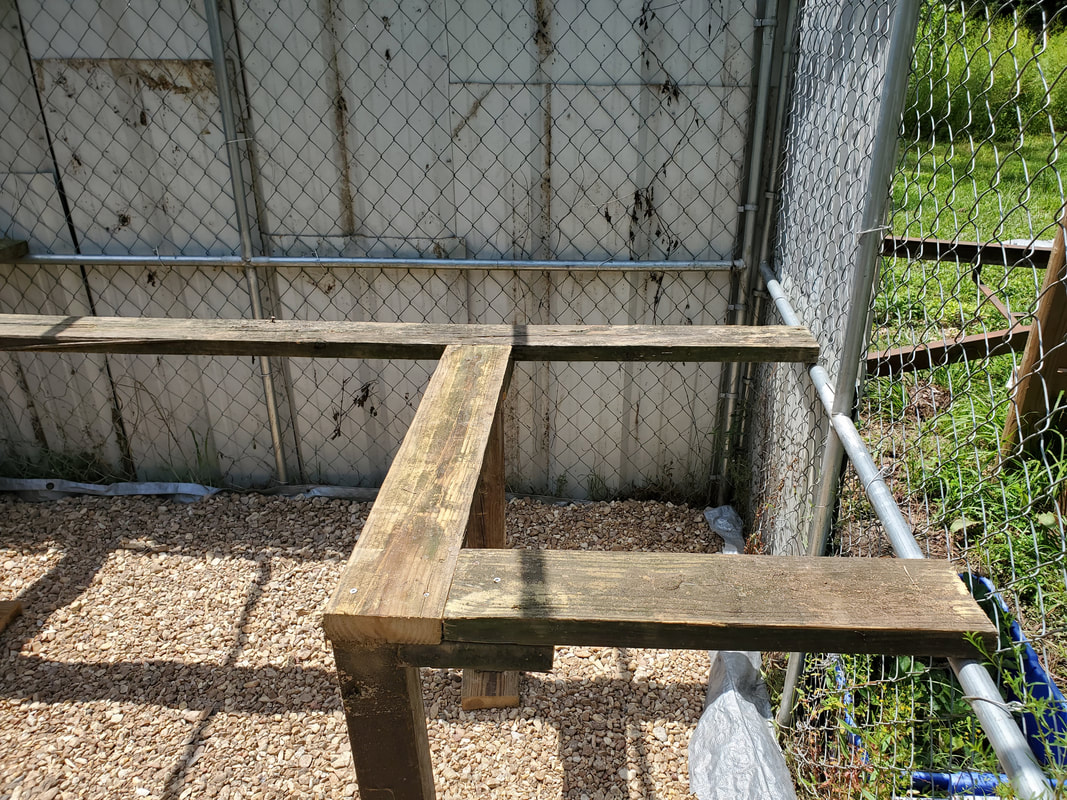
First board set up across walls spanning full 10ft with post holding it and second board up to the right. Note how post leg has base holding up and joining the shelves together to the right.
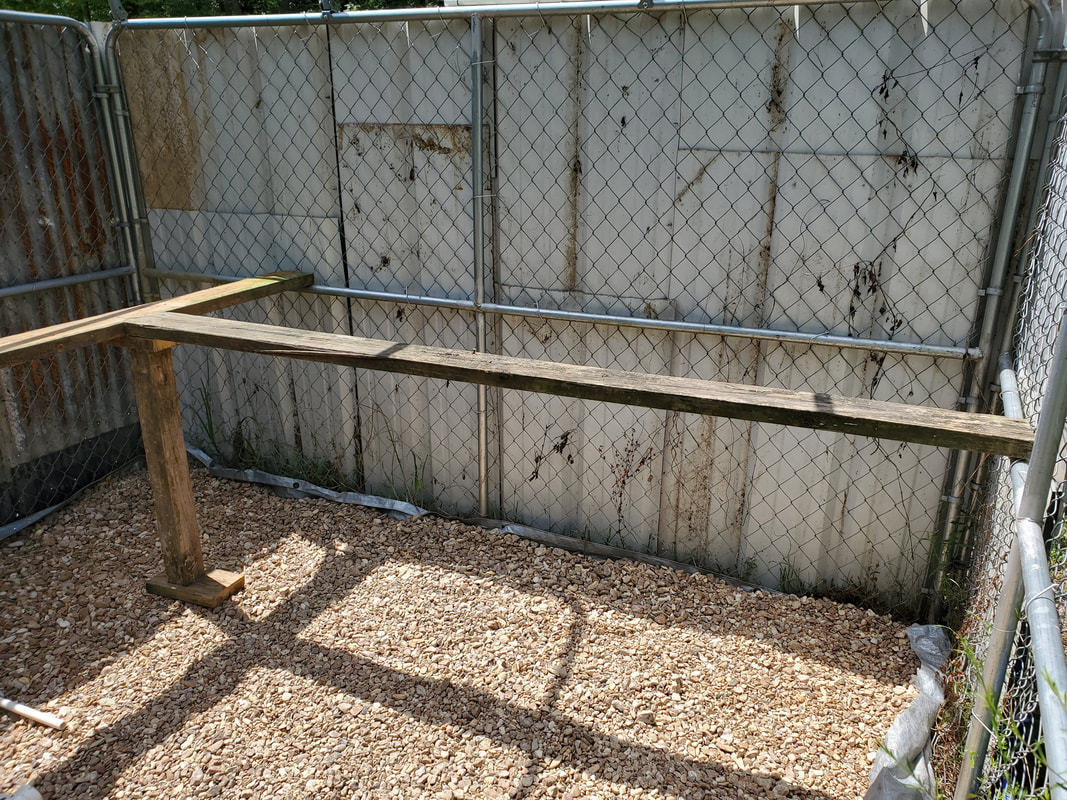
Second board set up across post and meeting up with wall panel. Again note how post is set up to hold the two shelf boards up.
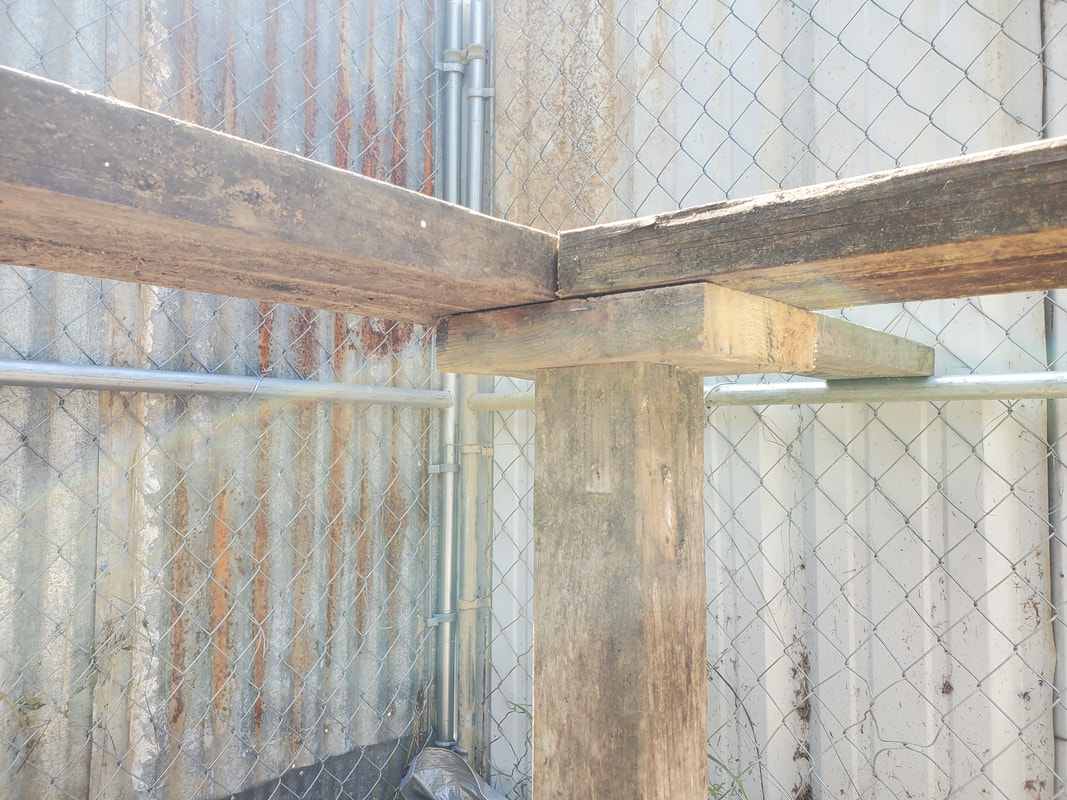
Closeup of how post is assembled and used in supporting the shelving boards.
As with the first post, another post is added to left for next shelf board to be attached to.
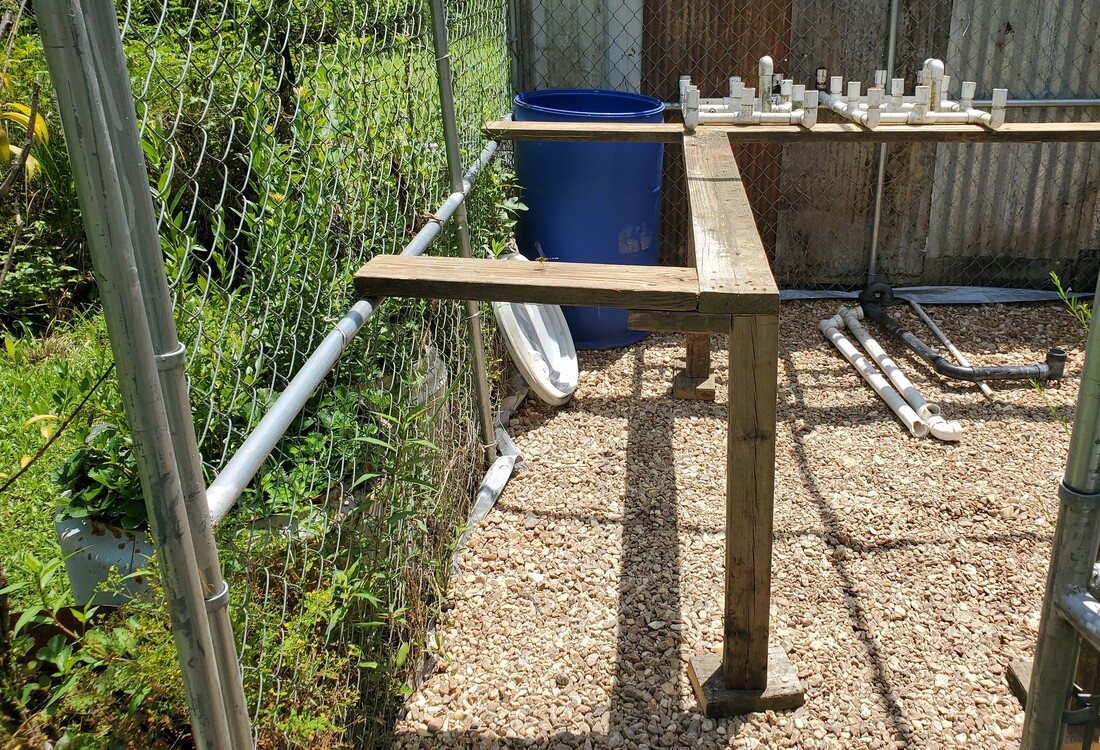
Third shelf built and attached to left post with another post and tie board added to make the end of the shelf.
Last shelf set up on wall panel next to gate, note use of posts, same all around. Shelf had to be made a little short to allow for space at gate for entry.
With that all four walls of the greenhouse have shelving set up, allowing for a decent amount of open space in the middle for working on the plants, especially when they grow in the way some plants do. Plants like tomatoes and cucumbers will need some space to spread, even with trellises or posts, the size of the plants will facilitate having plenty of space in the middle to move around when working the gardens. The only thing I'll have to do is drill some holes in the ends of the boards going through the metal tubing of the wall frames so I can secure the ends of the boards with more screws to completely secure the whole assembly to the greenhouse frame. With that I can start adding the extra wood that will be needed to hold the buckets for the raised beds as well as the hydroponic assemblies.
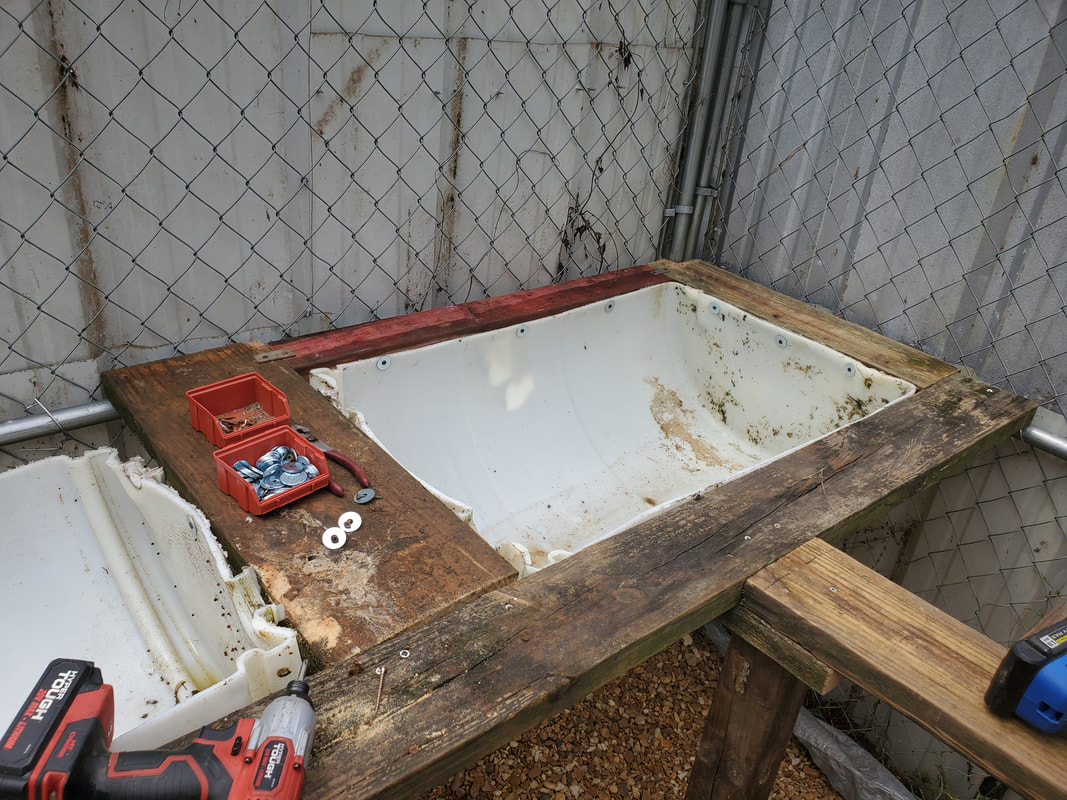
After having assembled the base shelving around the insides of the dog kennel greenhouse, I still had to secure the ends of the 2x6 boards to the horizontal tubes of the wall frames to ensure that everything would remain perfectly stationary. To do this I drilled a single hole in the middle of the board at the end, going through the tube of the wall frame. This was done on the ends of every board that met the metal tubes of the wall frames around the greenhouse. From here I drove a 3 3/4" wood screw through the end of the board and through the holes in the metal tubes, ensuring that the boards were secured to the wall frames.
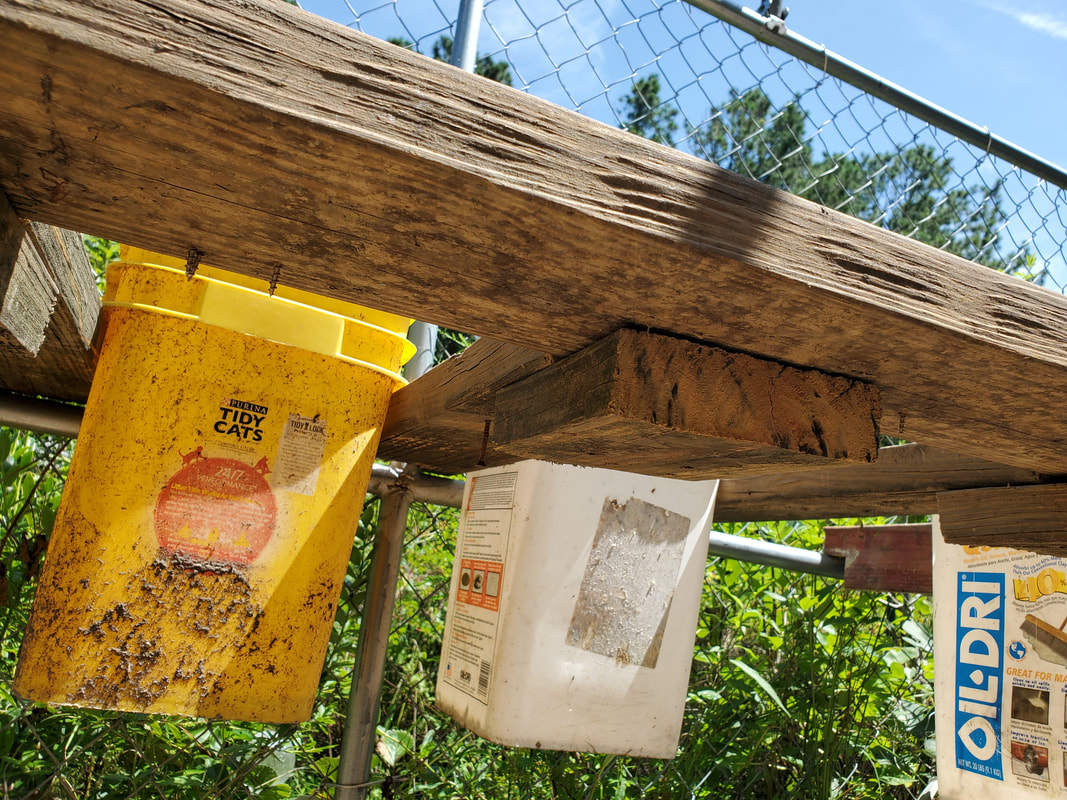
The next and main order of business for this session of the project was to create the dividers that would split the shelving up into sections to cradle the cat litter buckets that would serve as the bucket beds for the individual plants that would be contained inside the greenhouse. Just like the raised bed assemblies that are currently outdoors, the shelving will contain these buckets in a neat and concise manner within the greenhouse. I started with the section of shelving that was straight in front of the gate. After doing some measuring, I determined that to get the most proper spacing from one end to the other, I would have to use more 2x6 boards to serve as dividers. I took measurements and cut three boards that would span from the inner edge of the shelf board over to the horizontal tube of the wall frame. These boards would be the actual dividers. To allow for these boards to mate up flush with the inner edge of the shelving boards, I cut shorter 2x6 boards to serve as tie boards to go underneath the two boards, secured with wood screws from the top.
Divider boards with tie boards secured to ends, ready for installation to shelf. These boards will make up the cavities for the bucket beds and supports for the hydroponics. At the walls all boards are secured with a screw holding the board to a hole drilled in the tube of the wall frame.

Shelf with dividers in place and buckets in place for fitting purposes. Note 2x4 on right side serving as an extra spacer by last white bucket.
Underside showing tie board in place holding up divider board to mate ends of 2x6's to edge of shelf board.
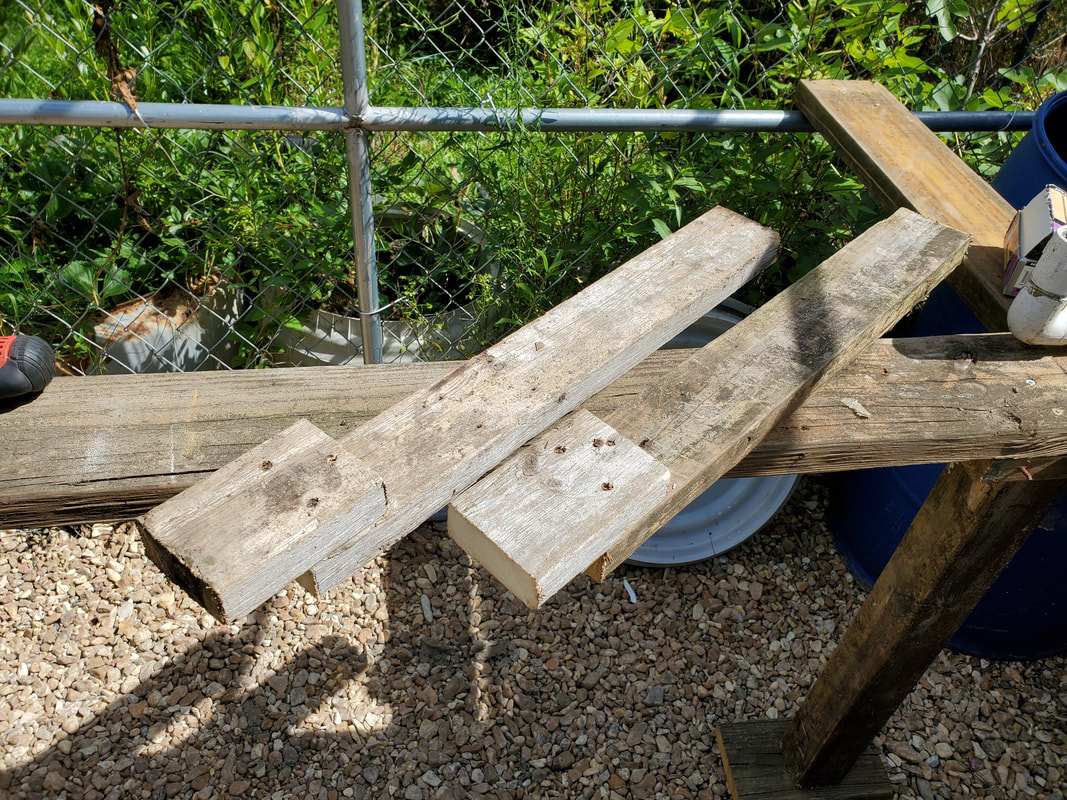
2x4 dividers made up in the same way as the 2x6 dividers for the smaller shelf.
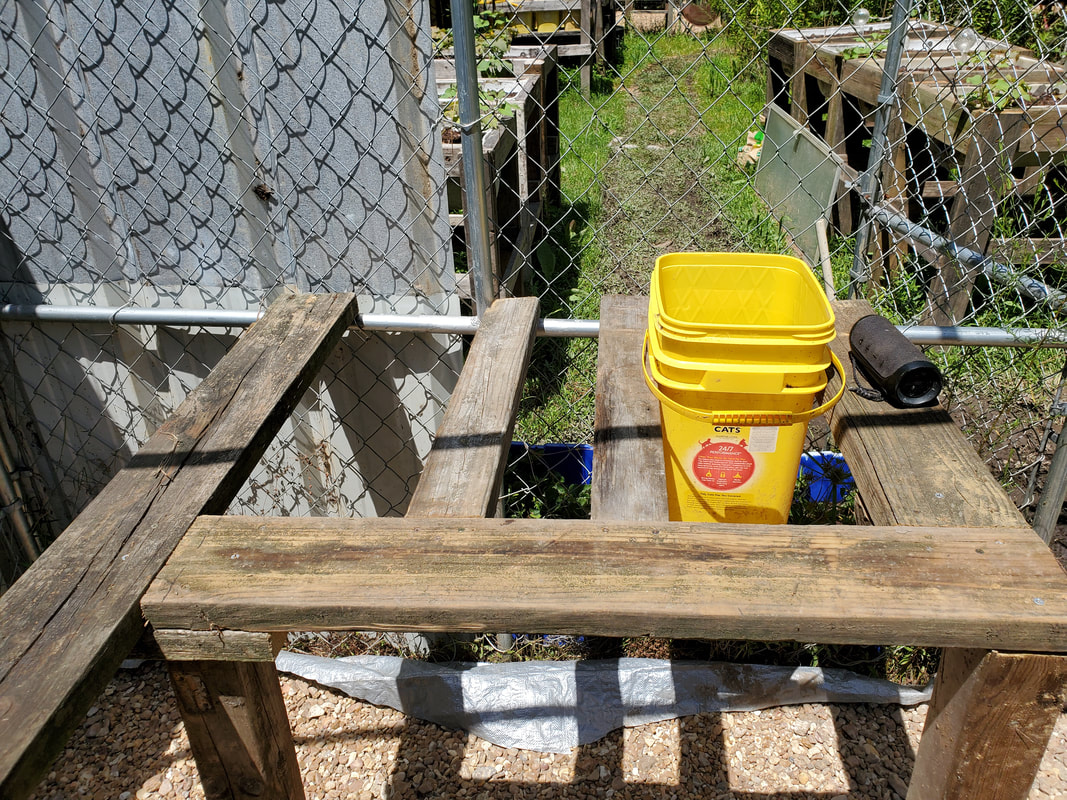
Smaller shelf established with the two dividers in place in the middle with the bucket for fitting purposes.
|
|
|
|
|
|
|
|
|
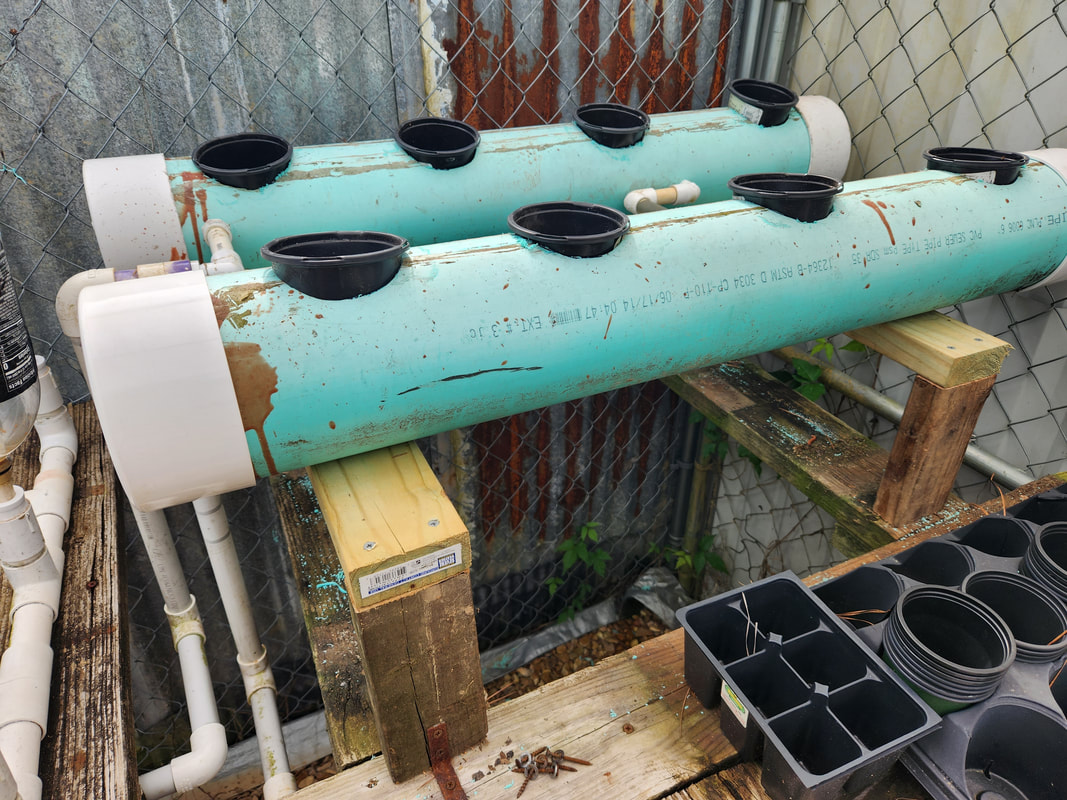
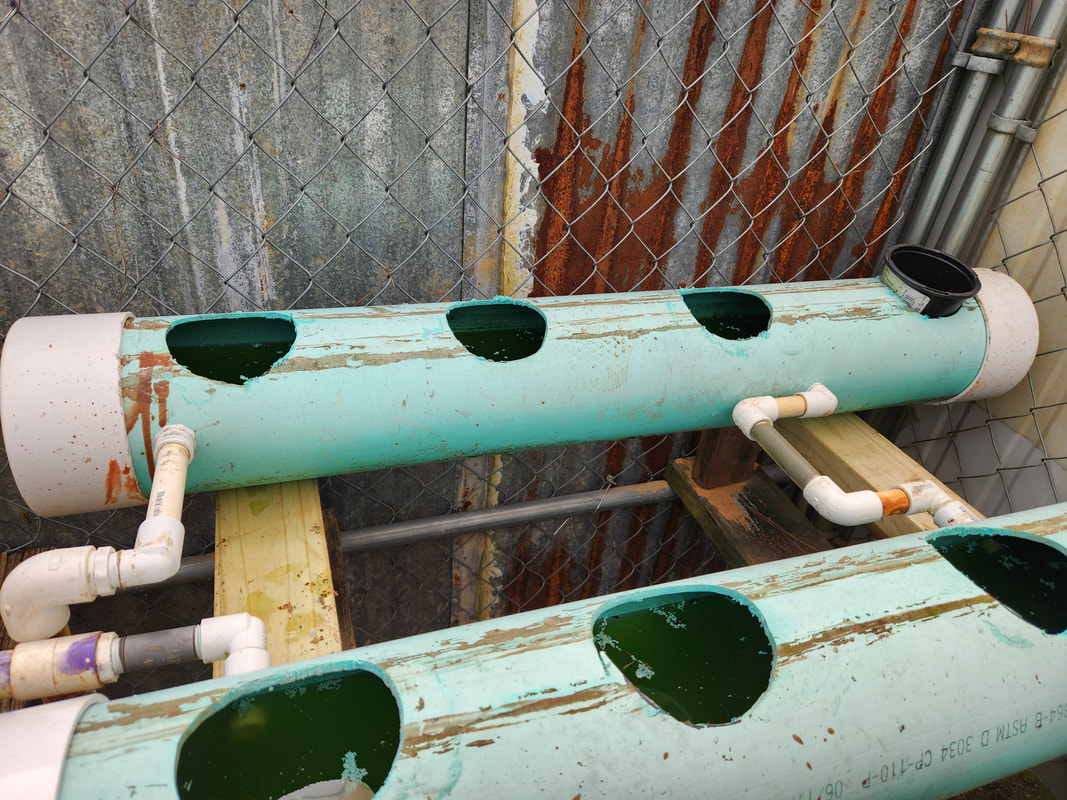
2x6 support boards assembled for hydroponic gardens.
Hydroponic garden setting on pair of support boards that are anchored in place on shelf.

Two old hydroponic gardens setting on pairs of support boards with conduit straps in place.
Closeup of conduit straps holding hydroponic garden assemblies to 2x6 boards.
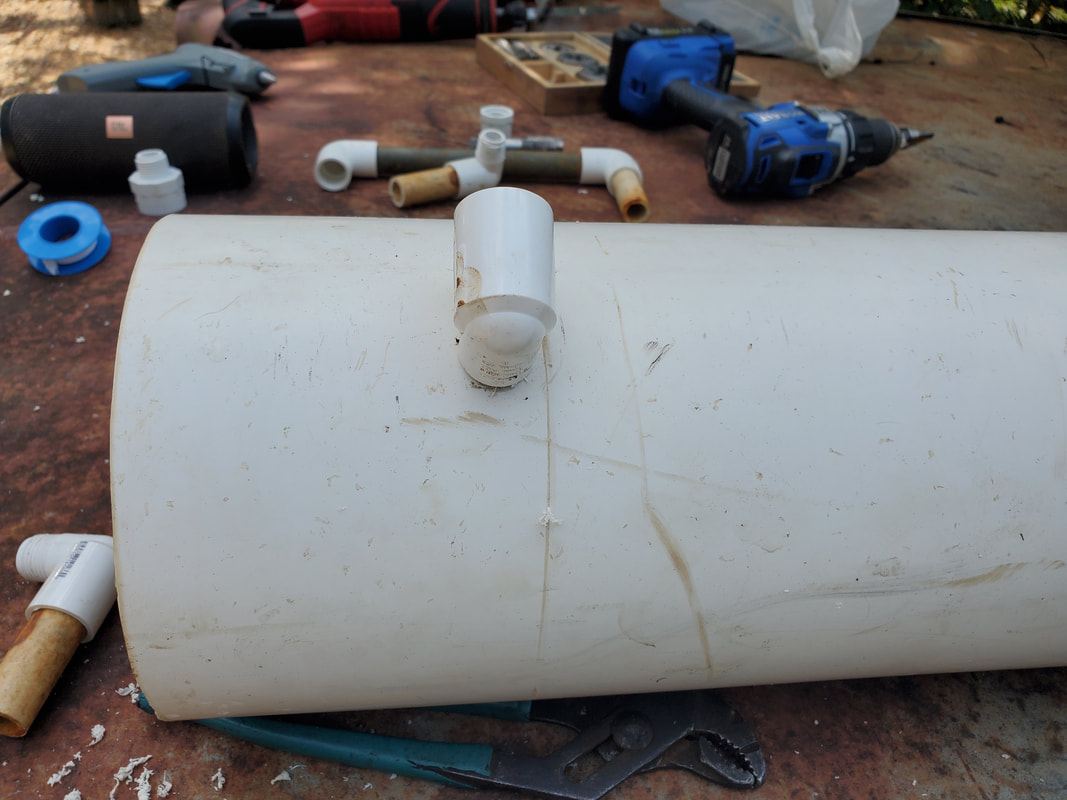
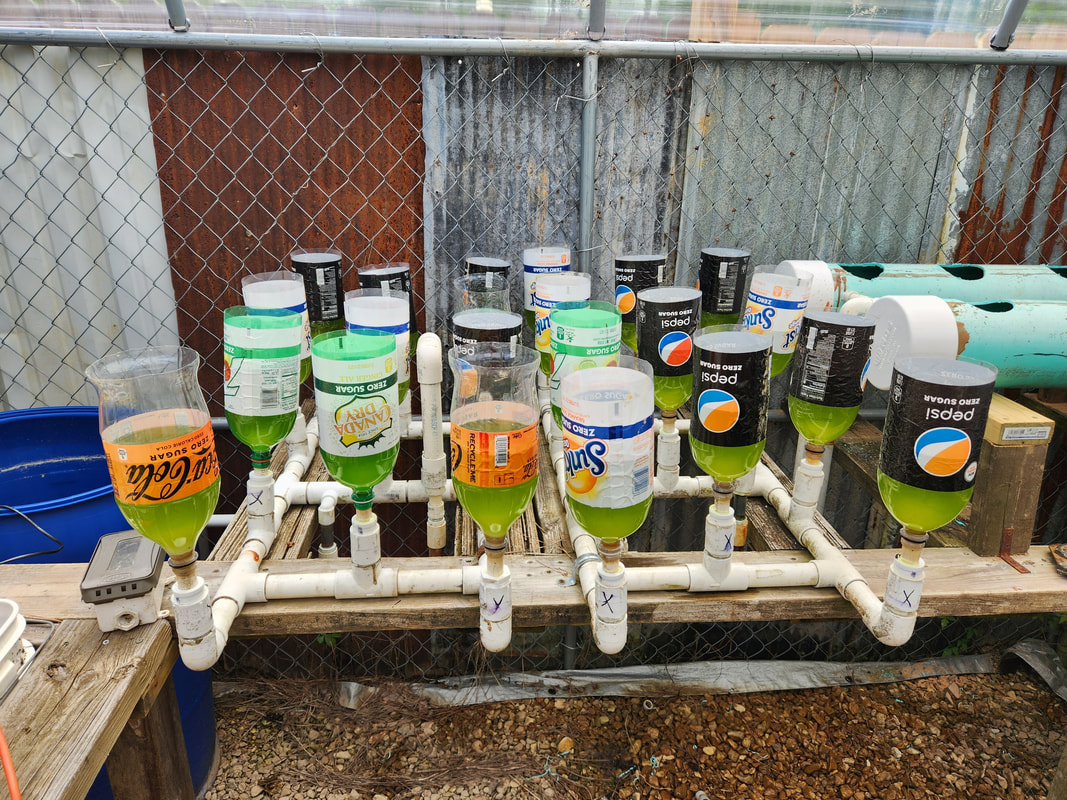
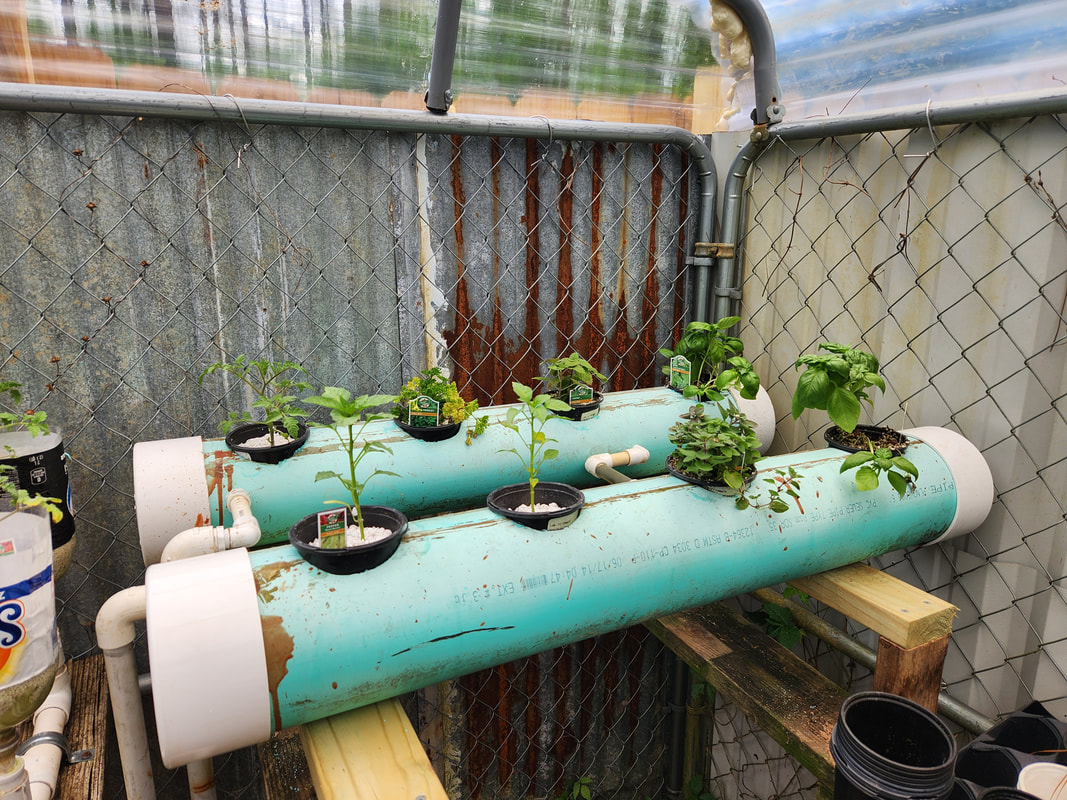
The next thing is getting a small set up started for the other form of hydroponic garden, and that is the one that uses 6" PVC pipe, much like the latest version of hydroponic garden. If you don't remember, that setup involves a couple of lengths of 6" pipe with large holes cut along the pipe and spaced apart by several inches. Each hole holds a 12oz plastic cup that serves as a planter. Pipe fittings threaded into holes in the pipe allow for plant solution to be pumped into one pipe, fill up to a fixed level where the outlet line allows overflow to flow into the 2nd pipe, which then does the same, flowing the excess from its outlet out and back down to the reservoir.
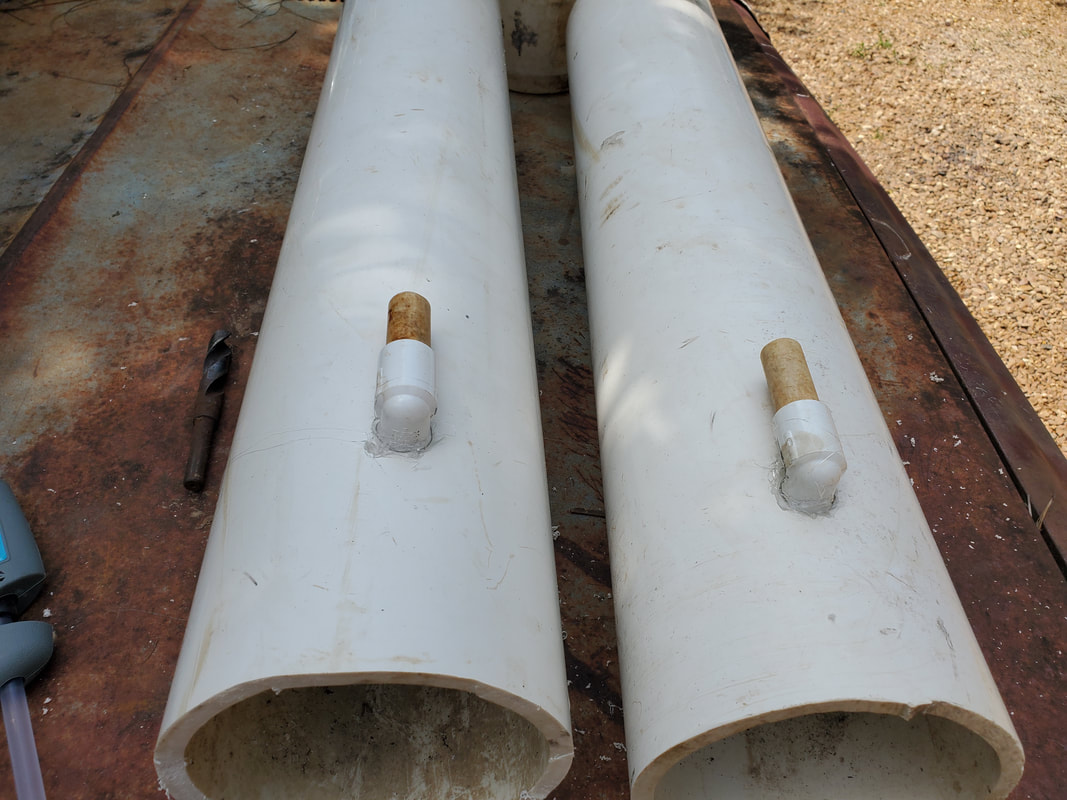
6" PVC pipe marked and cut for new hydroponic garden. Note mark dead center on pipe.
Pair of support boards in place with PVC pipe sections setting on top to show how assembly will go together in its final stages. Pipes are pushed back to give a view of the support boards underneath.
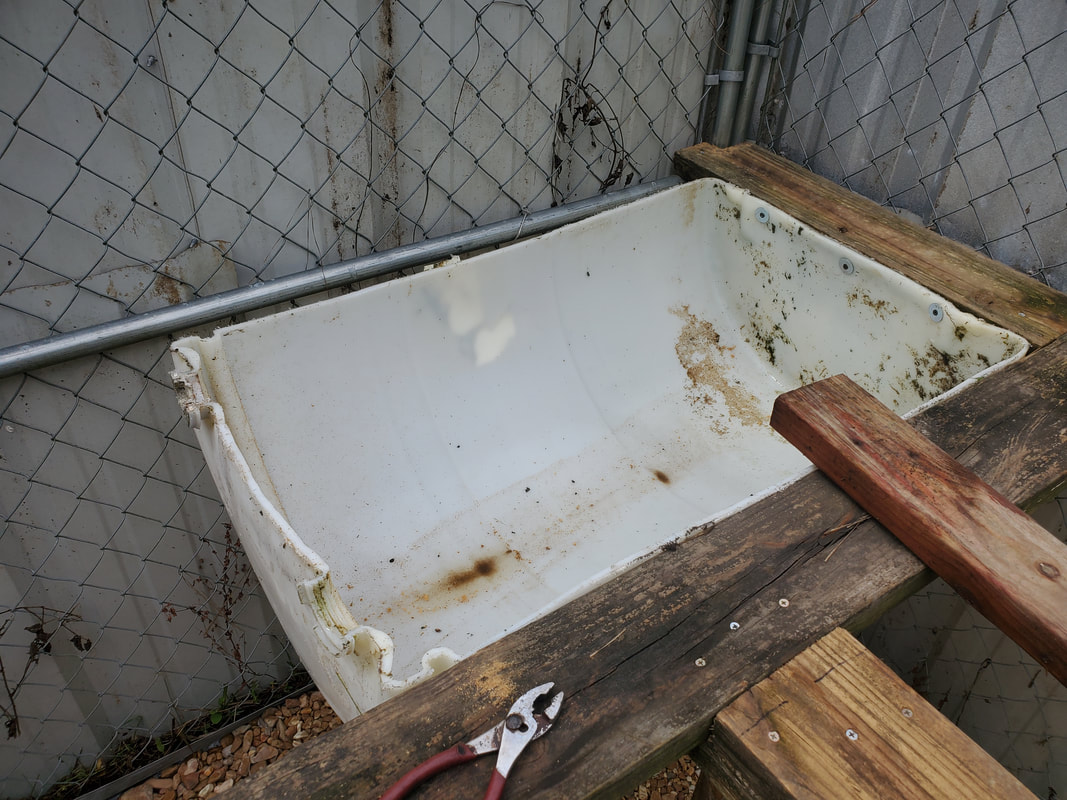
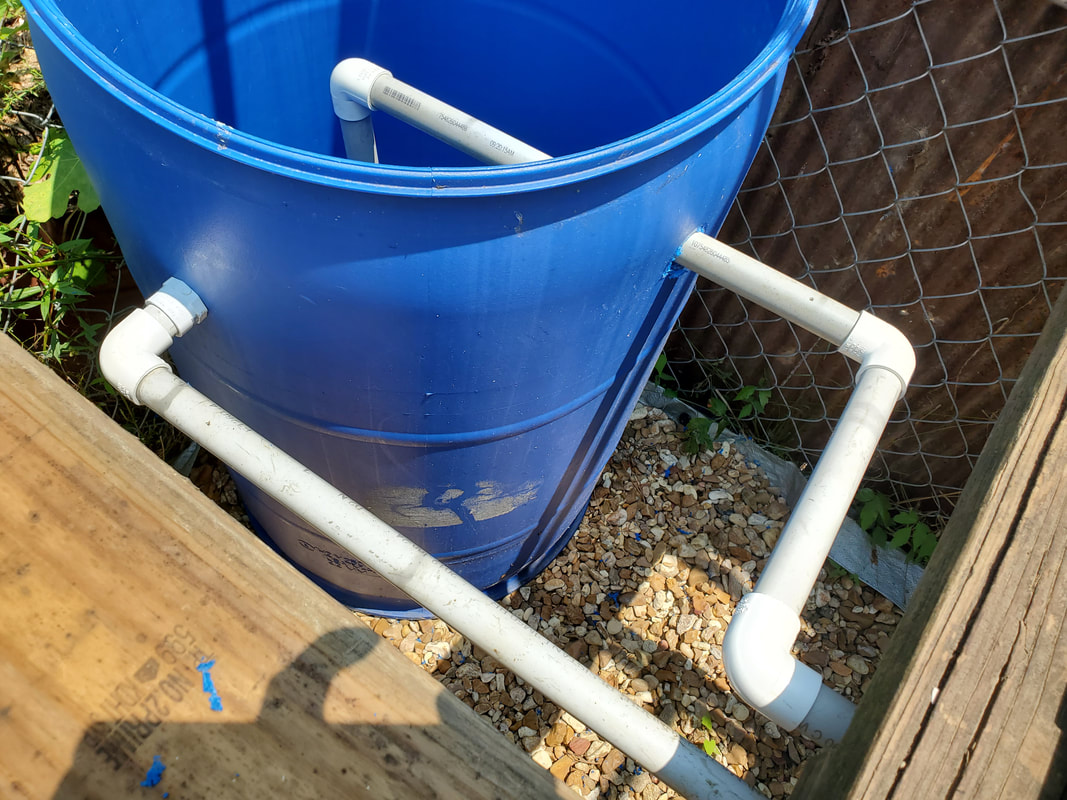
With only one side remaining open on the shelves of the greenhouse, I had to figure out what I would want to fill them up with. I could've repeated the same thing with more bucket beds or even more hydroponic assemblies but I figured it would be better to use the third form of raised bed I've been using around the garden and that is the drum bed. As you've seen in past posts, the drum beds consist of a plastic drum cut in half the long way and the two halves being used as raised beds, suspended by a wooden table. In the case of our shelf in the greenhouse, the space is large enough to accommodate the two halves of a 55 gallon plastic drum I happen to have laying around.
With only one side remaining open on the shelves of the greenhouse, I had to figure out what I would want to fill them up with. I could've repeated the same thing with more bucket beds or even more hydroponic assemblies but I figured it would be better to use the third form of raised bed I've been using around the garden and that is the drum bed. As you've seen in past posts, the drum beds consist of a plastic drum cut in half the long way and the two halves being used as raised beds, suspended by a wooden table. In the case of our shelf in the greenhouse, the space is large enough to accommodate the two halves of a 55 gallon plastic drum I happen to have laying around.
55 gallon drum to be sacrificed for the drum beds in the greenhouse.
Drum halves staged within opening of shelf.
End support board with smaller tie board attached and notch cut out of end corner. Note notch cut in board to allow it to fit at junction where wall panels meet.
First drum half hung in place at the end support board and main shelf boards. Note screws with washers holding the drum to the wood.
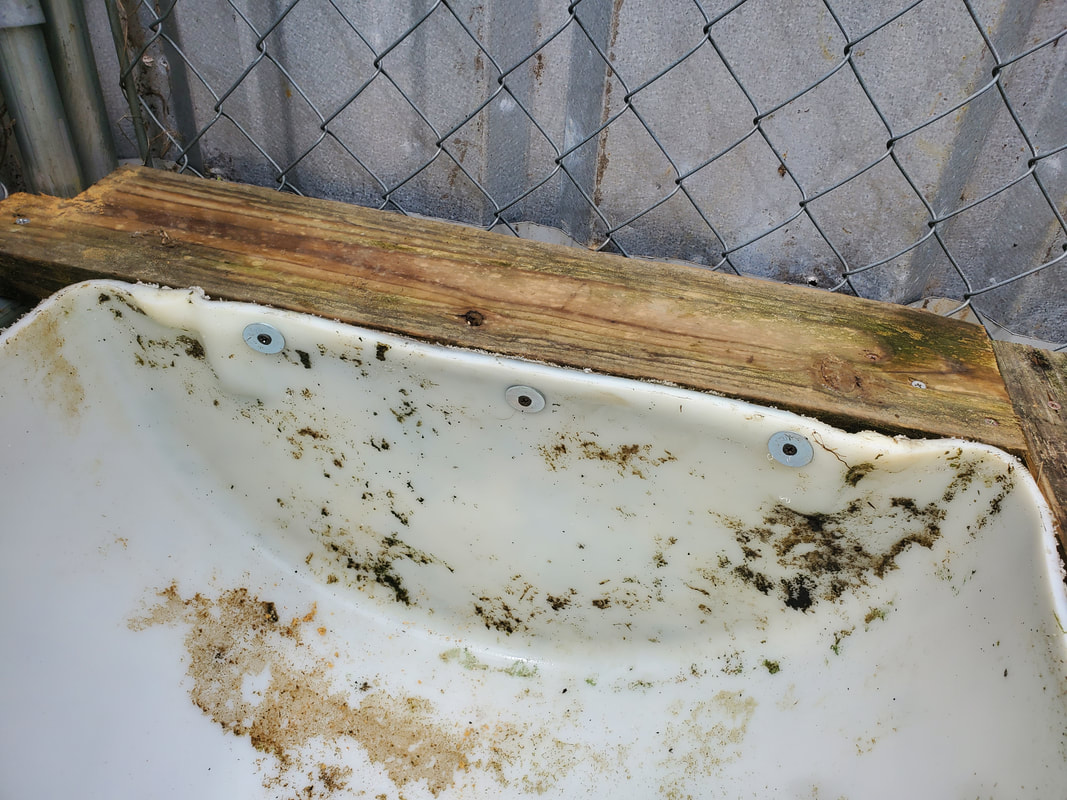
Closeup of screws/washers holding drum to end support board.
2x10 board used as divider/support board with associated tie board attached.
Divider board in place with second drum half attached to it and main shelf board. Note pink 2x4 at back of right drum half that is secured with straight braces for added support at the back of the assembly.
End board and wall board in place with brackets and second drum secured all around. Note at bottom left of drum by red parts bin the special bracket used to hold the boards together. This piece was another salvage piece from the old porch.
Closeup of wall side support board in place with bracket to hold boards together.
Closeup of corner of end support and wall side support boards, held together with bracket. Also note single screw holding end of board into the tube of the wall frame.
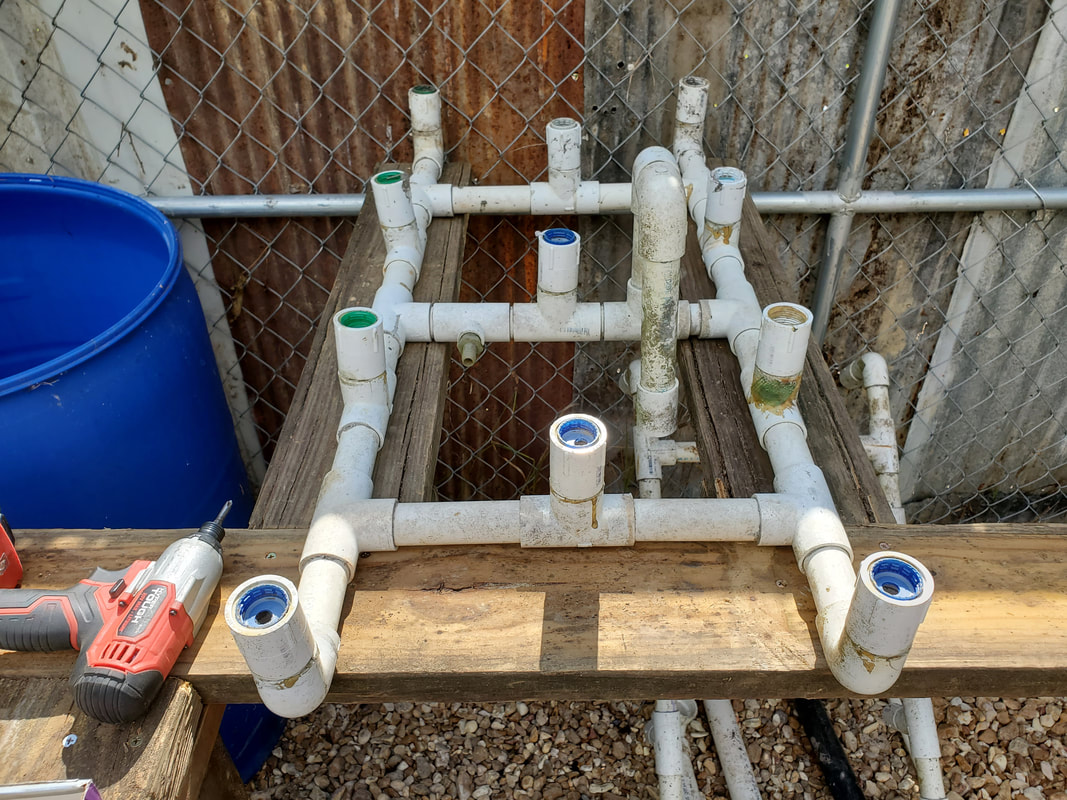
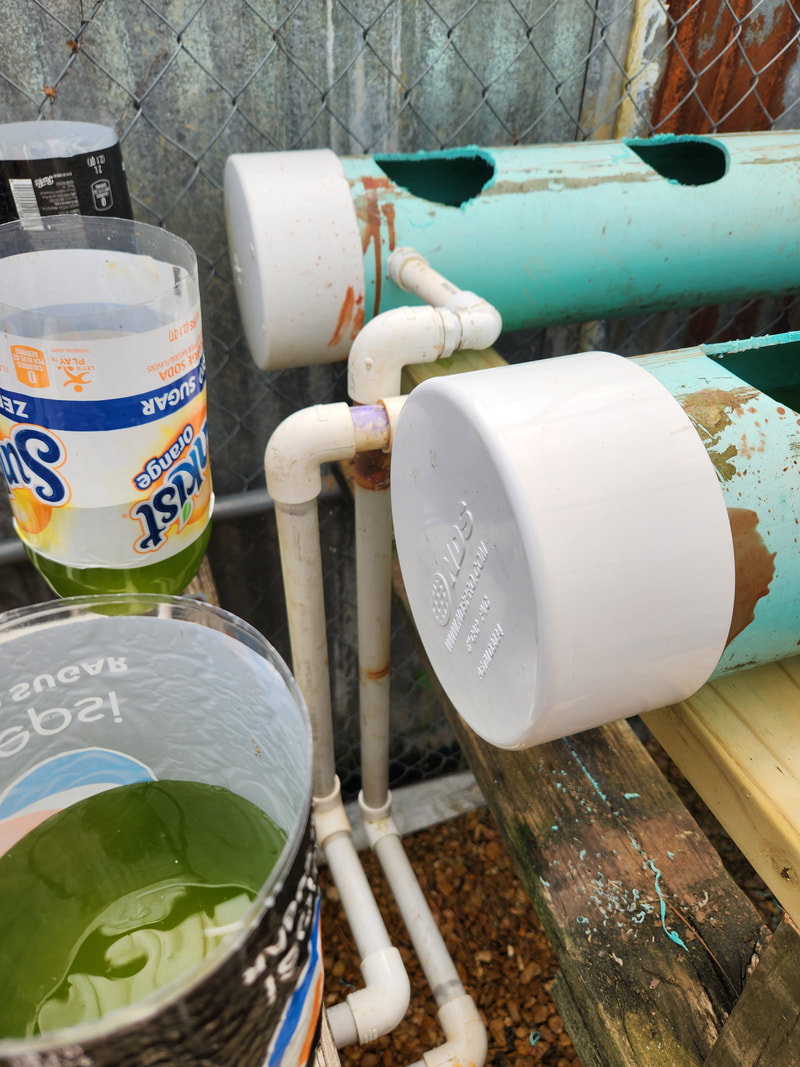
The hydroponic garden plumbing system is a pretty simple system made up of a mix of PVC pipe fittings from our stock, so instead of being super clean, its a mix of parts. In the end everything went together pretty well all things considered, with a minimum of outside sourced parts to complete the job. Drilling and tapping holes in the 6" pipe and hot gluing a couple of fittings in place put all the PVC fittings in place needed to hook up to the newer HPG setup while the drain ports and input ports of the older HPG assemblies made it easy to hook pipe up to both ends to be able to supply water to the units while allowing overflow to flow back out easily. The pictures show how everything went together.
The hydroponic garden plumbing system is a pretty simple system made up of a mix of PVC pipe fittings from our stock, so instead of being super clean, its a mix of parts. In the end everything went together pretty well all things considered, with a minimum of outside sourced parts to complete the job. Drilling and tapping holes in the 6" pipe and hot gluing a couple of fittings in place put all the PVC fittings in place needed to hook up to the newer HPG setup while the drain ports and input ports of the older HPG assemblies made it easy to hook pipe up to both ends to be able to supply water to the units while allowing overflow to flow back out easily. The pictures show how everything went together.
Tapping threads in hole at the end of both pipes for 1/2" street elbows. Both pipes have a threaded in elbow at one end.
1/2" male thread street elbow screwed into threaded hole at end of each of the two pipes. These will be oriented horizontally for the rest of the plumbing that will be connected.
Street elbows hot glued in place due to not having the necessary taps to cut threads for the fittings. These fittings make up the bridge between the two pipes to allow the overflow from one pipe to flow into the 2nd pipe before overflowing into the drain outlet.
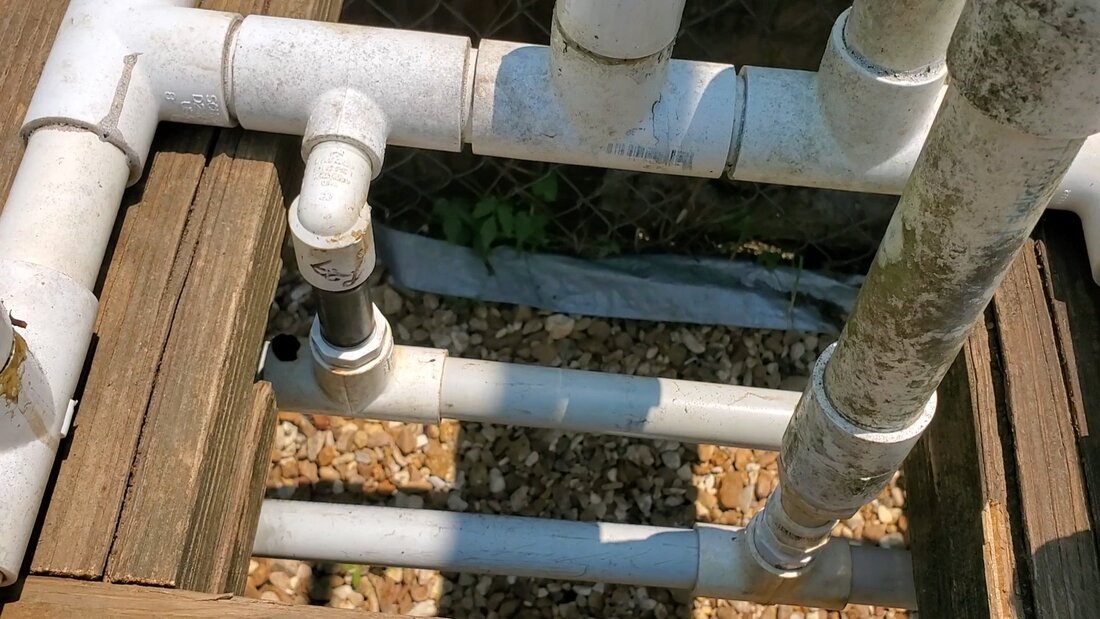
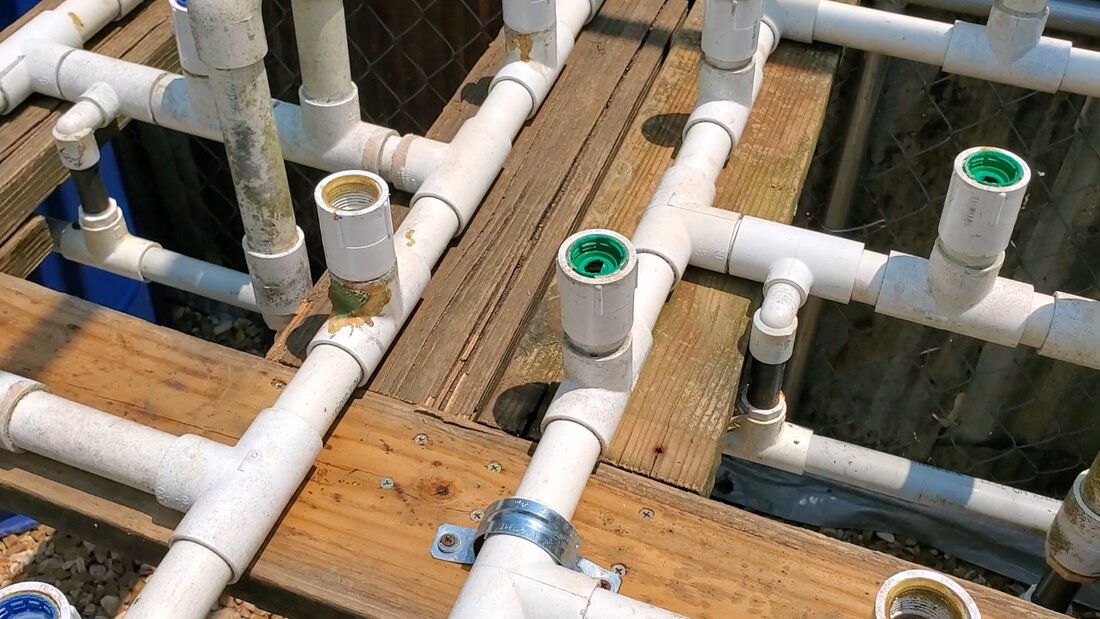
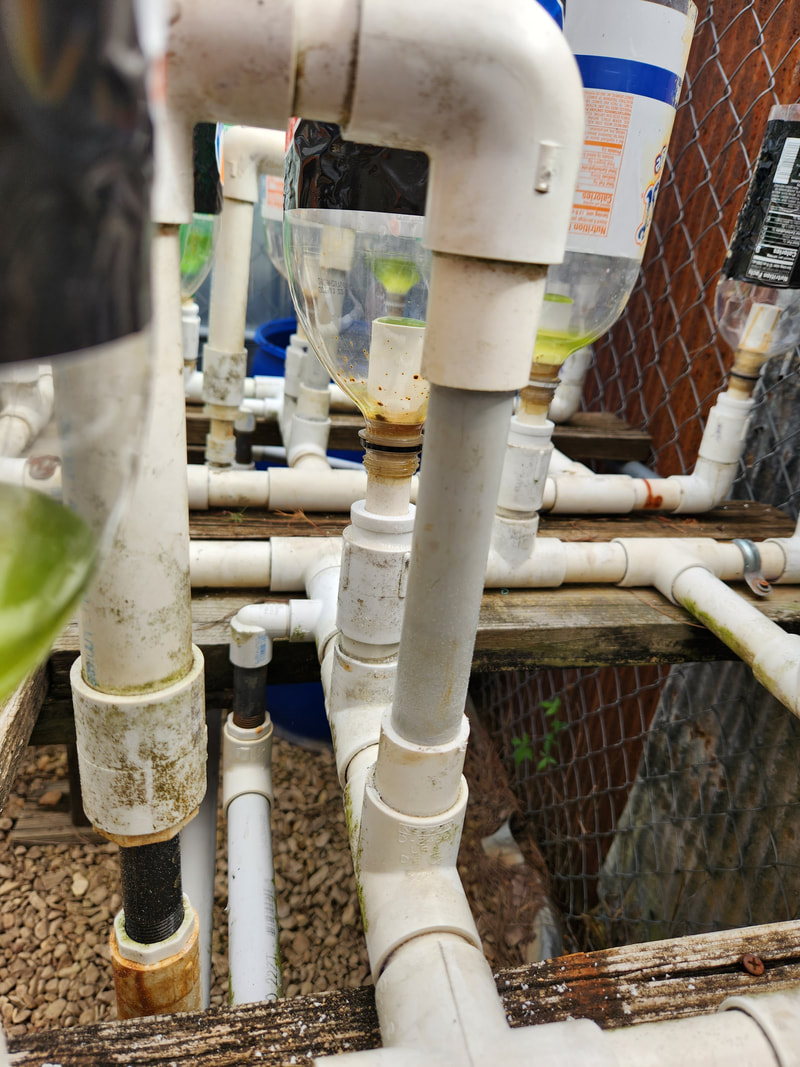
Several short lengths of pipe were used to connect the bridge between the two 6" pipes as well as the connections to the inlets and outlets for all of the gardens. Again, several adapters going between smooth and threaded pipe and fittings allowed everything to come together the way it did all the way up to the drum. All of the fittings and pieces of pipe used in this plumbing network are just pressed together versus glued together to allow for easy disassembly in case any type of maintenance needs to be done. The system isn't going to be under pressure so its not critical for this stuff to be glued together.
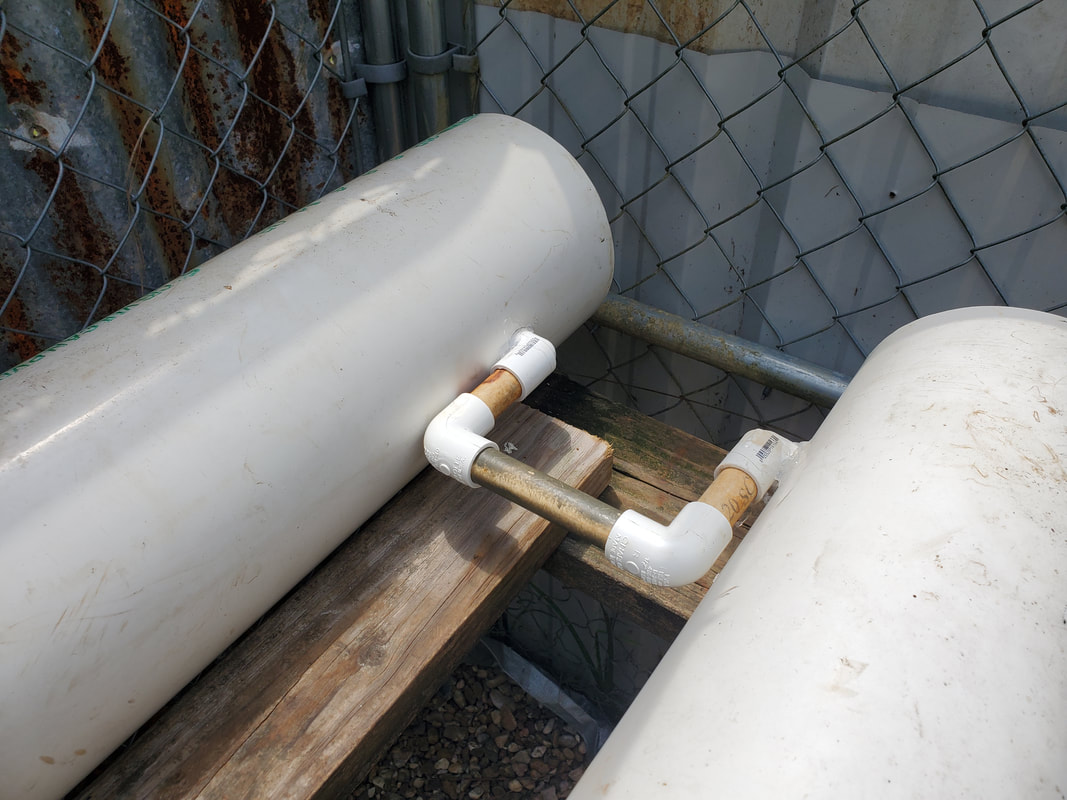
Pipe bridge completed with short pipe and more elbows connecting the two street elbows together and linking the two pipes as intended.
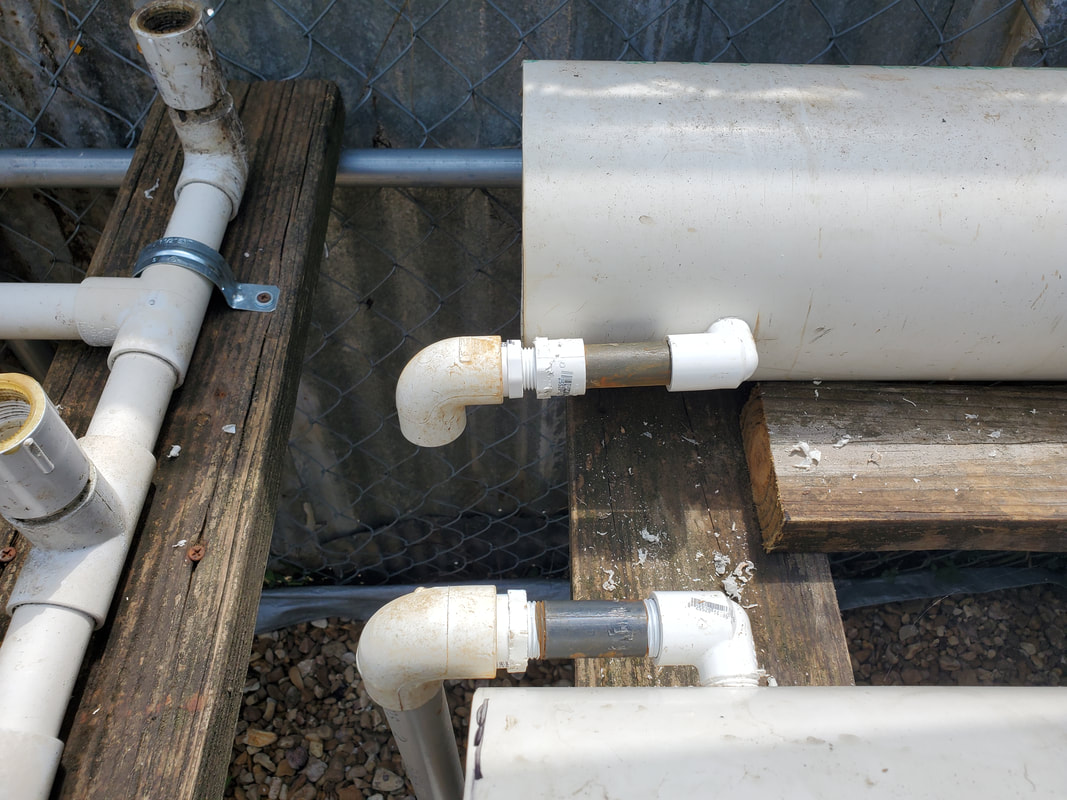
Inlet and outlet pipes threaded into holes at other end of pipe pair. Fittings and pipes are in place to bring the pipes closer to connection with the main pipelines that will supply water to the garden assemblies as well as return overflow/drainage water back to the drum.
Side shot showing how pipes are connected to drain pipe from 6" pipe garden and the drain pipe from one of the older HPG's. The downward pointing drain/overflow of the older HPG is 1" pipe reduced down to 1/2" then back up to 3/4" to mate to the main pipeline going back to the drum. Again, using what we had on hand has this mix of parts utilized like this.
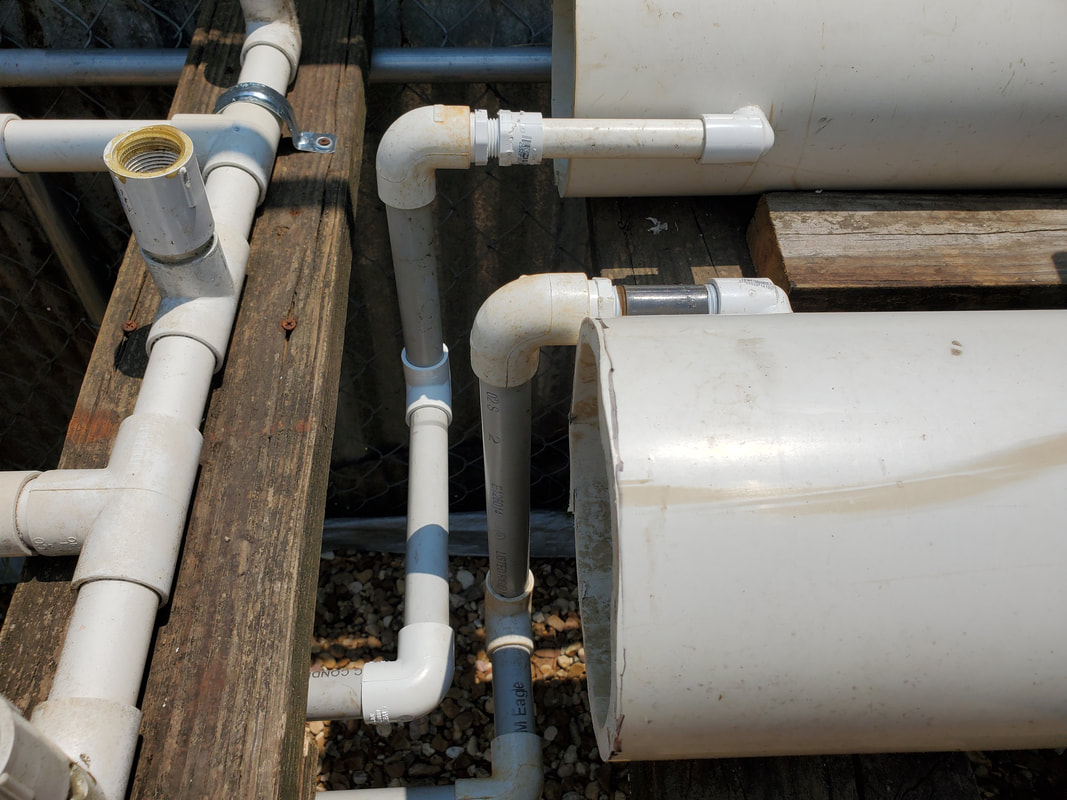
Inlet and outlet pipes for 6" pipe garden assemblies hooked up to main pipelines which are 3/4" PVC pipe and associated elbows and tees. Both lines run parallel to one another along the length of the shelf.
Closeup of old HPG setup showing drain line and how its hooked up to main drain line via various fittings and the water feed line plugged in via fittings into side oriented tee. Note how lines run parallel to one another.
Another angle showing how pipes are connected. Again, this isn't the prettiest setup due to the various PVC fittings used in the construction of this plumbing but it is together.
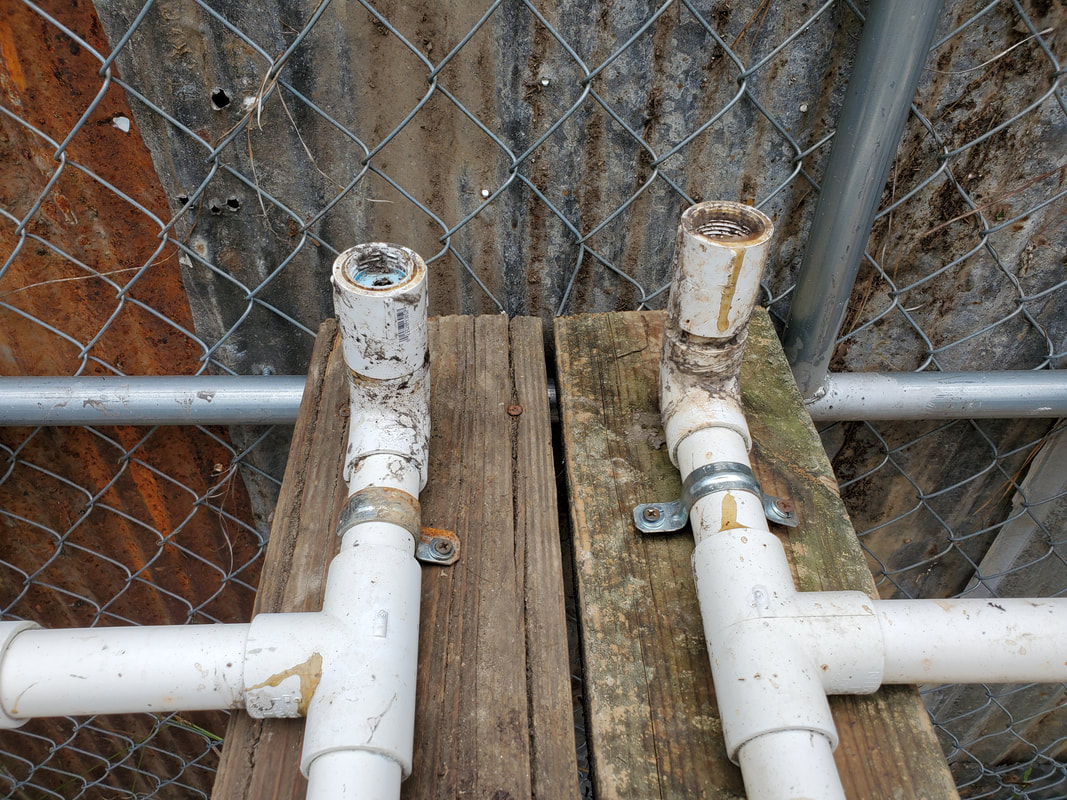
At the drum the drain line terminates with a 3/4" male to 3/4" female smooth adapter screwed into a drilled and tapped hole in the side of the drum that accepts the end of the pipe from the main drain line. As for the outlet water feed line the hole in the side of the drum has the pipe passing through from the main line going into the drum and angling down to the bottom where a pump will be hooked up.
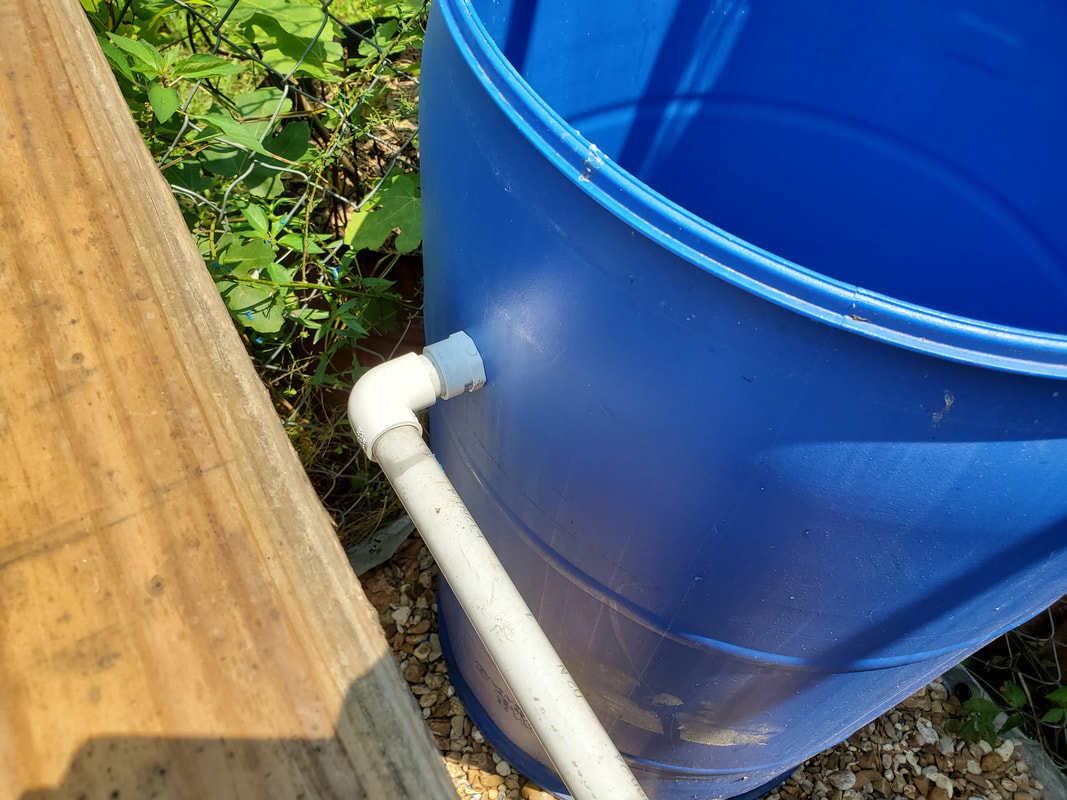
3/4" male thread to 3/4" female smooth adapter threaded in place in side of drum to accept end of drain line pipe.
Outgoing water feed line passing through hole in drum to connect to pipe line feeding HPG's.
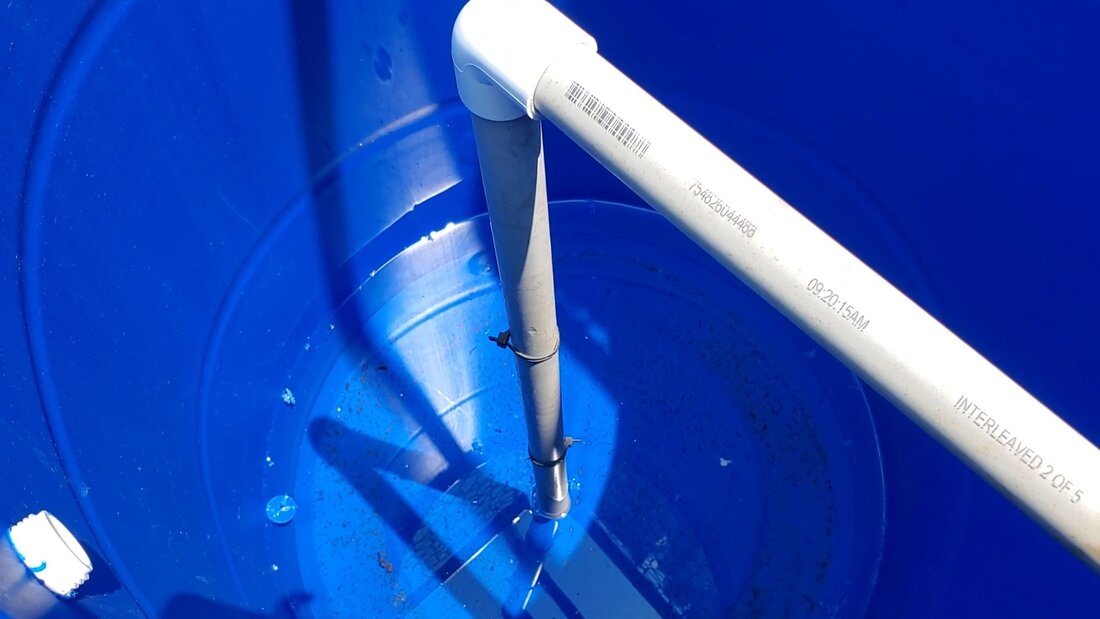
Water feed/outlet line as it goes through the side of drum, angles down to bottom of drum where a pump will be connected to pump up into the line feeding the HPG's. Note adapter for drain line in bottom left of picture.
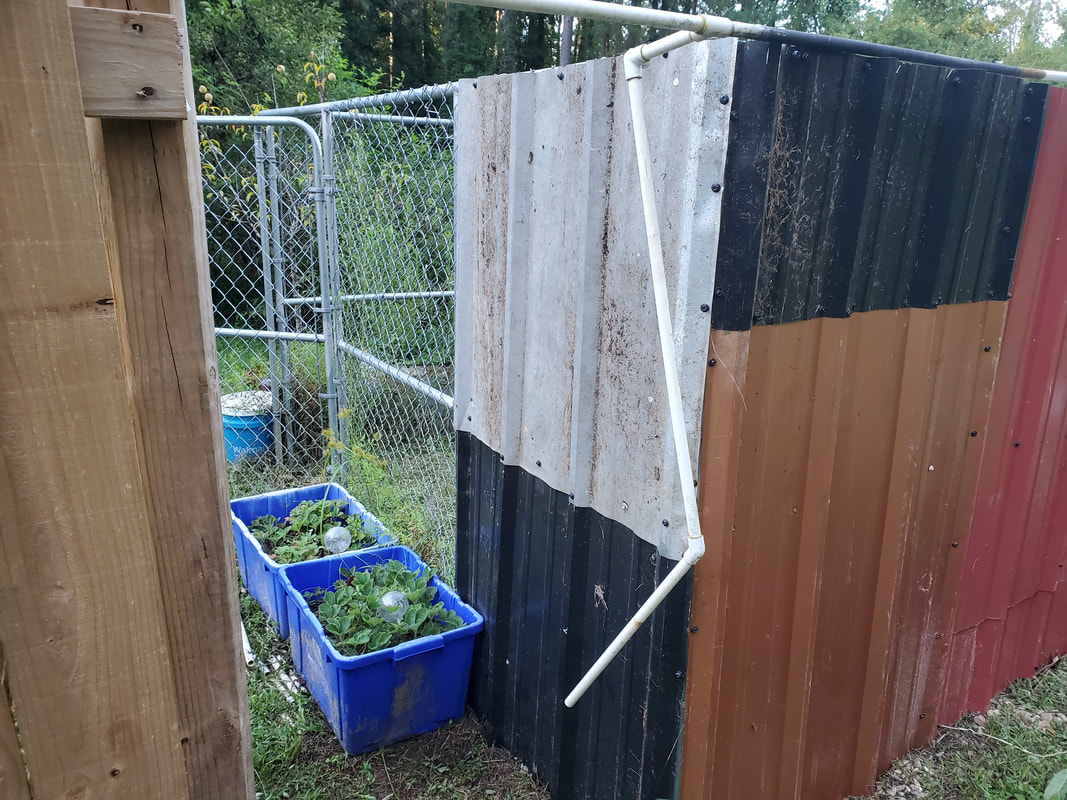
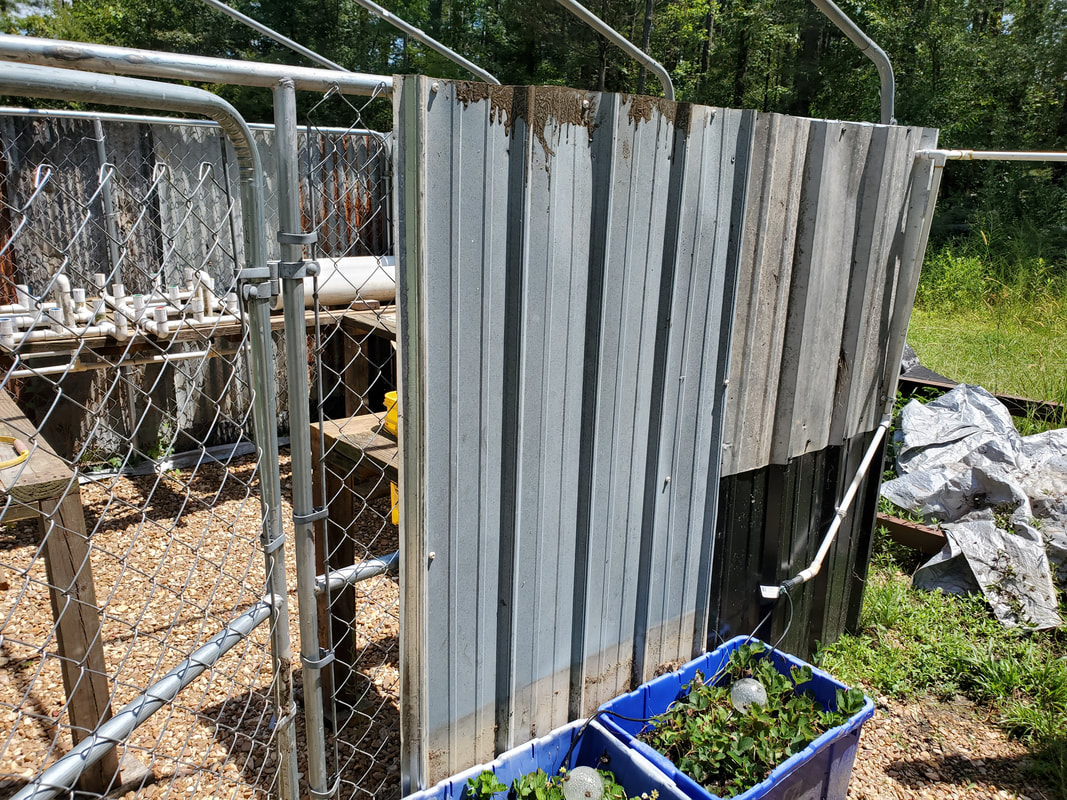
After having found some more corrugated sheet metal from a local source, I was able to get the rest of the walls done on the greenhouse. The panels we got were pre-cut to 6ft, making things easier for us with the idea we didn't have to cut down larger panels plus the size panels we needed were a couple inches shy of 6ft so all I'd have to do is trim a little off the top. I would end up having to cut a small notch at the top of one panel to accommodate the PVC pipe from the micro irrigation system where it passes through the wall to the inside of the greenhouse. I also had to cut the temporary wire ties holding up the PVC pipes, later hanging them to the sheet metal wall using conduit straps. Because of the width of the panels, I had to cut a final piece that was much narrower than the original panels, both walls needed a last piece that was around a foot or so in diameter. Even the door needed a little trimmed from the side of a panel to make it narrower to fit. I did have to cut a little metal from around the door latch to allow it to be able to be worked as designed. There is a small gap on both sides of the door but its negligible given the act that we will probably install a heater inside the greenhouse for use during the coldest nights.
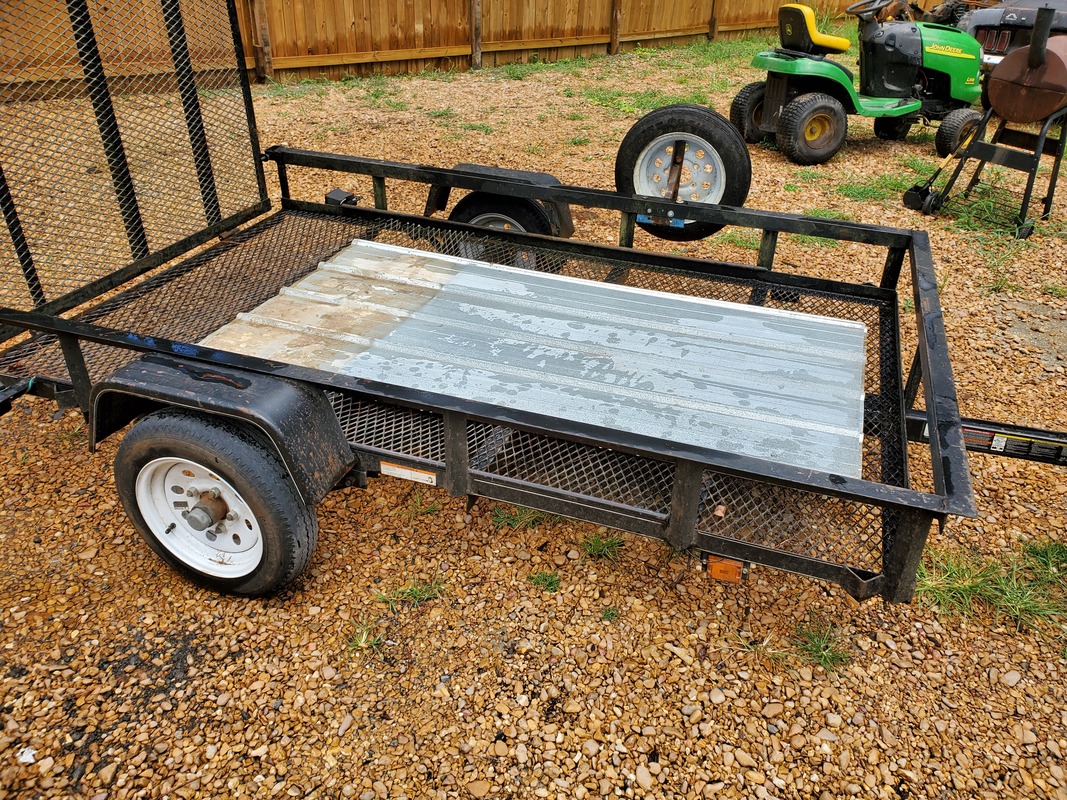
Batch of 6ft corrugated sheet metal panels on trailer.

First two panels secured to Dog Kennel wall with self tapping screws.
Closeup of notch cut into top of panel to accommodate PVC pipe passing through Dog Kennel wall.
Three whole panels installed on north wall of Dog Kennel Greenhouse. Note narrow gap at end of wall that will require cut off piece of sheel metal.
Single panel installed on west wall, leaving narrow gap on end of wall by door.
Narrow cut of sheet metal attached to west wall along with panel on door. Note gap between wall and door.
Last section of panel on north wall, along with door and western wall covered.
After a little hiatus from the Dog Kennel Greenhouse, I decided to come back to the project to finish things up and get this project off the books. It's past time to get this project done and online. I gathered up enough corrugated plastic paneling to cover the roof, along with self-tapping screws and washers. I started off the roofing with a panel from the bottom, then overlapping the second panel going up, with the last panel overlapping and touching the peak. On the other side its done the same way. The last panel at the peak would not be able to be fully secured from the inside as I would have to be able to reach from the outer edges. I had to move the ladder to the outside of the fence to cover all the panels along the outside roofing frame. I was able to climb up on the fence and the top of the greenhouse panel to reach over to secure the last panel at the middle roof frame. Since the panels are 8ft long and the Kennel frame is 10x10, there's a 2ft section that would have to be covered by cut sections of plastic panel.
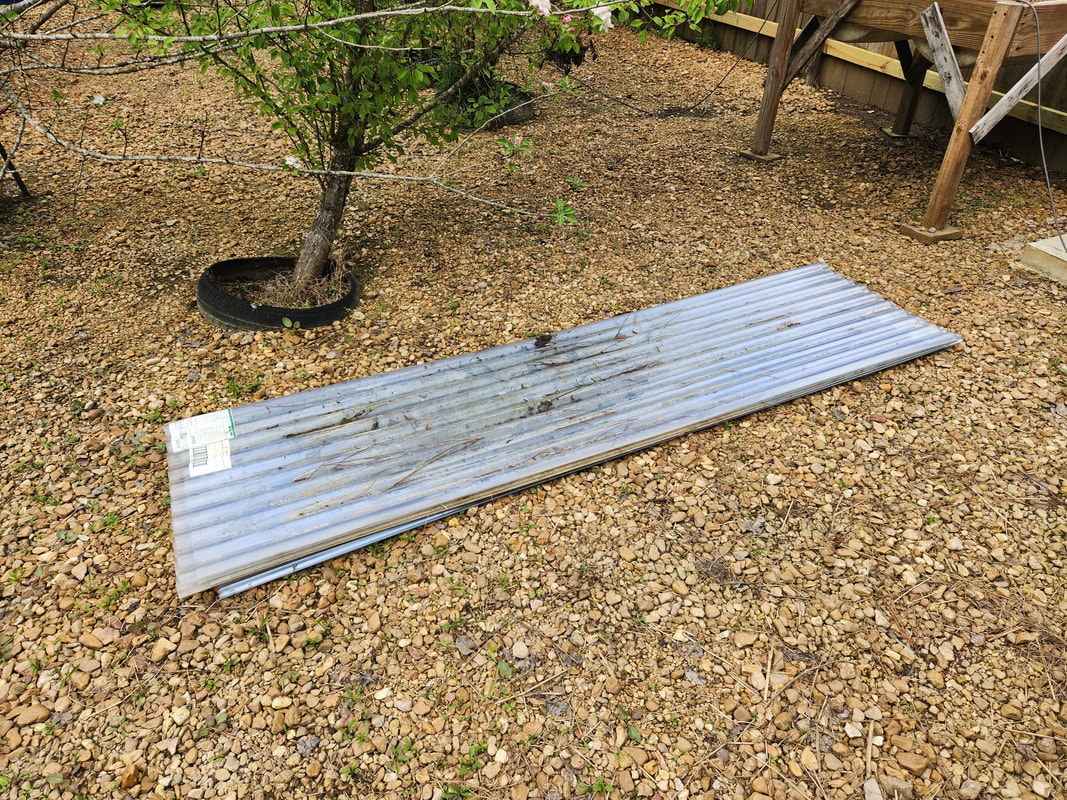
The stack of 2x8 corrugated plastic panels that will be used to cover the roof and upper sides of the greenhouse structure.
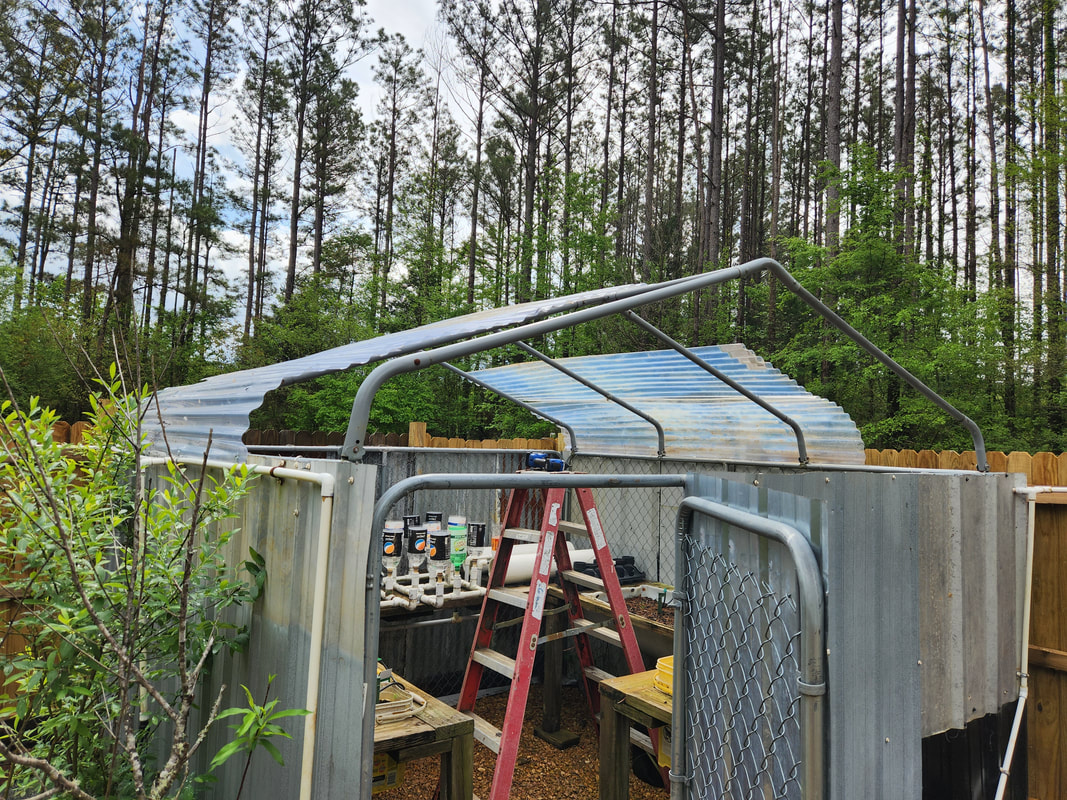
Starting from the bottom, the panels are attached with self tapping screws and washers. In the middle of the panels the screws are secured in the roof frame tubes to hold the panels down securely.
The panels are started along the top of the sheet metal sides of the greenhouse wall.
The last panel had to be secured from the outer sides since there was no way to get to it from the middle. I had to climb up on the fence to be able to reach over to the middle of the panel to secure it. Note the 2ft section that still needs to be covered by cut pieces of paneling.
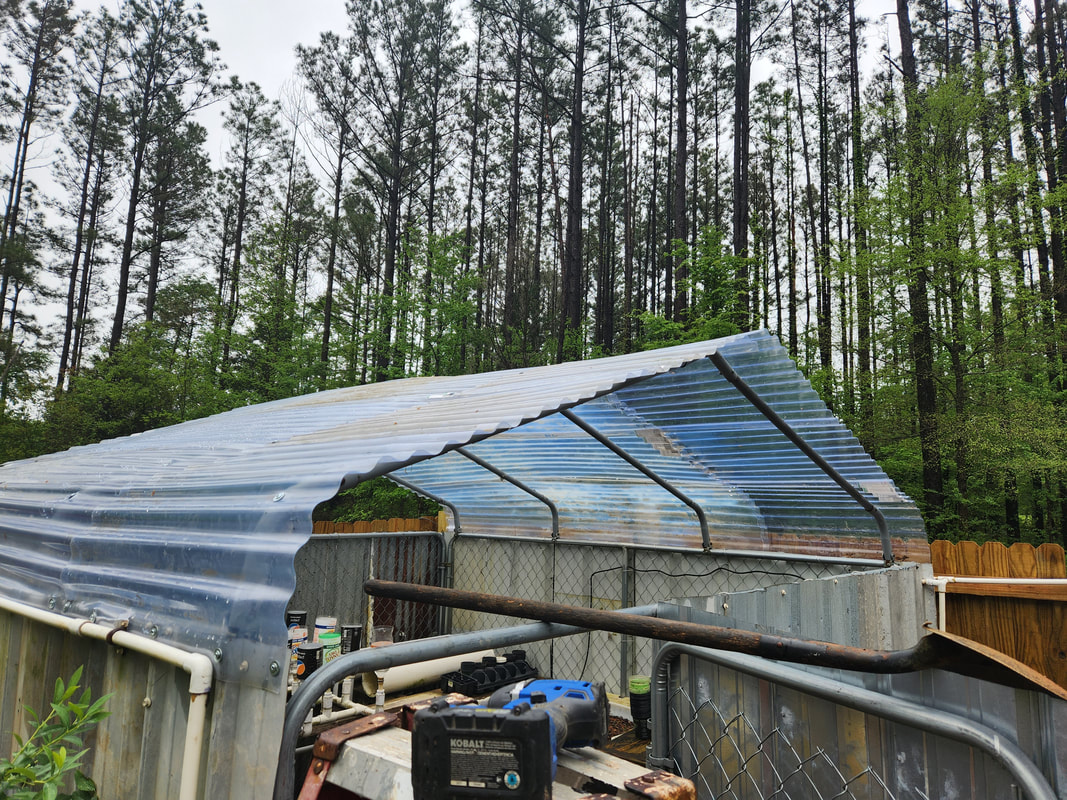
To cover the last section of the roof, I had to cut six 30 inch pieces of paneling, using up two whole panels for this portion of the project. The short pieces overlap the ends of the 8ft panels and overhang at the other end enough so cover the end roof tubes so the joints can be well covered.
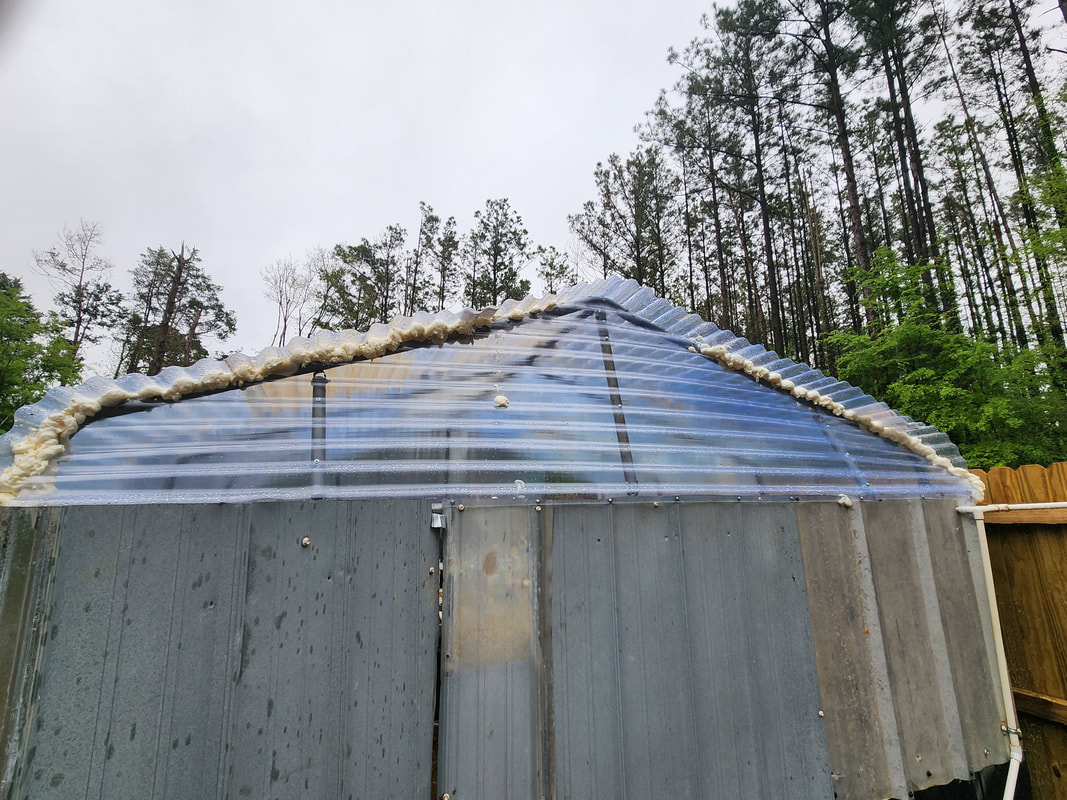
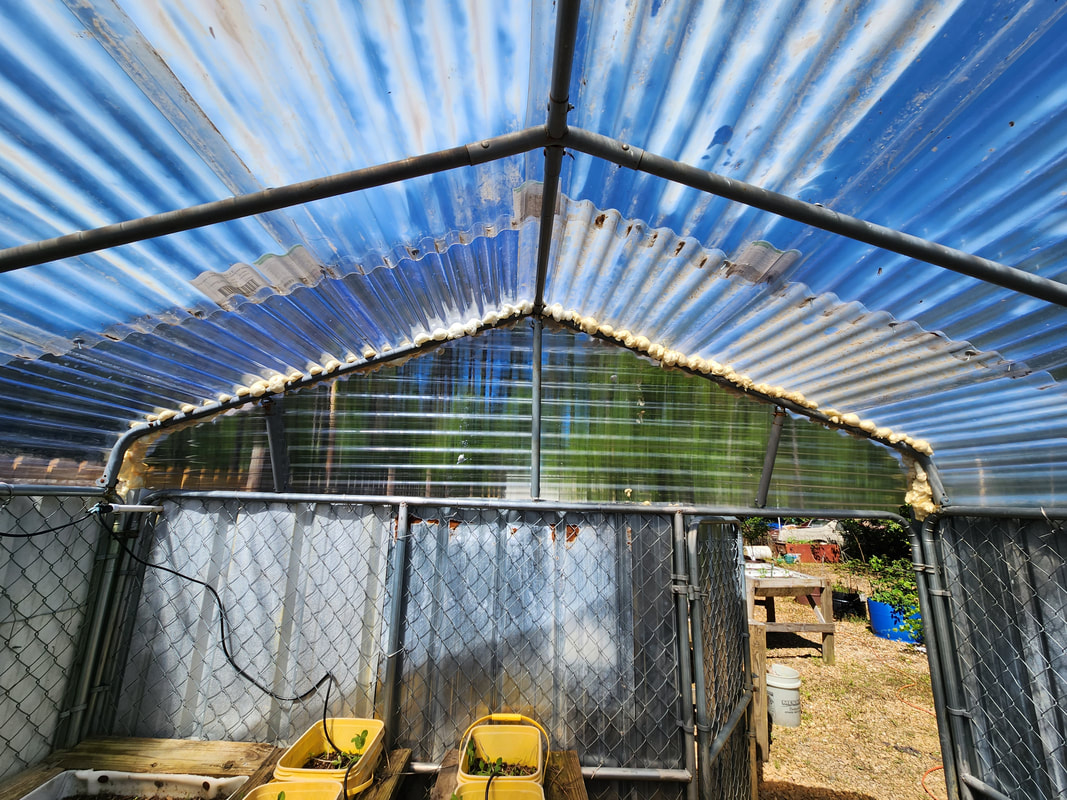
After three tubes were installed vertically as supports for the wall panel, using conduit straps to hold the ends of the tubes, an 8ft panel is cut and screwed in place to produce the wall. A short 2ft section of another panel is trimmed and screwed in place at the end. One of the vertical posts meets at the seam where the 8ft panel and 2ft panel meet at, providing an anchor point for the panels. At the top there was a small section that was open. This was closed up by cutting two small pieces of scrap panel and screwing them in place against the middle post. After producing the entire wall, expandable foam was applied along the top of the wall, closing in the gaps between the wall and the roof.

On the other end of the greenhouse the vertical tubes are visible to show the spacing that coincides with the dimensions of the plastic panels.

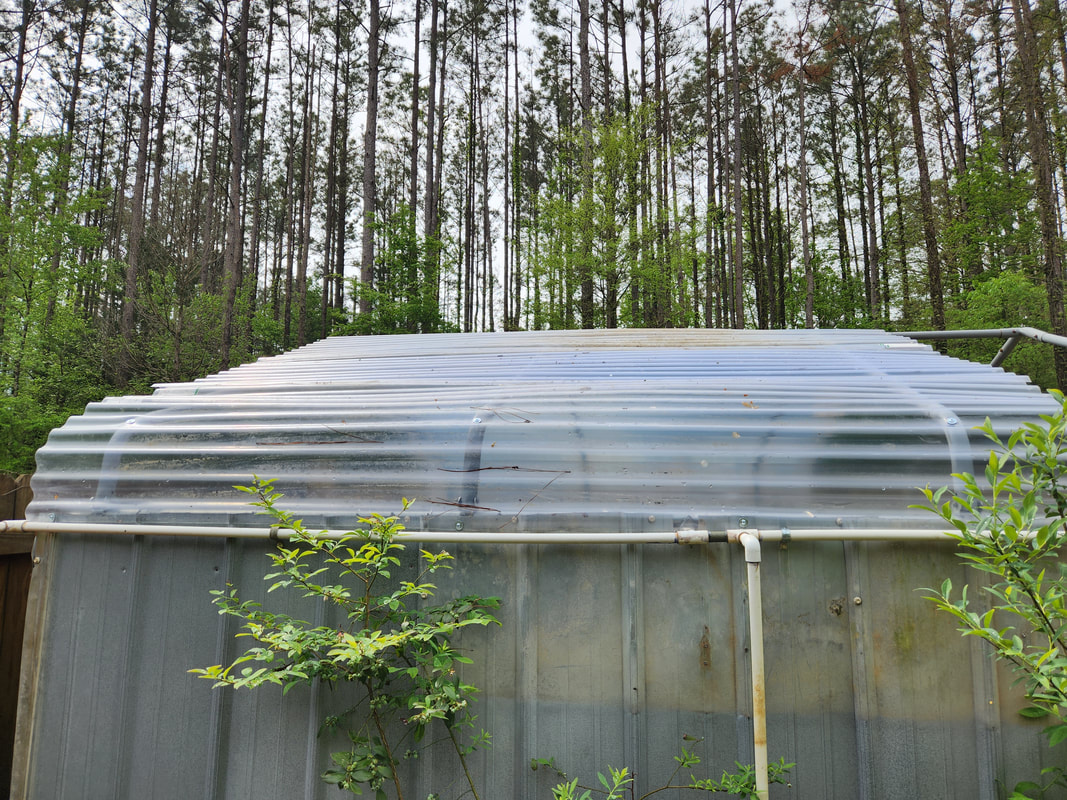
The east side of the greenhouse with all the corrugated plastic in place, including the short 2ft section and the small triangular pieces at the top middle. Self tapping screws and washers are all over, ensuring the panels are secured in place.
I took a moment to spray some expandable foam around the top of the side panels to fill in the gaps between the side and roof panels. I ran out of foam before covering the entire length of the seams. More foam as well as caulk will be used to seal the joints and seams where the panels meet or end. I also took a moment to adjust the hinges on the door, and trim the top of the sheet metal, allowing the door to fully close.
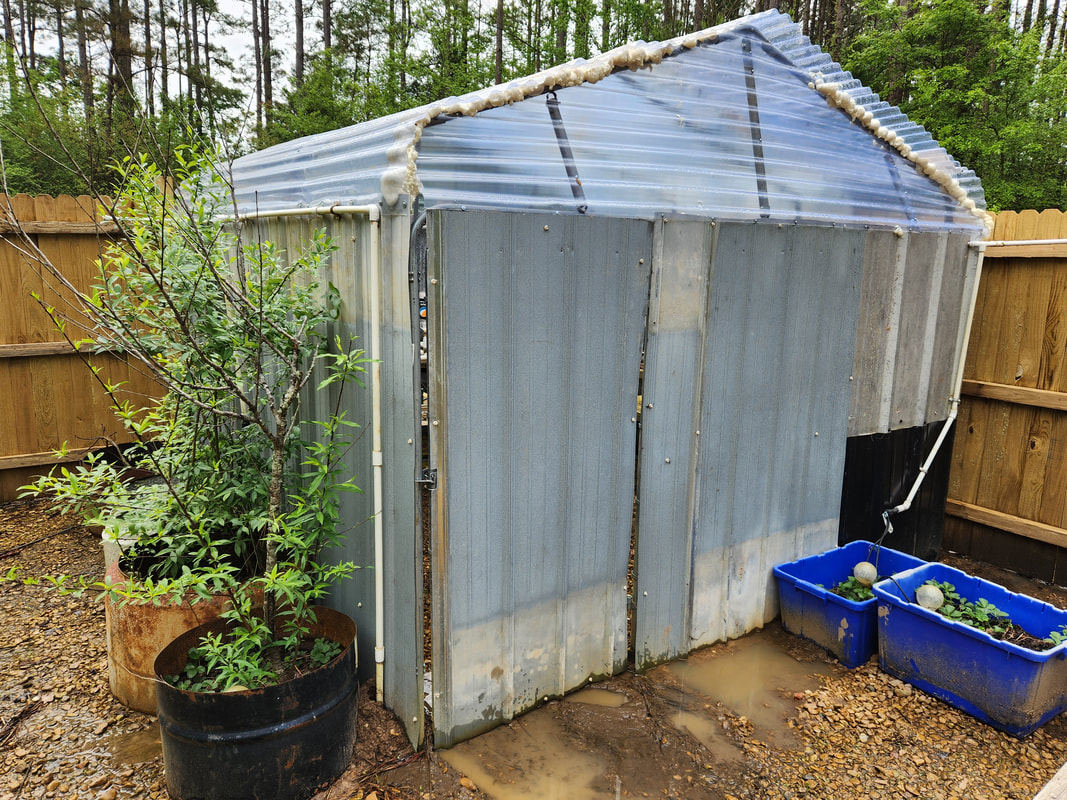
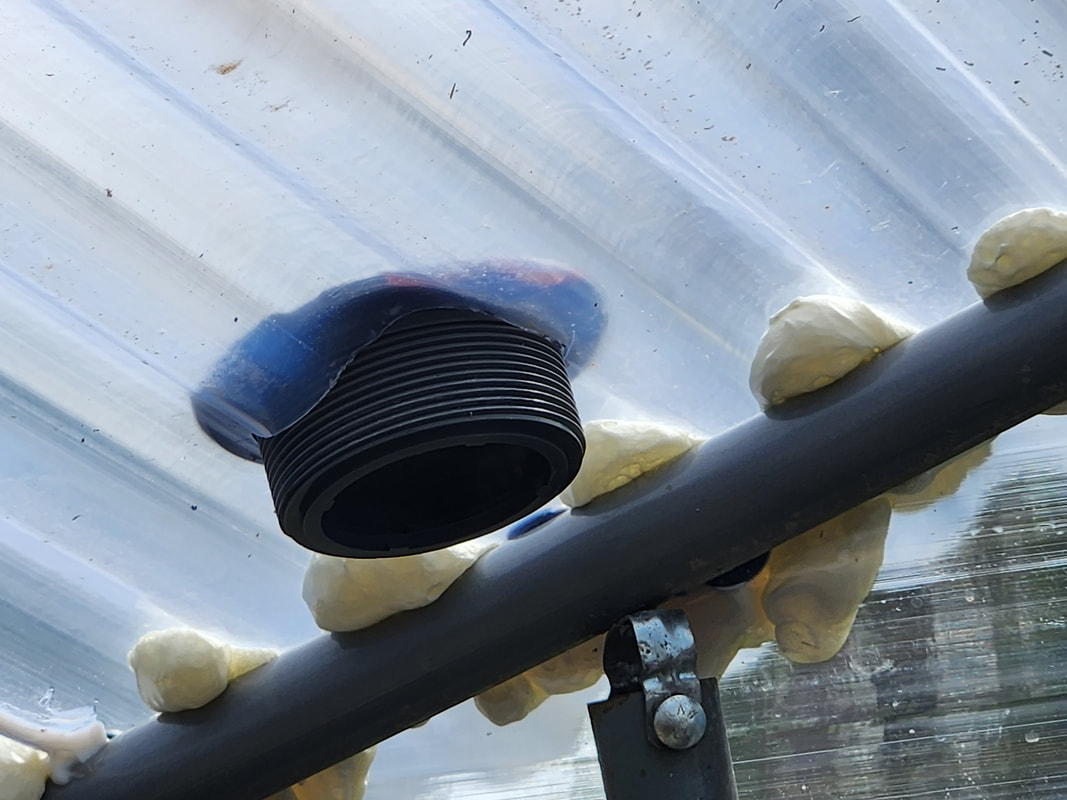
With caulk and more foam in a can in hand, I was able to finish up the west wall and most of the east wall on the plastic part, as well as caulk up the seams where the plastic overlaps and meets. The longer sheets were caulked from the inside since they overlap and would shed water anyway, the caulk on the inside would hopefully prevent moisture from somehow making its way to the inside of the roof. The joints where the shorter panels meet were caulked from the outside since these joints would allow water to seep in. Another thing I also knocked out was a drain system for the roof that would empty into the hydroponic garden drum with the purpose of refilling the drum when it rains. This consisted of a shower drain with a screw down retaining cap connected to some PVC fittings and a length of straight pipe emptying into the drum. The last thing to address is the hydroponic gardens themselves. With the addition of a submersible pump, I was able to run the system and make the necessary changes to make sure the system would actually work. This consisted of raising the Double Barrel system up on wood platforms, switching the input and output pipes around, then raising the drain overflow pipes on the soda bottle systems so the water levels were allowed to raise up high enough to fill the soda bottles as well as flood the DBHPG. Everything had to be setup in unison with each other. If the DBHPG stayed low, then water would've never rose high enough to fill the soda bottles. If the drain overflows weren't raised up then water wouldn't be able to fill the DBHPG or soda bottles. With that all done, the entire hydroponic system in the greenhouse is ready to go. With the roof sealed up and the drain/drum refill system done, I can move on to the other little bits and pieces that will make up the overall greenhouse system.
A shot of the inside of the roof with the foam sealing the entire west wall along with the caulk along the seams where the shorter 2ft sections meet the longer 8ft sections.
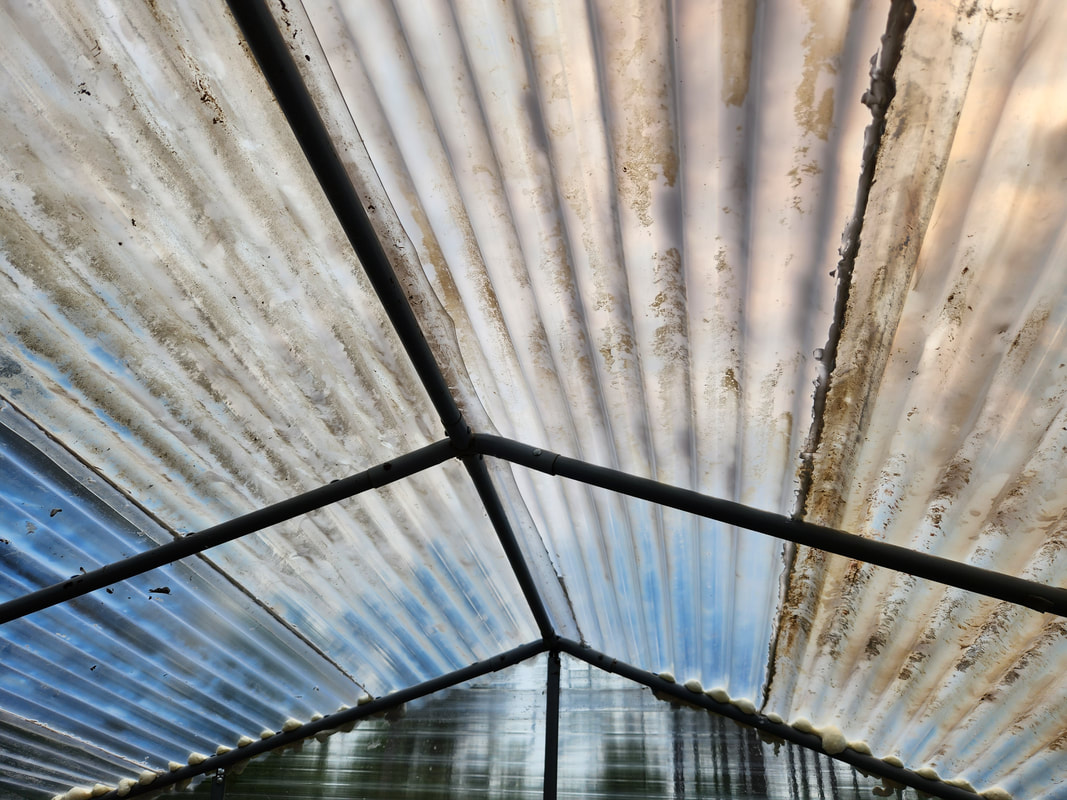
The seams where the 8ft panels overlap one another shows the caulk applied on the inside, running the length of the roof. The west wall in the lower background also has foam in place.
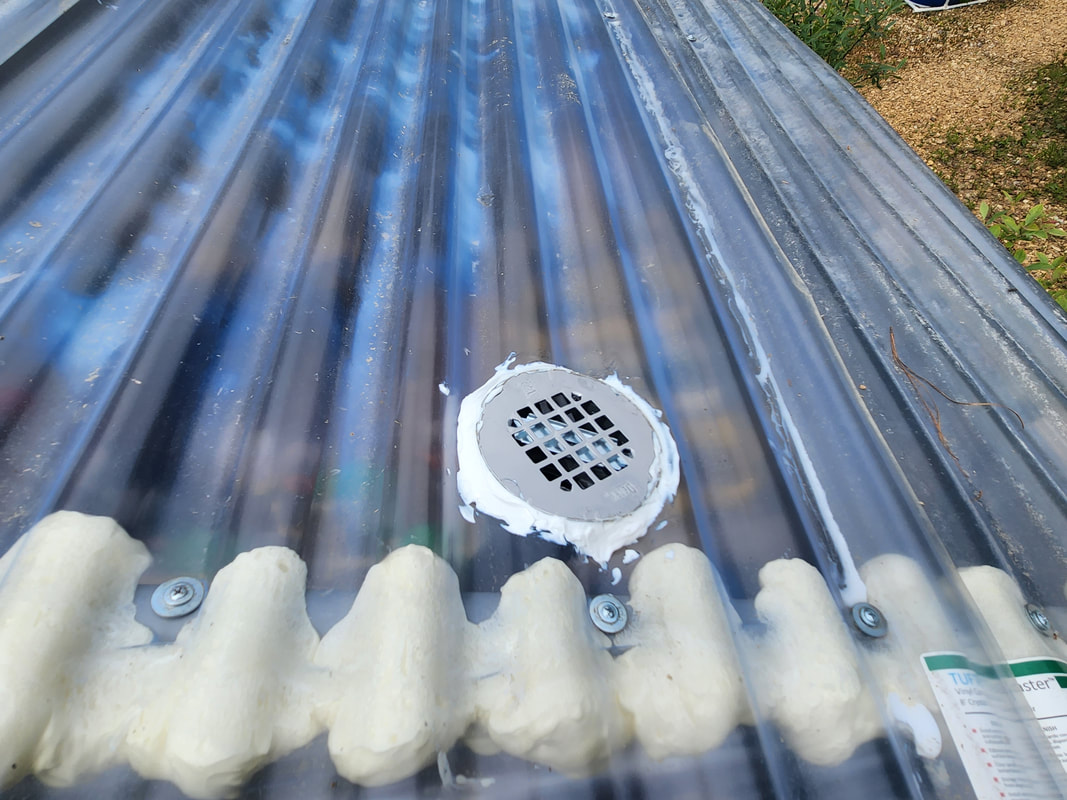
A closeup of the foam on the east wall being obvious, the shower drain turned roof drain is in place with caulk around the base of the drain piece to seal the openings that are present due to the corrugated surface.
Before applying the caulk, the screw down cap for this drain will hold this piece in place against the corrugated plastic roof. Even though it won't help seal anything, the rubber washer and hard washer that would normally seal the floor of the tub/shower that this piece is normally used in will still be applied, if for no other reason than to cushion the contact point between the screw down cap and the plastic roof.
The entire drain assembly completed, showing the PVC coupling and pipe on the drain, along with the 45 degree elbow that then connects to a 4ft length of 2" PVC pipe. Because of the angles of the roof and PVC elbow, the straight pipe would still be crooked, but still terminates in the drum. A 2" conduit strap/bracket held with a single lag bolt holds the end of the pipe in place against the inside of the drum. The strap sprung outward from the drum, not allowing the second lag screw to hold in place in the plastic of the drum.
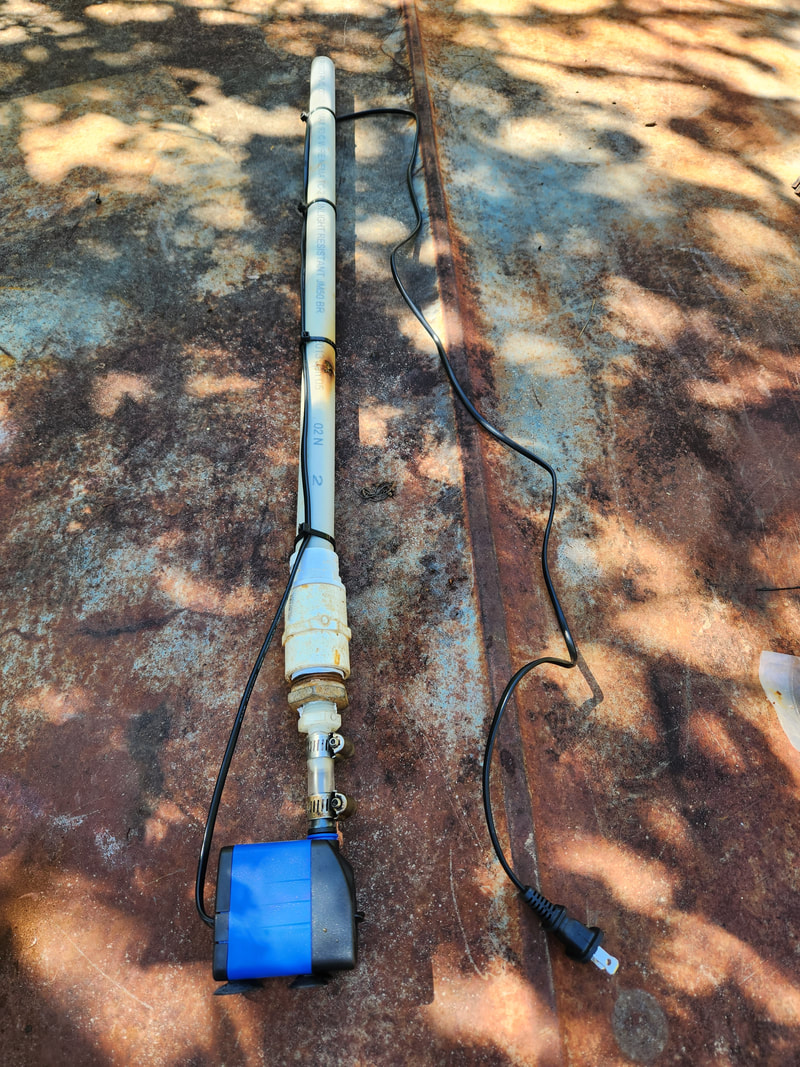
The fountain pump turned into a cheap submersible pump assembly with the aid of some pipe fittings to terminate at a hose barb, allowing me to use a short piece of hose and clamps to couple the pump to the length of pipe that would go in the drum. The power cable is zip tied in place.
Two 2x4 wood platforms were made to raise the DBHPG to a level that would allow the water level to raise high enough fill the soda bottle assemblies to the left.
The drain overflow pipes on the soda bottle garden systems needed to be raised up to the same level as the modified soda bottle planters to allow the water level to raise high enough to fill the soda bottles as well as the DBHPG assembly. This was done by just cutting the 1" pipe and taking a 3/4" pipe, grinding the ends to make the pipe a little bit narrower so the 3/4" pipe could be inserted into the ends of the 1" pipe. Extra 3/4" pipe was added along with a coupling at the bottom of the drain overflow.
The input/output pipes on the DBHPG were switched around since the original output side was a little lower than the other. Now, the input is on the lower side, so when the water floods the pipes, it will raise above the input port before it drains out of the output pipe.
With everything dialed in, the pump is doing its job to flood the soda bottle planters, as indicated by the old algae water from the drum.
The DBHPG is also flooded as intended during the operation of this system.
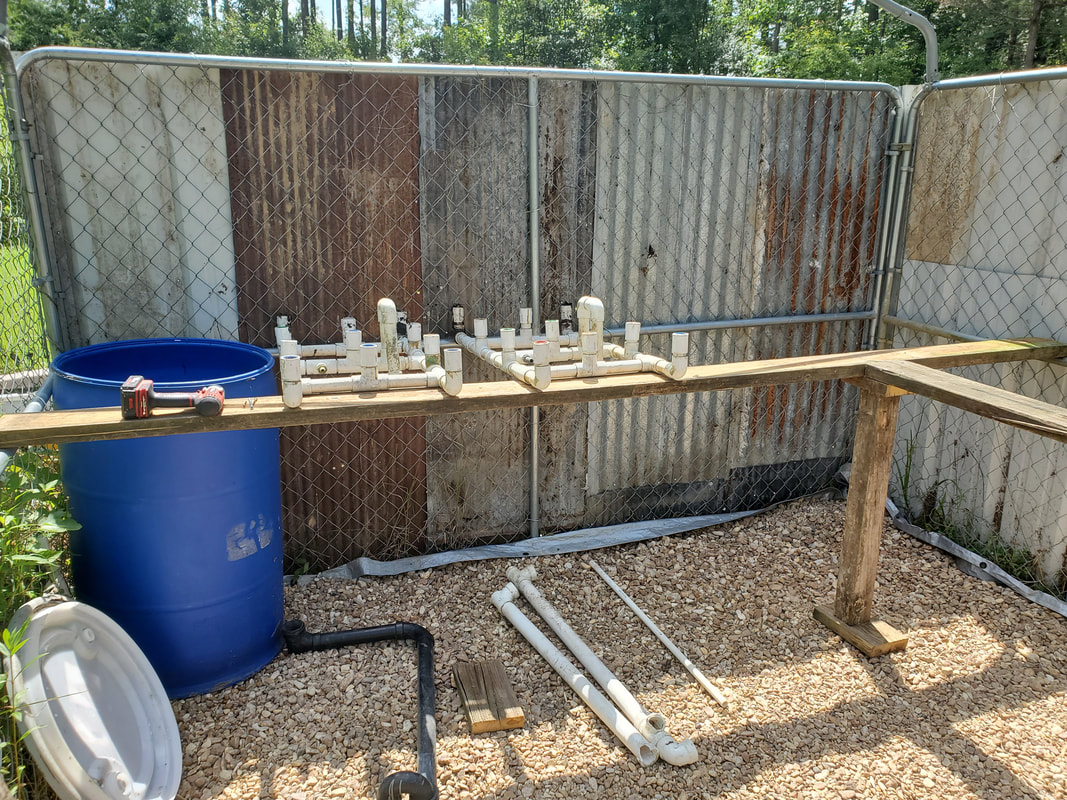
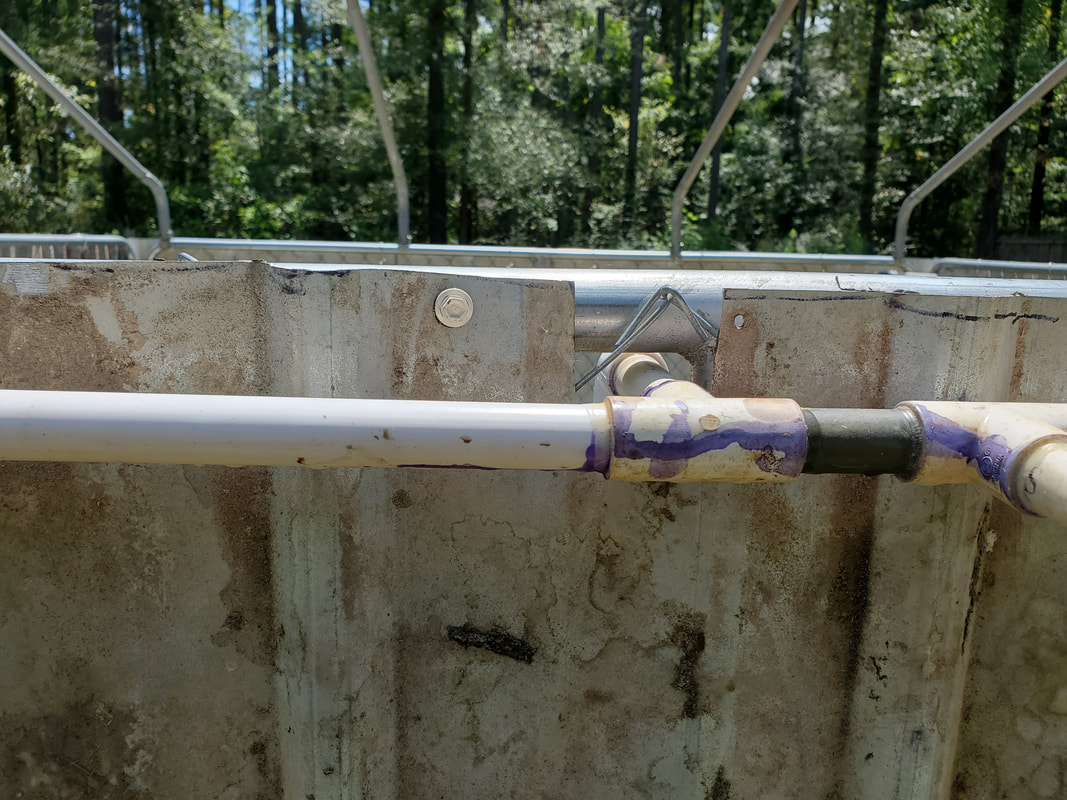
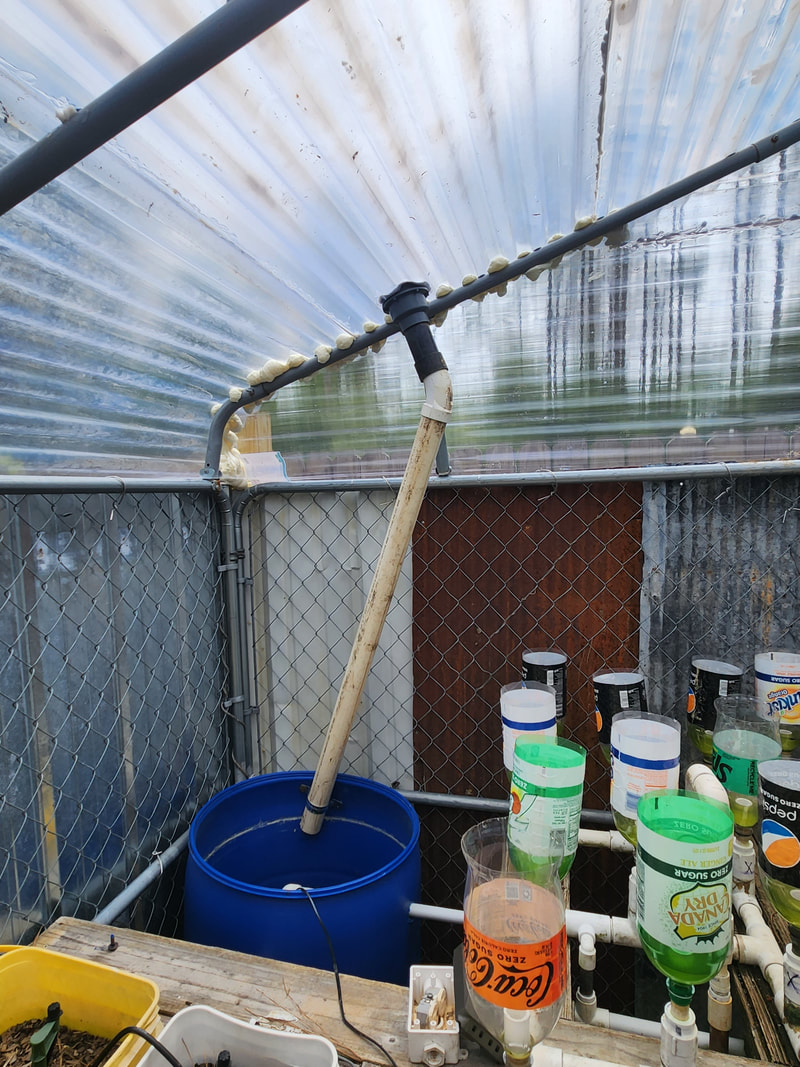
The next order of business is getting power to the Greenhouse. This was accomplished by first setting up an outlet box inside and hanging a timer next to the box for the hydroponic setup. From there I routed a 100ft extension cord from the outlet box, around the perimeter of the greenhouse frame and outside to run along the fence line all the way to the opposite side of the garden and along the west fence of the garden. From here the cord stops at the area where we have another extension cord routed to, which is plugged up to the Storage Trailer. At this spot another outlet box is set up in a temporary manner, plugging the extension cord from the Storage Trailer to the outlet box while the extension cord going to the Greenhouse is plugged to the outlet box like a normal load. With the power established, I was able to set the times on the timer for the hydroponic garden. I also took care of the tap in the plumbing which will feed water to the hydroponics drum, allowing it to take on water whenever the irrigation system is cycled on. At the same time I planted the Double Barrel HPG along with the drum beds and remaining bucket beds. Some of the soda bottle planters were also planted. The hanging planter was planted along with the upside down hanging planter.
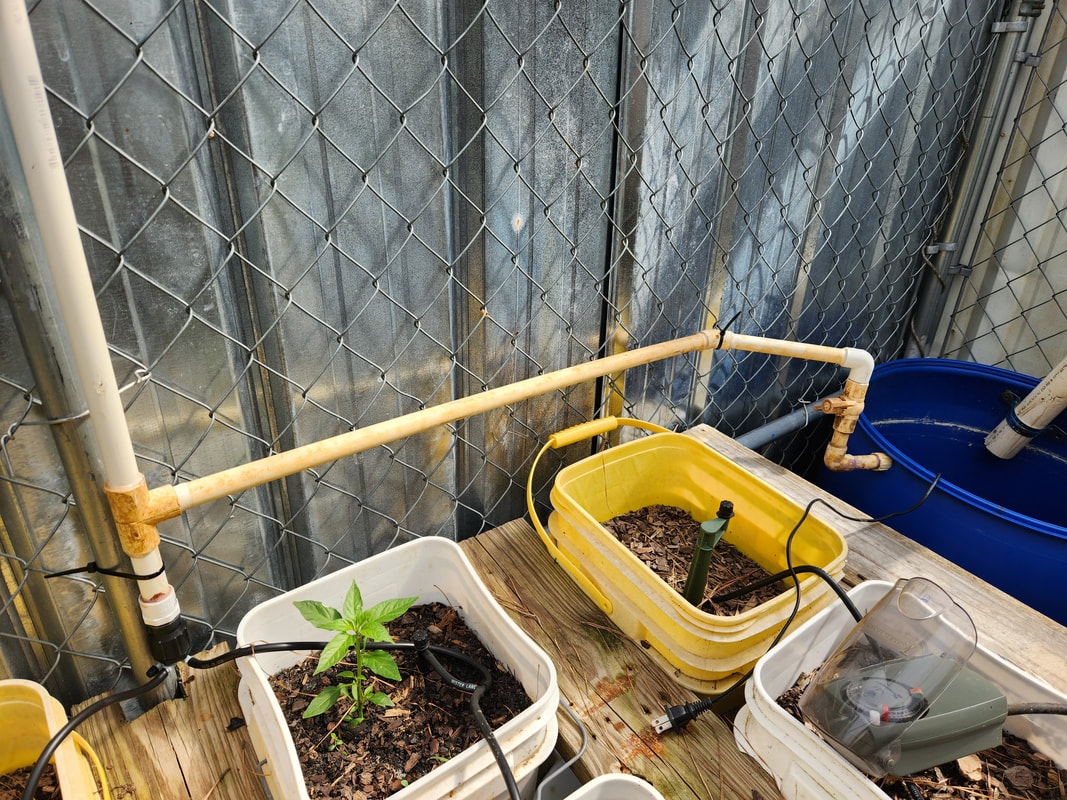
A tee tap in the PVC line feeding the irrigation manifold is connected to a length of PVC pipe that terminates at the drum, with a regular ball valve in place. I would've used a float valve but didn't have one on hand. Turning the valve only 1/4 to 1/3 open will simulate the volume that a float valve would supply, except the automatic shut off part. The threaded end of the fitting in the drum does allow for the attachment of a float valve later on though.
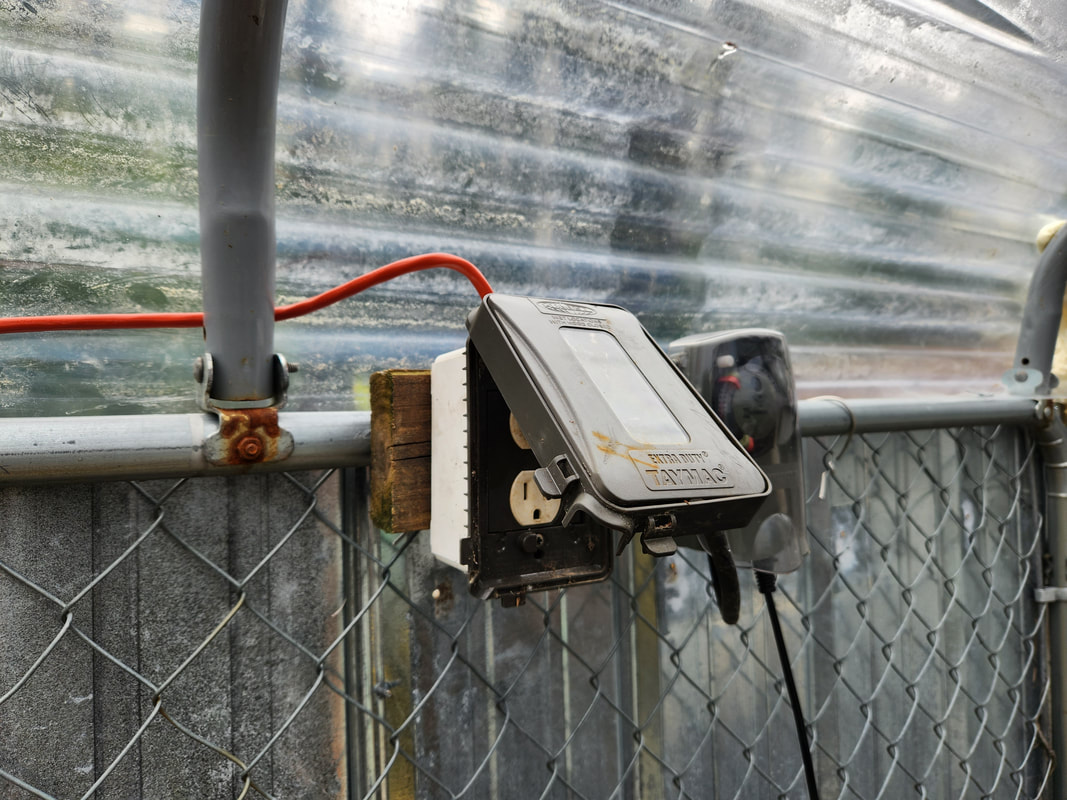
A 2x4 hung on the tubing of the kennel frame holds the outlet box and timer for the hydroponic gardens. The orange cord hardwired in place is routed around the top of the kennel frame to the outside at the fence line.
The orange cord is routed around the top of the kennel frame wall, zip tied in place. The 100ft extension cord was cheaper than 100ft of 3 conductor cable.
The orange cord is tacked in place along the bottom 2x4s of the fence panels all the way to the west end of the garden where the cable is then laid on the ground and routed over to the power spot midway across the west fence line.
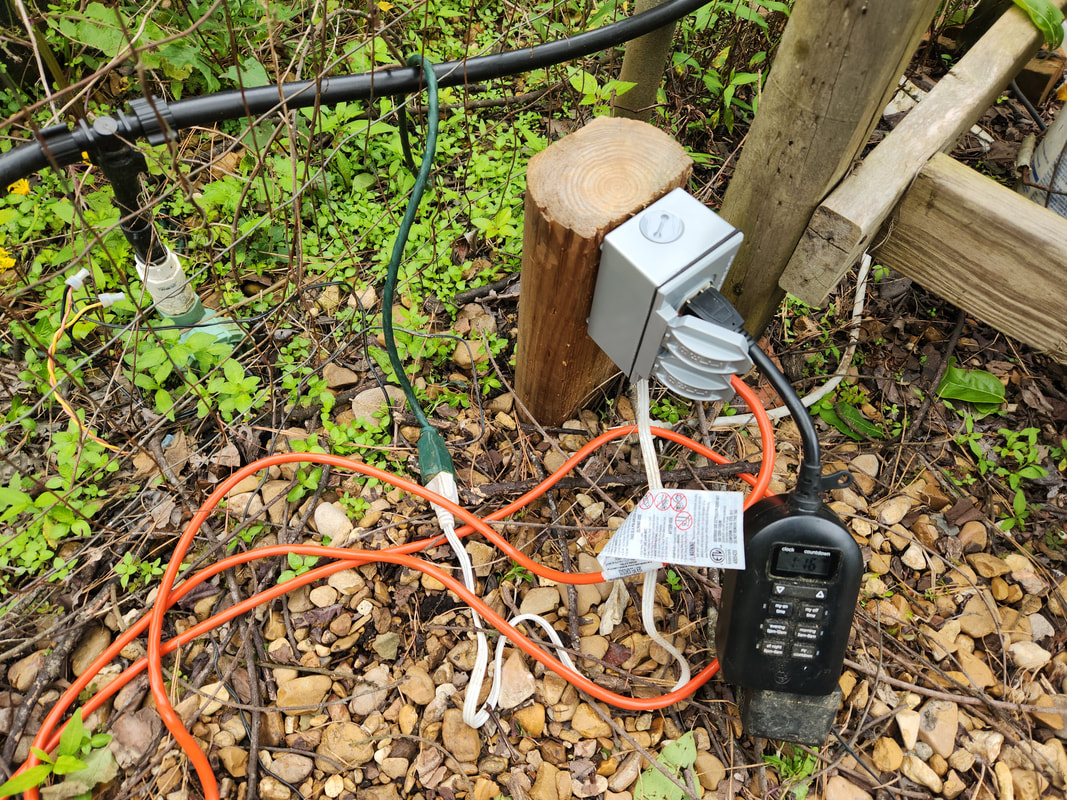
A landscape timer is hammered into the ground and an outlet box is attached. A short length of cable with a male plug is hardwired in to the outlet box. The green cord plugged to the male plug goes back to the Storage Trailer where its plugged into another outlet box. All of this stuff is obviously removable in this state but at some point in the future will be made permanent with a buried length of cable that will be hardwired into the Storage Trailer's outlet box and this outlet box. The orange cable will also be hardwired into the outlet box.
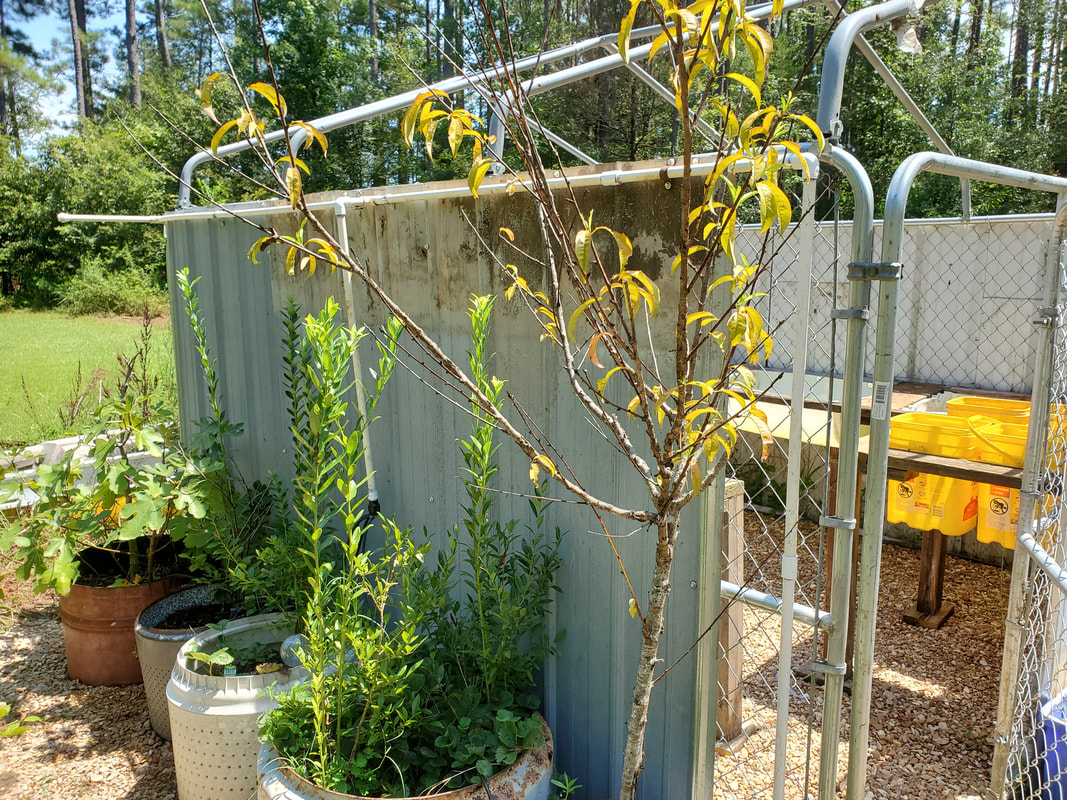
With power supplied to the greenhouse, we were able to plant several plants in the Double Barrel Hydroponic Garden. A mixture of peppers and tomatoes, catnip, basil and oregano are planted, giving us a mixture of our commonly used veggies and culinary herbs along with a treat for the feline bastards.
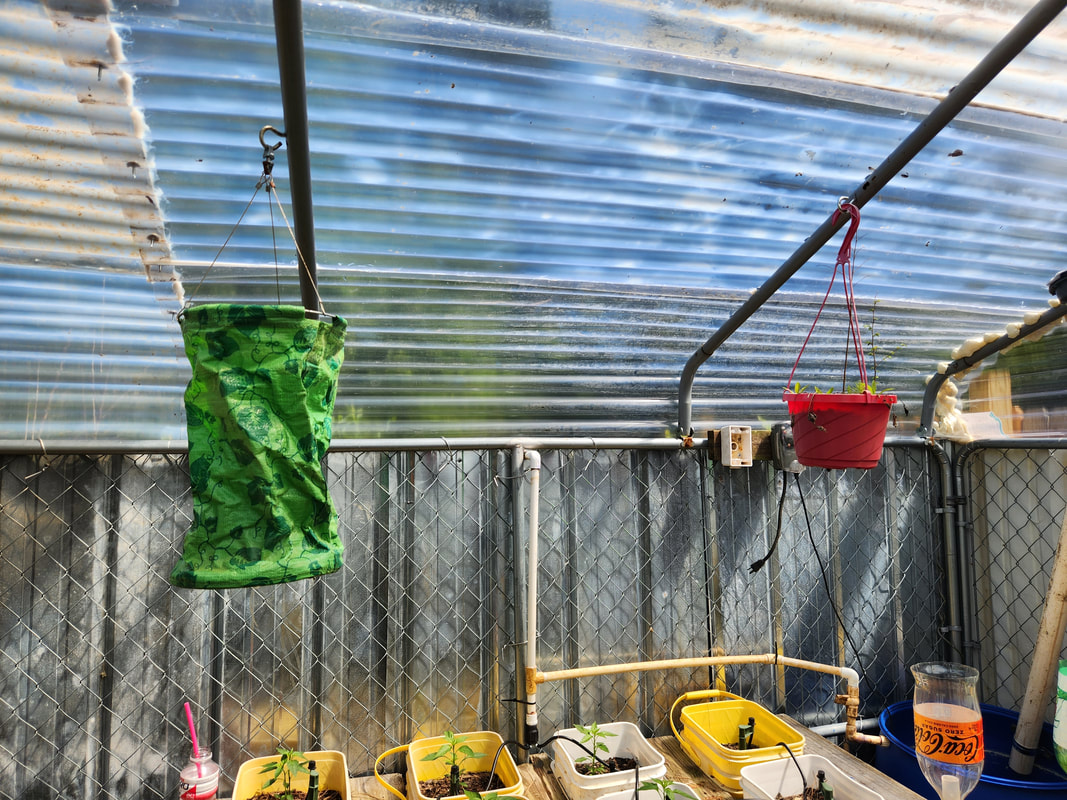
The upside down planter to the left will be planted with a single tomato while the hanging basket to the right will be planted with a catnip plant. Water globes will be placed in both planters in order to allow for spacing between watering intervals.
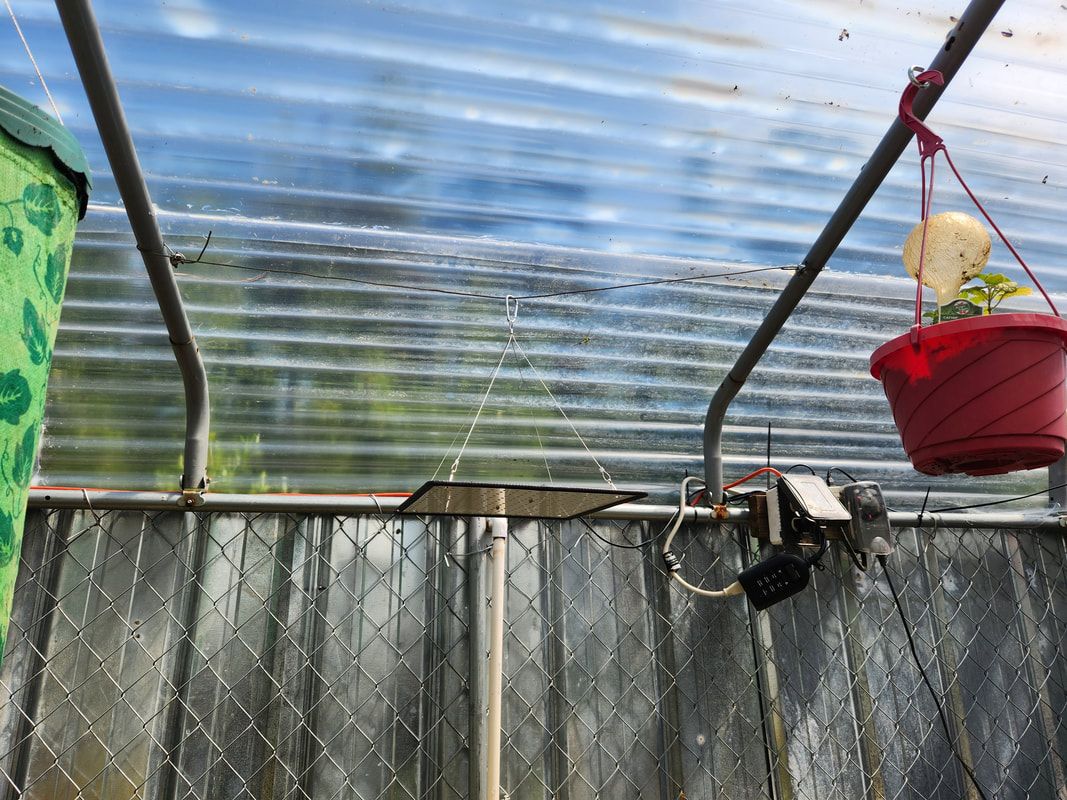
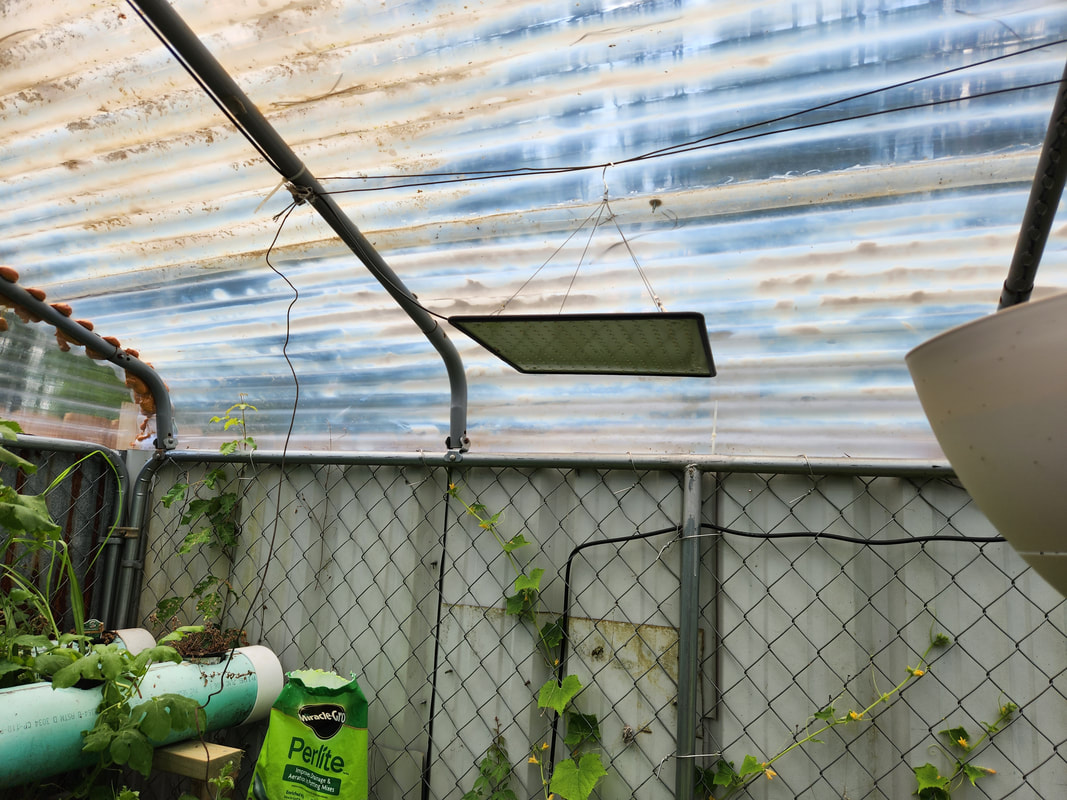
We did get a couple UV LED grow lights to hang in the greenhouse. I hung one unit over the eight bucket beds and one over the soda bottle HPG. These lights give off a good amount of light, showering the plants in a bright purple light. I will need to add a couple more lights to cover the DBHPG and the half drum raised beds plus the section of four buckets. I also added a timer that turns on the grow lights for 12 hrs, from 6pm to 6am. I also added a solar panel and a 12v car fan to help in pushing out the stagnant air as the temps will get pretty stifling inside since the outside temps are also creeping up as well. Eventually I will try to add a permanent fan in the side that will serve as our ventilation for the greenhouse.
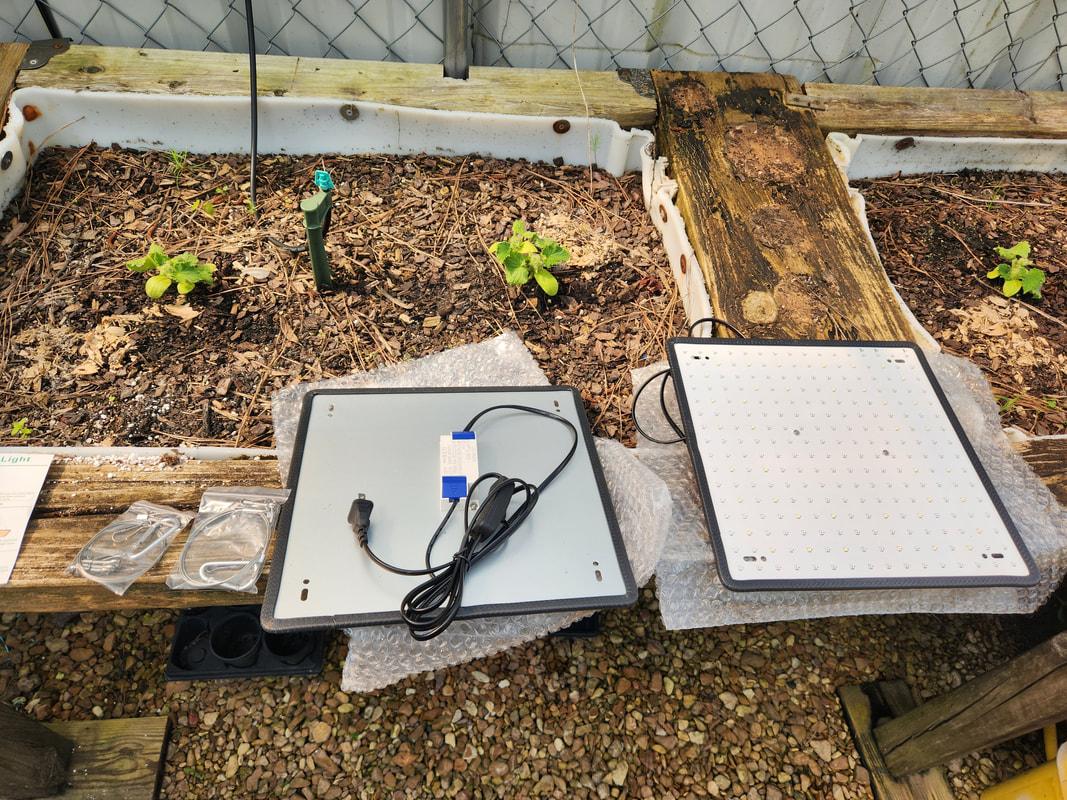
The set of UV LED grow lights that will be getting installed over two spots in the greenhouse. Both lights come with hanging hardware.
I did have to add an extra cable between two of the roof frame tubes to provide a spot for the light to hang directly over the eight bucket bed area. Note the timer that's plugged in for the grow lights.
The second grow light was able to be hung from the peak point of the roof frame, right over the soda bottle HPG. The power cord is zip tied to the roof drain and routed over to the timer.
An extra power strip had to be added since the timer only has two spots and I will still have to add a couple more grow lights.
This small solar panel is temporarily set up on a bucket and clamped to the 12v plug of a fan that's typically used in cars/trucks for air circulation.

The 12v fan is set up on the end of the bucket bed shelf, pointing at the open door to move the air our from the greenhouse.
This grow light is set up over the four pack of bucket beds near the doorway, with some overlapping onto the corner of the drum bed garden side. A short extension cord was sacrificed to make the circuit for this light that connects it to the power strip that supplies the other lights and is connected to the timer.
One of the grow lights set up over the drum planters, with some overlapping coverage by the Double Barrel Hydroponic Garden. An extension cord was made from an old power cord cut from a dead appliance and zip tied to the greenhouse's framework.
