THE BATTERY ELECTRIC BUSH HOG/WHEELED WEED CHOPPER
In the process of trying to clean things up and downsize the amount of random crap we have around the compound and garage, we run across a lot of things that either haven't been used in a while, or are unable to be used or are outright garbage. Those things that are garbage either get scrapped, thrown out for regular garbage, or burned in a brush pile. Those things that are still good or otherwise usable either get sold on the 2nd hand market or get taken to the 2nd hand store for donations. Point is, we don't want stuff laying around that either isn't being immediately used or isn't on standby for later use in the very near future, or in the case of preparedness stuff, emergency use.
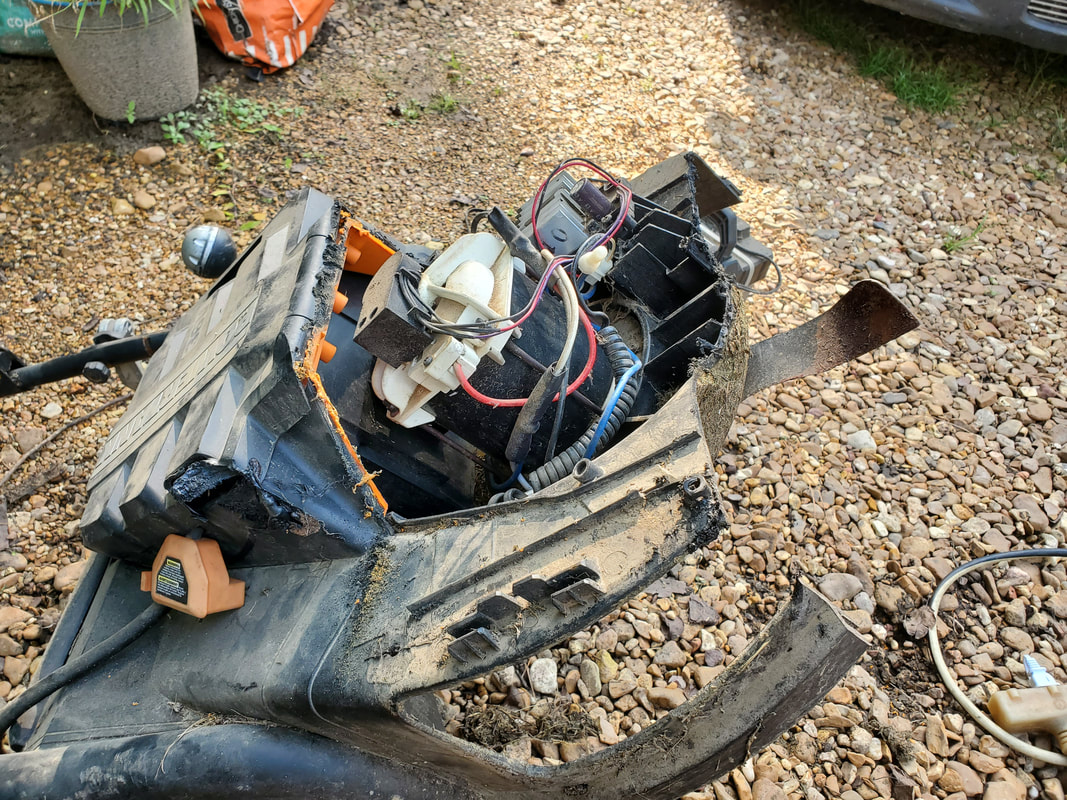
One of the things that we have that was still usable but not to us was an old battery electric lawnmower. This was our first foray into larger battery powered equipment and actually did a fairly decent job when it came to being able to cut grass within reason. The machine was a 36v system that used a battery pack that consisted of three sealed lead acid batteries. I had to remake the initial battery pack after the batteries died but after we got our hands on the Kobalt 80v lithium battery powered mower, this mower ended up pushed aside in a corner of the garage. Because even the new battery pack eventually died and with this mower being outdated, we couldn't even sell the thing 2nd hand for dirt cheap. So rather than scrap it, I decided to do a project with this thing, that is to turn it into an electric bush hog.
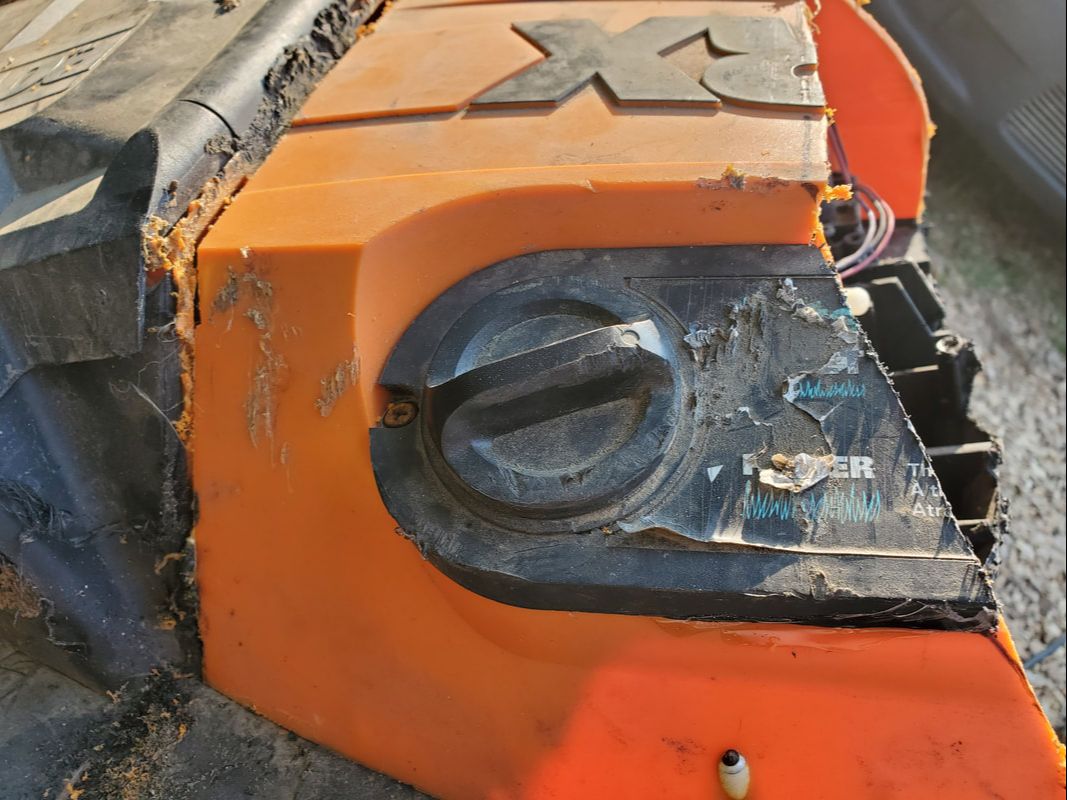
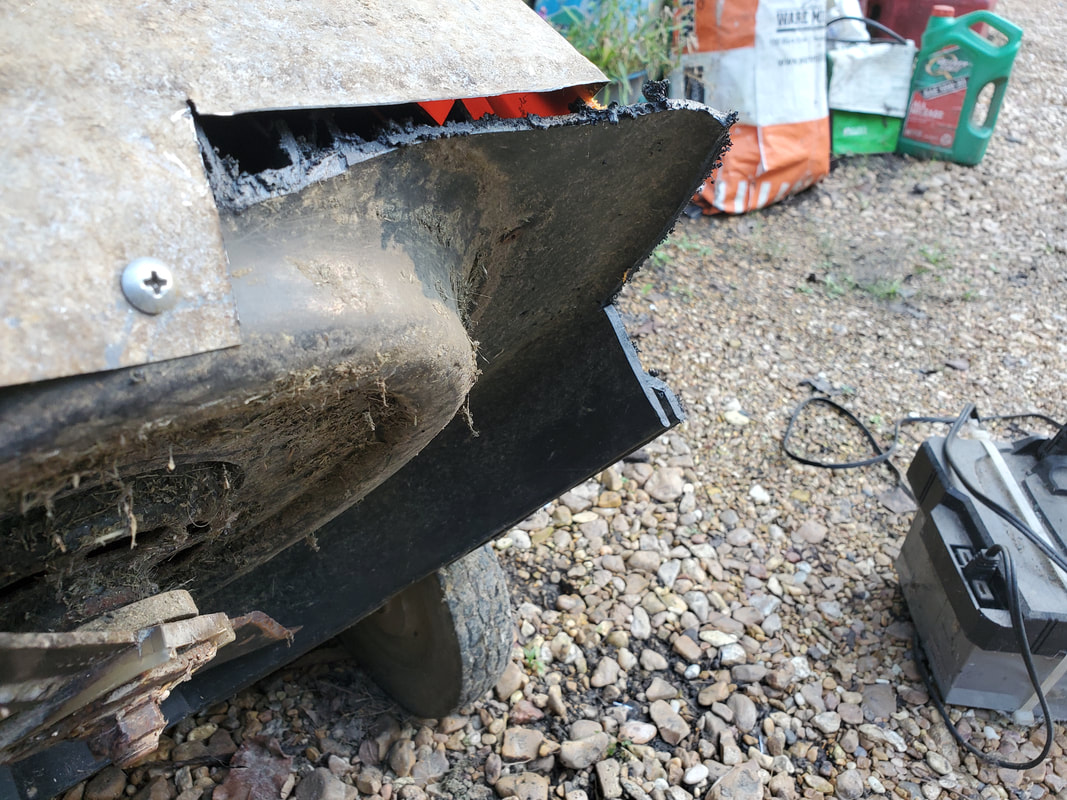
What's a bush hog? Its like a bastard hybrid union between a push mower and a weed eater. The thing looks like a mower with the front half chopped off and the head of a weed eater attached to the front for the sake of being able to be pushed into thick brush on rough terrain where a regular 4 wheel push mower would not be able to be used and too heavy for a standard weed eater to be used. My idea was to just like I said the commercial bush hogs look like: chop the front portion of the mower off but instead of somehow attaching a weed eater head to the thing I just figured that if I cut enough of the front of the mower off, it will expose more than enough of the death blade to allow me to push the machine into brush for the blade to chop it down.
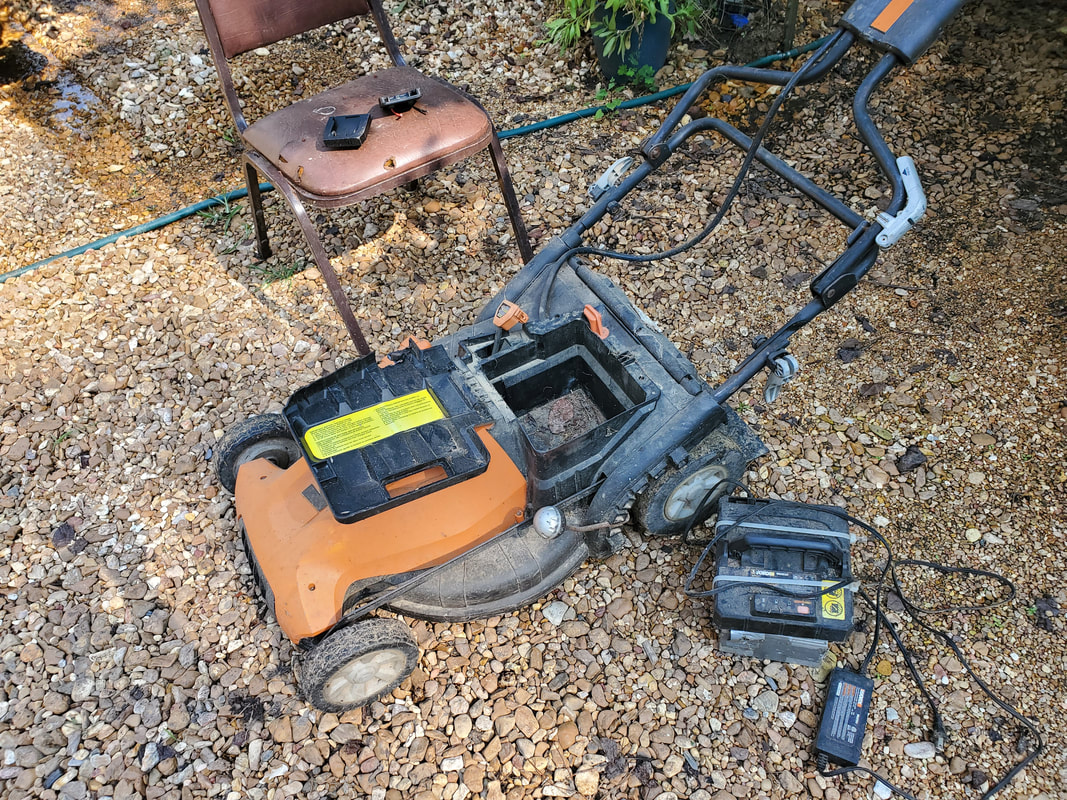
The 36v battery electric push mower with old battery and charger.
First thing was to remove the front wheels from the machine. The height adjustment lever of this mower is set up where a bar attaches to the front wheels from the rear wheels so when the lever is moved it works both sets of wheels simultaneously. I would have to remove this bar just as well since it won't be needed, obviously. The front axle was held on with some simple retaining bars held in place with simple sheet metal screws. The bar was attached with a simple lock washer and cotter pin. The other thing I did was remove the grass exhaust chute from the side, which involved cutting since the screws were too rusted to take the tip of the screwdriver.
Front wheels/axle removed, note grass exhaust cover also removed from side.
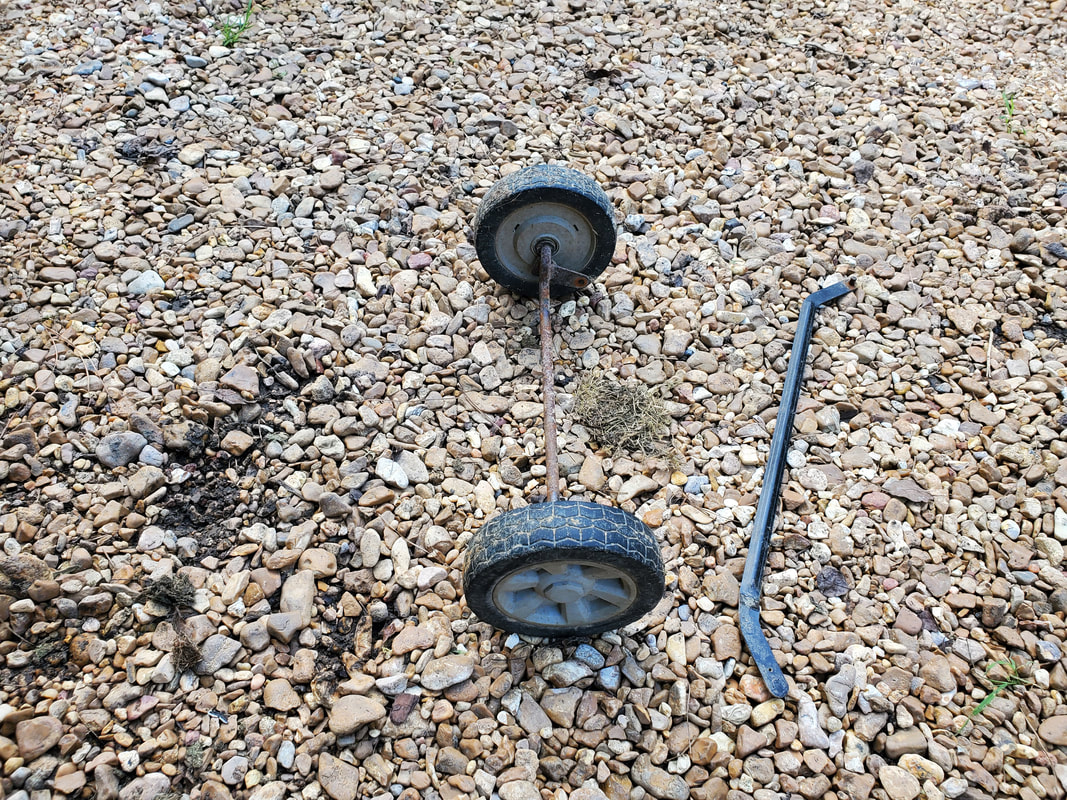
Front axle and height adjustment bar removed from mower.
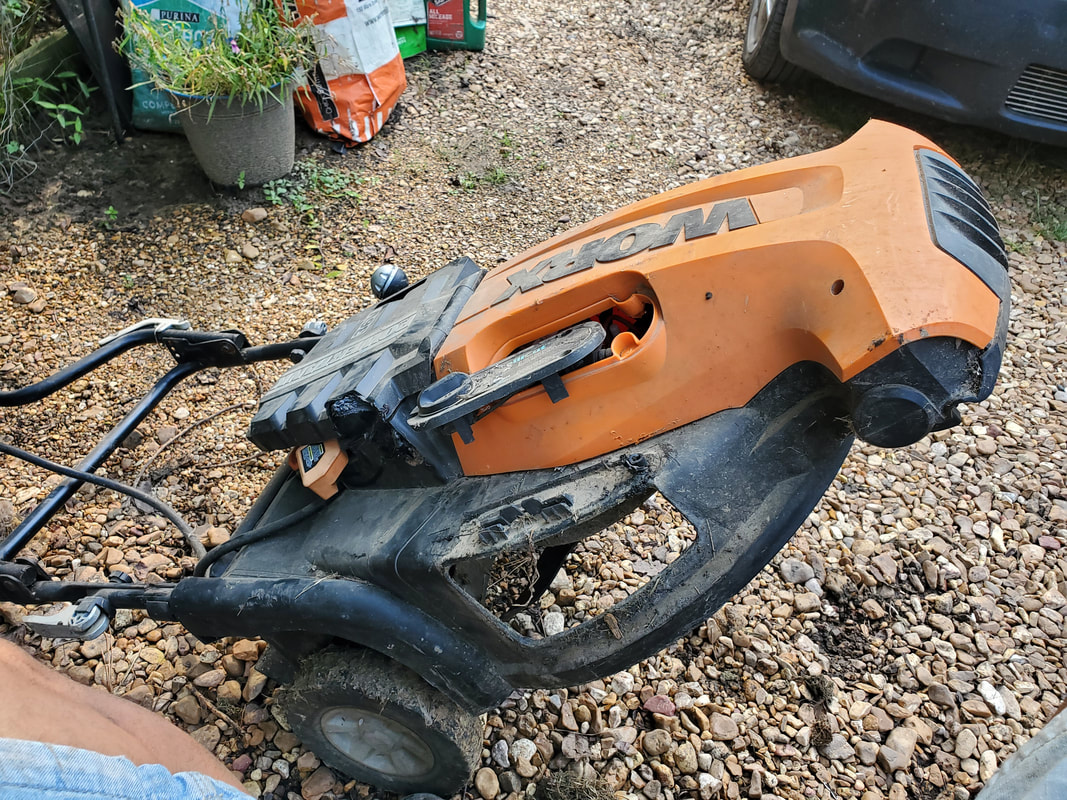
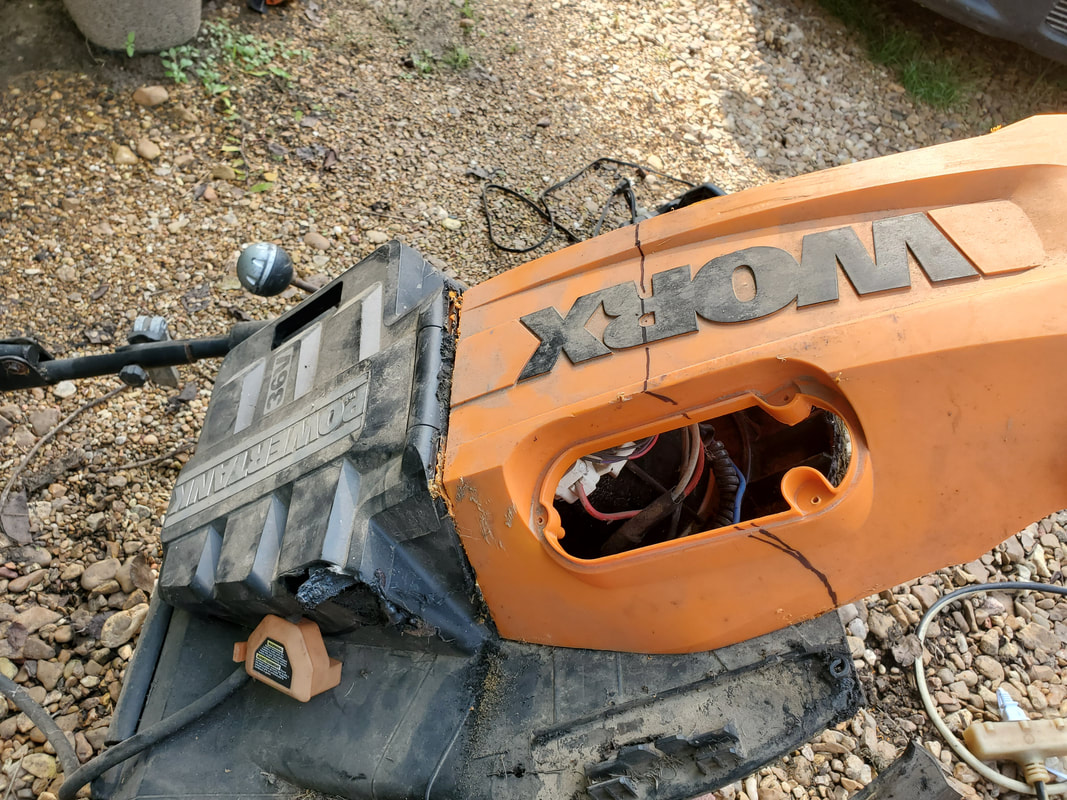
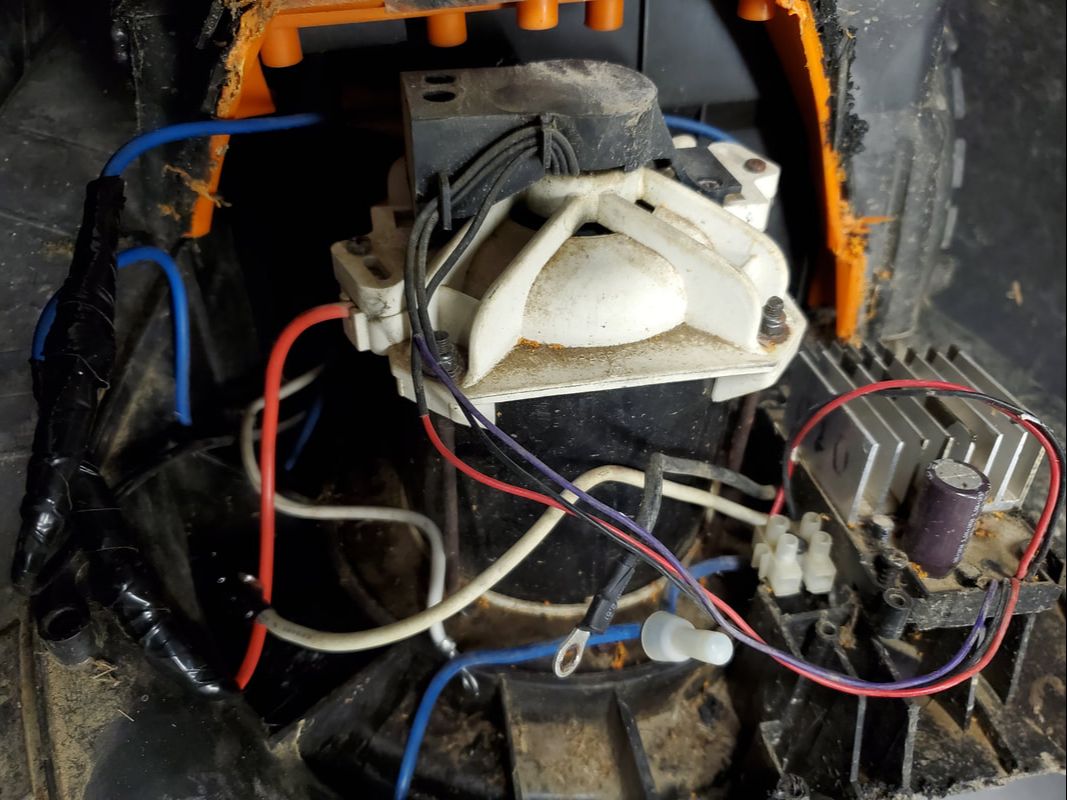
The next move was to remove the cover from the top of the mower in order to gain access to the electronics and see where I would be able to cut across the mower body. From what I could see I would have to relocate some stuff within a little farther back. The way the body looked the screws were in some odd spots with only one being reachable from the top. The others were underneath and were rusted badly enough to not be able to be removed. I ended up cutting the shell free from the point where the orange shell met the front of the battery compartment shell and cut across the front of the shell just over where the front axle was.
Front cover cut and removed from top of mower exposing insides, note electronics and wiring relocated further back towards motor.
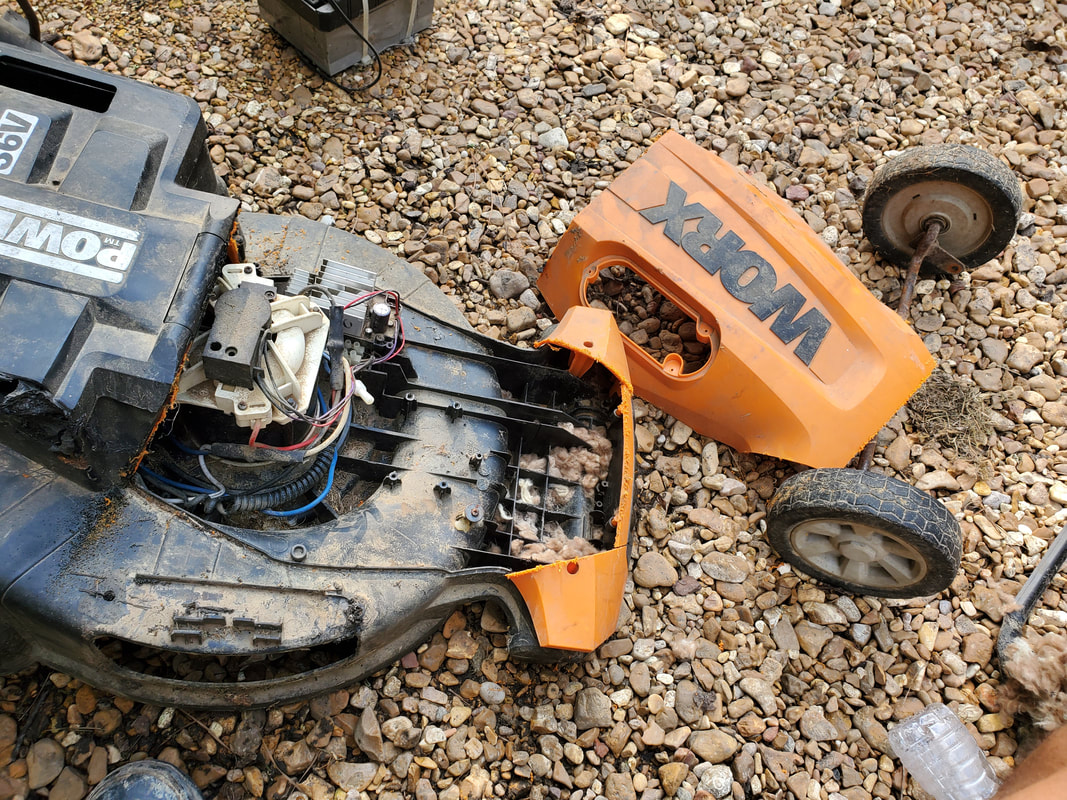
Next was the actual chopping of the mower body. As stated before, I would have to move some stuff back to get it all out of the way since their original mounting points were in the sections of the body that would be cut free. The controller of the machine had to be removed from its original mounting point and mounted to a spot right next to the motor, more to the rear. With the wiring and controller out of the way, I marked a line along the very front of the motor going all the way across and put the saw to the mower body, which was all plastic anyway. From there I put the shell I previously cut free back on the top of the remaining mower then marked it so I can trim the excess from that shell piece to remake the cover for the smaller machine.
Front third of mower body cut away close to motor mounting area. Note amount of blade sticking out from the front of machine, able to catch any weeds in front of it, or any errant feet.
Shell placed back on top of machine and marked for trimming down to match with cut down mower body.
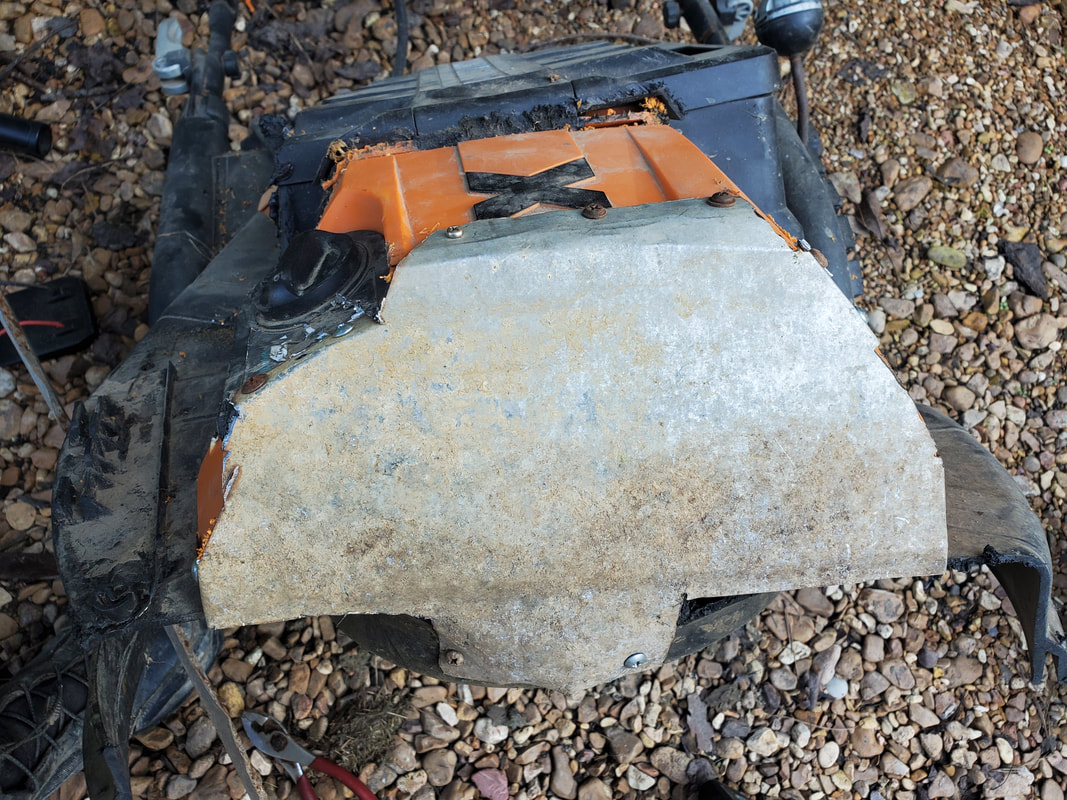
With the shell marked, I chopped off the excess from the piece then laid the piece back on top of the mower body. Now since the piece of plastic I cut from the shell was unable to be used I had to come up with something to cover the opening on the front of the cut down shell. The answer: sheet metal. I dug out a piece of thin sheet metal from the scrap pile and cut a piece that was the width of the opening on the shell. From there I drew a rough line following the contours of the front of the shell, then drew what amounted to tabs that I would later bend down to serve as anchor points for screws. I carefully cut the piece from the sheet metal then bent the tabs down then test fitted the piece.
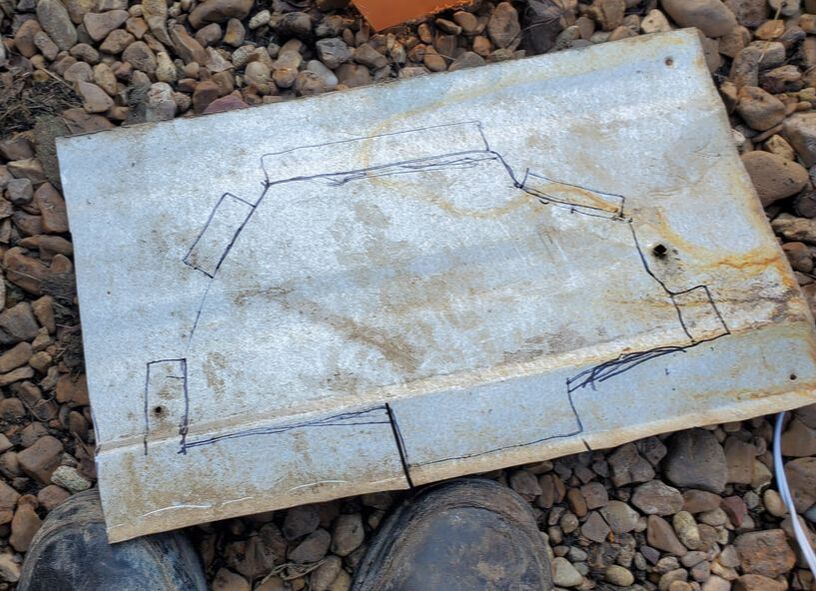
Template of cover drawn on sheet metal panel. Note tabs around edges of panel.
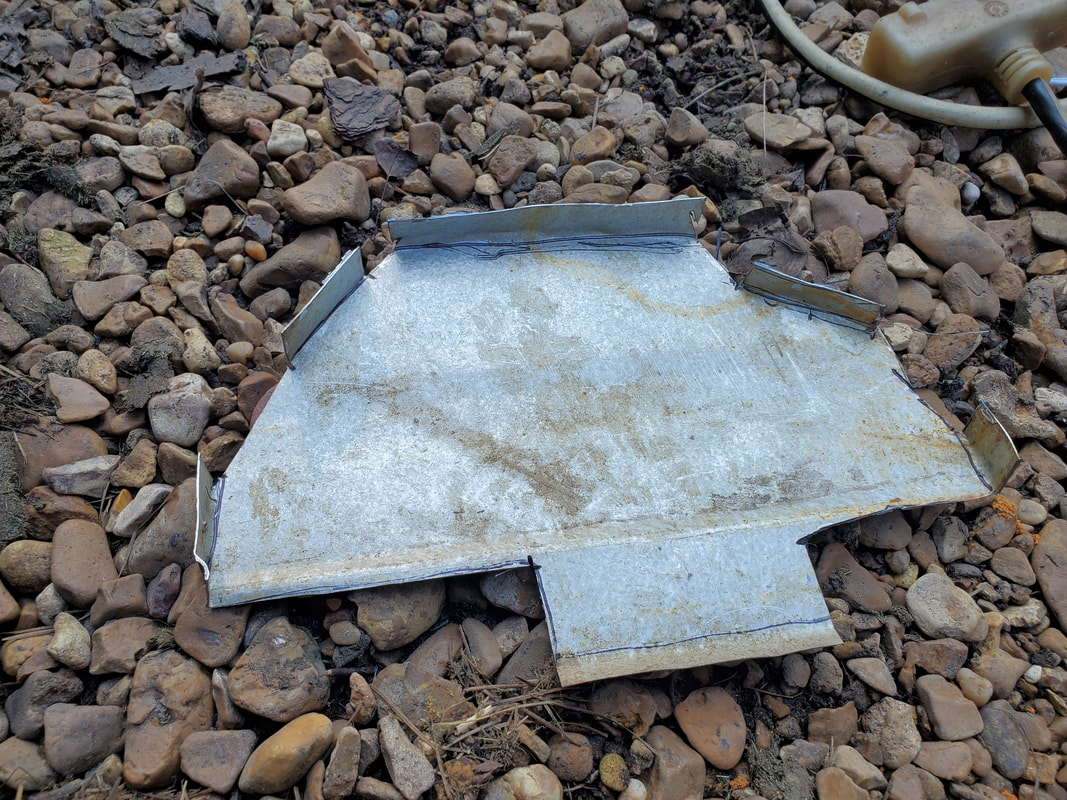
Panel cut out from sheet metal piece with tabs bent out.
Another little thing I did on the body was where a switch cover was mounted. Since the cover extended past the point where I cut the cover down, I just mounted the switch cover back in place then trimmed the excess from it as well, making sure the edges matched up with the rest of the body. From there I was able to start mounting the sheet metal shell to the front of the shell. I drilled some pilot holes in the tabs and through the plastic shell then drove the screws through the tabs and the shell to secure the panel in place. I didn't want to use the impact in the soft plastic as it would've quickly spun out and wallowed out the holes made by driving the screws through. I would rather just drill small pilot holes then work them through manually with a regular screwdriver to ensure that the mounts are not compromised in any way.
Switch panel trimmed to match up to cut down mower cover.
Sheet metal cover attached to front of shell on mower body, note screws on front bottom and top of panel.
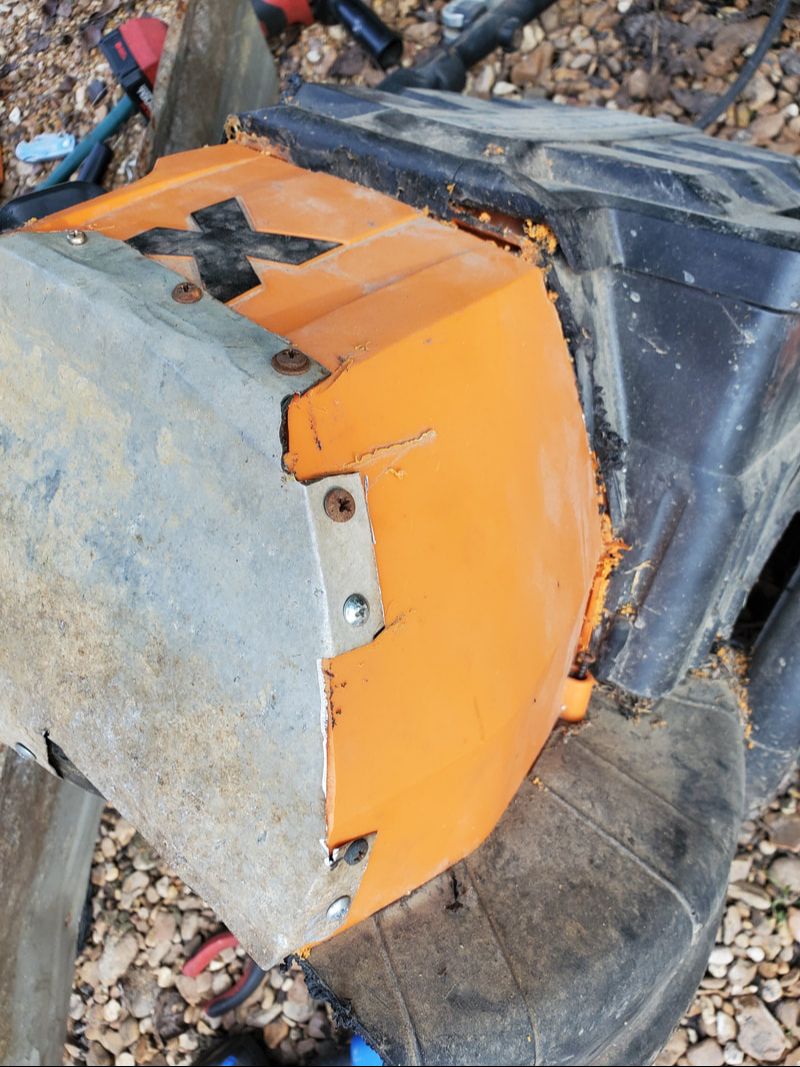
Tabs screwed in place to hold sheet metal panel to plastic mower cover/shell.
After attaching the sheet metal cover to the front of the shell I also found that there were a couple of points on the mower body where the shell sat that were perfect for new screw points. While these points were solid plastic, after drilling a small hole through the point it allowed me to put a screw through the mower and into the mounting point of the plastic shell, securing the shell to the mower body at the front, along with the one mounting point that I mentioned in the beginning at the back of the shell. With the shell fully mounted to the mower, I took time to use the hot glue gun to further glue the switch cover to the shell to help in sealing the inside of the machine from the elements. The last thing I did was trim the bottom piece of remaining plastic from the grass exhaust chute then cut an equal piece of plastic from the other side so both sides of the mower body would match one another. The purpose of this was to open up the area around the front and the immediate sides so when the machine is pushed into a patch of brush, even if something gets close enough to the sides, its getting chopped up.
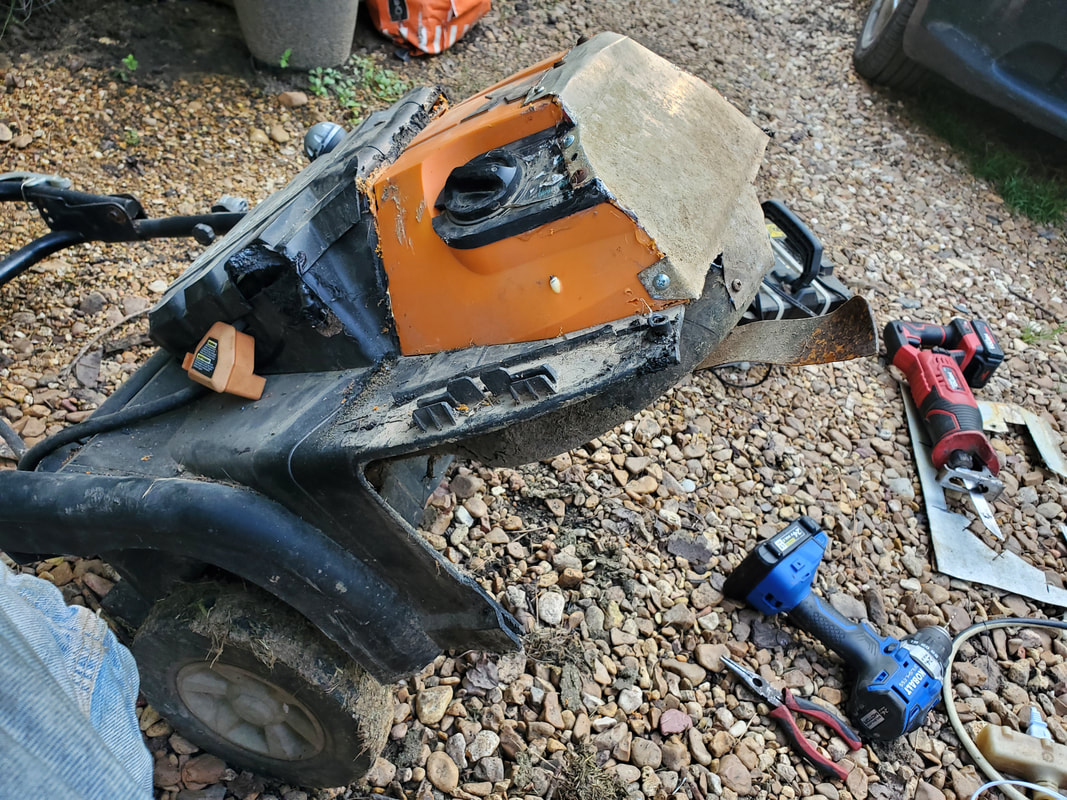
Plastic piece from old grass exhaust chute trimmed away to open up side.
Now for the disappointment. Well not immediately, but still one nonetheless. This is regarding the power source for the machine. I managed to acquire some aftermarket battery clips that accommodate the Hyper Tough batteries that our battery tools use. My plan was going to be to use these clips in series with two batteries to make a pack that would hopefully supply 40v to the mower. At least in theory. The weed eater and baby chainsaw work this way, so why shouldn't it work? Read on.
First I took time to disassemble the battery plug on the mower that used to go to the original battery pack. The wires from the plug were then rerouted through a hole I drilled in the bottom side of the battery compartment to allow me to route enough cable through so I could attach the ends to the wire ends on the battery clips. I connected one of the positive and negatives of the two clips together to make the series connection then connected the other positive and negatives to the power wires going to the mower electronics and motor. Rather than permanently mount the battery clips in some way, I had to test the system first.
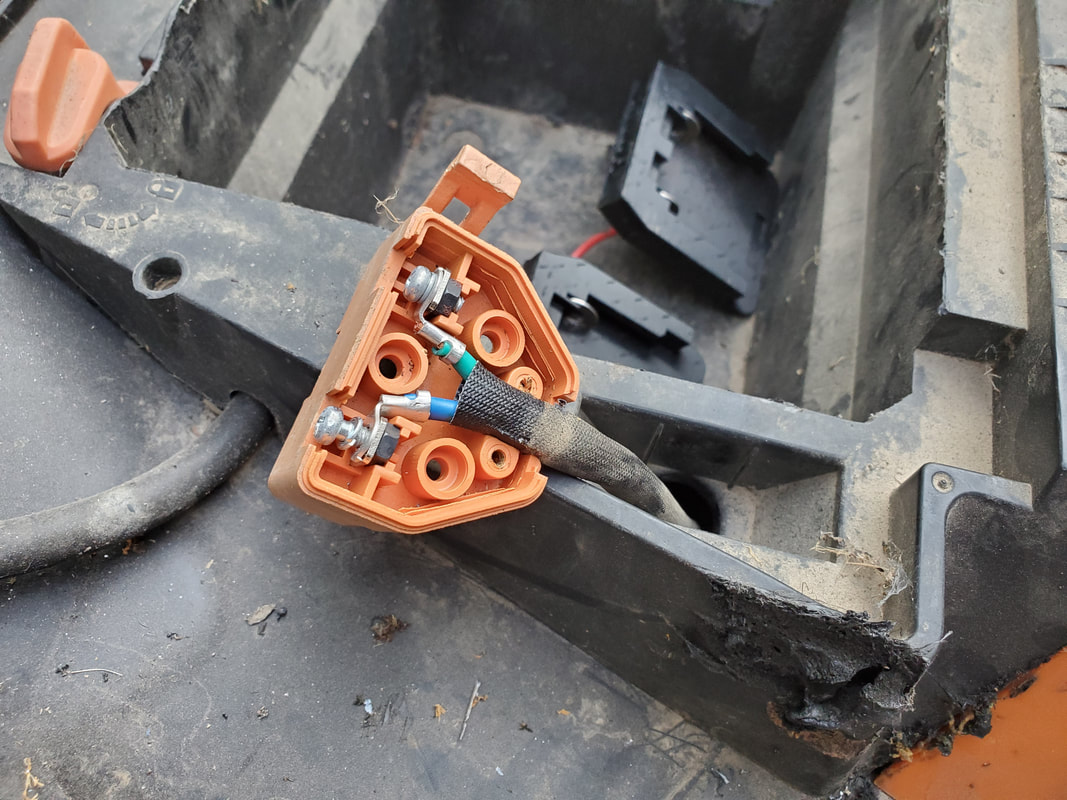
Old battery plug being disassembled prior to hooking up to battery clips.
Aftermarket battery clips wired together with terminals ready to wire up to mower's power wires.
The disappointment was when I plugged the batteries up. Upon hitting the switch, I got nothing. I immediately put the meter to the battery "pack" to test the voltage, and I got only 20v. WTF??? I hit the switch with the meter in place and the 20v went to 0v. WTF??? But then I thought about it. These batteries in these types of tools have internal electronics that regulate charging power coming in, and apparently outgoing power to the tool. Also from what I surmise the tool also has some internal electronics that feedback signals to the batteries to "amp" up the power output for differing loads in order to preserve power for light duty use. Since our outdated lead acid battery powered mower cum bush hog has no such thing for this type of power supply, the newer batteries have no way to really know what to even output. SOB.
Now one of two things can happen here. I can research what these batteries or similar batteries would need to put out that burst of juice to put out the full 20v each, and hopefully not blow up any of these pricy batteries in the process of experimenting, OR, just like with a couple of past projects that were remakes of long dead devices, just buy a dedicated lithium battery pack that is made to put out a set voltage with no regulation, in this case 36v, at around the same amp hours as the old battery pack so at least I can be confident that the machine should last as long as the old battery used to hold the machine. Now if I go this route, I would have to wire the battery pack in permanently just like I did with the portable power supply and LED lantern and just hot glue the charging port somewhere on the body to allow me to plug the charger up to the machine easily during charging. More than likely this will be the route I'll go rather than try to work with the power tool batteries and end up messing up some batteries.
|
|
|
|
|
|
|
|
|
|
|
|
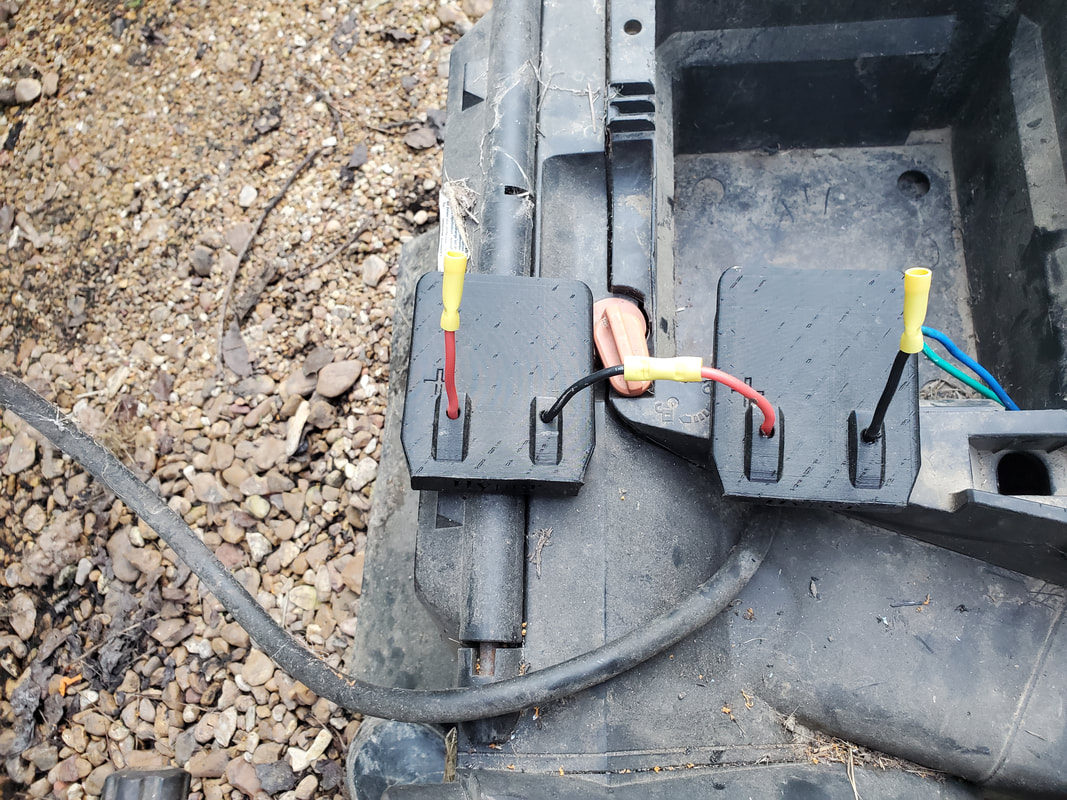
With the twin 20v power tool batteries failing to activate the mower I went ahead and ordered a dedicated battery pack, rated at 36v, 4Ah. This pack would need a plug wired to it as the plug that came on it was of some type I didn't have the other end to. This was fine as I was going to use one of the plugs I salvaged from one of the automotive wire harnesses I stripped. I would also use another plug for the battery charger too, which wasn't included with the battery pack. I still had the charger from the mower's old battery so I would have to wire up both the charger and the battery pack.
Of the plugs I had available I only had one that was capable of handling high amperage. Only problem is one of the wires on one end was of a smaller gauge so I needed to replace this smaller gauge wire with something of a heavier gauge. I ended up disassembling the one end of the plug to remove the pin and remove the wire from the pin, then solder on a thicker wire and reassemble the plug. From there I connected the plug to the bare wires of the battery pack after cutting off the odd plug. I also stripped a spot on each wire so I could solder on one end of the other plug I would use for the charger. With that I plugged the battery up to see if things work. They didn't.
I then decided to open up the old mower to see how the circuitry layout was. There is a controller that is hooked up to the motor and a two way switch and some type of encoder on top of the motor. I had to see if the motor would run solo without the electronics. After disassembling the switch and finding the two of three wires I would need to switch the motor on, I then separated the wires from the motor and did a fast test with the battery pack. After the motor jumped to life I went ahead and wired up the ends of the motor to the wires coming from the switch and one of the power wires to complete the new simple circuit. As for the encoder and controller and its associated wiring, all of that crap came out. Once the insides were cleared I reassembled the unit and hooked the battery up, making the machine come to life.
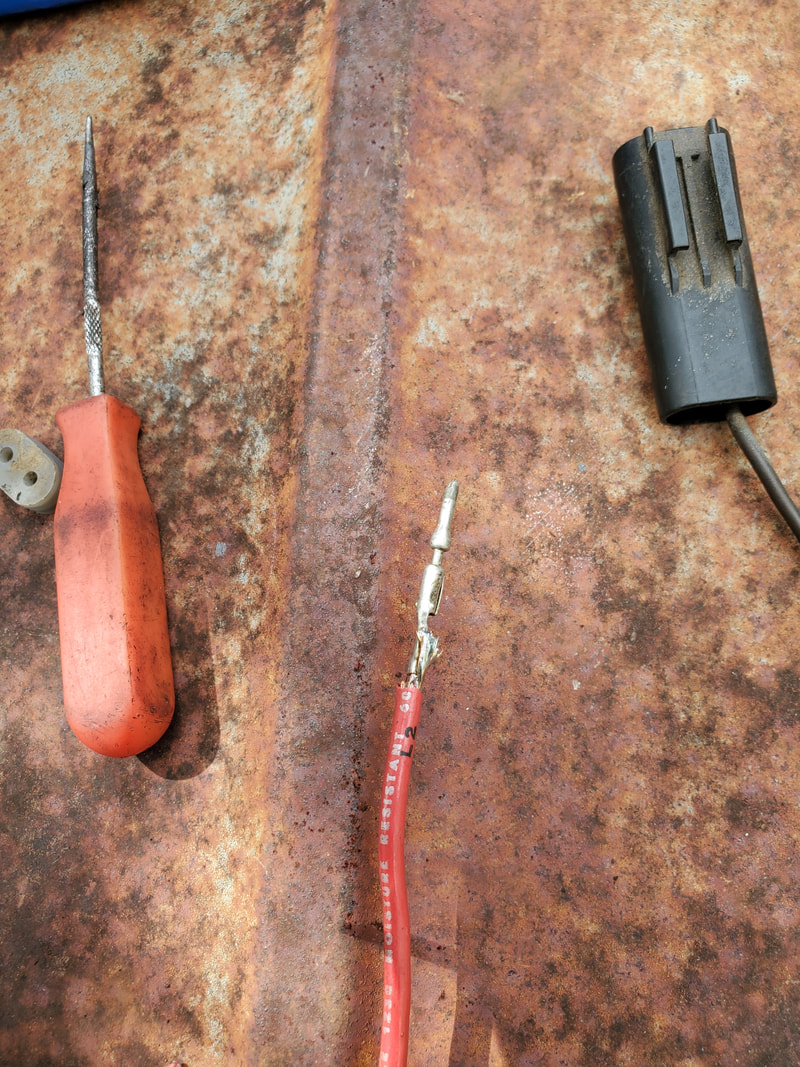
Battery pack and tools along with plug.
Pin from plug with new wire soldered in place.
New wire and plug installed back in plug body.

Extra plug wires soldered to wires on battery pack to connect to battery charger.
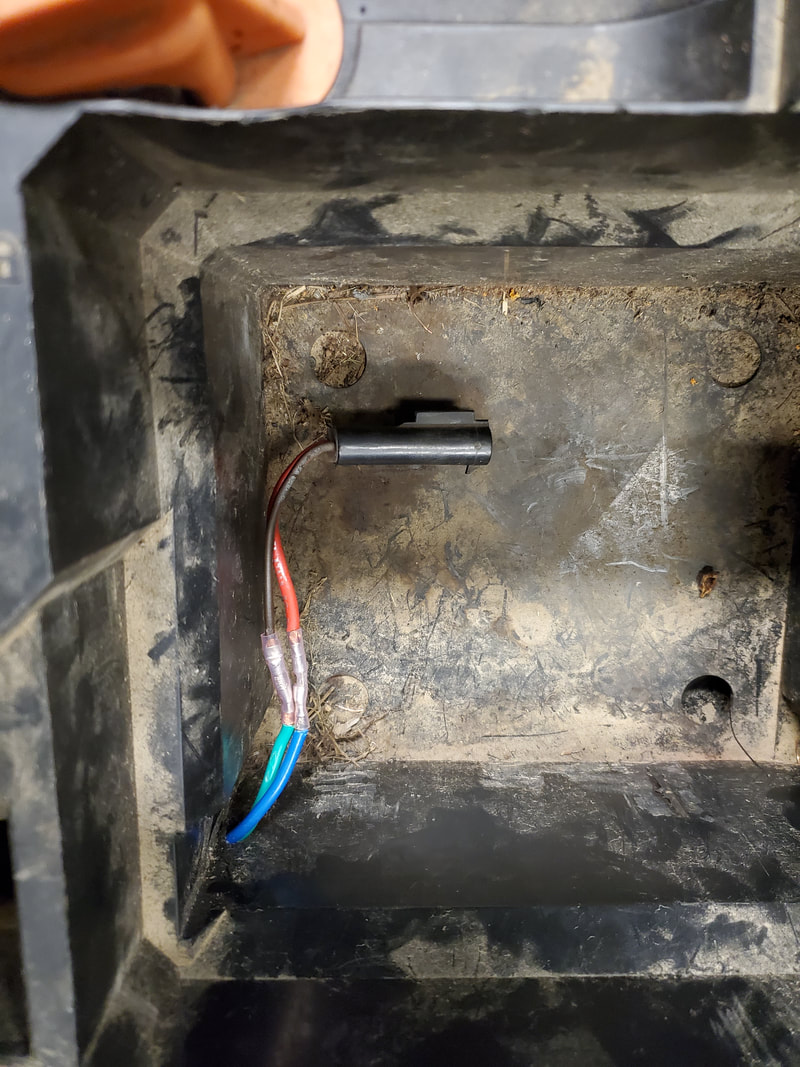
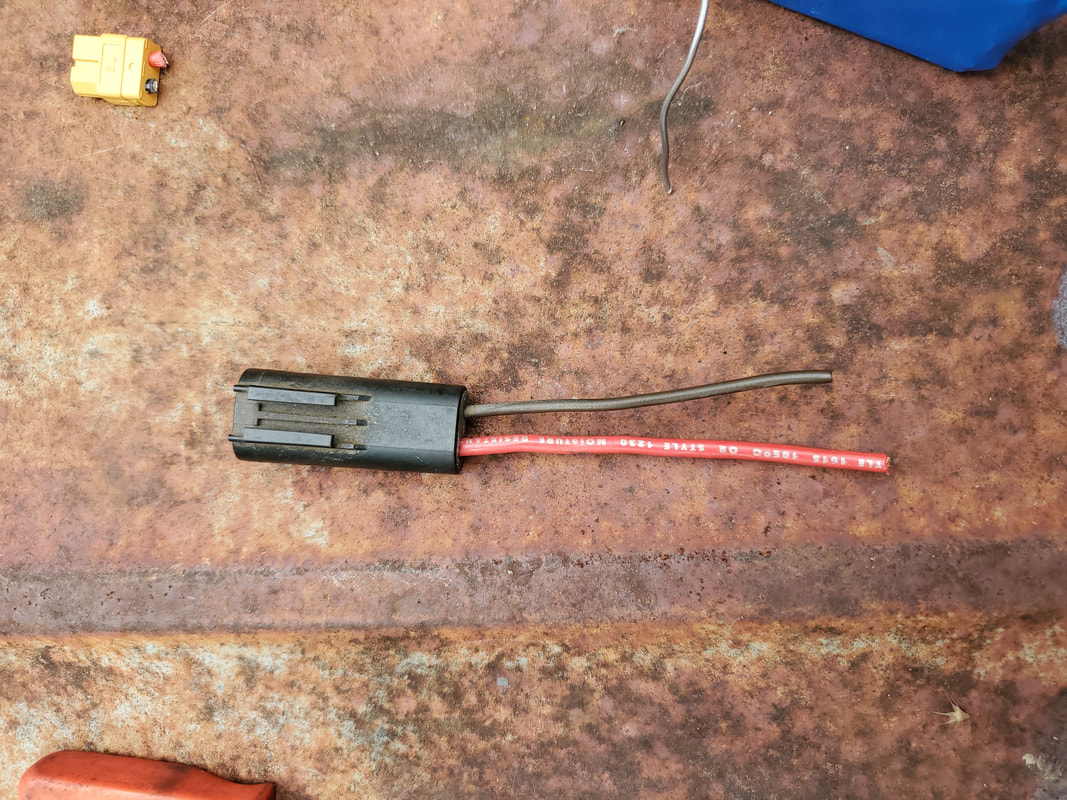
Plug end for battery pack connected to power wires in mower.
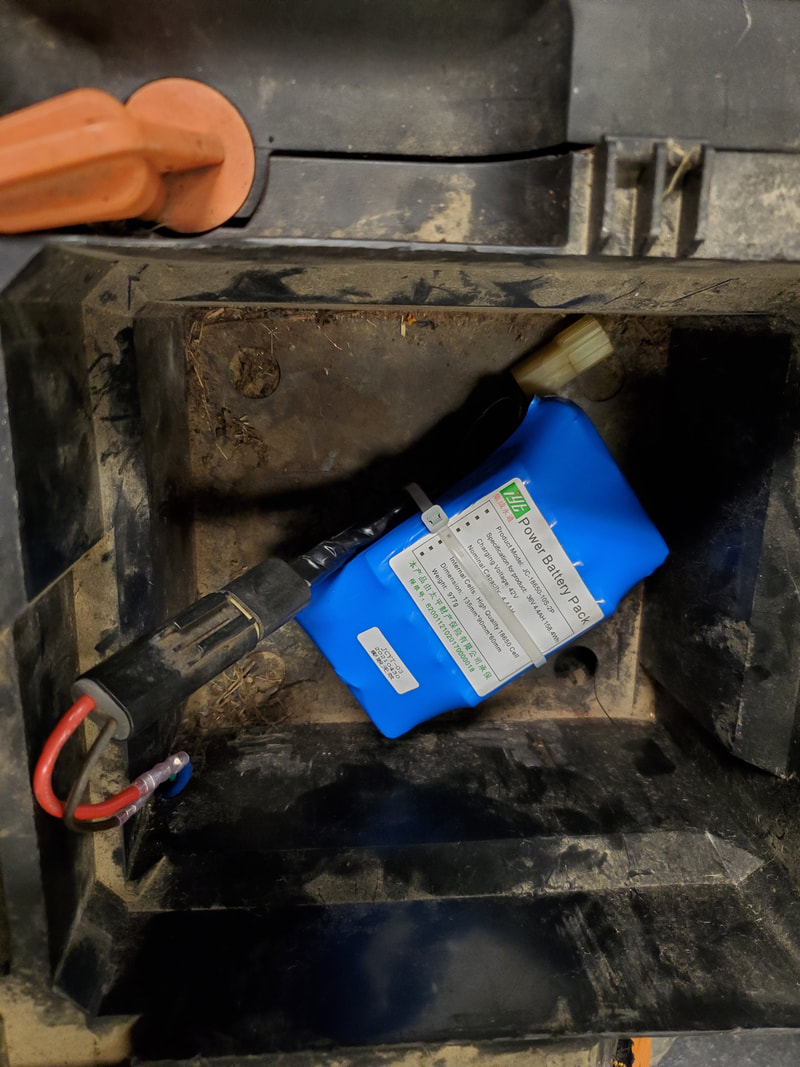
Battery pack plugged up in mower.
Motor with electronics and wiring inside of mower. Motor wires are already disconnected and wired up to switch wires.

Inside of mower after removing electronics and unnecessary wiring. Now its just the motor with its wires hooked up to the switch and power lines.
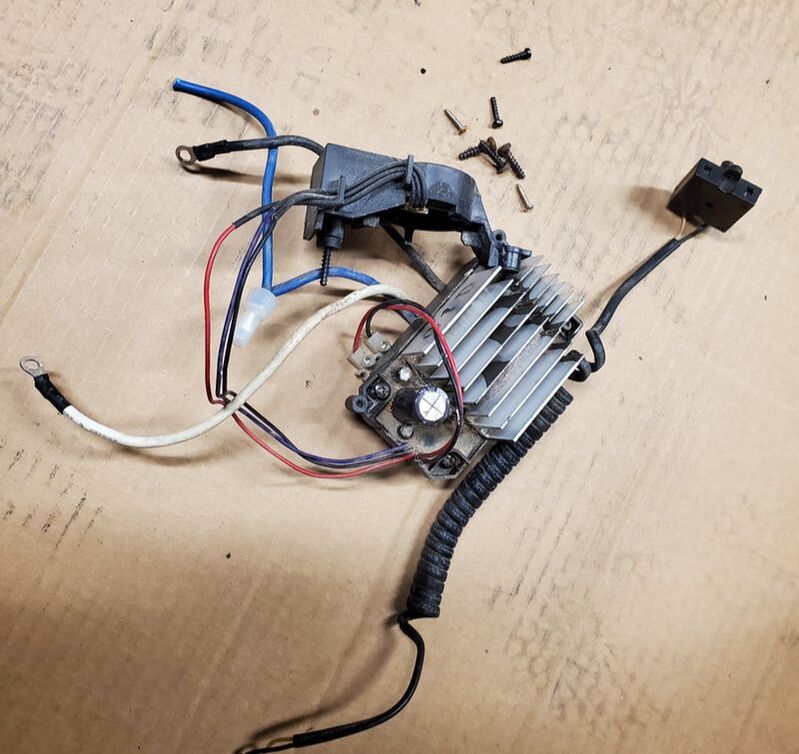
Controller and other hardware removed from inside of mower, more junk.
With that the Electric Bush Hog/Wheeled Trimmer/Chopper is completed. The only thing left to do now is to actually test the thing out on some brush. Hopefully this thing will not bog down or otherwise choke up when we really dig into some brush. One of my ideas would be to see if I can install a large trimmer head in lieu of the blade and use heavy duty string like some of the commercial wheeled trimmers and just work with that where I'll be better able to chop into thicker brush without the blade coming to a dead stop if we hit something like a sapling or what not. But either way, the Bush Hog is done, that's another project added to the roster of completed TIC projects. Until the next time.
