THE AVIARY
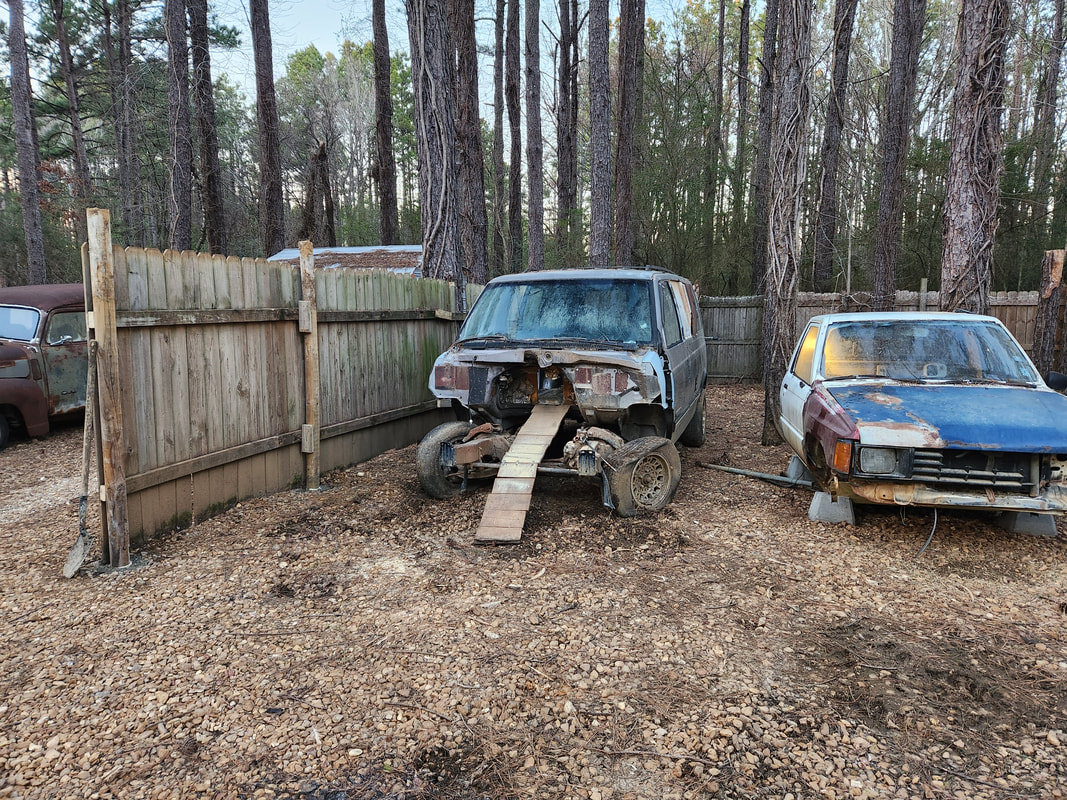
After allowing the chickens and ducks to roam free around the yard for so long, we finally come to the conclusion that it's time to lock these nasty shits down. Even with the gate and fence established, the chickens still have free range of the garden and even my work areas, which has to stop. They hardly even use the car coops anymore and instead go roost in a huge pear tree in the garden. I decided to create an aviary in what is the old chicken yard. This would consist of bringing in the east and west fences in closer to the car coops, then create a front wall that would be a few feet out from the cab coops. The front wall would just be a chicken wire covering and to top things off, a chicken wire roof will be established. I will have to sink several posts on the inside of the enclosed area and hang 2x6 boards with which to attach the chicken wire to for rigidity and support. At the back of the aviary I will set up a sheet metal wall that will run along the length of the north fence but hang from the north fence into the enclosed space by about six feet. Under this area I plan on setting up nest boxes and some roosting areas that would allow the birds to take refuge from rain. Inside the caged in area we will have things that the birds can use to keep themselves occupied, like a raised bed dirt bath, some swings, and some hanging veggie holders for the birds to peck at. The car coops themselves will provide areas for birds to run around and under and inside to keep themselves occupied just as well. With the chicken wire the area will be able to get proper ventilation to the outside world so it doesn't get toxic inside from smells and the like.
With that, the first thing i had to do was remove the old east and west fences to open the area up. Salvaging the fence panels and even the posts, I was able to rebuild the east and west fences in the spaces I wanted to, even using a couple trees as supports to hang the panels on the side next to the Minivan Coop and the Ranger Cab Coop.
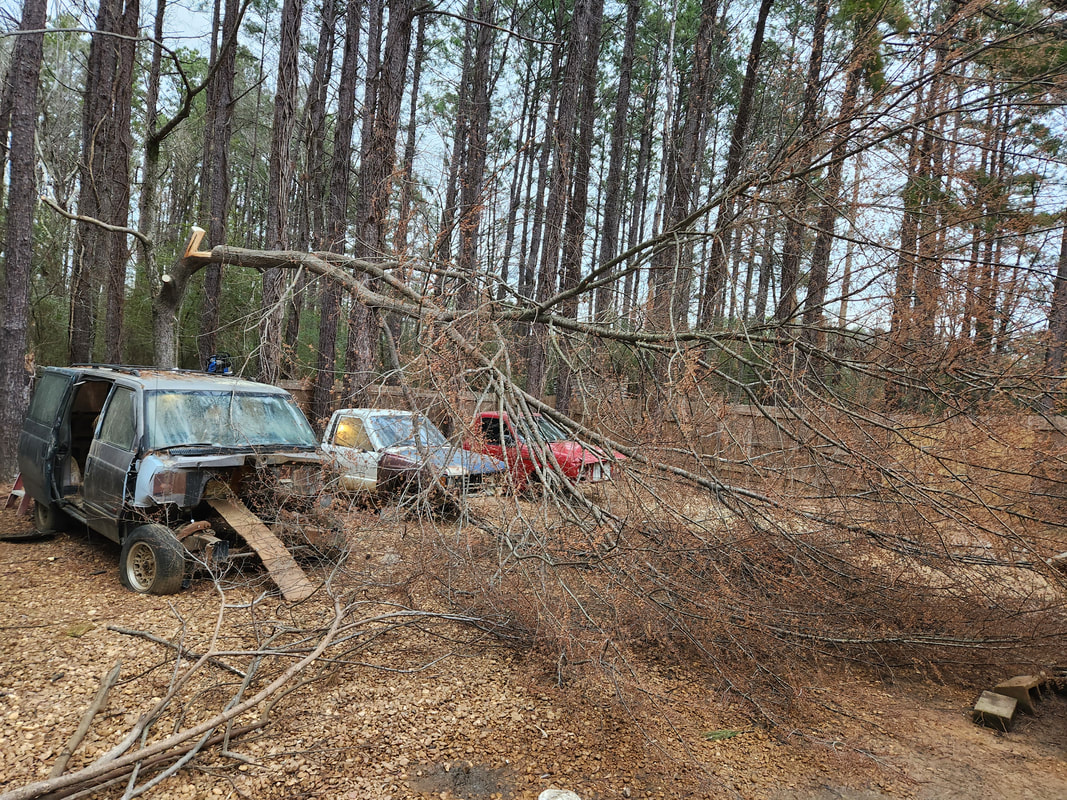
This large tree which used to be used by the birds as a roosting area, had to be brought down and broken up for disposal. The tree was behind the Minivan Coop and had to go in order to allow me to push the van coop back more into the area where the aviary will be set up.
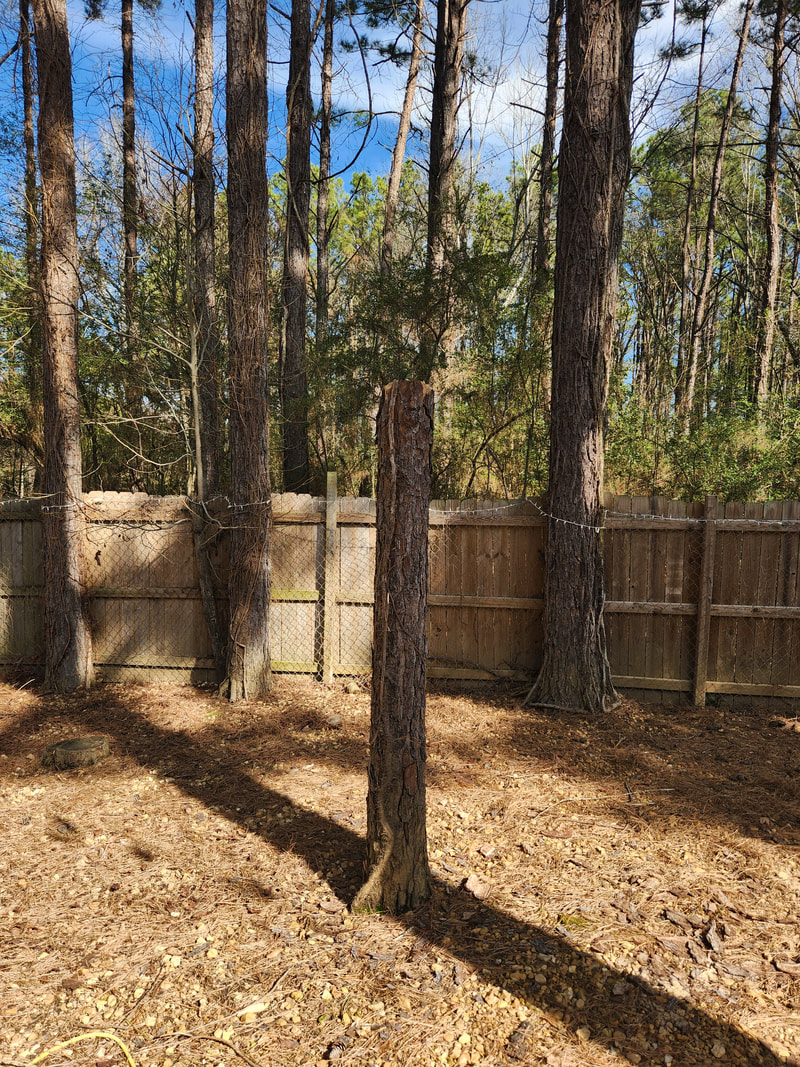
A dead tree trunk in the middle of the yard was cut down at about 6ft high in order to use the remaining trunk as a post for supporting the roof frame when we do start building that part of the aviary.
The old chicken yard west fence is dismantled, with one of the gate kits being rebuilt into a larger gate for the main entry gate. The remaining panels are staged for reuse later when we start building the new fence/wall that will be right next to the Minivan Coop.
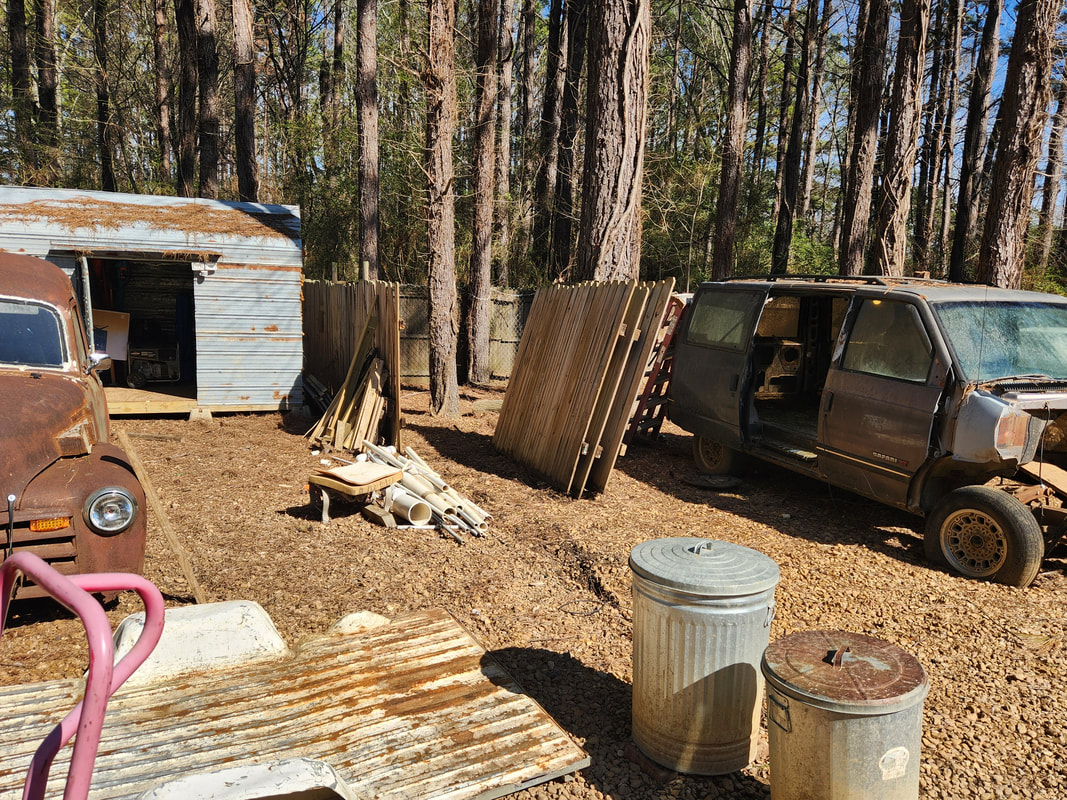
On the east side the fence is dismantled, with most of the fence panels salvaged. A couple of the panels were made using only two 2x4's and started falling apart immediately and ended up being broken up later on. The other panels were factory three board panels and will be reused in the new east fence/wall. Note the posts stacked against the tree next to the Ranger Cab Coop, which will also be used for the new fence.
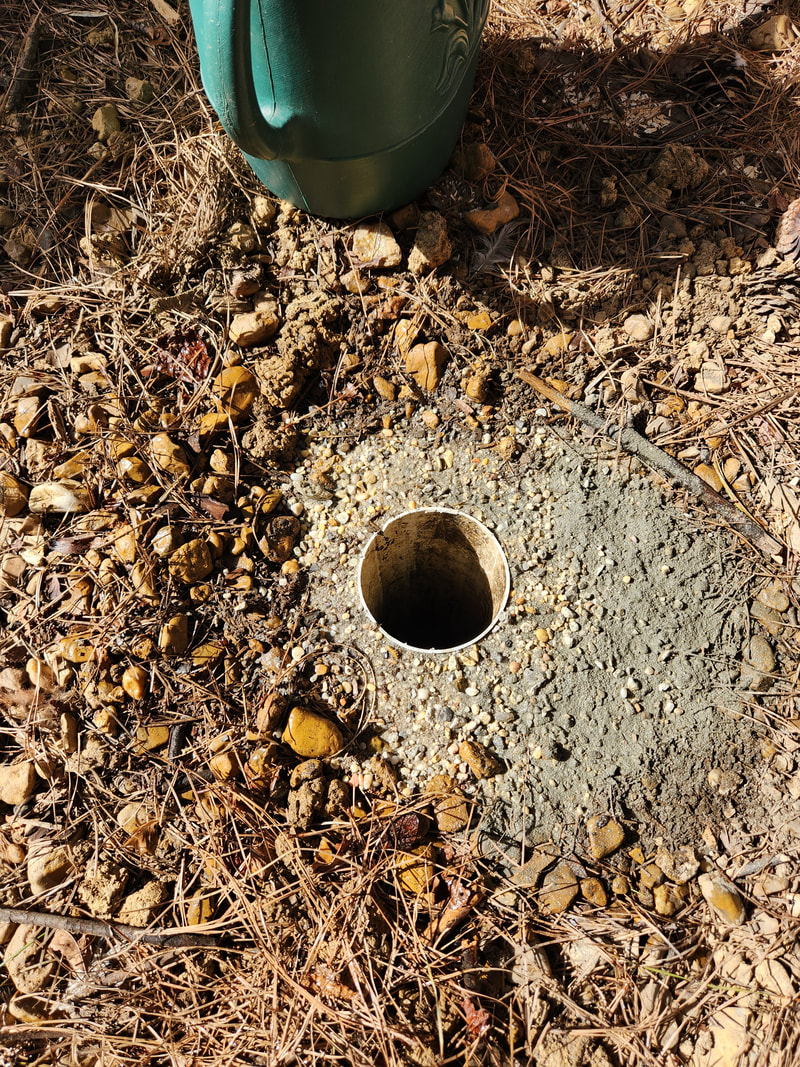
To make things a little easier for future maintenance, I sunk large PVC pipes into the drilled holes where I can slide the fence posts right into the pipes. When the wood does rot, I can pull the posts out and slide a fresh post in without having to worry about dismantling the fence to remove the concrete clod to sink a new post.
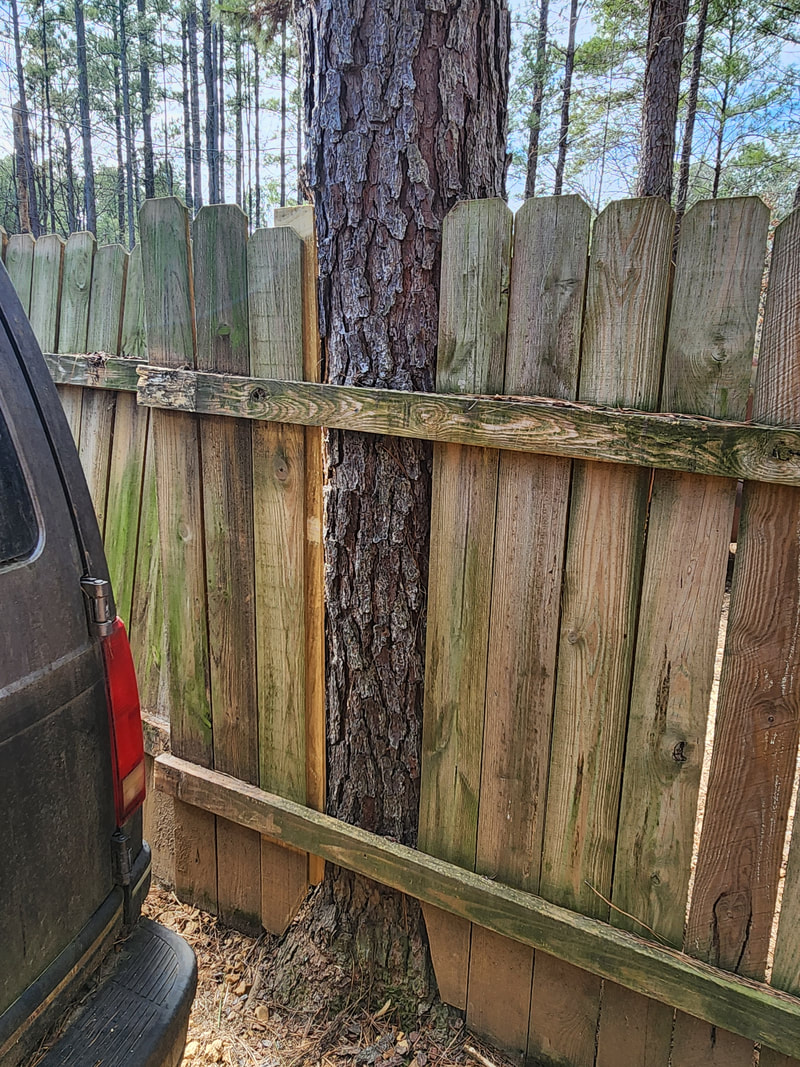
In setting up the west fence, when I go to the tree next to the Minivan Coop, I removed a couple pickets from the panel to attach the 2x4's directly to the tree. I cut notches from the pickets on either side of the tree so the panel can sit flush and vertical against the tree.
The last couple of PVC pipes had a slightly narrower inner diameter so I had to cut a notch off the last couple posts to allow them to slide into the pipes.
Because the panel that was attached to the tree had only a couple feet overhang from the tree, it wasn't far enough to allow me to drill a hole without hitting the root ball. I had to attach the next panel with a couple short 2x4's counting on the tree to be the support for that next panel, while sinking a post on the opposite side of the panel. The panel attached to the tree and the next panel were really like a tied together extended panel. Extra support will be established with the roof framework that will be built.
Since the front of the aviary would be right in front of the Minivan Coop, I had to push the coop back enough to allow the front ramp to clear the front wall line by at least a couple feet. I also had to pull the coop to the left by a couple feet, bringing it closer to the Toyota Cab Coop in order to provide more space between the right side of the van coop and the west fence. Now there's room to move around the right of the van coop as well as the front for both us and the chickens when the front wall is set up.
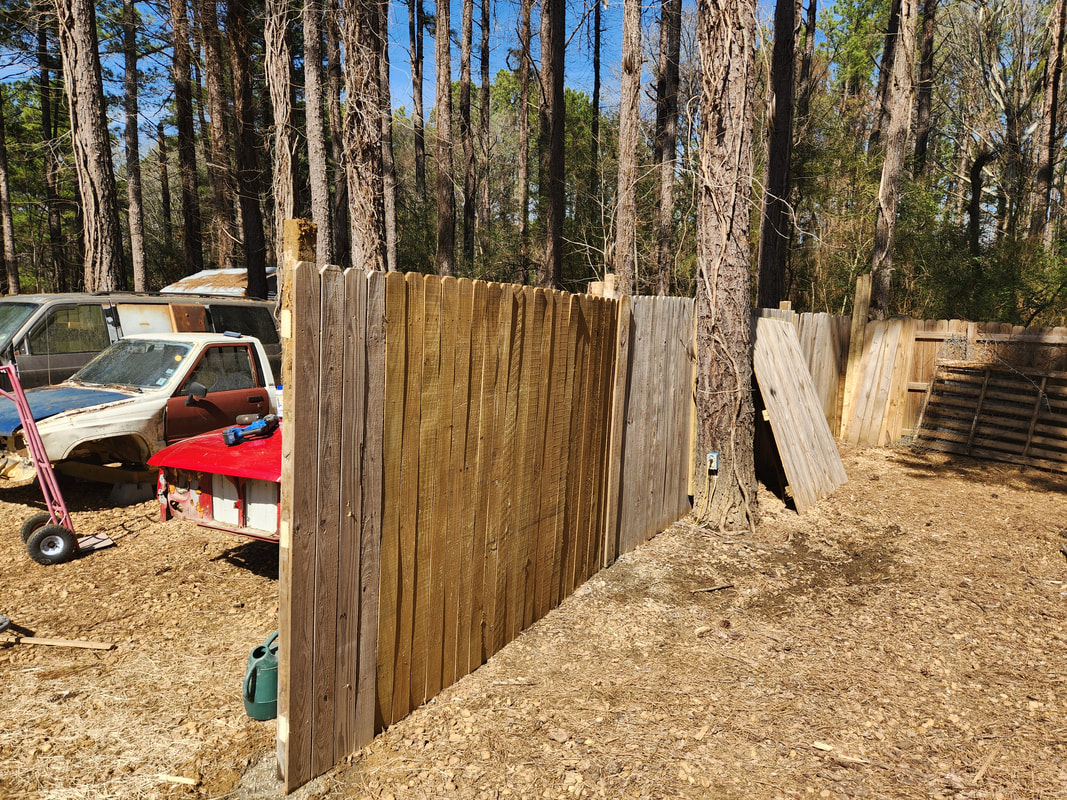
The east fence wall is set up, using another tree for a support. Even though I was able to sink posts on either side of the tree, I added a 2x4 to the tree with which to anchor the fence panel to the tree for added support.
With the walls done, I sunk a few more posts so I can begin the construction of the front wall. The first thing hung was the chain link gate panel. Afterward I hung three 2x
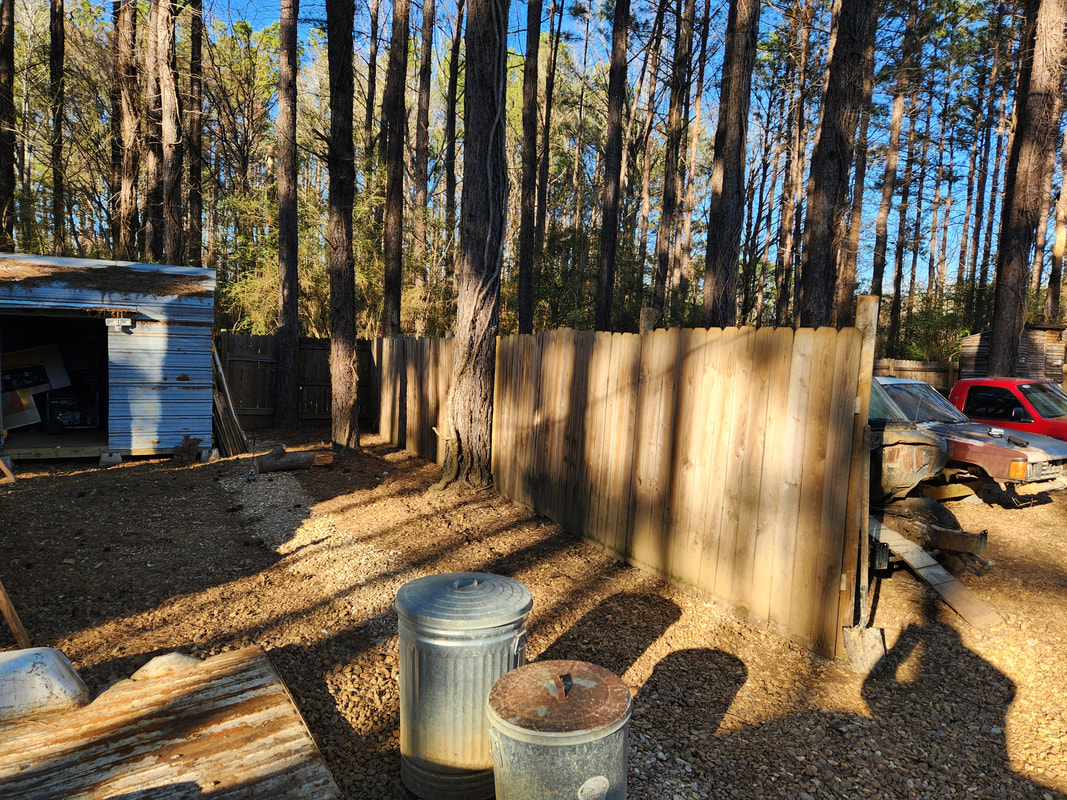
4s, one a little less than a foot off the ground, the second a little better than a foot above the first board and the last one at the very top of the posts. The two bottom boards were set up to accommodate fence pickets that were cut to be even with the middle board along the run of the front wall. This half wall setup is for aesthetics as well as practicality since the fence pickets create an impenetrable barrier to keep loose adolescent birds in as well as critters out. On the top half chicken wire was hung to cover the opening so the area is open but contained. With this done, the aviary is ready to accept the birds, with their wings cut of course, so they can't just fly up to the top of the front wall and over to the outside. I still have to do a covering for the top though.
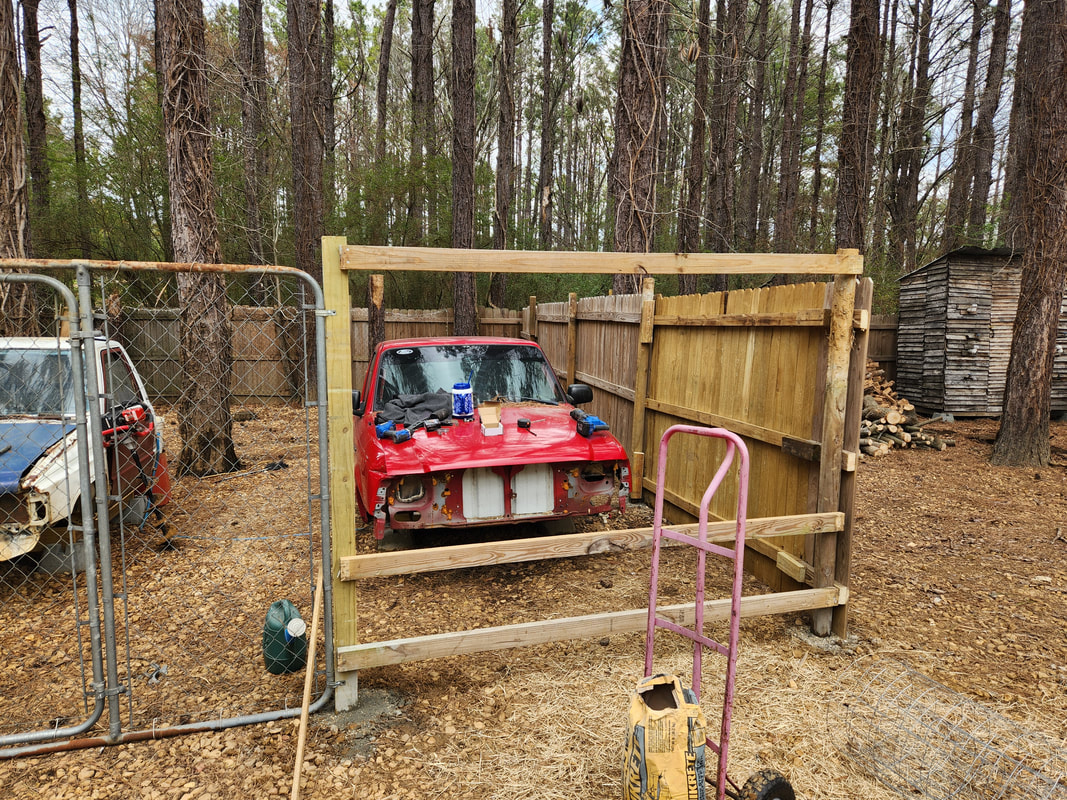
The chain link gate is hung first then each section of front wall is made with two boards close together at the bottom to accept cut fence pickets that will cover the lower half of the wall while the top half will accept chicken wire.
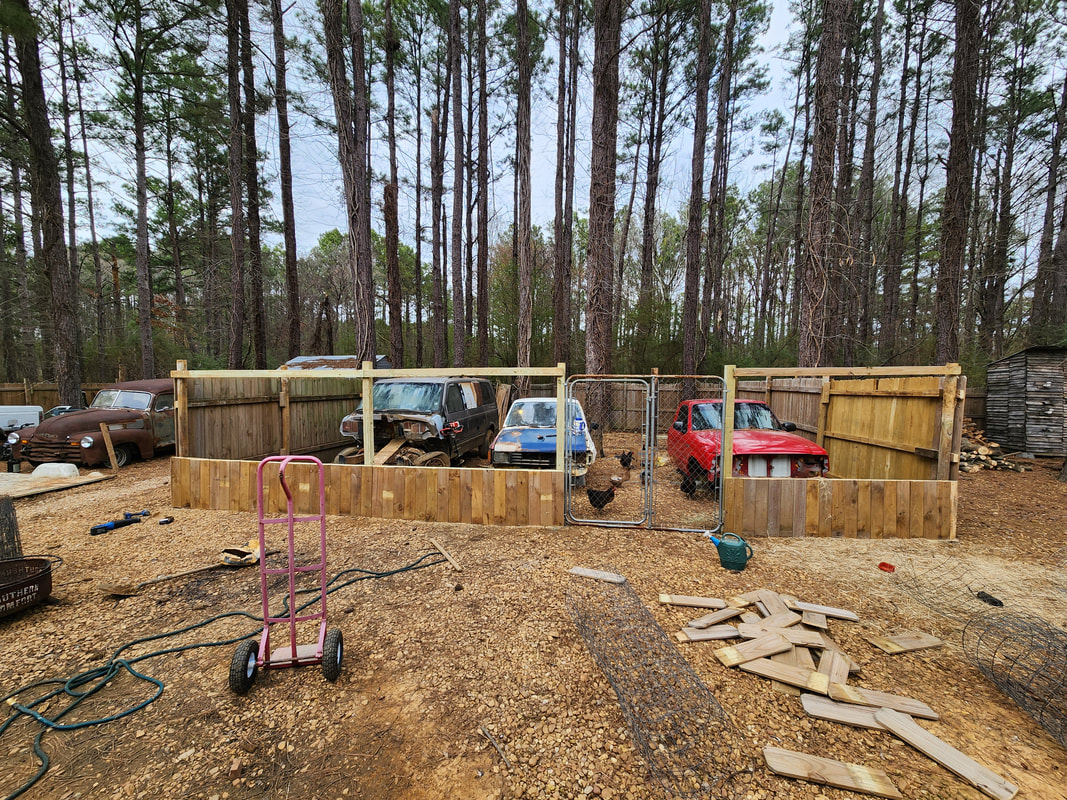
The entirety of the front wall is covered in trimmed fence pickets that were hung on the 2x4s, cut level with the middle board, then the other portion hung next to the previous portion with the remainder cut off and discarded. Note the pile of discarded picket tops to the right in the picture.
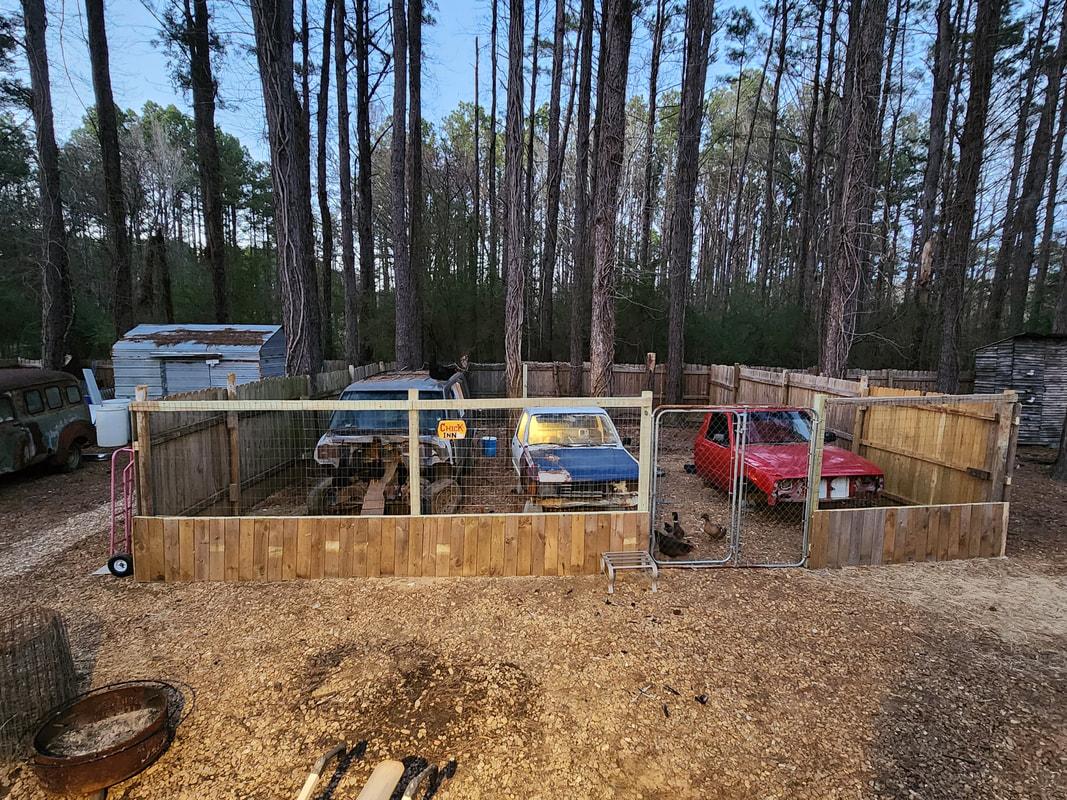
The front of the aviary is fully covered with chicken wire. The wire used was a little wider so I had to trim a few inches from the top after hanging the wire in place. U-tacks were used to secure the wire to the 2x4s along the wall.
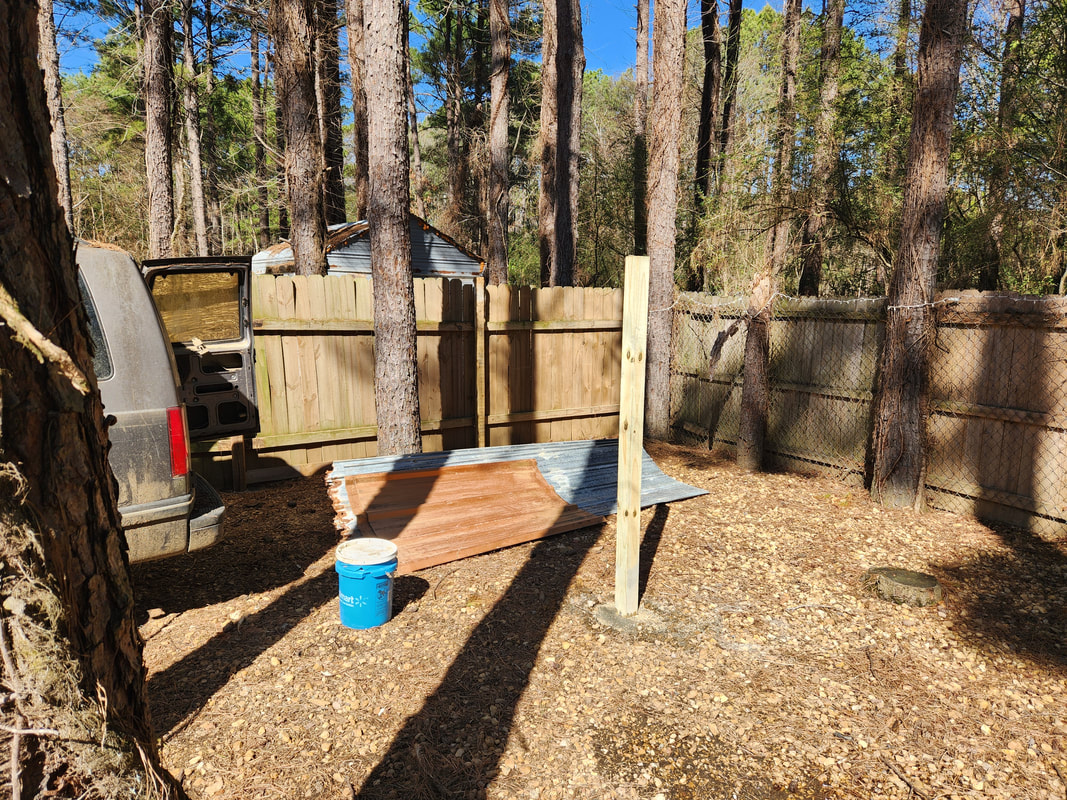
A lone post is sunk in the middle of the aviary yard, in line with the tree trunk to the far right in an east/west line. This will be where one of the roof framing installations will begin, allowing me to build on from there, reaching back to the north fence and forward to the other trees where another east/west line of boards will be hung.
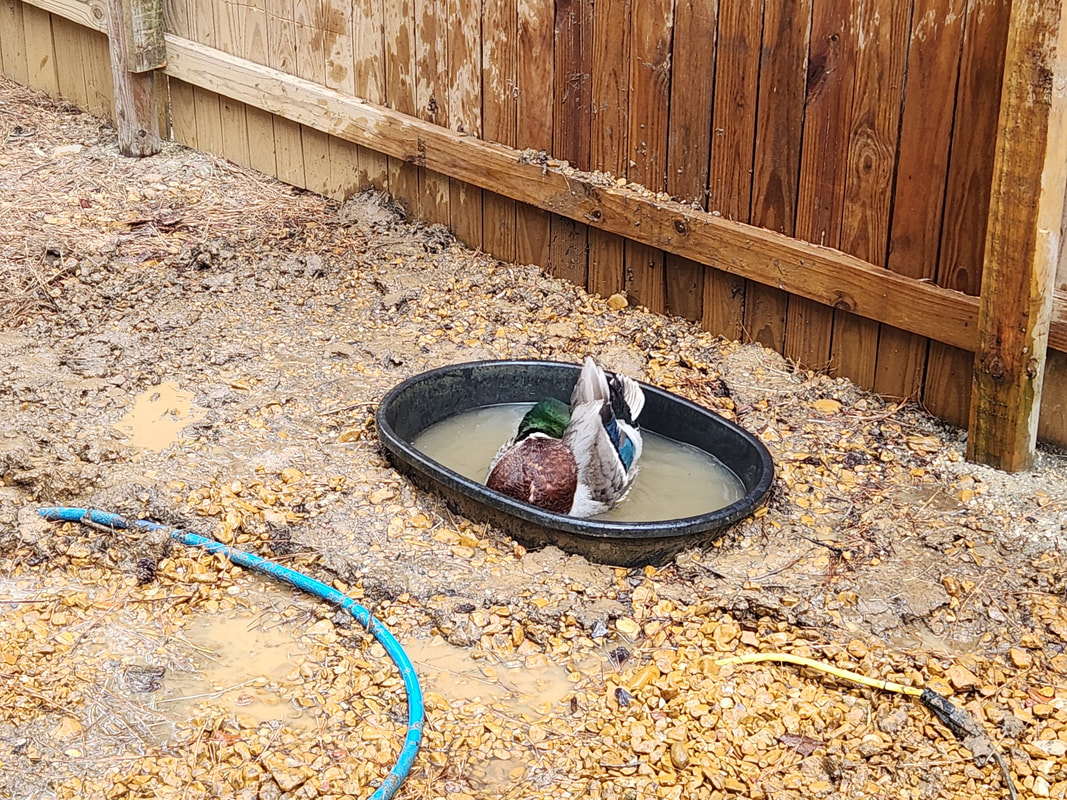
As an added bonus, a hole was dug for this small tub to be partially sunk in the ground and filled with water so the ducks can have a pool to play in. Later on I will use a couple of railroad ties from the garden to create a sand/dirt box at the northeast corner of the aviary. This will be filled with dirt and sand mixed so the chickens can dirt bathe in this area as they do, and not try to do the same in the gravel, creating ruts that can pose a trip hazard or the creation of a mudhole when it rains.
With a single post sunk in line with the tree trunk near the back of the aviary, I set up a section of 2x6 framing, along with another span of 2x6 framing, tied with boards that reach from the first row of boards to the back fence. This allowed for the hanging of the shorter pieces of sheet metal I had since I couldn't reach out to the first row of boards that connected to the tree trunk and post. Some sections of roof were made up of two sections of sheet metal and as such, required extra wood framing to help in supporting the sections of sheet metal. Some metal was a few inches short of reaching the rear fence and instead of going through the effort to move the second row of boards back more, I added small pieces of sheet metal to close the small gaps at the rear of the roof.
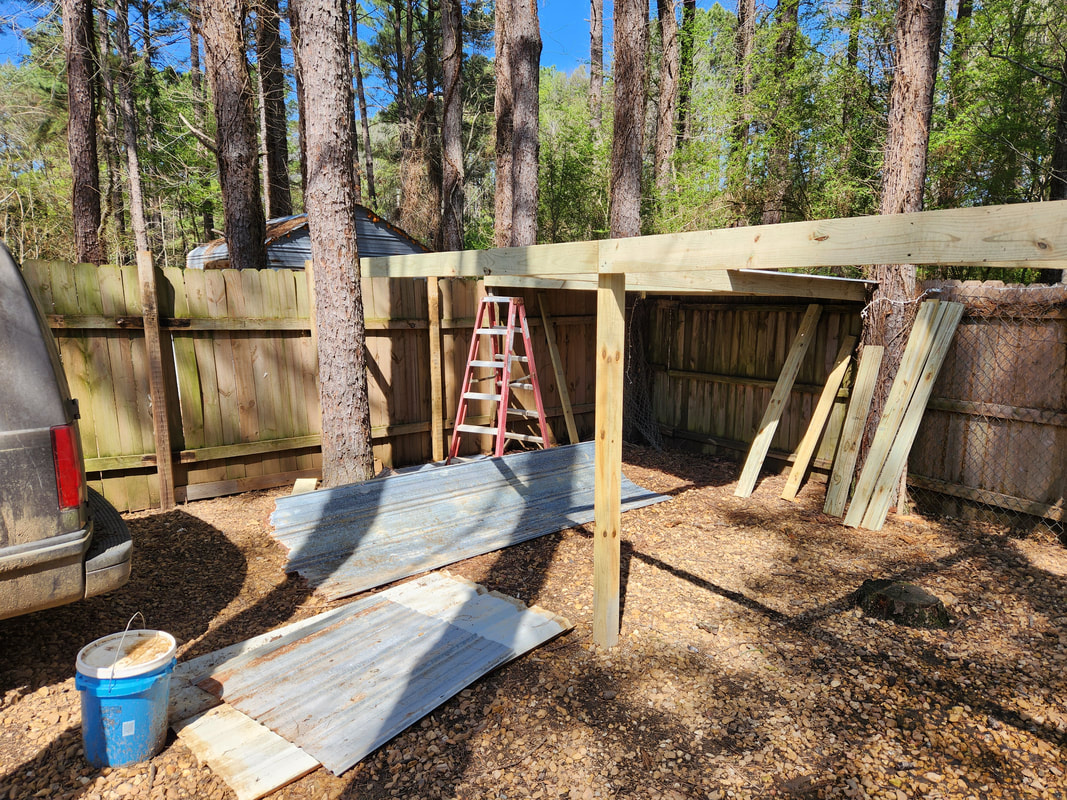
One row of boards is hung across the post and tree trunk. Boards are attached from this row back to the rear fence, with another row of boards hung in thirds across the span of the aviary. It is on this row where the ends of the sheet metal will be hung.
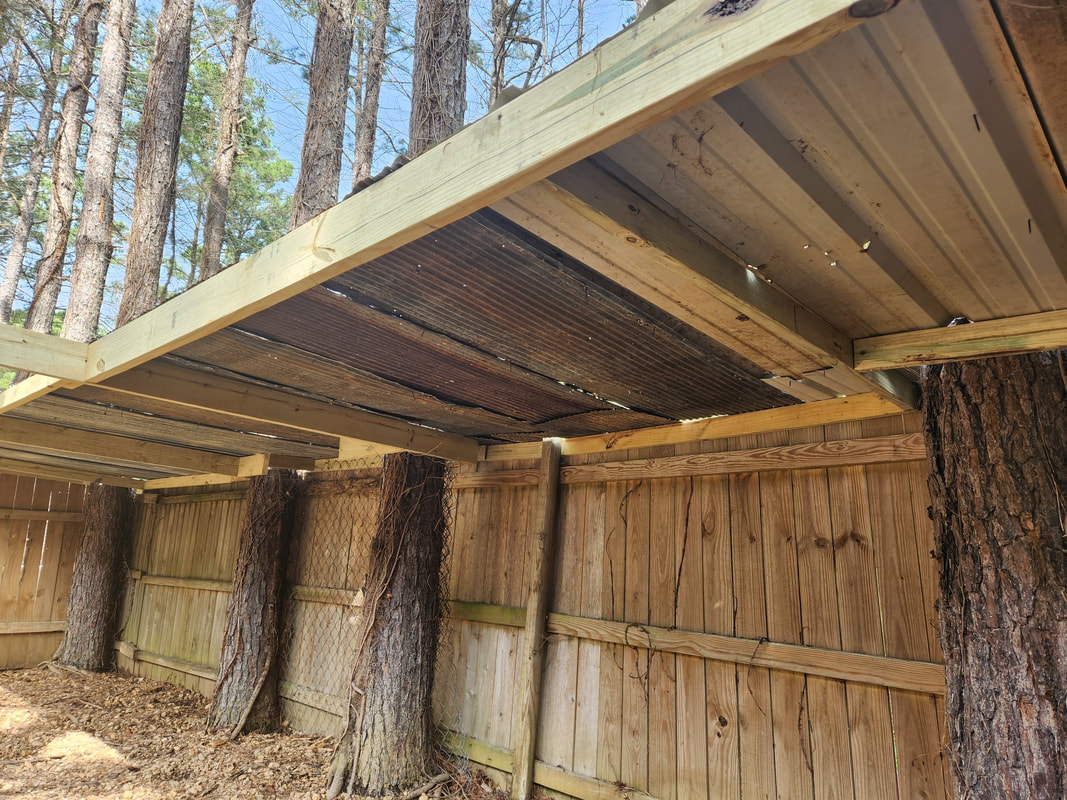
The roof is made up of different types corrugated sheet metal that we had available. Some boards were a little too short and required a little extra at the rear, along with the extra wood support to help hold the metal up solid, especially around the trees.
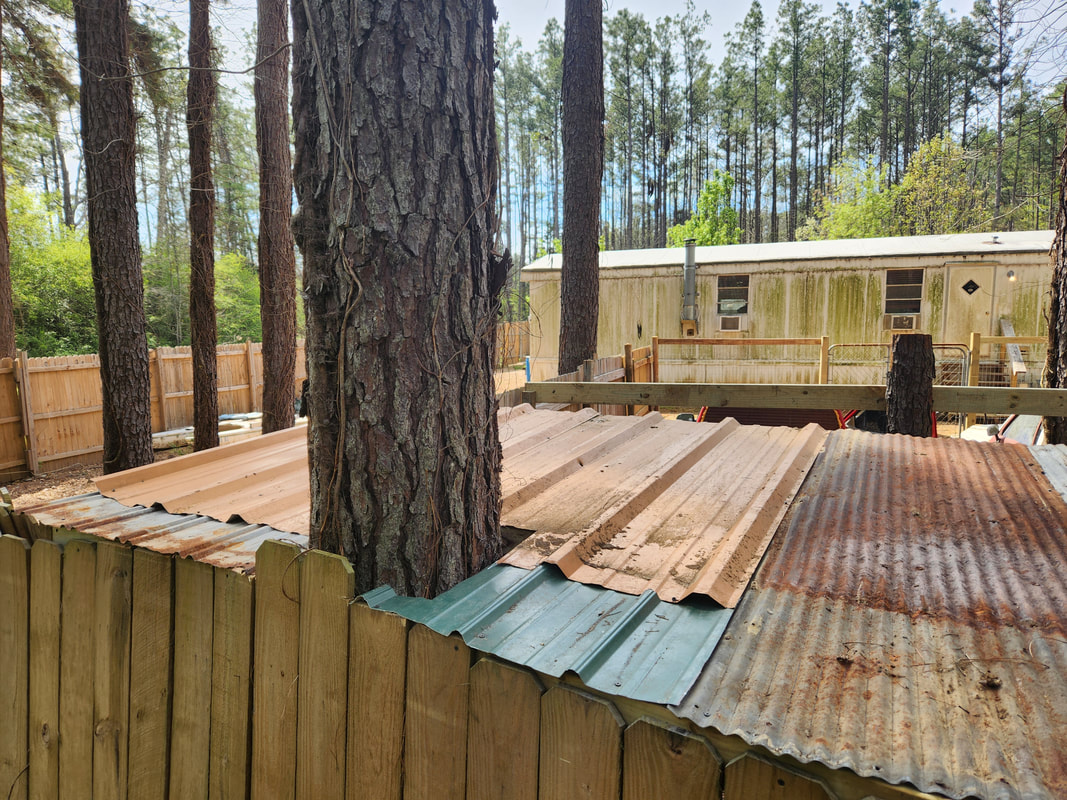
A shot of the top of the roof showing how the different types and lengths of sheet metal go together, especially around the trees.
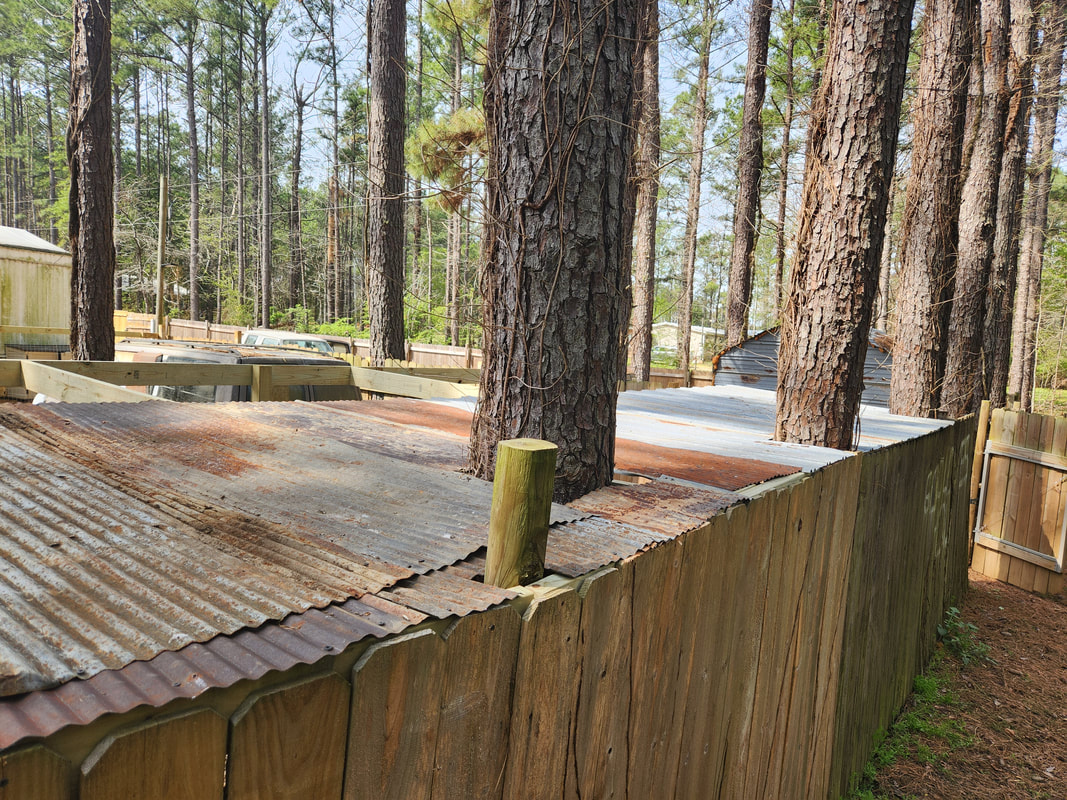
The rear fence is not straight so getting the lengths of the sheet metal even with one another was not going to happen. As a result extra metal was added at the very rear to ensure full coverage, especially around the trees.
