The 1976 Chevy LUV Toyota Truck Frame Swap
The Chevy LUV is a truck that has sat in our ranks for quite a while, being a test platform for a number of different setups that I thought of throughout the years. This truck has had a diesel powerplant in it in two different versions, its had its original powerplant rebuilt and dropped back in for a short while. It's had an old S10 2.8L powerplant installed. It's had a Ford 2.3L/C3 automatic powerplant dropped in. Just recently I dropped in an EV ensemble that consisted of an electric motor coupled to a Ford C4 transmission. Since the batteries needed would've set me back upwards of $700, this project hasn't been completed. Not to mention a traditional EV would not even be practical for use other than around the yard, since the range would not allow the truck to get to the closest town, much less to the urban areas we frequent. For the same $700 I could find a used powerplant and drop that in the truck and restore it to regular operation. As time went by, parts for this truck have become harder and harder to find, making this truck become more impractical to have in its current state. Conveniently, I found the truck frame that made up the Toyota Chicken Truck has the same wheelbase as the LUV. Since the bed on the TCT was rotted, it was of no use in the chicken coop format. Recent work had me take the Toyota cab and mount it on a standalone foundation as a chicken coop, leaving the frame open and free for me to use for a frame swap project. The LUV truck was stripped of most of the EV hardware, save the motor/transmission. I'll remove that when the old LUV frame is freed up, since all I'll have to do is lift it easily off the frame without having to work around the truck body. I want to start off removing the bed since there's only eight bolts holding it in place and they're all easy to reach.
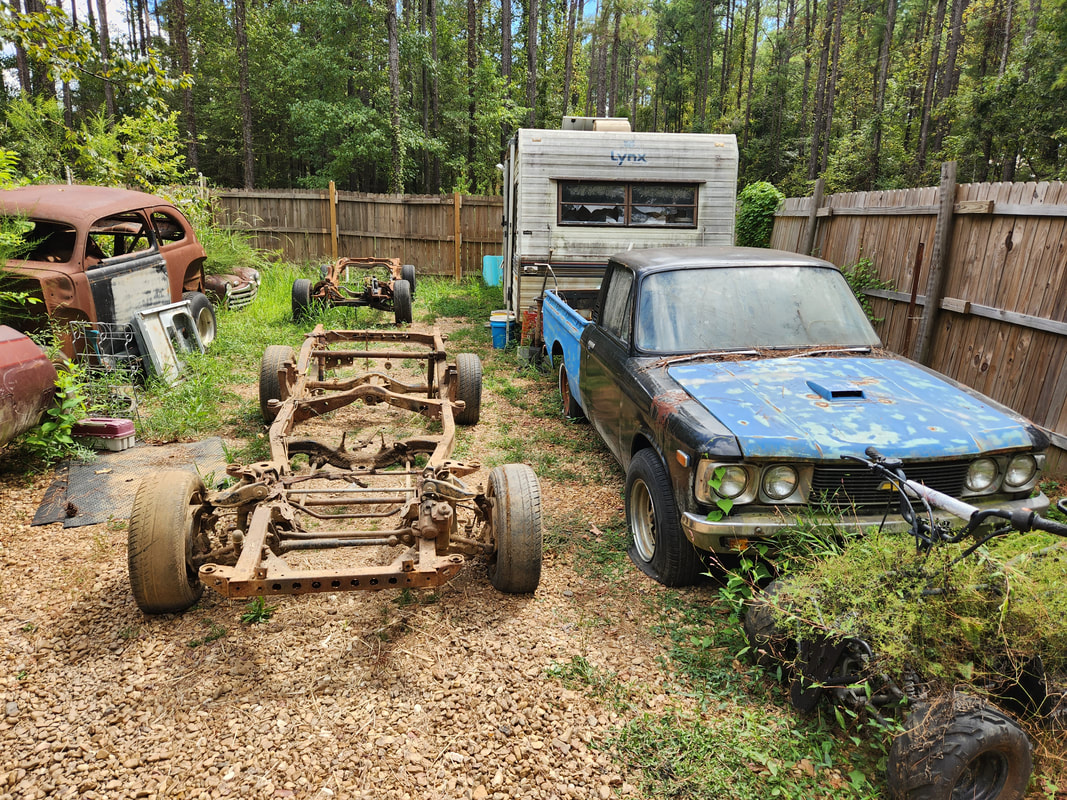
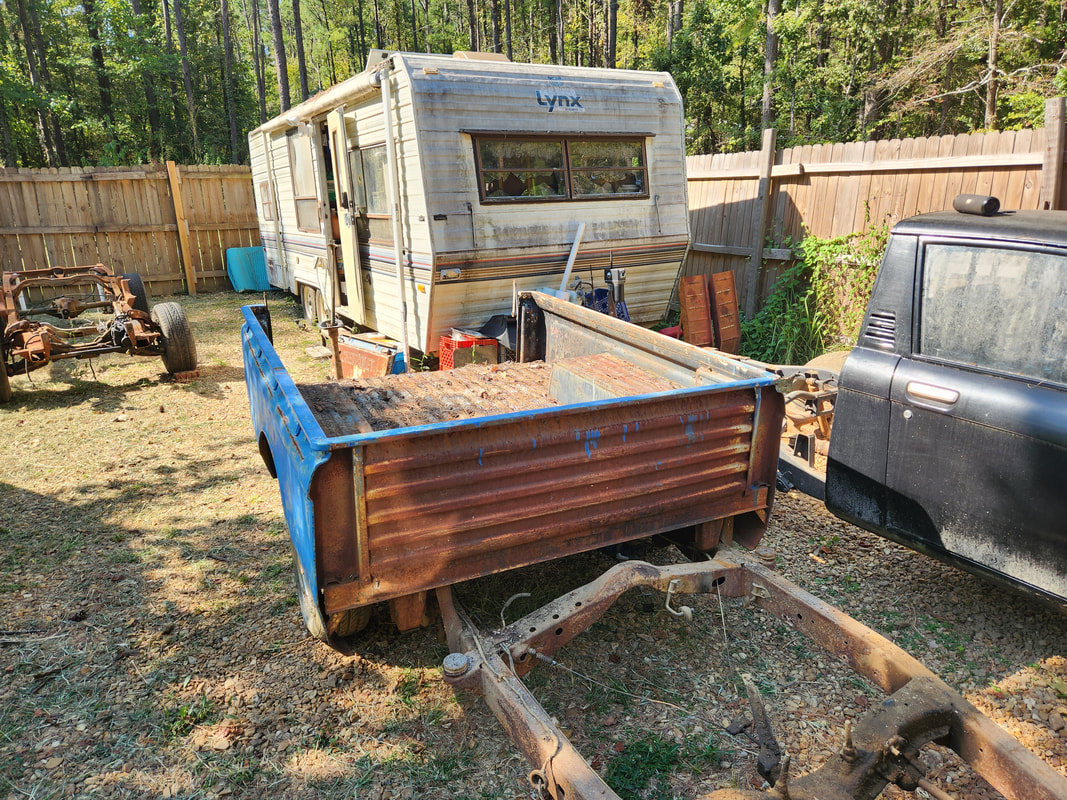
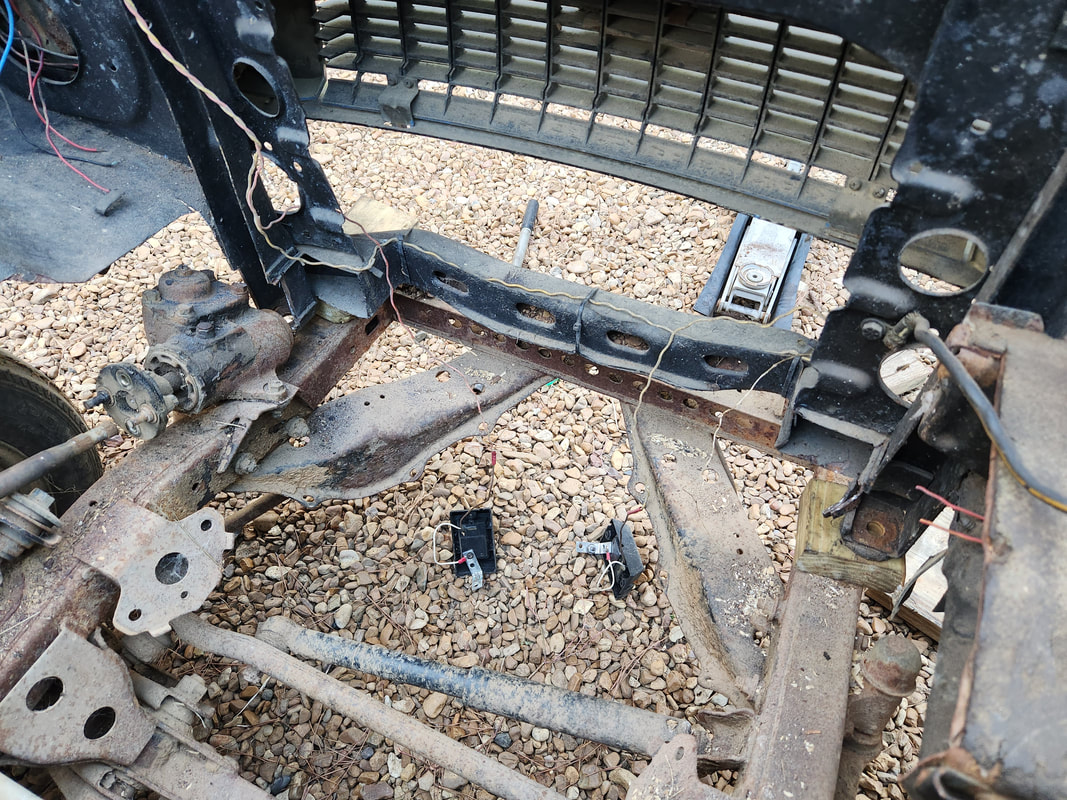
After removing the cab from this frame, the frame was dragged and pushed into position to park it next to the LUV to have it ready for the swapping of the LUV body over to the new used frame.
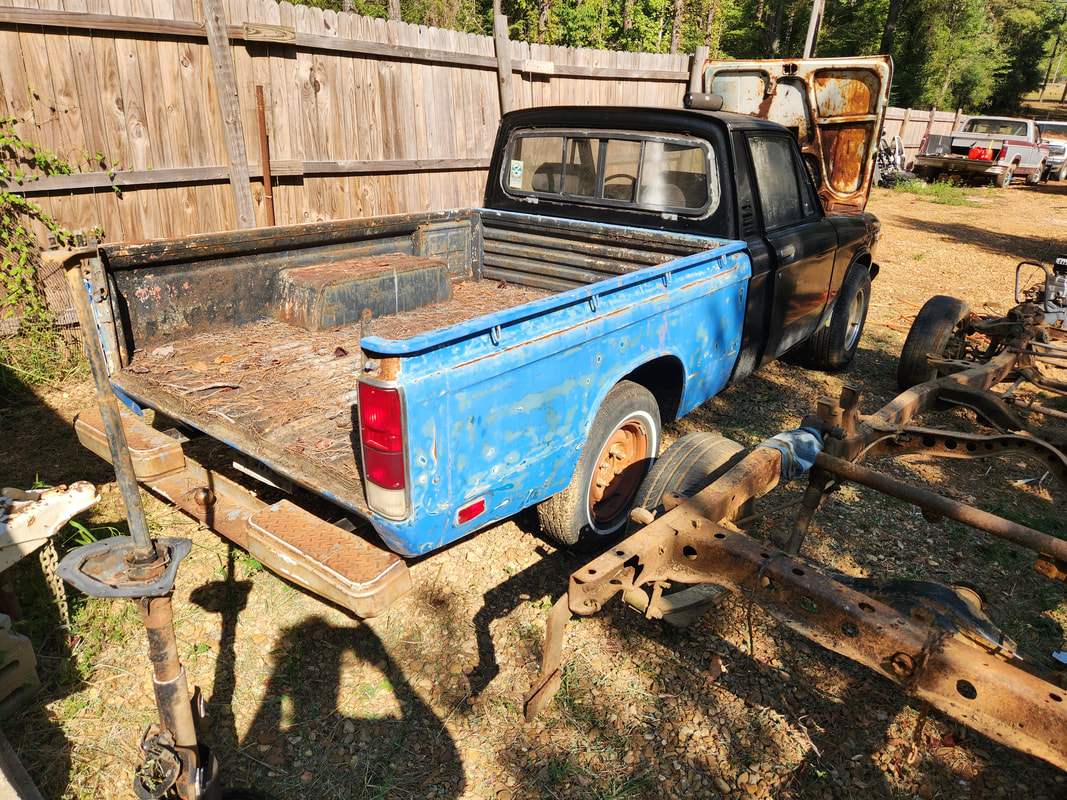
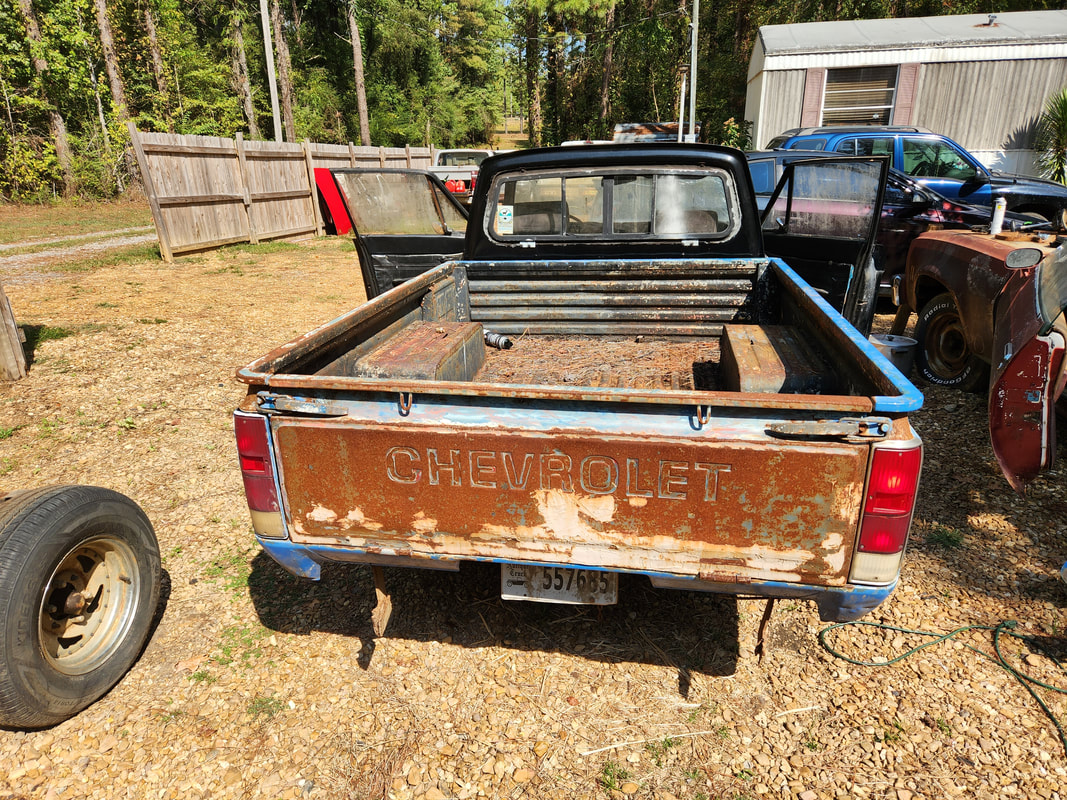
After removing the nuts and bolts from the bed, the tailgate was removed and the Yota frame was worked over closer to the LUV to close the gap so moving the bed over will be easier.
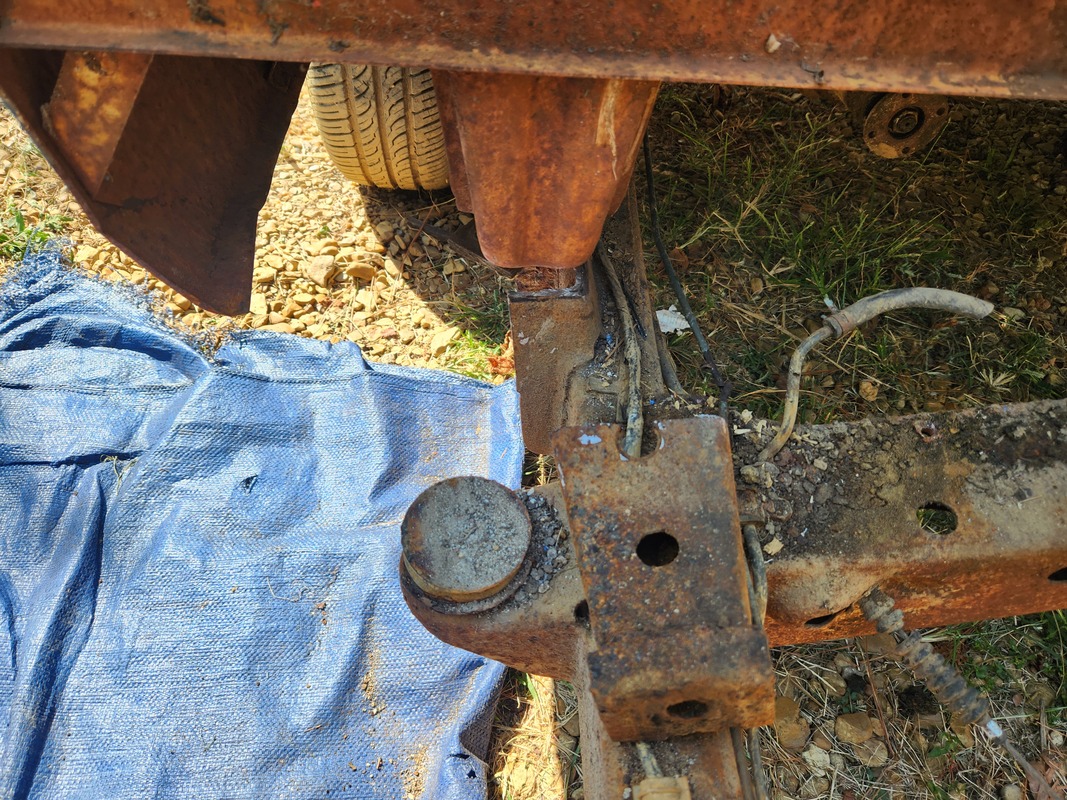
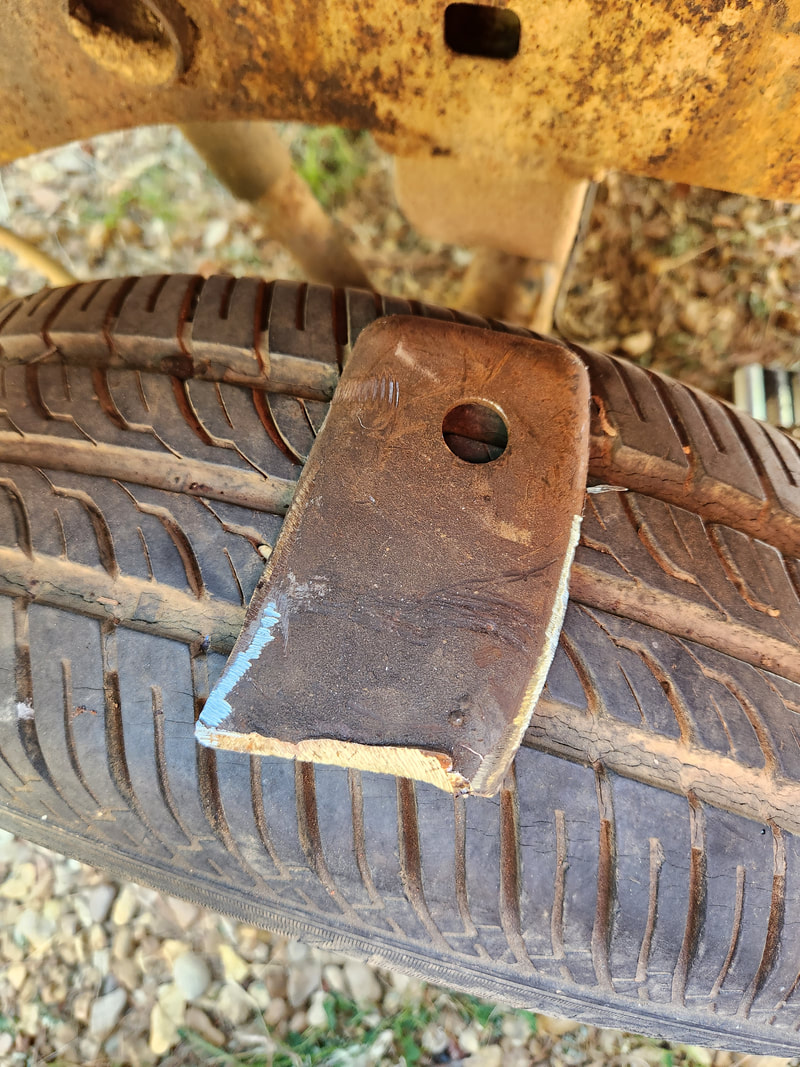
After moving the bed onto the Yota frame, the bed mounts on the LUV bed hang down while the bed mounts on the Yota frame poke up. Both are obstructing one another so the bed had to sit off center some until I can cut one set of mounts or the other.
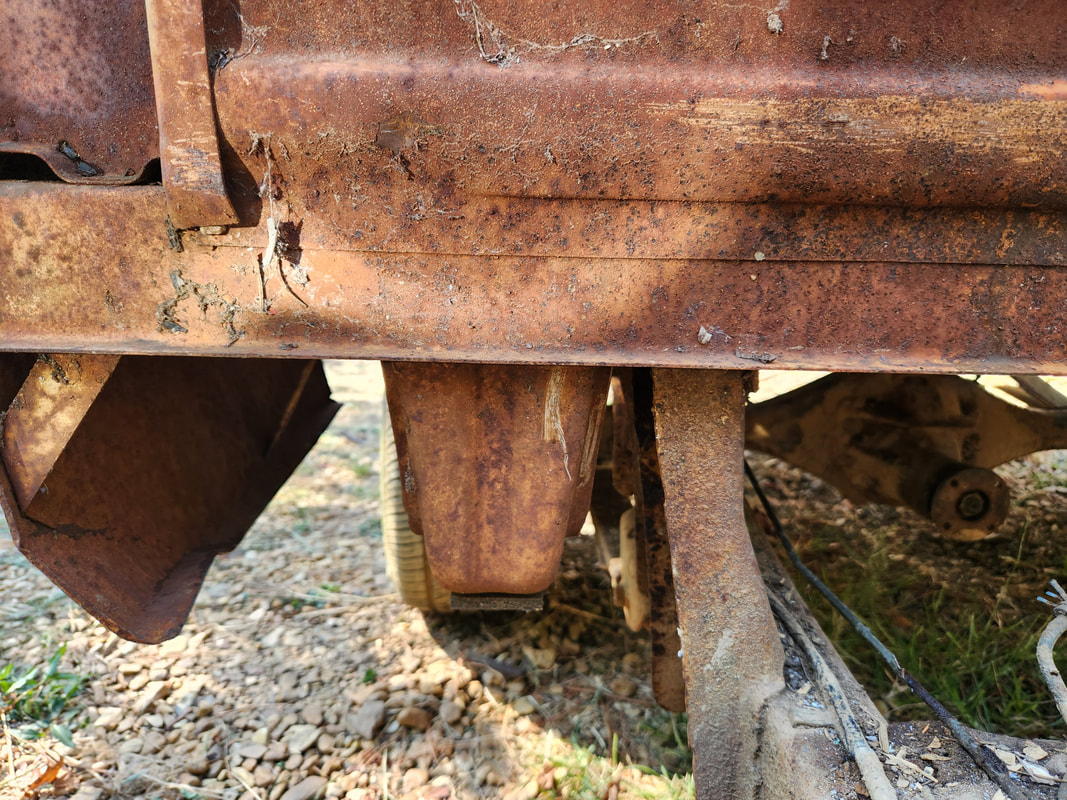
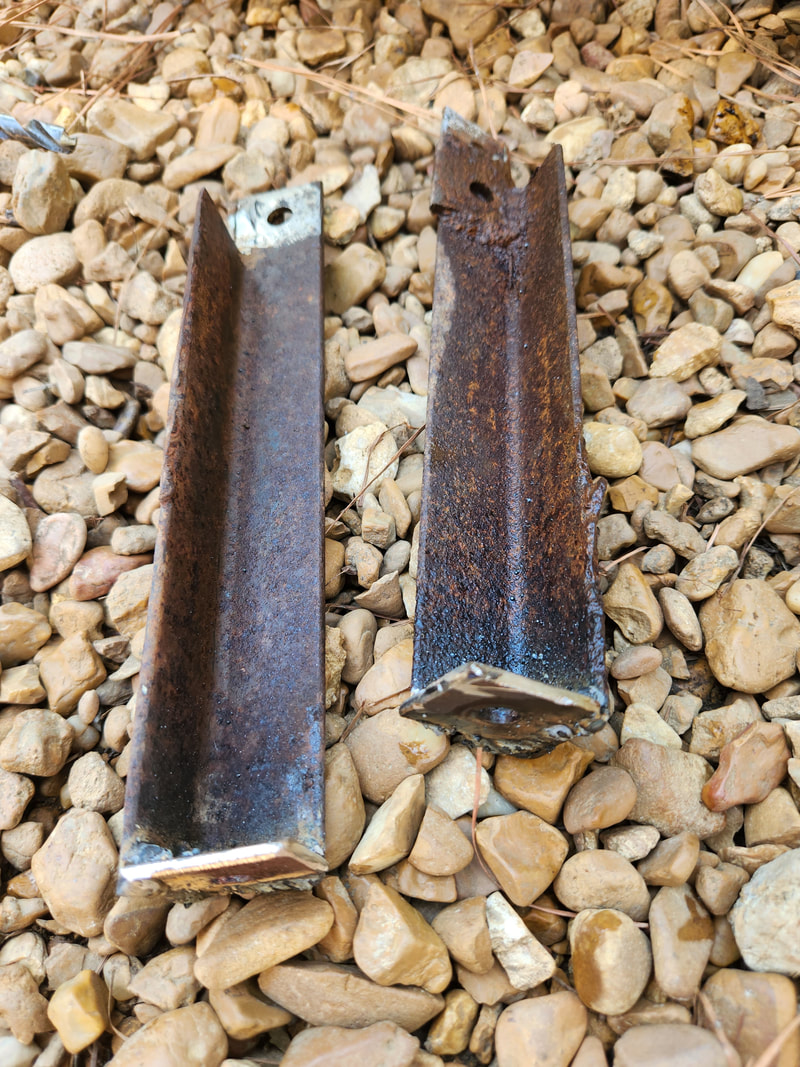
The closeup of the two different mounts shows where we stand. Since the LUV frame is more valuable intact, I chose to cut the mount off the Yota frame.
After chopping off the Yota frame bed mounts, I was able to slide the LUV bed over to center it on the frame. The LUV mounts sit right on top of the cut off Yota bed mounts perfectly. I'll take the bolt hole tops from the Yota mounts and cut them short then reweld them to the cut down bases so I can bolt the LUV mounts to the new Yota frame mounts, securing the front of the LUV bed to the frame.
After cutting the large portion of the brackets from the front of the frame, I trimmed the top portion of that piece, leaving a top that I can weld right on top of the base that remained on the frame. This provided a solid surface for the front LUV bed mounts to sit on top of, allowing me to secure the front of the bed with their respective nuts and bolts. Moving to the rear, I had to do things a little different. Since the rear mounts on the LUV bed were nowhere near the Yota frame rails, I had to create a whole new mounting assembly, a crossmember if you will. I took a length of heavy conduit pipe and trimmed it to fit between the frame rails. Then I took the brackets that I cut from the front bed mounts on the Yota frame and trimmed them down to where they would be able to bolt to the LUV mounts and make contact with the pipe. After welding the two brackets in place, I welded another length of pipe next to the first pipe, making a thicker heavier crossmember. I had to lift the rear of the bed up to give me the clearance to allow me to weld all around the pipes, top and bottom. With the pipe crossmember welded in place, I was able to lower the bed back onto the frame and the new crossmember, adding the nuts and bolts to secure the rear in place. As for the two intermediate mounting points that I spotted, the left side is in an open spot that would allow me to cut a bracket that's like a large angle brace that I can weld in place and secure the nut and bolt between it and the mount. As for the right side, a bracket that holds the rear brake line over the axle is right in the area where I would have to weld a bracket at. I'll have to see what I can do, but worst case, I'll just make the left side mount bracket and at least we can have five mounts holding the bed in place.
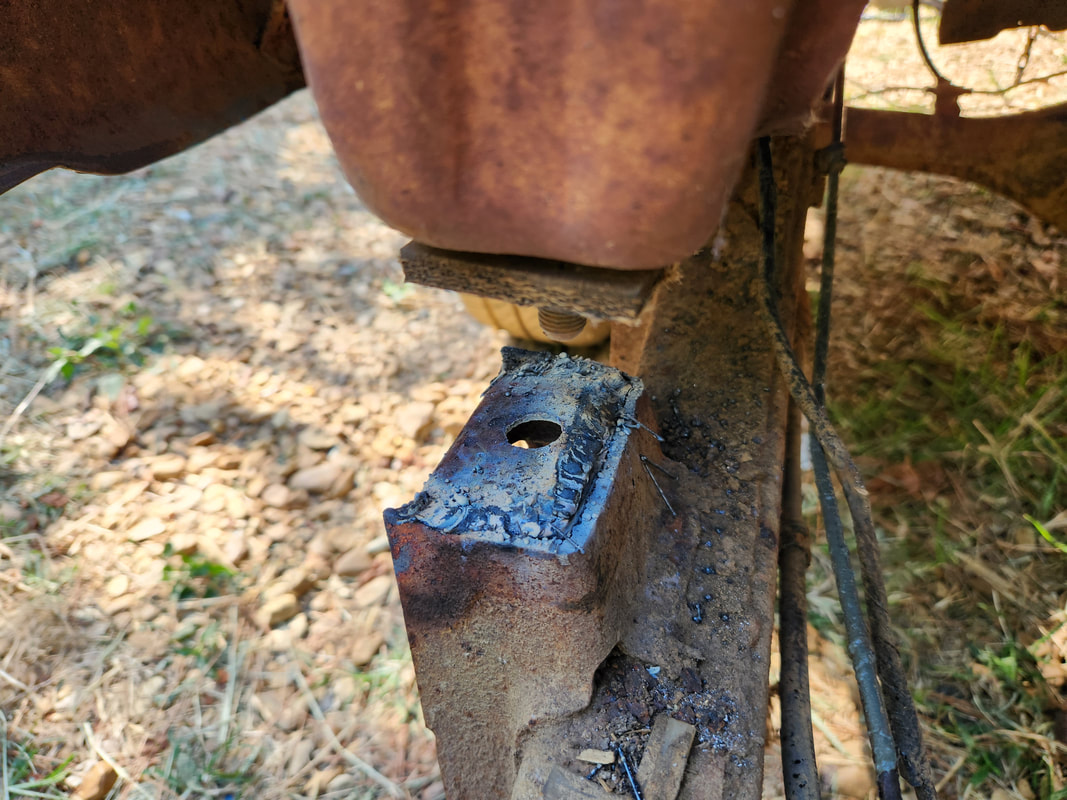
After trimming the tops from the chopped off frame brackets, I welded the tops to the remaining bases, providing the mounting surface for the LUV bed mounts.
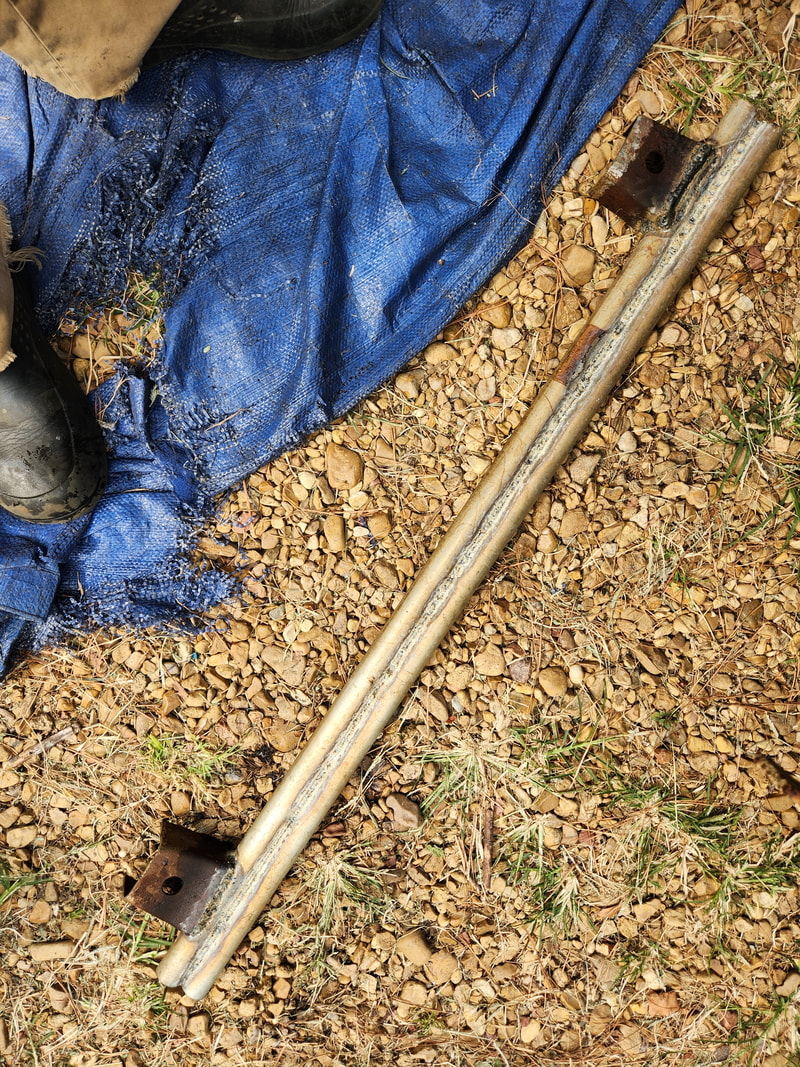
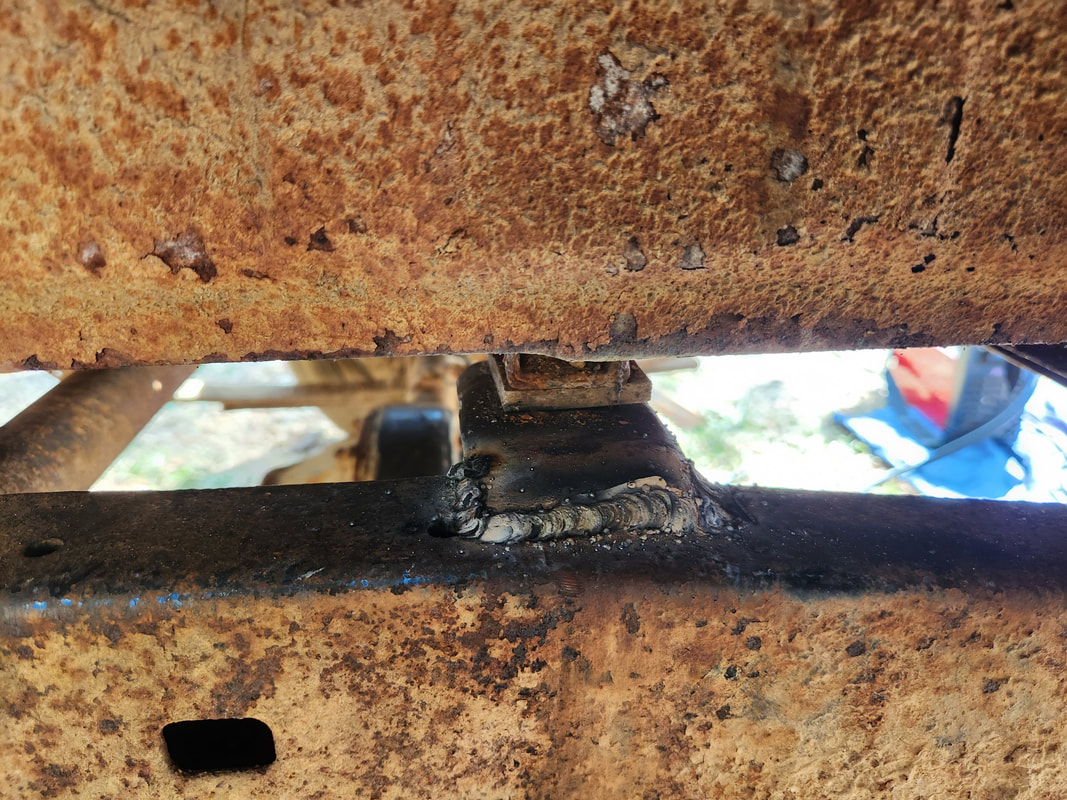
Using the cut off brackets from the front of the Yota frame, I made a crossmember with those brackets to accommodate the rear LUV bed mounts. A second pipe is welded to the first pipe to make the crossmember wider and heavier.
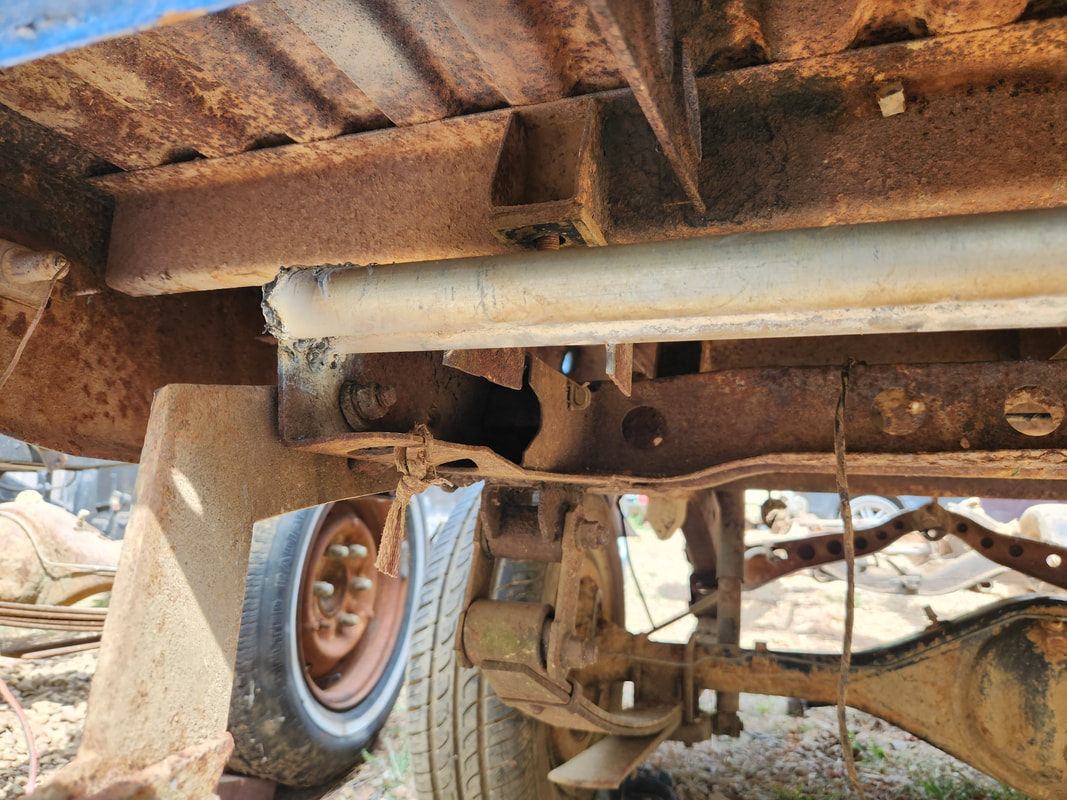
After lifting the rear of the bed for clearance, I welded both ends of the pipe crossmember between the Yota frame rails to complete the crossmember that will hold the rear mounts on the LUV bed.
With the bed mounted, the next order of business is prepping the cab for removal and placement on the Yota frame. This involved removing the doors and hood, seats, brake lines from master cylinder, parking brake cable, body mount bolts, and install the Yota transmission and driveshaft before placement of the cab. It would be easier to do the transmission now when the frame is wide open versus when the cab is in place as its a pain to put the transmission under the truck on a jack to install it in the regular manner. Most of the bolts came out easy despite excessive rust but one had to be cut free due to excessive rust. The front bolts had to be tapped upwards to remove them from their bases. The front bumper was also removed with its brackets for better clearance around one of the body panels that go partially under the rear lip of the bumper. Once this was all done, the tractor with the forks was brought in. I used chains and tow straps to secure the cab under the forks in order to lift the cab off the frame with a minimum chance of damage to the cab. Coming in at an angle from the side, once the cab was lifted from the frame, the frame was pushed out of the way so I can come in from the same angle right onto the Yota frame. Once the cab was staged on the frame, I was able to do all the jacking up and cutting and moving around of the cab to get it positioned how it needed to be so the body lines are matched up and gaps between the bed and cab are matched up and the cab is overall level with the bed. With this done, I can start the final mounting process.
The brackets that were cut from the S10 frame during that project provided the material to cut these brackets out of for the intermediate body mounts.
The pieces are welded in place on top of the frame rails, centered around the mount studs on the LUV bed so once the nut is torqued down, it will pull the bed closer and more solidly in place.

Doing the intermediate mounts like this allowed me to be able to clear the brake line bracket that would've prevented me from making large angle brace mounts. The welds go all around the bottom and tops of the brackets.
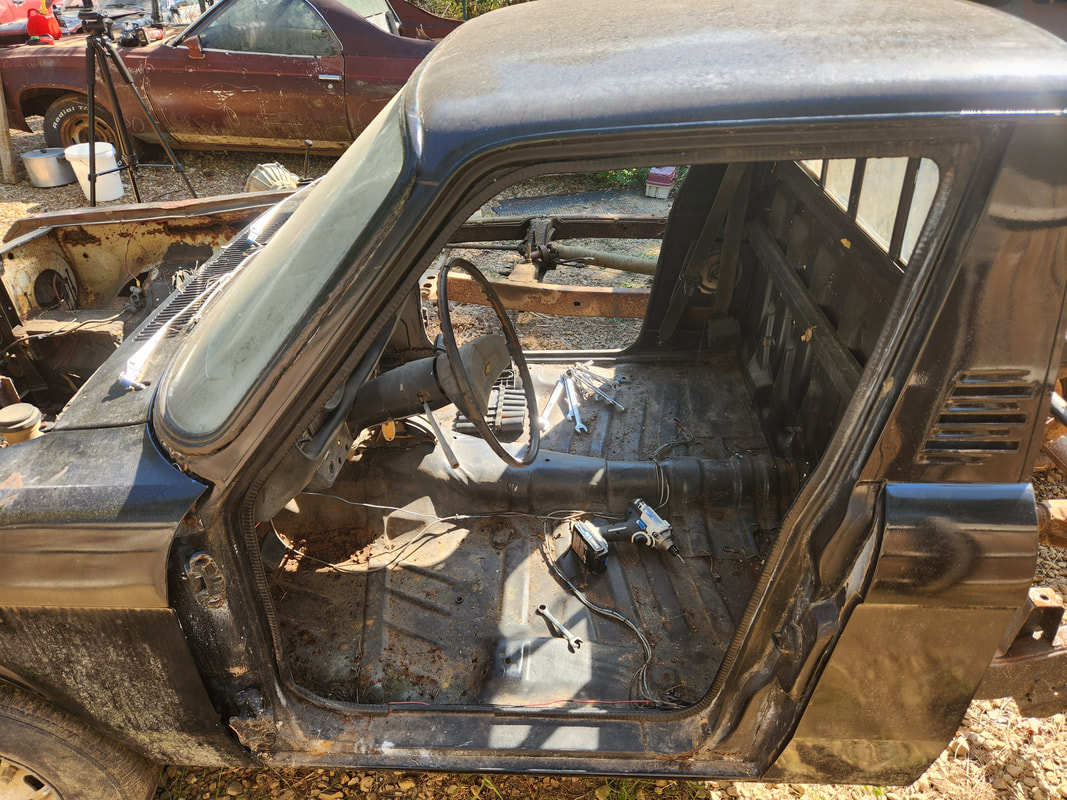
The doors and seats are removed from the cab in preparation for cab removal. The body mount bolts are removed or cut out too.
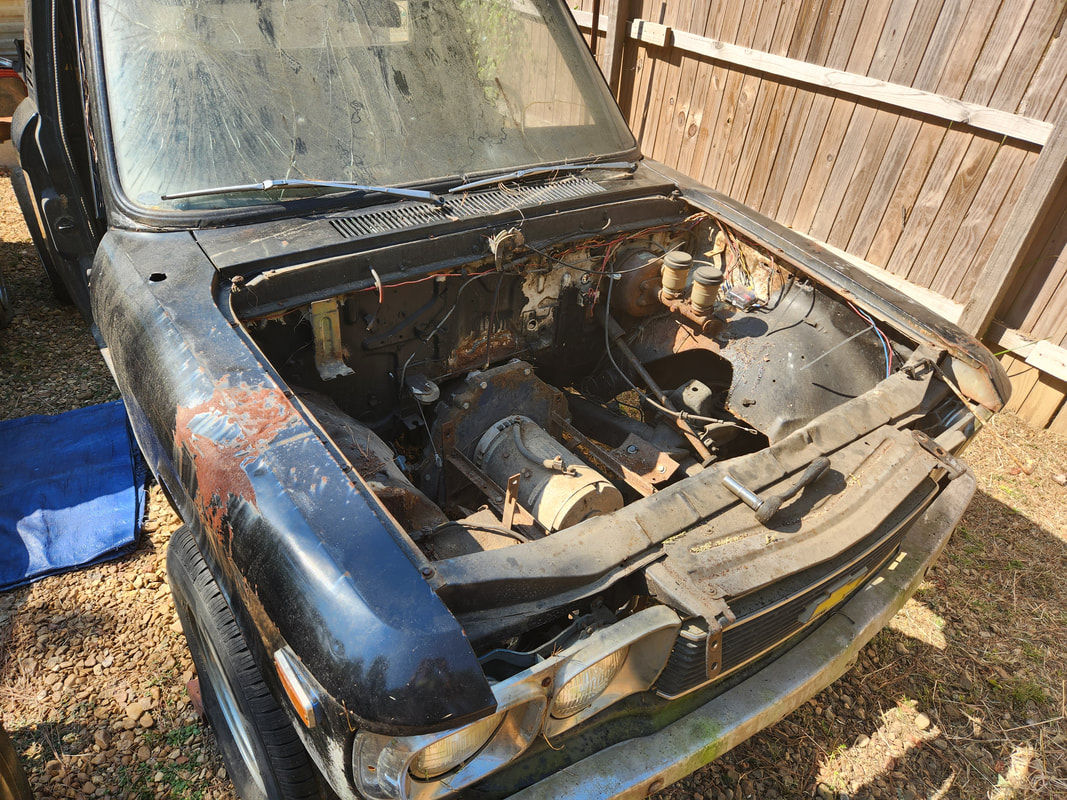
The hood is removed and in the engine bay the brake lines are disconnected from the master cylinder as was the parking brake cable. The front mounts were tapped out and the bumper removed with its brackets. With that the cab is ready for removal.
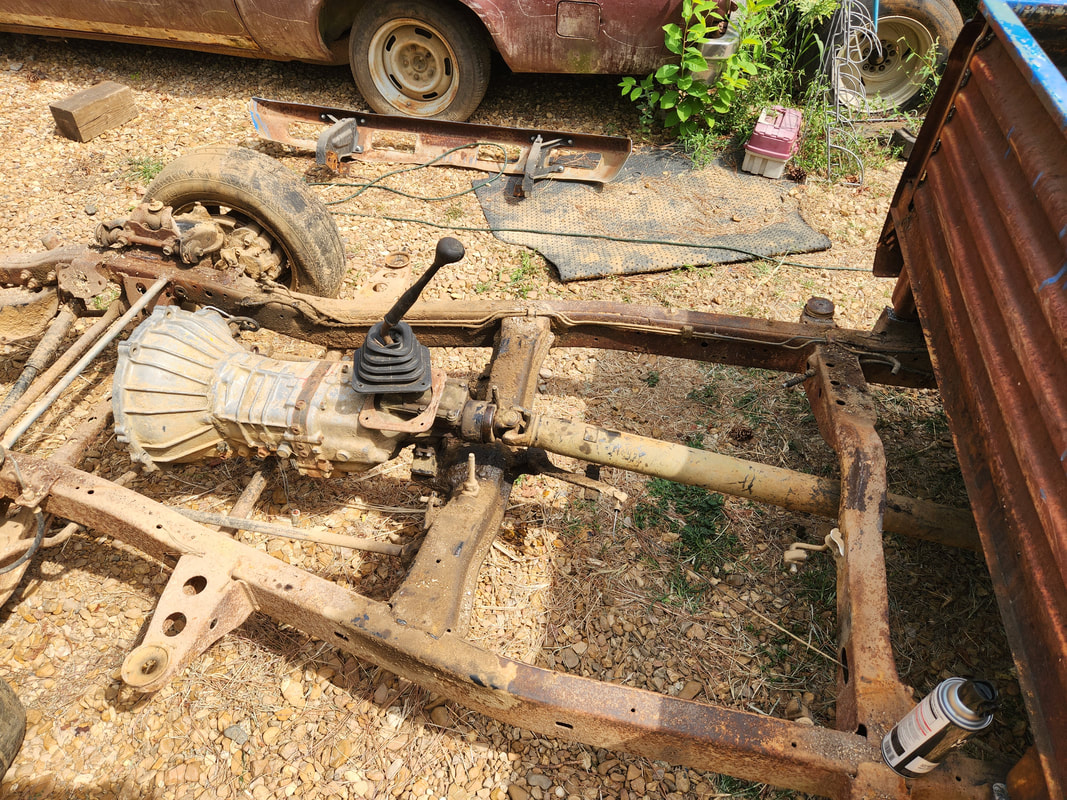
Before placing the cab down on the Yota frame, the original 5spd transmission and driveshaft are installed, with the original hardware, so when an engine is placed in this truck, the transmission back is already taken care of.
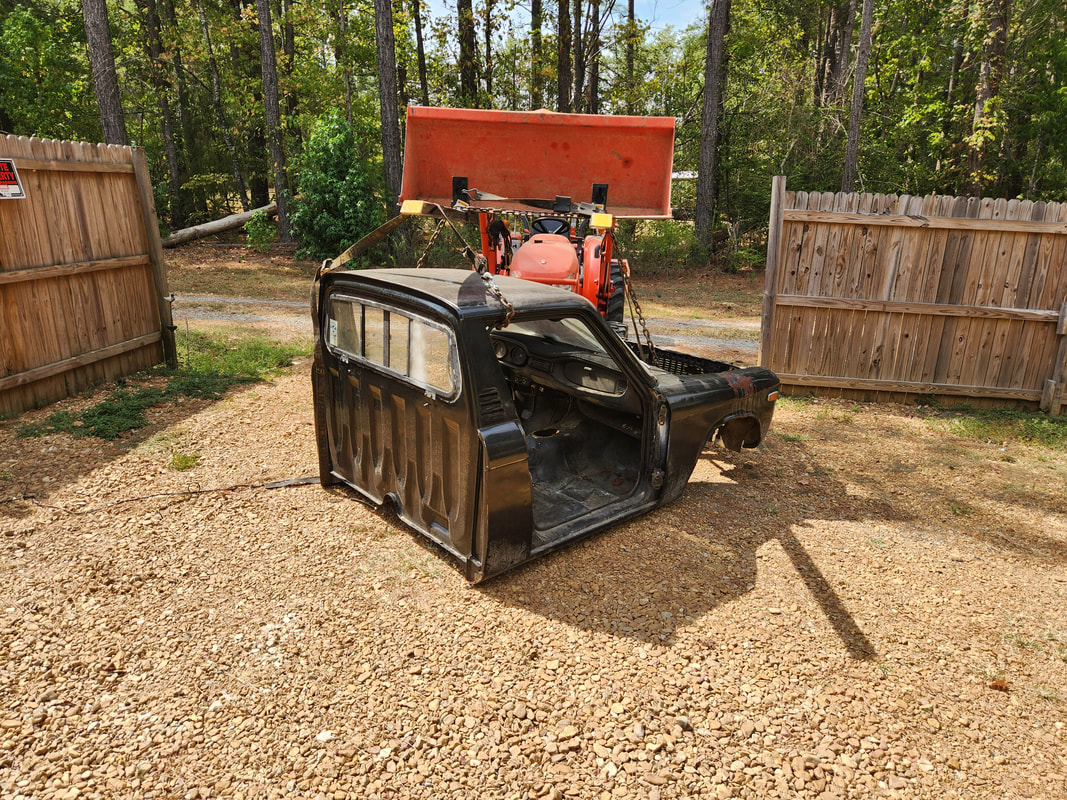
The forks are placed over the cab and chains and straps used to lift the cab off the frame. This way the potential for damage is lessened compared to just placing forks under the roof or under the rocker panels to lift the cab.
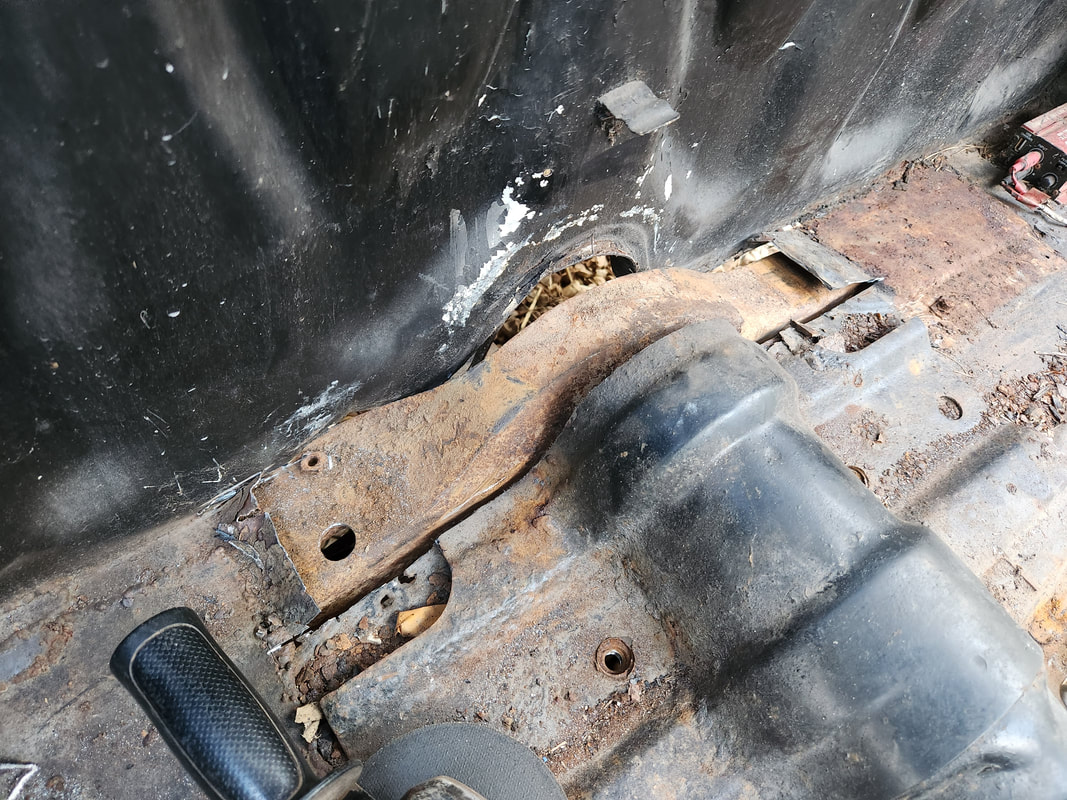
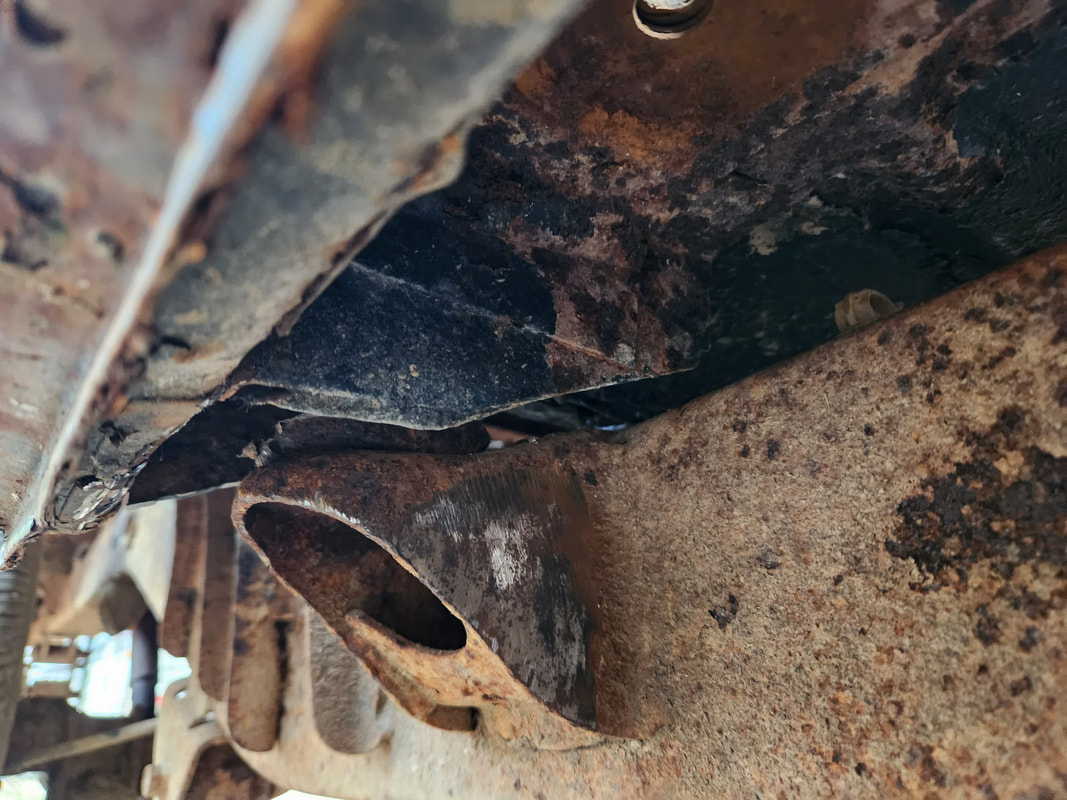
This Yota frame crossmember is higher than the floor on the LUV body. I had to cut a patch from the floor to allow the crossmember to protrude into the cab so the cab can sit lower on the frame.
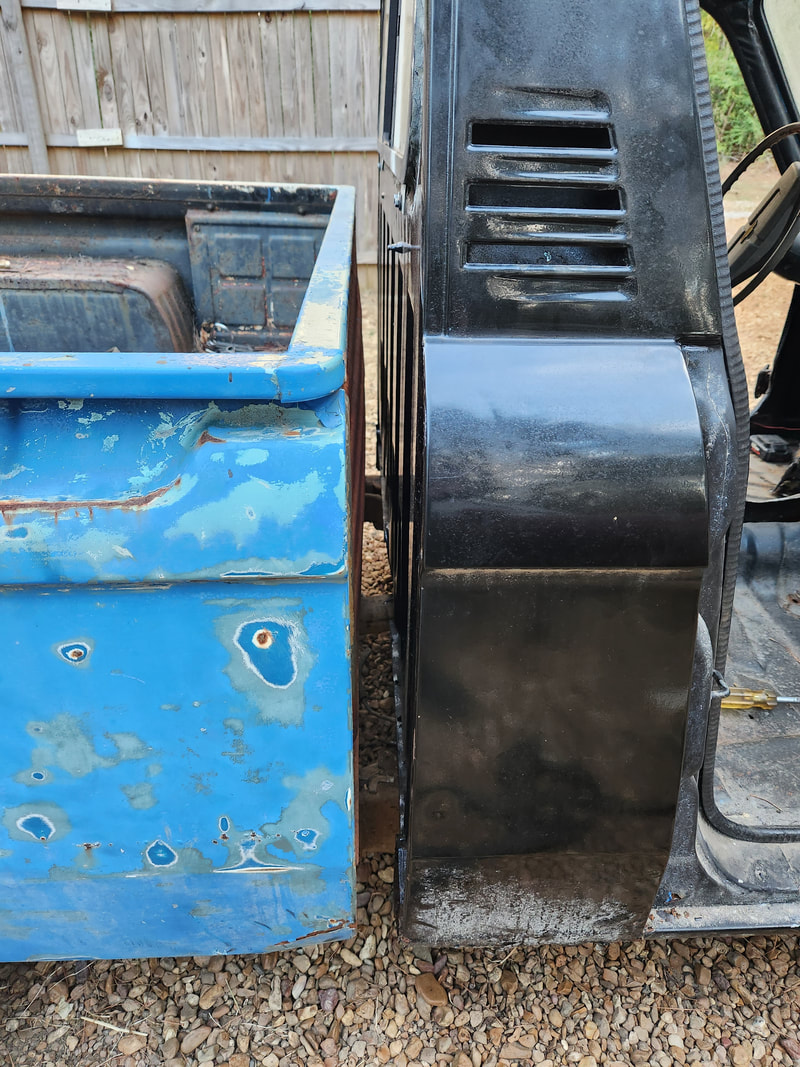
One of the most important things is maintaining the body lines between the cab and bed while also maintaining an even gap between the two from top to bottom.
To help in getting the rear of the cab to sit lower, I had to cut out these metal boxes to allow the Yota body mount brackets to sit in place without interference. I can drill holes through the LUV floor to place bolts in place. Bushings would go between the body mount bracket and the bottom of the LUV floor.
To make the cab sit level and even with the bed, I had to jack up the front of the body and place blocks under the body core support member to hold the cab in the desired position. I also had to cut out a little bit of metal from the left side core support area where the left front body mount is located in order to clear the Yota steering box which was making contact with the body core support.
|
|
|
|
|
|
|
|
|
To begin the final mounting of the cab to the frame, I started in the rear with drilling holes through the Yota mounting brackets and up through the LUV cab floor. I had to add double bushings on the right side to clear the gap between the bracket and floor and when the bolt was torqued down, it compressed the bushings enough that the cab was drawn back down, realigning the cab with the bed. The same went for the left side, except I didn't have to add two bushings, just one, since the gap was much smaller. The left side spacing between the bed and cab is even from top to bottom while there is a slightly wider gap at the top compared to the bottom on the right side. This might be due in part to the idea that the original truck was in an accident and could've compromised the frame somewhat. On the right side the corner of the LUV cab floor broke away due to being a patch panel added a long time ago. I had to weld the panel back up, filling in the gaps with weld slag to correct this problem. I also took a moment to weld the patch panels on the center hump where the shifter was since the shifter did line up with the original shifter hole on the LUV cab. As for the front mounts, I drilled holes up through the frame rails to line up with the body mounts on the cab body. This allowed me to add extra long bolts with washers and bushings to support the front of the cab body while providing the spacing necessary to keep the cab level with the bed.
Two old body bushings had to be sandwiched together to fill the gap between the mounting bracket and the bottom of the floor. The thickness was a little more than the gap but when the bolt was tightened it compressed the bushings, drawing the cab down to line it back up with the bed.
As a result of the extra compression on the bolt, it pulled the corner of the LUV floor free from some old welds. Since this was a patch panel, the welds broke free, leaving large gaps that had to be welded back in, as seen here. The floor on the cab is really made up of the main floor and the sheet metal on the outside that remained after cutting the box section to accommodate the bushings.
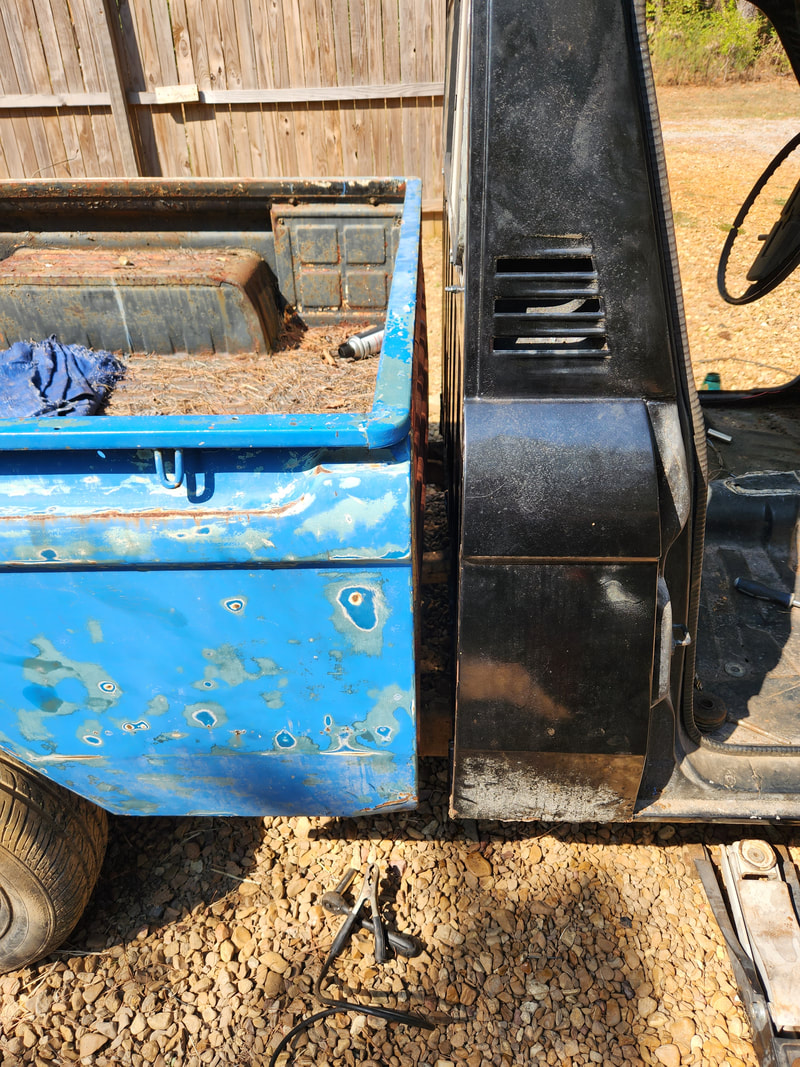
The body lines are maintained after securing the bushings and bolt with only minor unevenness between the top and bottom. This could be due in part to past accident damage that may have twisted the frame some. Hopefully this eventually settles through use.
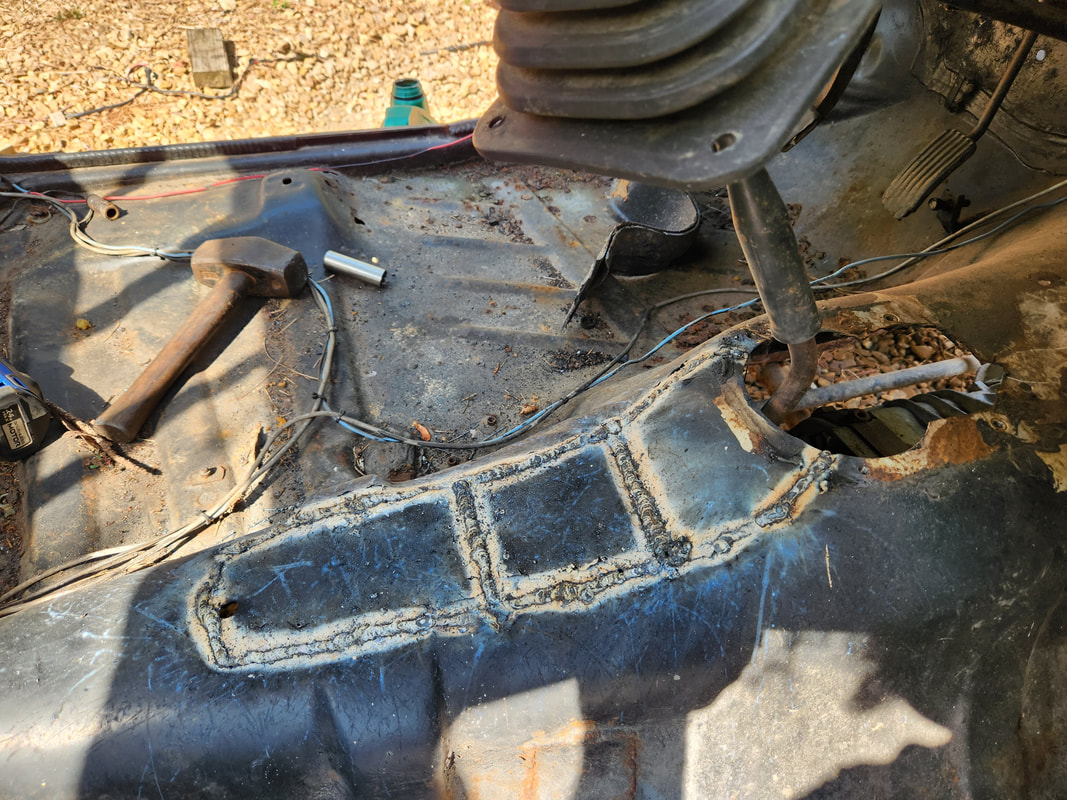
The area of the center hump cut out during the placement of the cab was welded back in since the Yota shifter sits within the opening of the old LUV shifter.
|
|
|
|
|
|
|
|
|
|
|
|
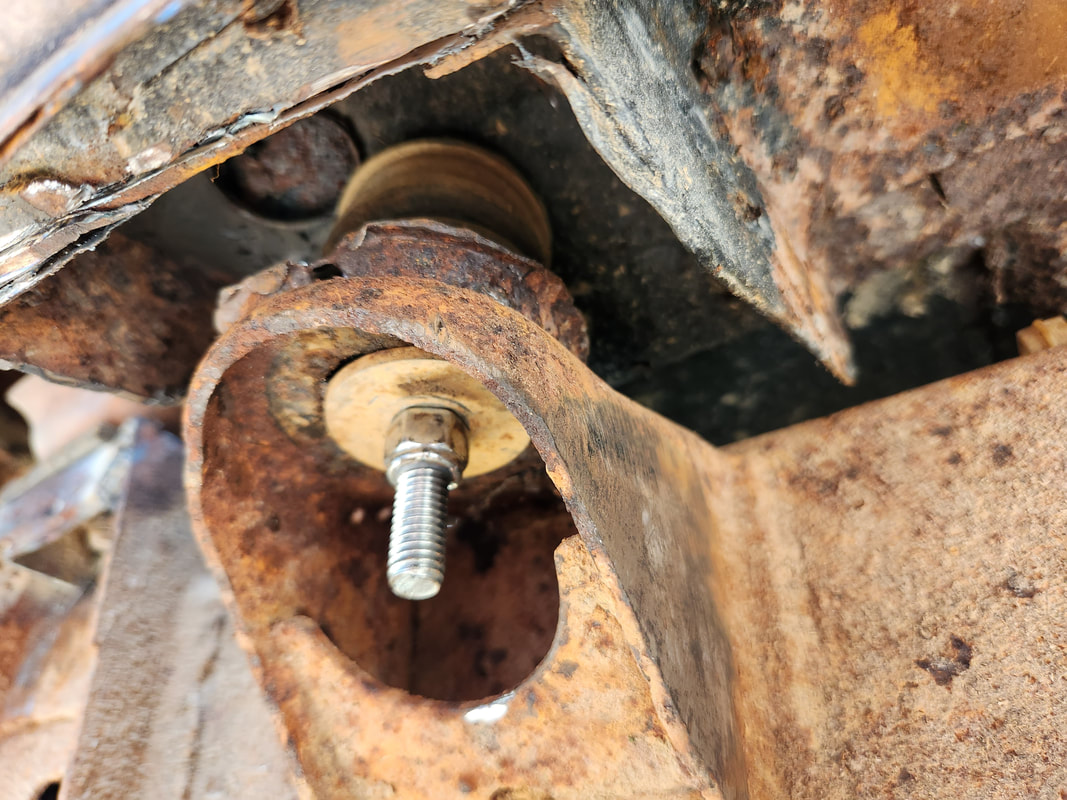
Establishing the front body mounts was pretty simple for all intents. After drilling a hole through each front frame rail, lining up with the LUV body mount, I placed a salvaged body bushing with a couple of stacked washers on either side between the bottom of the LUV body mount and the frame rail. A long bolt was placed though the body mount and through the bushing, washers and frame rail, with a lock nut and washer securing the bolt under the frame rail. With both sides done in the front, the intermediate mounts were even simpler. Since the Yota frame mount brackets were right below a large open section of floor, I just drilled a hole up through the mount and through the floor. Another salvaged bushing was squeezed between the mount and the floor, with another bolt placed through the floor and the bushing and mount. Large washers were used on either side to ensure a wide distribution of force over the floor sheet metal. With the body mounts all done, I put the doors and hood back on so the interior of the cab and engine bay will be protected from the weather.
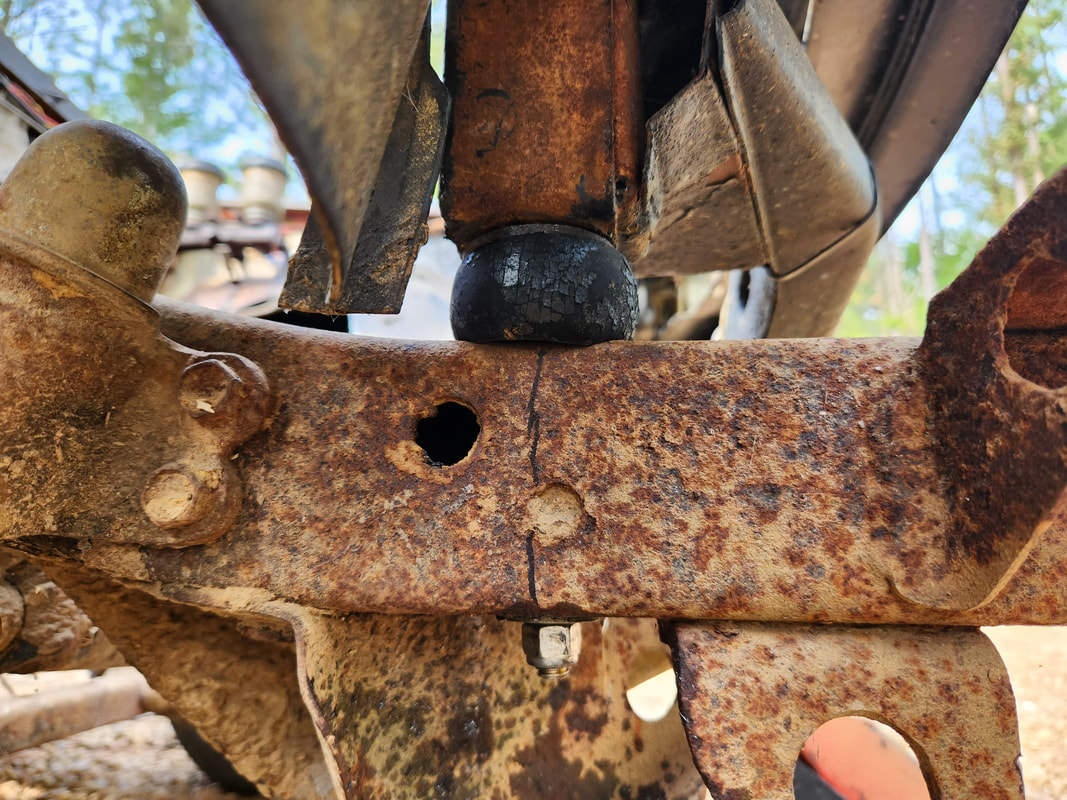
A salvaged body bushing with a washer on either side fills the gap between the LUV body mount and frame rail. With the bolt torqued down, the bushing compresses some but the washers help maintain the gap so the cab can stay level.
A top view showing the bolt going through the body mount base and into the frame rail.
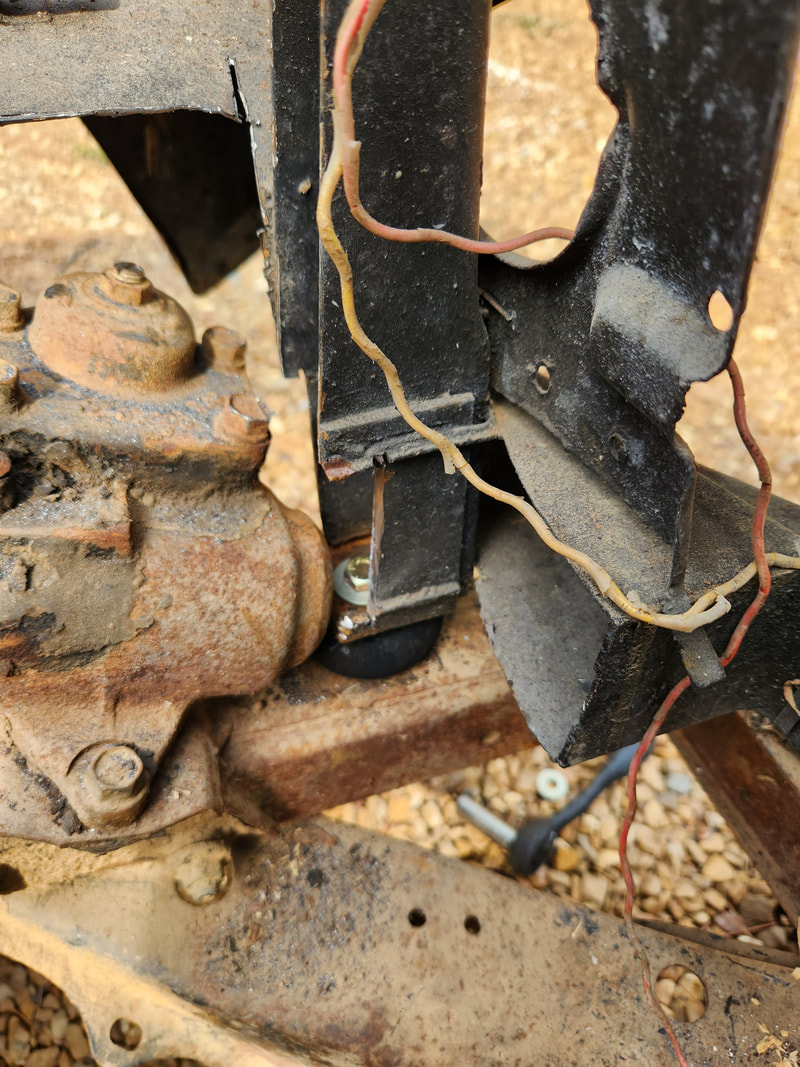
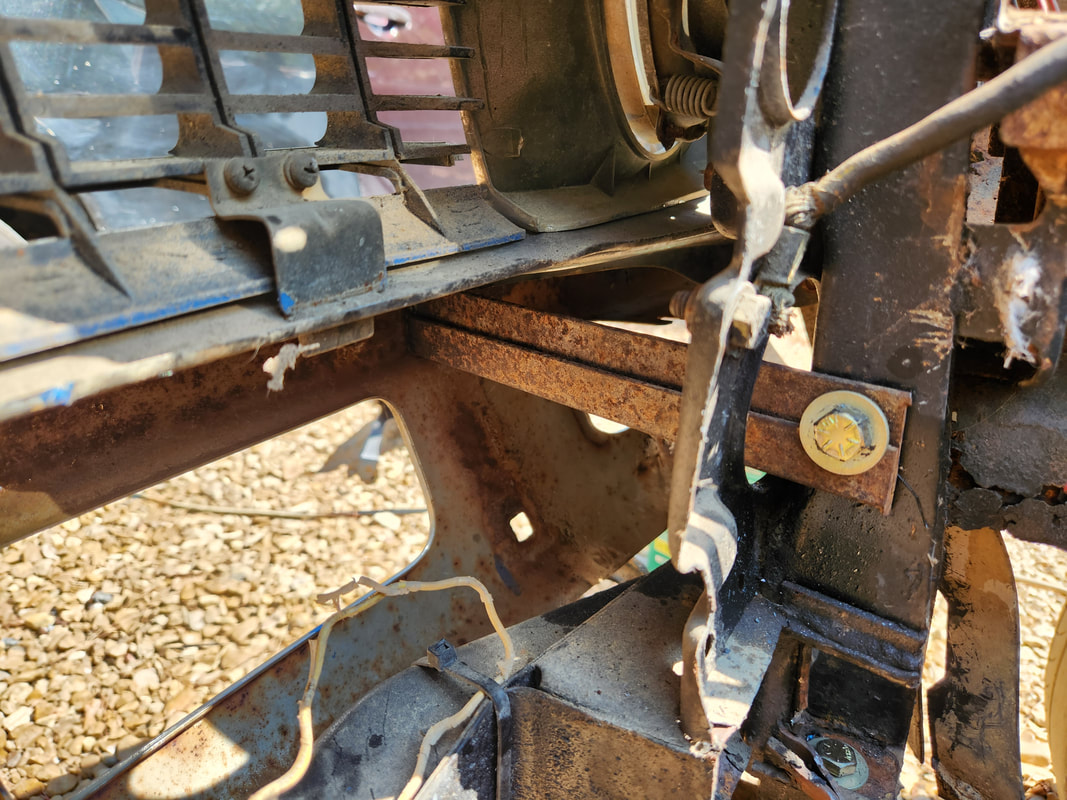
On the left side the support member had some metal cut out to clear the steering box. The whiole of the mount base was maintained in order to not compromise the strength of hte mount.
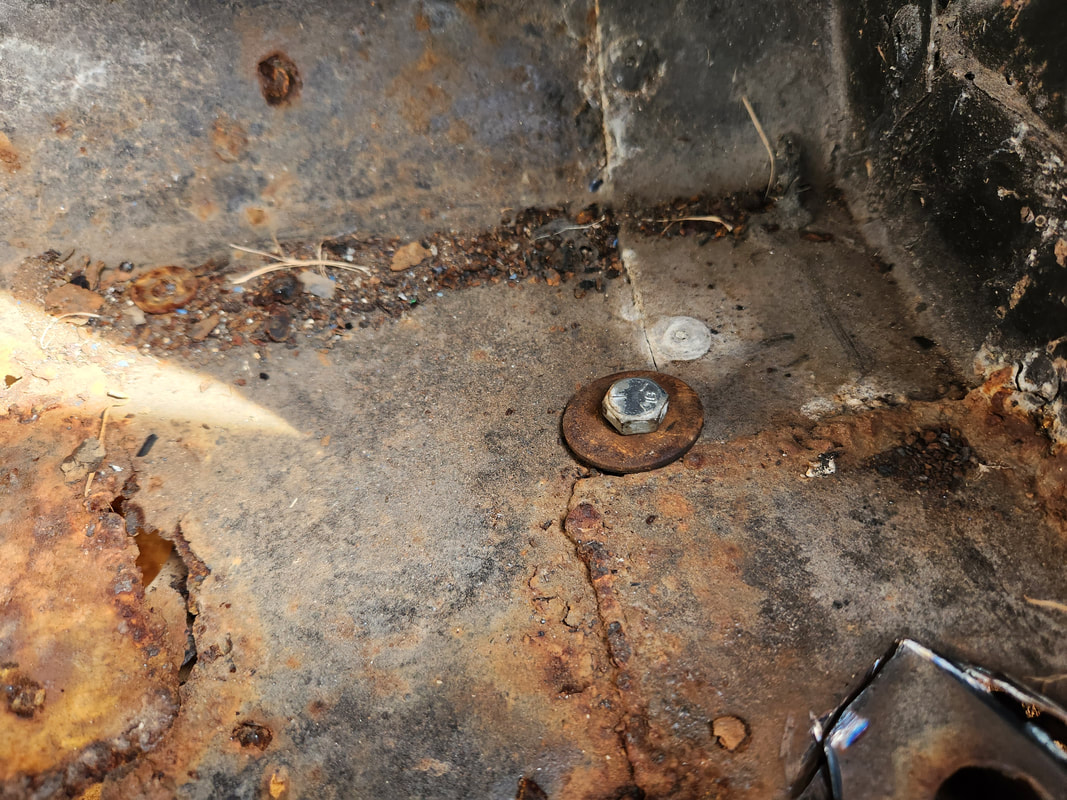
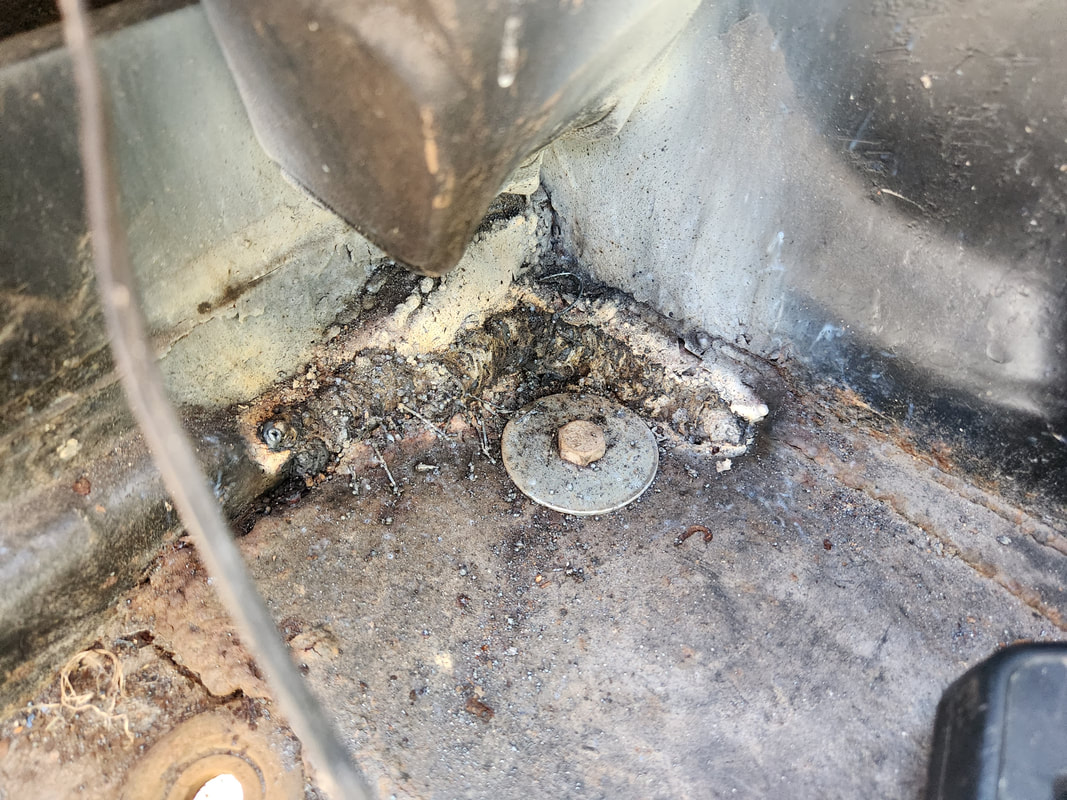
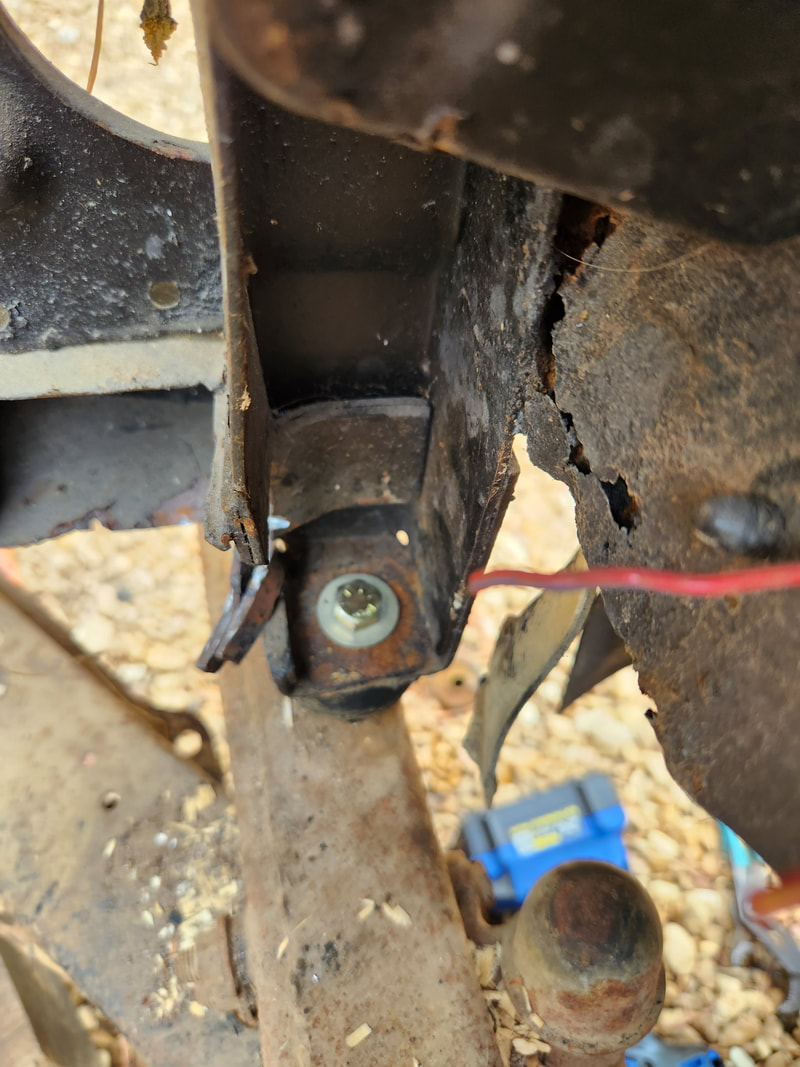
The bolt for the intermediate mount goes through the floor and into the bushing cushioning the body over the Yota frame body mount. Luckily this area of floor isn't too rotted that the metal still maintained its integrity under the stress of the torqued bolt.
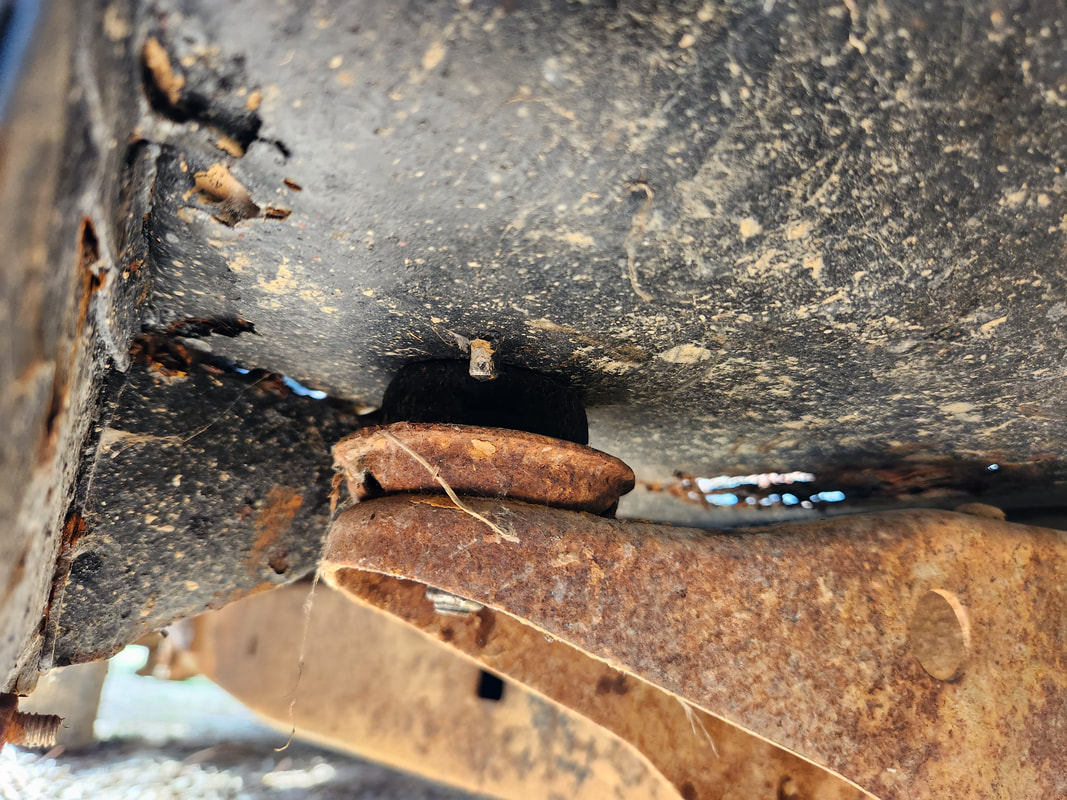
The body had to be pushed up a little to open the gap between the body and the frame body mount in order to squeeze a bushing between the two. Once torqued down, the bushing only had light compression since the rest of the body was already down. Too much torque couldn't be applied as it might cause the floor to distort or crack.
With the body mounted in its entirety, the doors and hood are instaleld to close everything up.
In the interior, wrapping up with the interior, I had to weld up a patch over the hole cut to clear the crossmember on the Yota frame. I also had to reweld a small patch on the right front floor. I added a small piece of sheet metal at the front of the shifter hole then clipped a small piece of metal from the rear of the shifter hole to allow the shifter to be able to toggle all the way back without hitting the floor metal. I installed the shifter boot as well. With this all done, the seats were able to go back in. From there I went into the engine bay and taken care of the steering coupling. I had to use the coupling end from the LUV steering shaft along with an intermediate washer piece and stretch the rag joint to be able to get the bolts from the narrower bolt pattern LUV coupling piece to pass through into the Yota rag joint. Once this was done, the steering was good to go. Looking at the bumpers, I found the exact opposite to be true. The front bumper ended up being easier to work with than the rear bumper. The brackets for the rear bumper would not line up in any capacity with the frame rails and to even be able to mount the bumper it would've required extensive welding to fabricate brackets to hang the bumper. I don't have the heavy metal required to do this since the rear bumper is heavy as hell. As for the front, being light, I was able to get away with fabricating a pair of brackets from a pair of scrap angle iron pieces that were salvaged from another project. I bolted the angle iron pieces to the left and right sides of the core support then bolted the bumper in, using carriage bolts in two of the original holes. I will end up probably fabricating a pair of roll pans for the rear valance panel in order to create a flush surface across the rear. Even if I did fabricate mounts for the bumper, I couldn't safely tow with the thing so rather than try to install this heavy ass bumper, I can go with the flush lines of a roll pan setup.
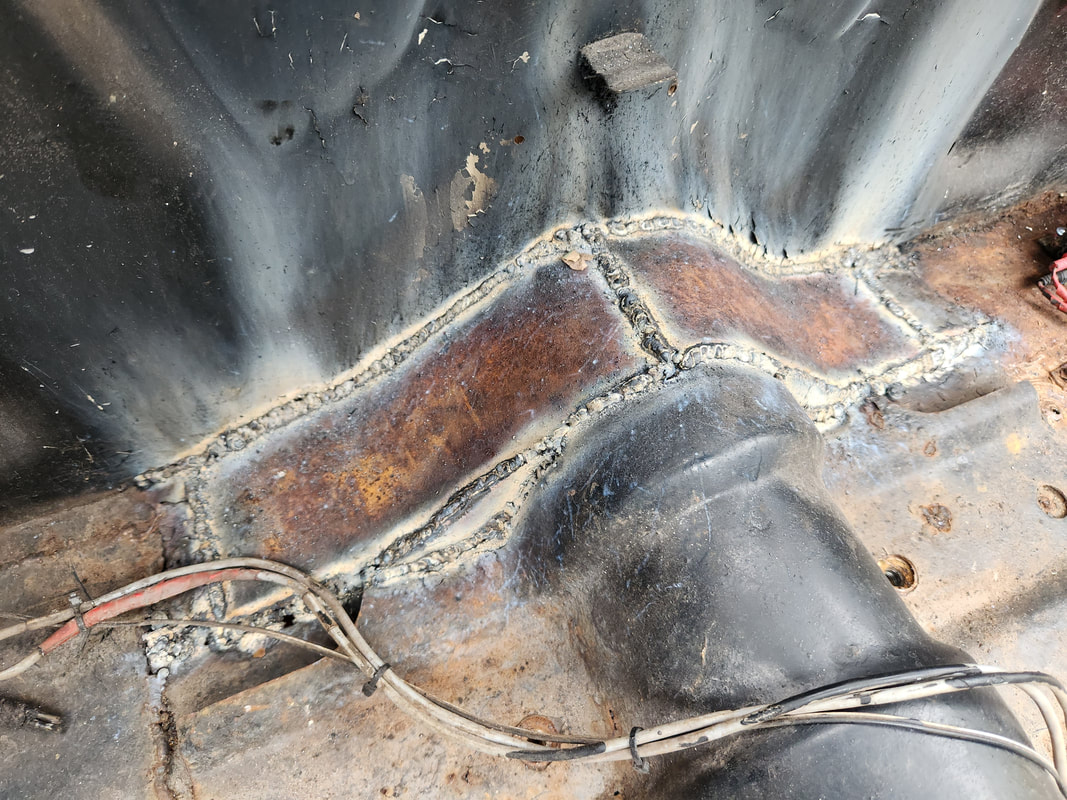
Since the metal that was cut out cannot be used over this hole, I had to weld in some scrap sheet metal to fill in the gaps and openings to cover this area.
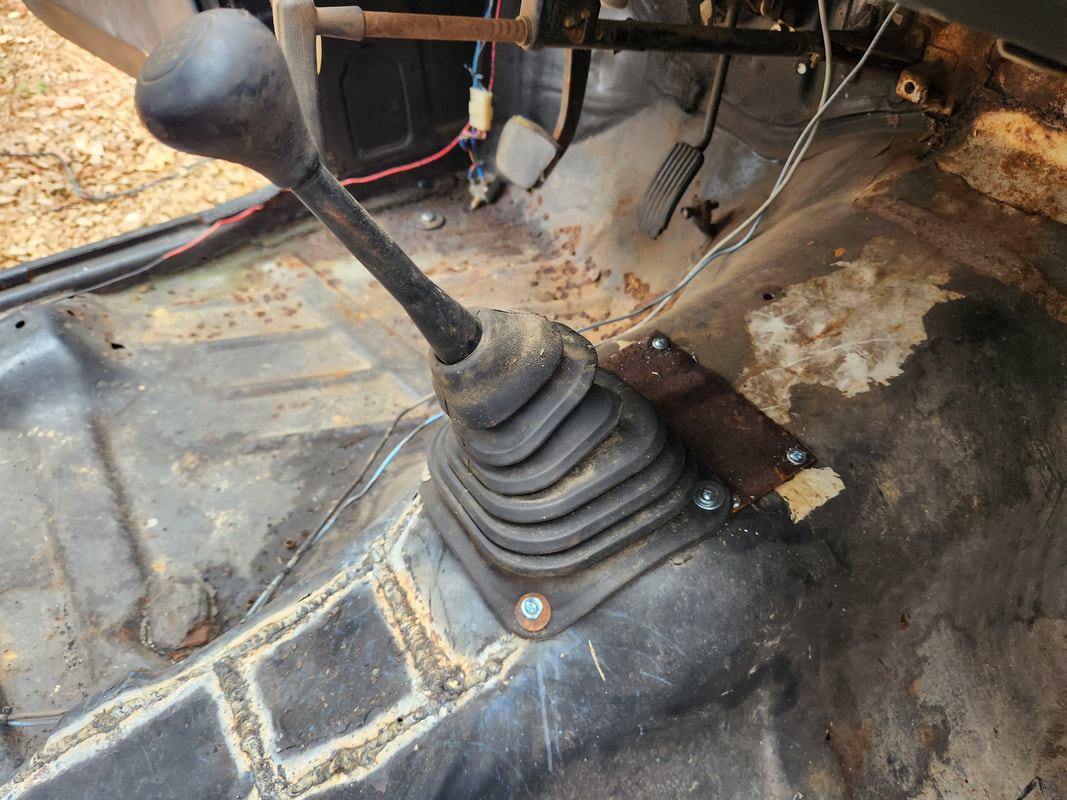
A piece of sheet metal is secured at the front of the shifter hole using self tapping screws. The shifter boot is also secured with self tapping screws and washers after cutting a little more metal from the rear of the hole to allow for better clearance of the shifter.
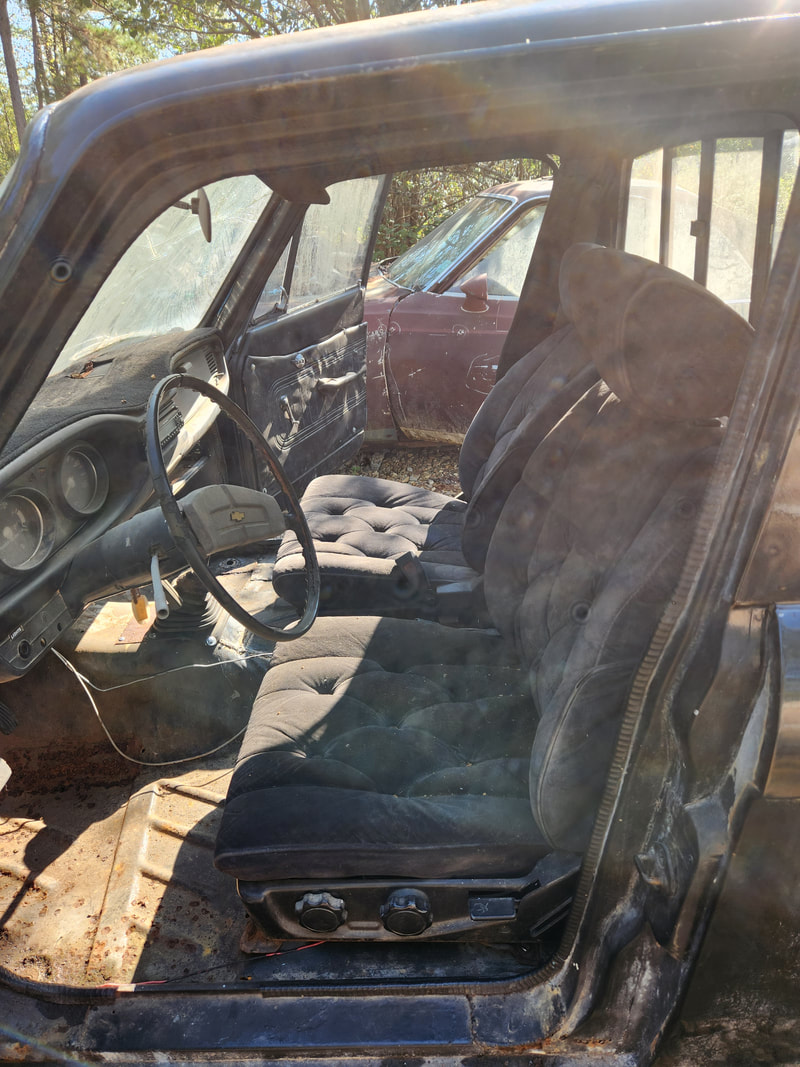
The seats, which came from an 80's Toyota car ironically, are bolted back in place, completing the reassembly of the interior.
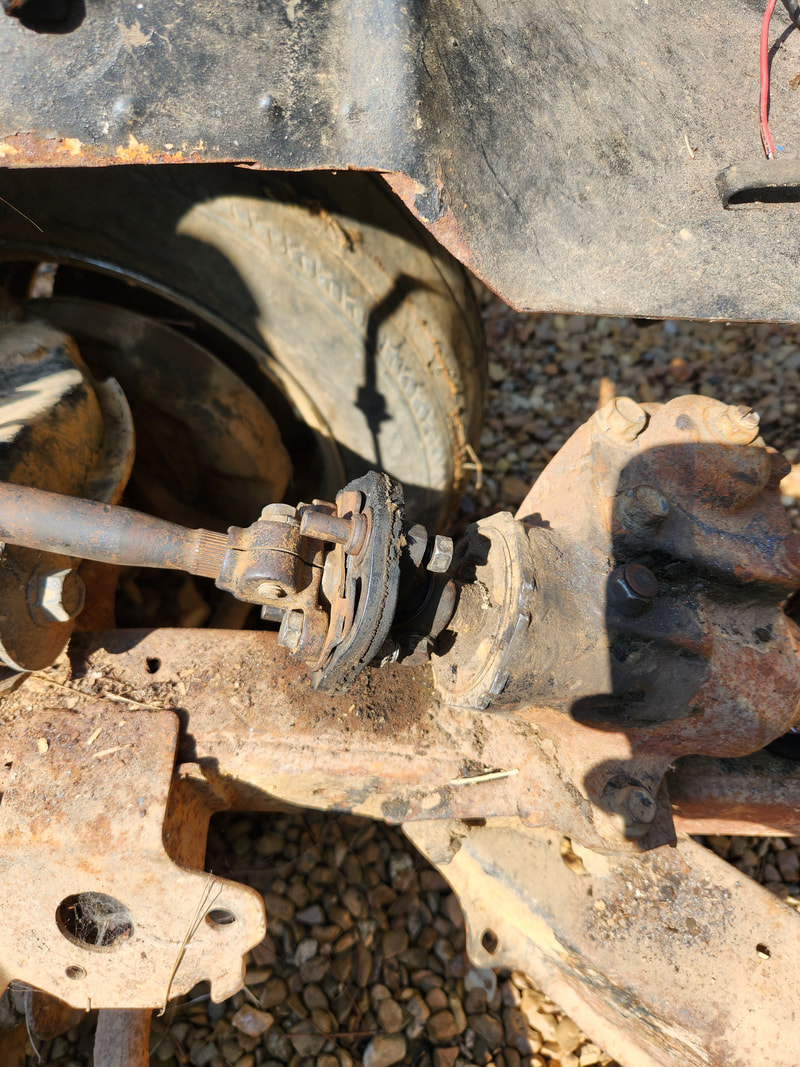
The steering coupling is made from the piece of LUV coupling that goes to the steering shaft and its intermediate washer piece. The Yota rag joint has a wider bolt pattern but was able to be compressed to bring the bolt holes close enough to match up to the spacing of the LUV coupling piece so everything could be put together. Hopefully the rag joint holds out for a long time but the intermediate washer will serve as a redundancy in case it doesn't by catching the pegs on the Yota steering coupling.,
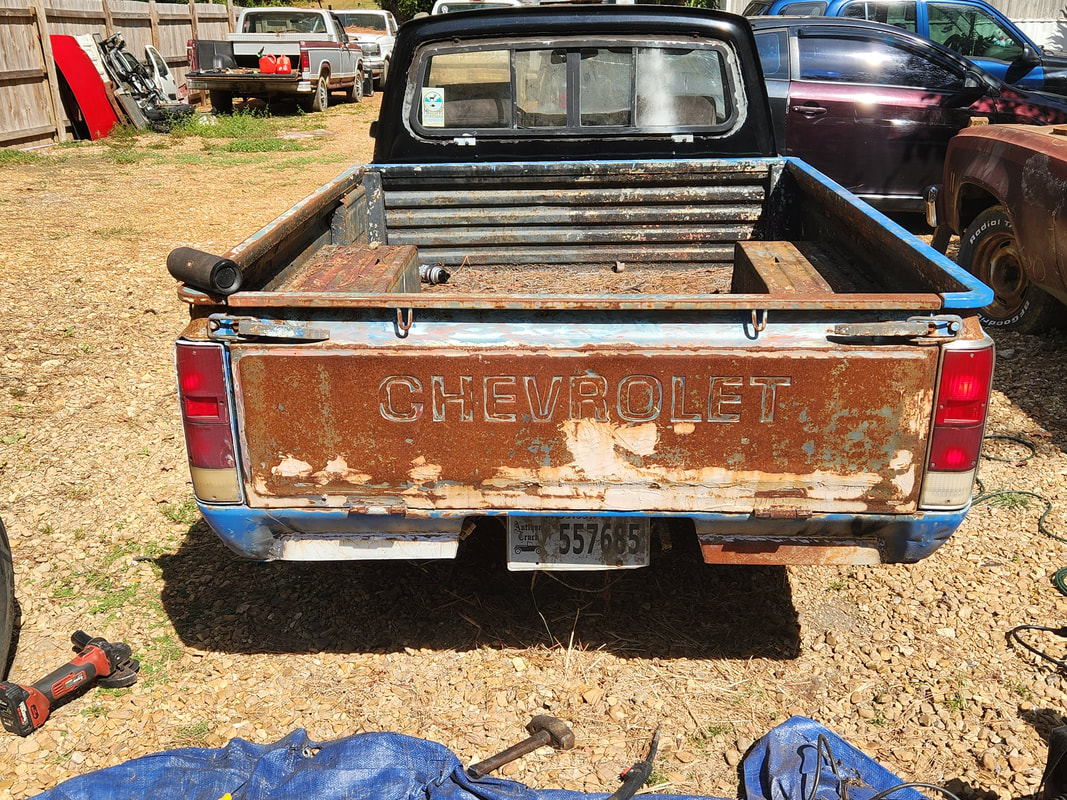
As an added bonus the tailgate was also reinstalled. Because of the difficulty of installing the rear bumper, the rear valance/quarter panel is a prime candidate for a roll pan conversion.
As for the front bumper setup, these crude brackets made from some scrap angle iron pieces have added metal welded to provide a bolt point for the carriage bolts to hold the bumper in place. The opposite side of the brackets will be secured to the sides of the core support.
The brackets are bolted through a single hole on each side of the core support. The brackets were bent to line up with the bolt holes on the bumper to secure it in place.
The bumper is in position in a way as to look like it belongs. I can still secure the bottom of the bumper with a couple braces bolted to the frame to keep the bumper from bouncing around.
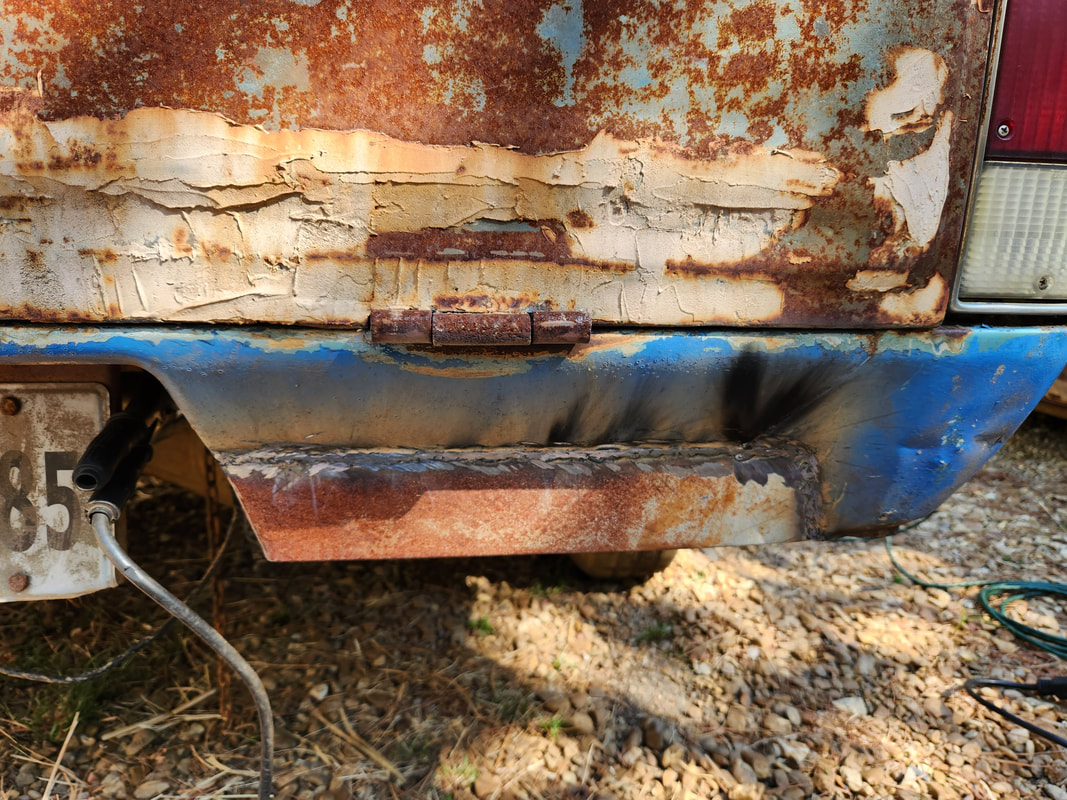
A closeup of the sheet metal panel welded to the valance panel. A piece was cut and placed on the inside of the valance panel and welded in place with tack welds then full welds. The welds were ground down in order to clean them up. Later I will probably add mud to smooth the surface down even more so it looks better.
The sheet metal panels welded in place on both sides of the license plate. The panels were cut from a piece of appliance panel where it was stamped with straight ridges forming a kind of pattern. Cutting the panels along these ridges gave the panels a rolled edge, similar to the old valance panel edges.
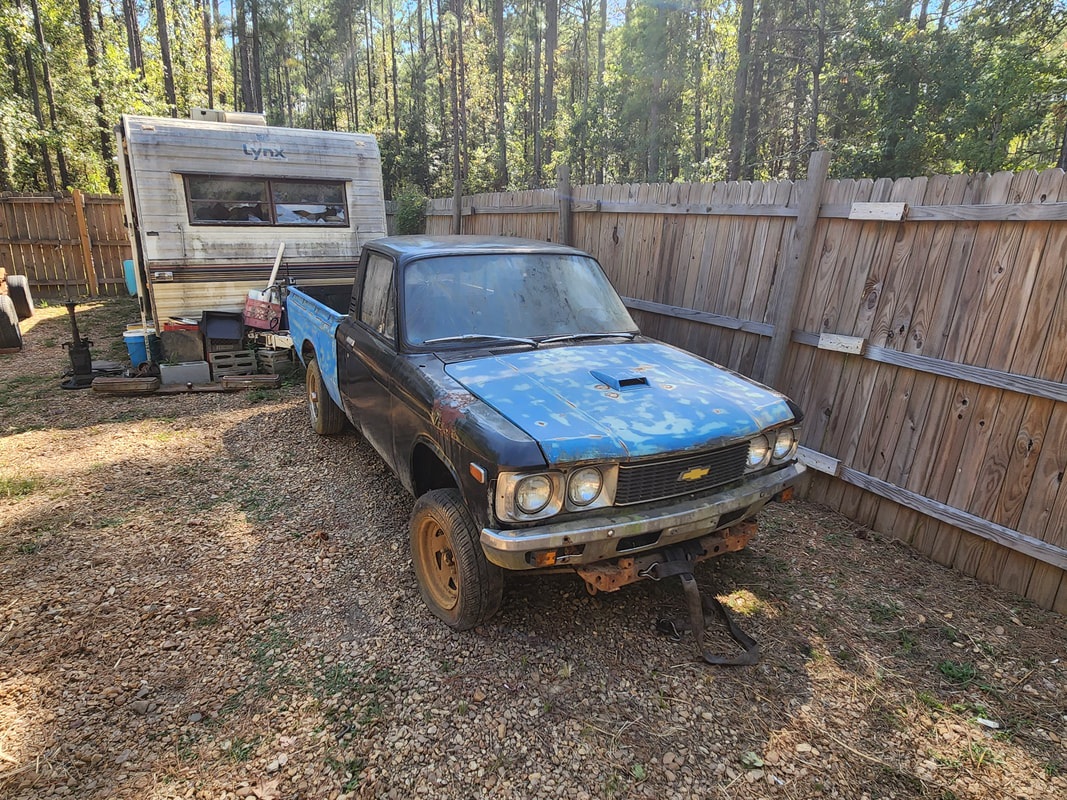
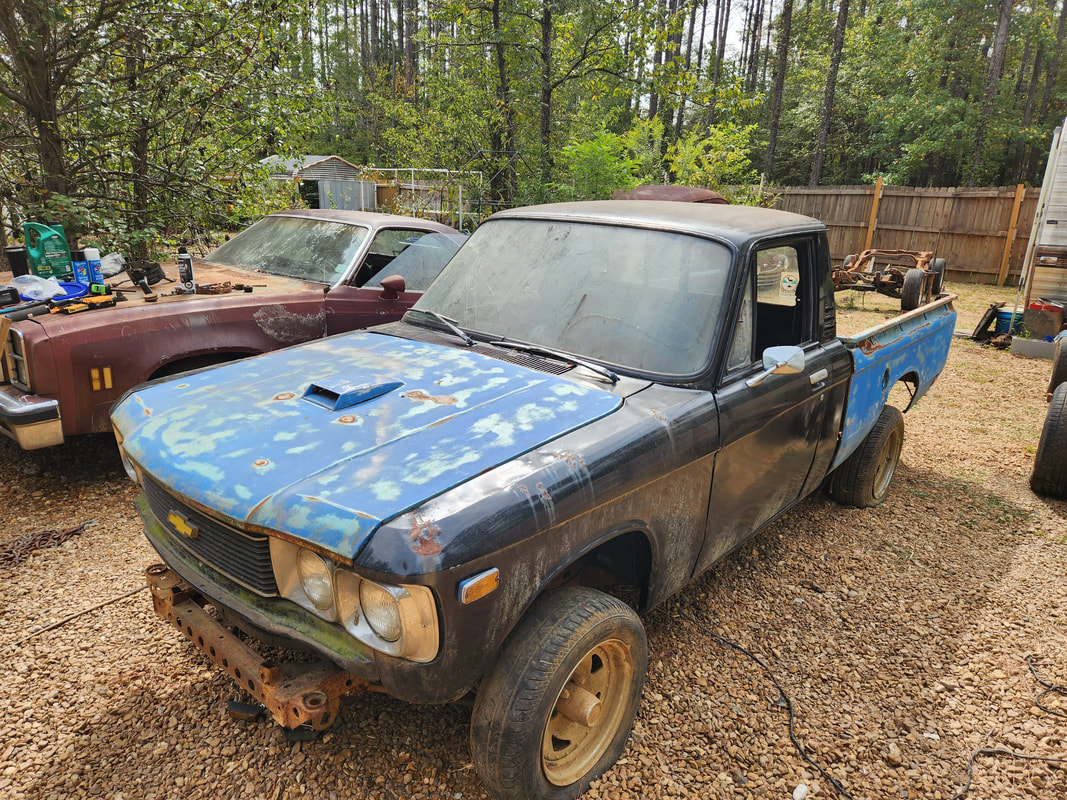
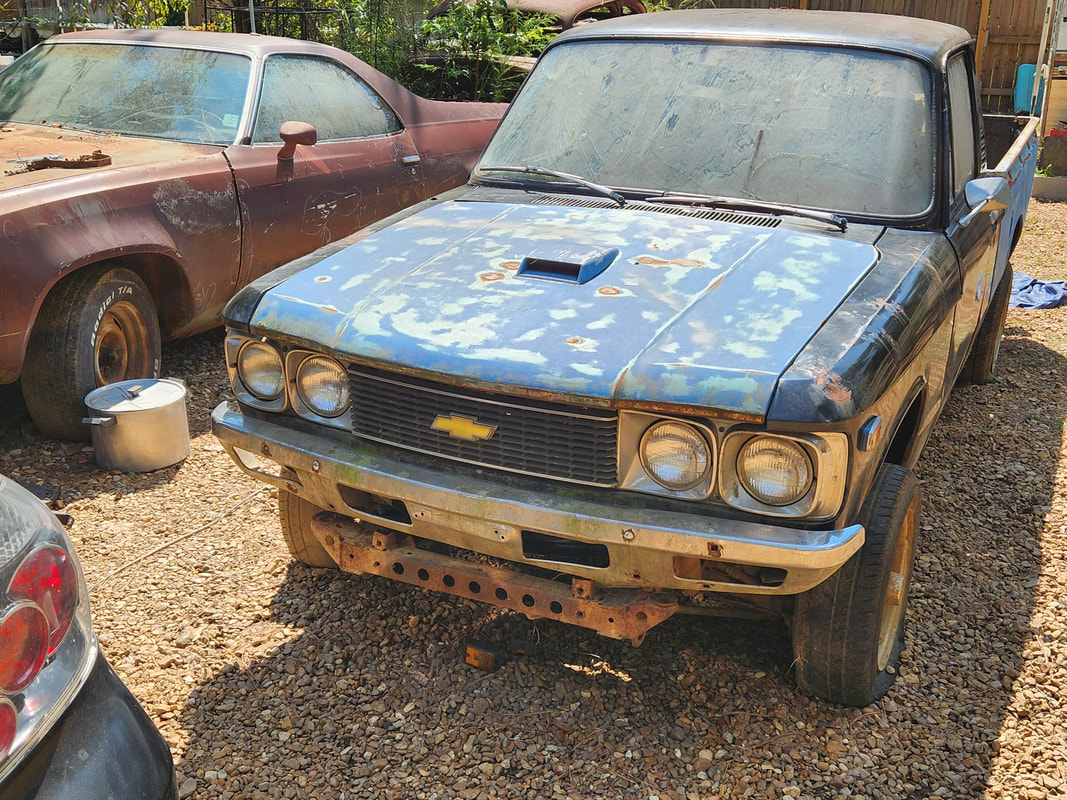
After moving the old LUV frame up to the garage to remove the motor/transmission then staging the frame in the greater yard next to the 51 Chevy frame, I was able to park the LUV back in its old parking spot. I had to remove the frozen caliper to free up the wheel and inflate three of the tires. They required a refill a 2nd time in the process of moving the truck.
With the rear taken care of and the truck parked back in its old spot, I will be taking a moment to rebuild the brake system on the Yota frame as well as freshen up the suspension so the truck will be ready for the next phase in its new life. I do have plans to use this truck as a test platform for some small engine installations, similar to what others have tried. The first project will be the installation of a 212cc engine I have left over from something else. The engine itself needs to be freshened up but the whole setup will be similar to an oversized gokart, using a centrifugal clutch and/or torque converter setup coupled to the 5spd transmission. For the time being it will not be important to install a clutch pedal or clutch master cylinder for the transmission since these types of setups use the small engine's TC or centrifugal clutch to separate the engine from the rest of the driveline. There will be plenty more of this truck to be seen in the future.
|
|
|
|
|
|
