Outdoor Wireless Security Camera System
After waiting for so long despite the technology being out there, we finally took the plunge and bought some wireless security cameras to set up to cover the compound. We did start things off with a cheap system from Harbor Freight. This was a system that was on sale and included a 4 channel monitor and two wireless cameras. I mounted the cameras and started the setup process with our wireless network and that's where things went south. The system would not connect to the router no matter what we tried. Even when I did manage to get the green light that would indicate that the camera system was online on the network, it was really a case of "lights on nobody home". Eventually we ended up taking everything down and returning the system. Harbor Freight let us down again.
Anyway, we ended up going to America's store, walmart. There we ended up finding a wireless standalone camera under the brand "Night Owl". These cameras can be used with a DVR or as a standalone unit on a wireless network. These cameras were around $70 and for two cameras put us at even cheaper than the shitty HFT system. We really didn't have a need for a separate monitor or DVR anyway since anyone could snatch the DVR if it came down to covering their tracks. I liked the idea that we can set up a cloud server to record our footage to so as to not need a DVR. The cameras also have on board SD cards but just like with the DVR, if you take the camera you take the evidence. Of course these cameras have the phone app that allows you co view the cameras in real time as well as talk through the units in an intercom mode. You also have the option to start recording if you see something that needs to be recorded. The cameras have a motion detection feature that can start recording automatically and will notify you through the app that it picked up motion or even a face if it detects something that resembles a person on the camera. We brought two of these cameras home and promptly set them up.
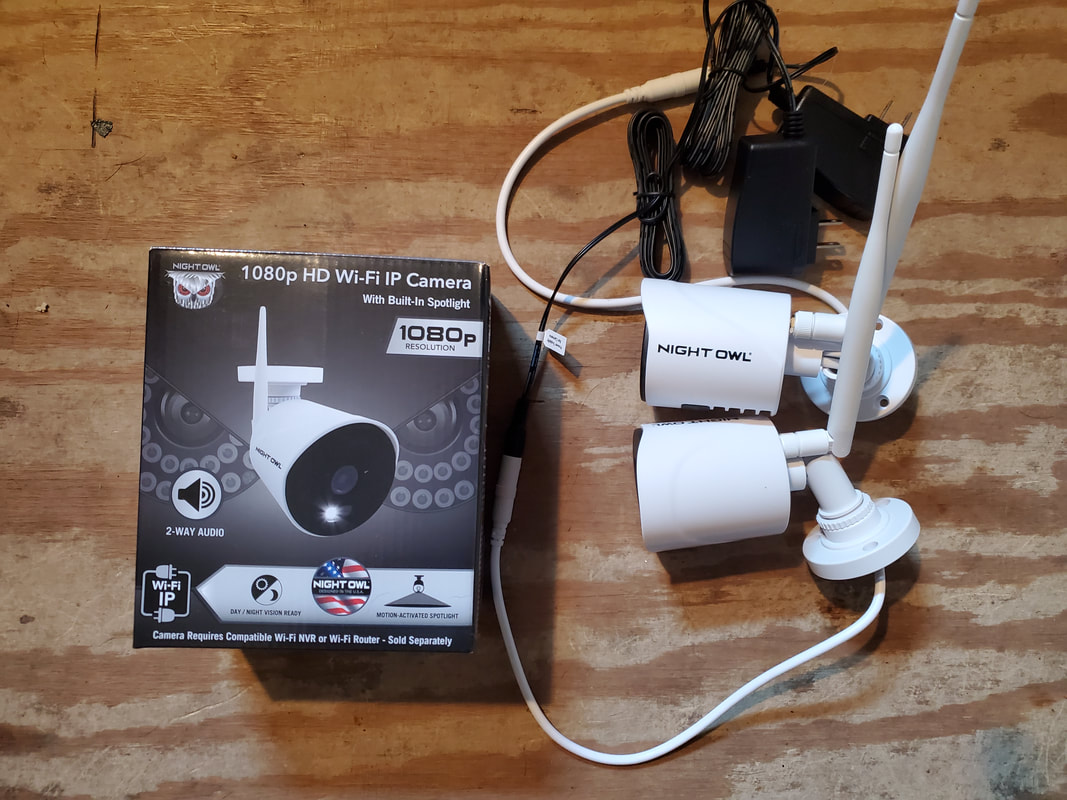
The first thing I did was download the app on our phones and start the setup procedure before mounting the cameras. I didn't want a repeat of the HFT camera situation so I had everything laid out on the floor. Each camera has a QR code that gets scanned in the process of setting up each camera. The app has you start by selecting standalone camera then scanning the QR code for the app to recognize the unit. Afterward when the camera is set up in the app, you pick the wireless network you want the camera to connect to, enter the password (you do have your network password protected right?) and the camera connects itself to the network. At that point you name the camera then can click on the camera to view in real time and do whatever you need to do with the unit. You can go in the settings to set the sensitivity of the camera with regard to motion detection and facial detection to slow down false alarms. All in all the setup process is quick and easy. From there I mounted the cameras.
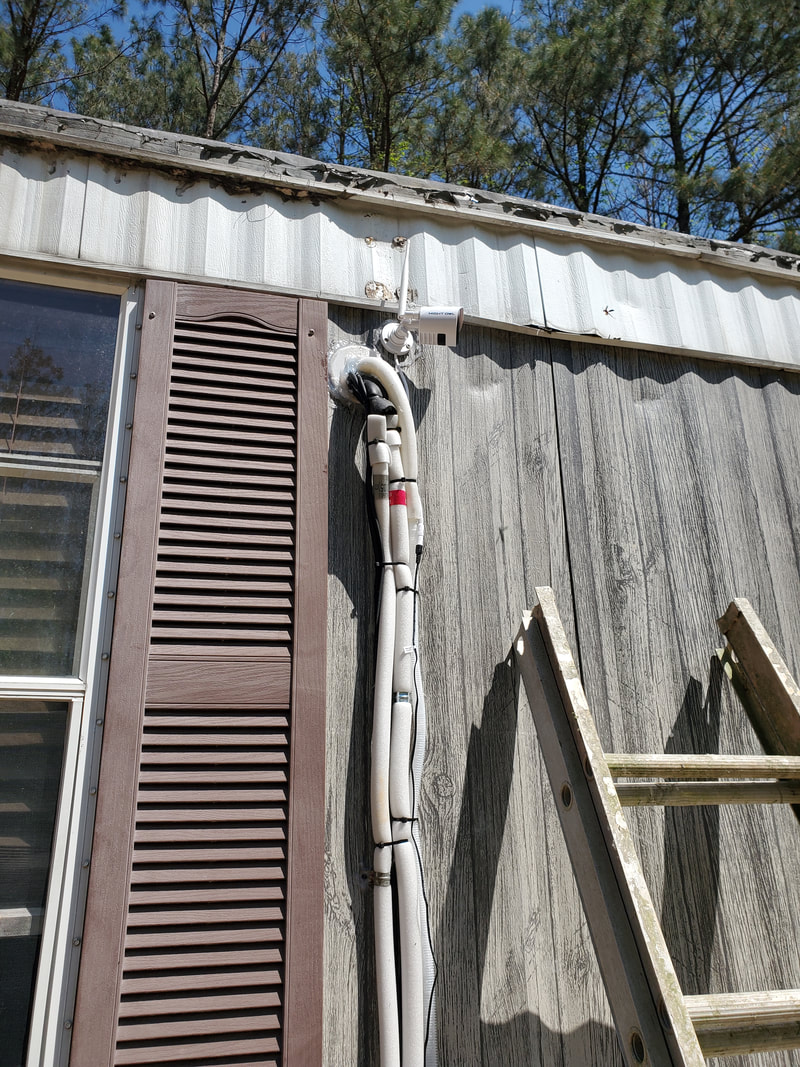
Since I only had two cameras, the main coverage I wanted at the time was coverage of the main entry gate/opening to the driveway and what will be the rear entry gate/backyard area. These two cameras were easy to mount as one was mounted on one side of the front door overlooking the driveway up to the main gate and the other one was set up next to the AC lines from the new ductless AC system to take advantage of the lines to secure the power cable for the camera. I had installed an outlet just under our kitchen window overlooking the old porch since I had a doghouse on the porch with a heater in it for our outside dog to keep her warm prior to us bringing her inside. Now that outlet came to our service as the power supply for the front yard camera, as it was labeled in the app. I used wire straps to secure the power cable to the side of the house and along the bottom of the corrugated sheet metal where I held it in place with more straps then back up to the outlet using more wire straps.
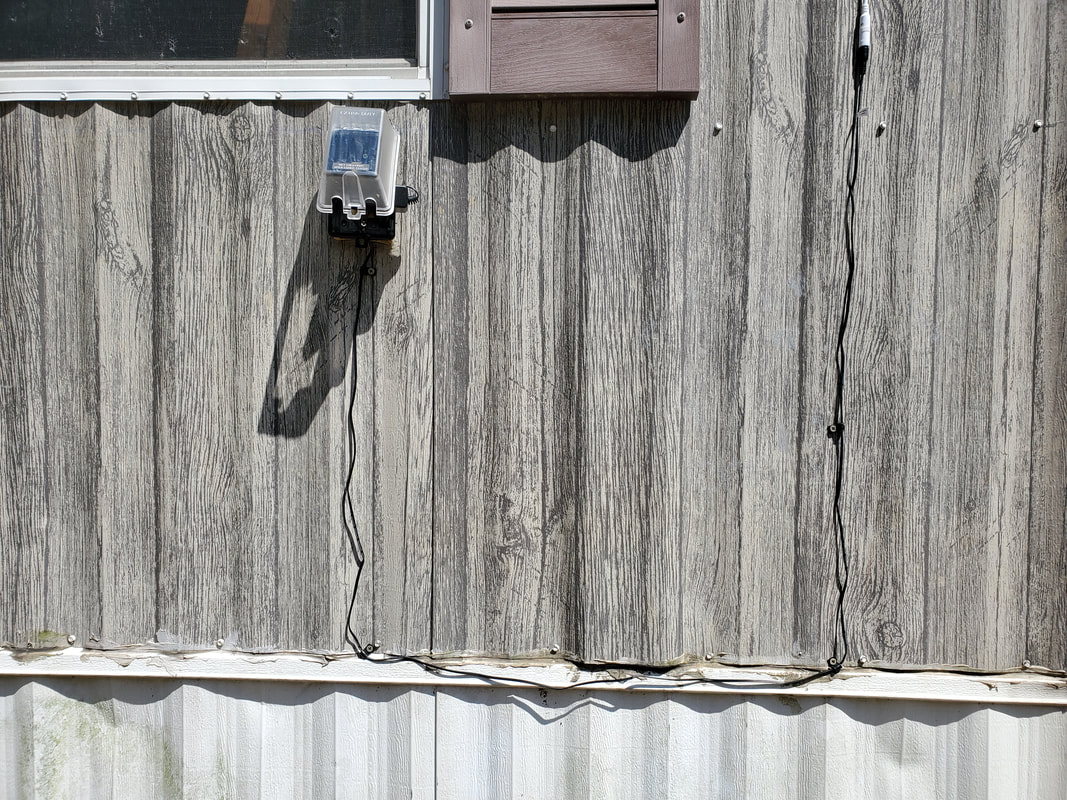
Outlet box and power cable secured via wire straps to side of house.
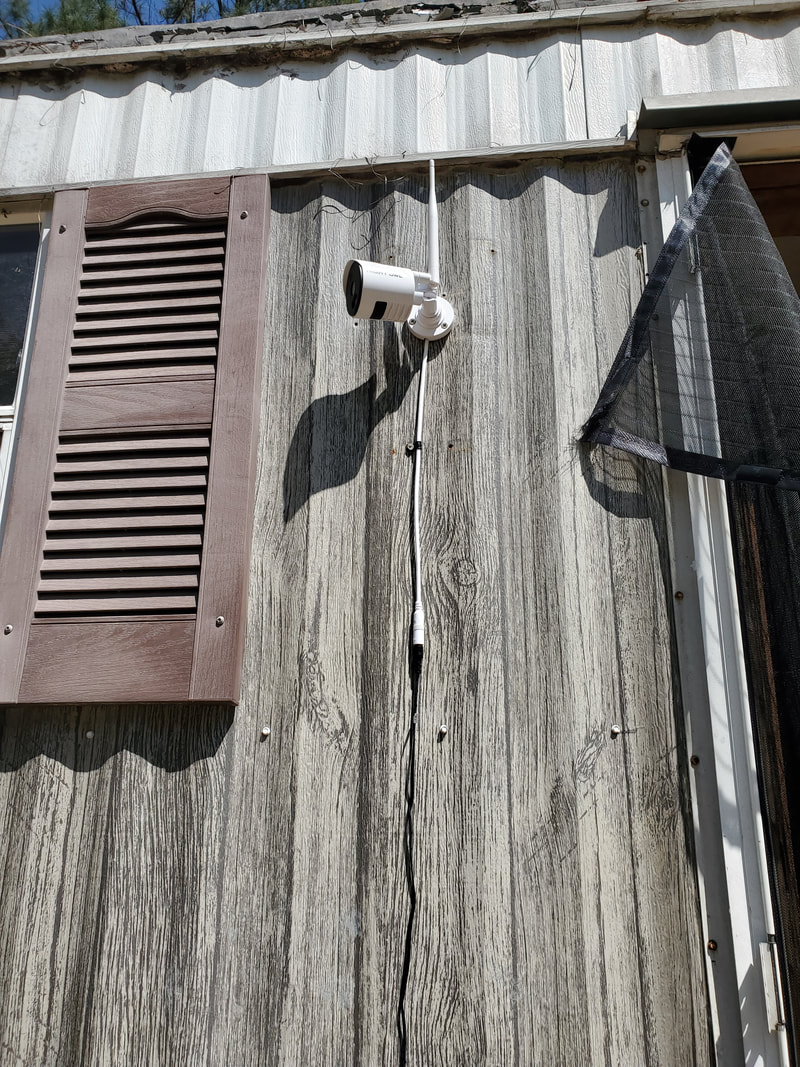
Front yard camera mounted to wall and aimed to overlook the driveway all the way to the main gate.
As for the backyard camera (as it was labeled in the app), like I mentioned, I took advantage of the AC lines I secured to the wall on the other side of the living room window to secure the power line feeding the camera. The camera was mounted to a stud right by the AC lines and the power wire fed through the bundle of tubes and cables that are already secured with zip ties over to another outdoor outlet that I had to set up specifically for this application. I secured the power cable under the molding under the living room window and secured the wire with straps as I did with the other cameras power line. With the wires set up and the camera mounted and aimed, I was able to sit back knowing that the yard is covered by cameras.
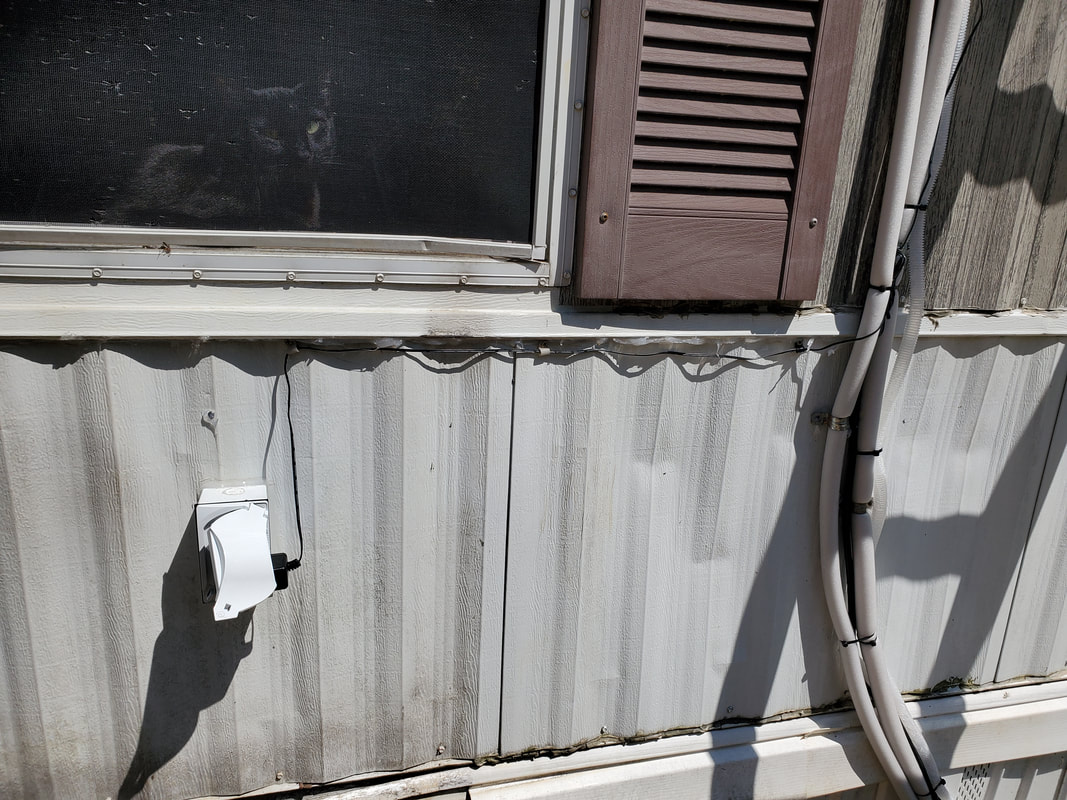
Outlet box set up with power wire routed along moldings over to AC lines where its routed up to camera.
Backyard camera mounted to wall among the AC lines.
The next course of action is going to be to get an indoor camera to set up so we can watch what's going on in the house to monitor what the dog and cat are doing while we're away as well as provide overwatch when we're away in case someone comes inside or if something happens like a malfunctioning item that's smoking and may need to be addressed before it gets out of hand. We will also get more of the same outdoor cameras so we can set one up to look over the chicken yard and the far off areas past the storage trailer and fuel shed, especially since there will be a third back gate that we plan on using for when we need to pull vehicles all the way around the compound. One, maybe two more cameras will be set up to cover the main driveway outside of the compound to look over the driveway to cover any vehicular traffic. It all depends on the number of standalone cameras the app can handle.
|
|
|
|
|
|
|
|
|
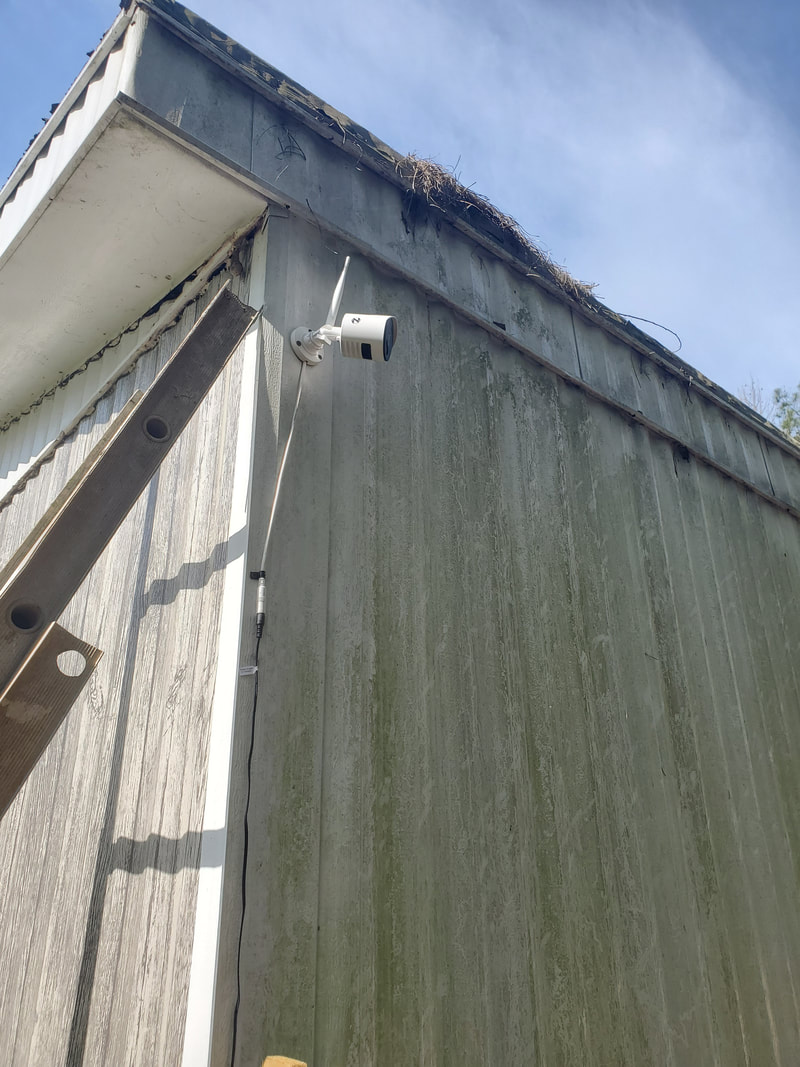
We ended up getting another outdoor camera to install on the side of the house pointing into the chicken yard. We wanted one looking over this area as it would let us know if there's something going on in the yard that is out of the ordinary, like some varmint causing problems. To start off we set the camera up in the app so it'll be ready prior to me hanging the unit on the wall. With that I was ready to go ahead and hang the camera up and set up an outdoor outlet to power the camera.
For the outlet, I planned on removing an outlet in the spare room and tapping into that outlet for power. I went ahead and got the camera hung first. Using wood screws, I hung the camera high up on the outside wall, aiming from that corner of the house into the chicken yard. I then took some cable straps and secured the power cable working my way down to the decorative molding on the corrugated metal wall. From there I routed the cable over to the spot where I would install the outlet.
Camera mounted to wall with cable secured via straps.
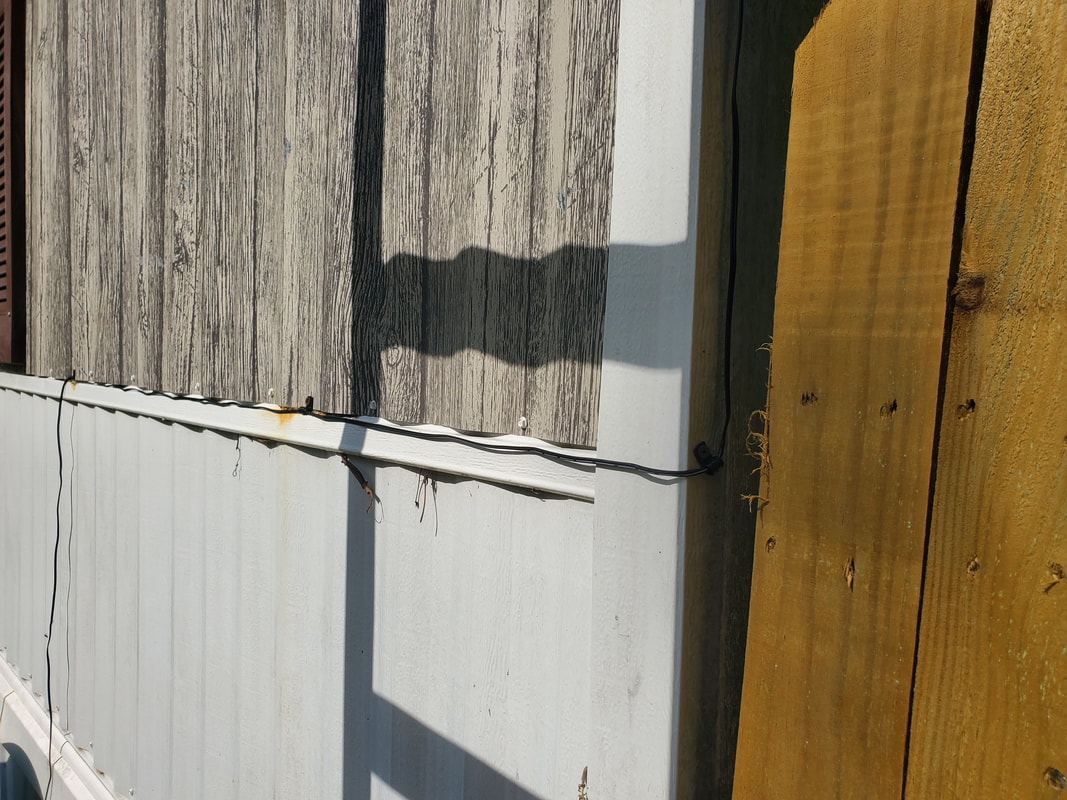
Power cable routed along molding over to outlet box installation site.
Next I went inside and pulled the outlet from the wall. I then went outside and drilled a hole through the wall next to a stud. This way, I was able to mount the outlet box through to the stud right over the hole . From here I ran a length of romex cable through the hole to the inside. I hooked up the outside end of the cable to the outlet for the box and buttoned all of that up then moved back inside to pull the outlet apart to press in the stripped ends of the wires into the piece. After reassembling the outlet, I was able to plug up the camera and have it come online with no concern over setting the camera up.
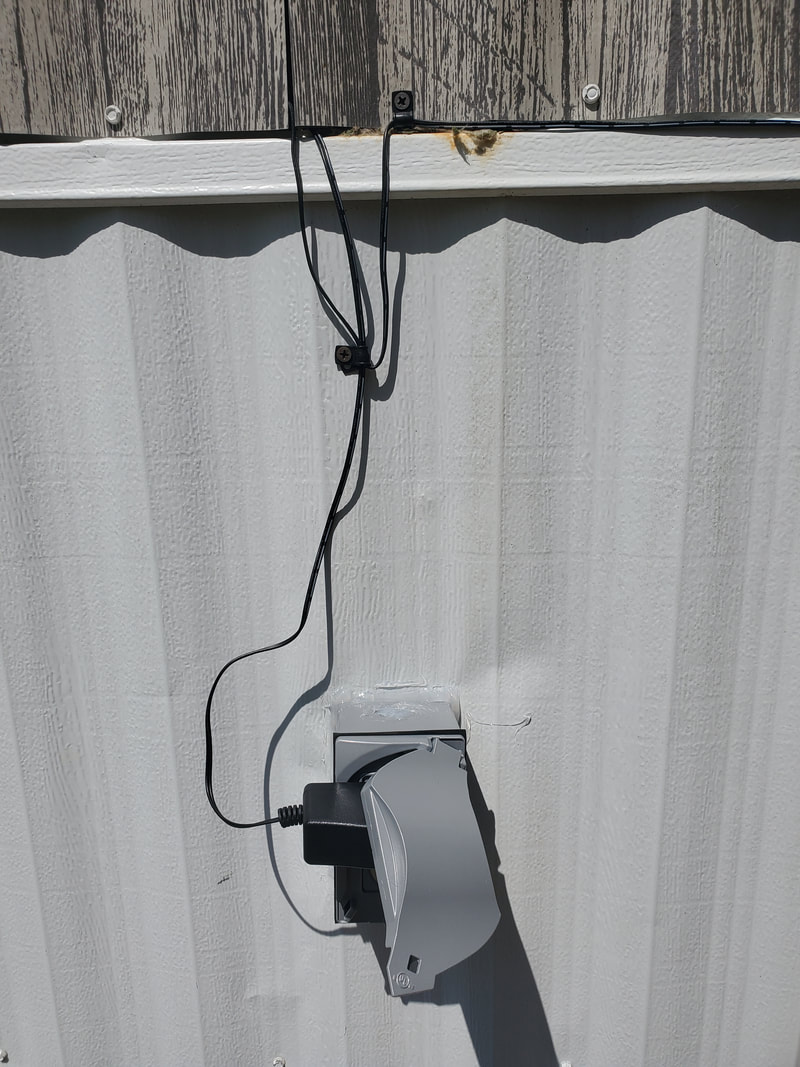
Outdoor outlet installed to wall with power supply for camera plugged in.
With the outlets all taken care of and neatened up inside and out, I was able to call the camera install a success. We tested the camera out and works just fine, just like the other ones. I didn't bother to put an SD card in the camera since this camera isn't intended to catch nefarious characters but instead just provide us with a means to monitor the chickens in our absence. At least now we have just a little more coverage. From the angle that the camera's mounted at, I'm able to see the entire chicken yard and a small part of our firewood staging area. Next area for a camera is going to be over the main driveway, overlooking the outside of the fence.
