THE MINIVAN CHICKEN COOP
Originally I had planned on using this minivan body to build a doghouse but had changed my mind after the realization that the dog in question would be the only one using it and the size of the van body would not warrant its use for just one dog. I took the time to move the van body into the chicken yard and get it staged in the spot where I would want to set up another car coop. The time has finally come to start fitting out this van body to serve as a chicken coop. This one won't be just any chicken coop, but one that would help sustain chickens on a long term basis when we're away. I plan on installing a homemade bulk feeder that would hopefully hold a whole feed sack's worth of feed. I would also have the same drinker cup watering apparatus to help keep the chickens wet, just like in the other car coops.
To make things a little easier, I chose to just weld the two doors shut as the side sliding door and rear doors will be the only ones opened and closed.
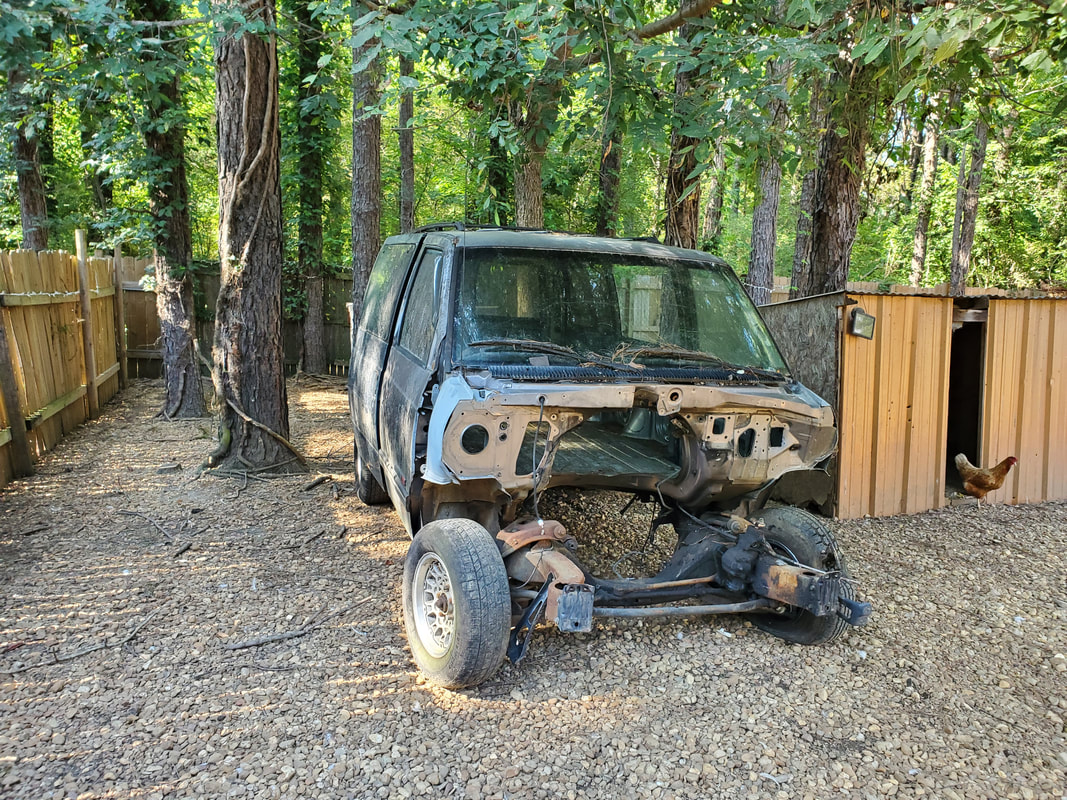
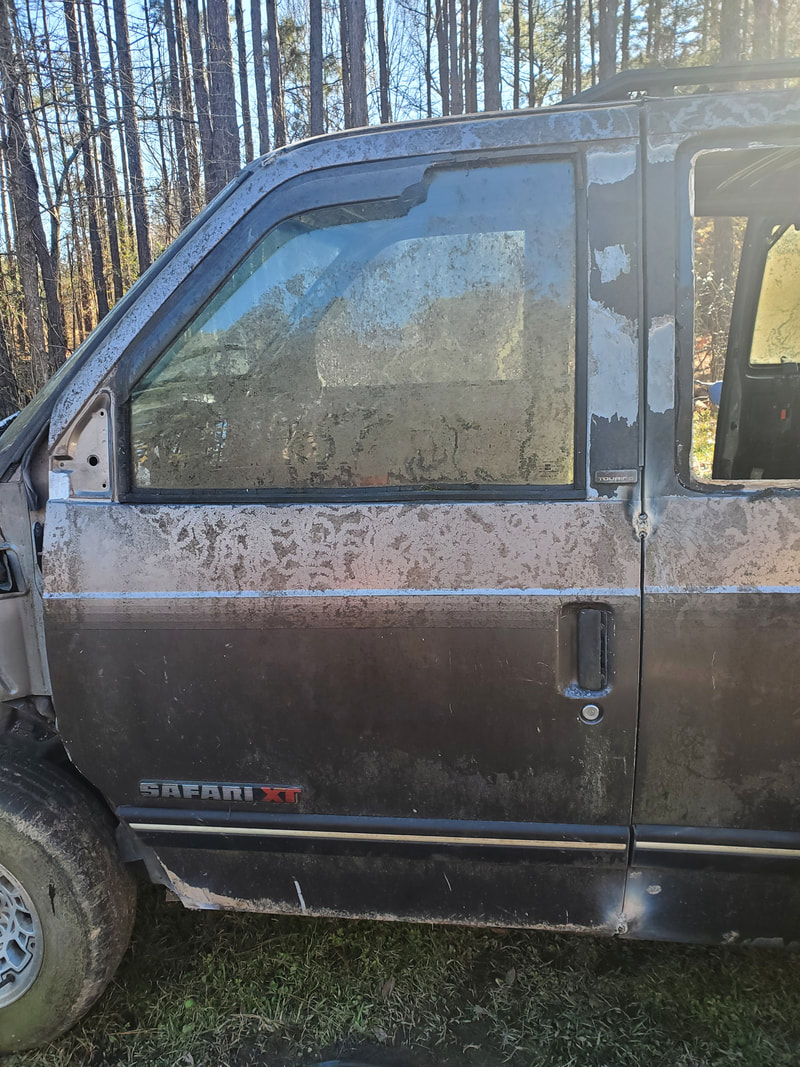
Van body parked in chicken yard in its new spot prior to fitting out as a chicken coop.
I gathered a batch of parts, mostly scrap metal parts, along with some PVC pipe and other associated hardware so I can start building the watering system first. This system would be just like the other car coops, where its a high and low pressure setup. The high pressure side has a garden hose going into a regulator which feeds a float valve in a bucket that serves as a reservoir. The bucket has an output nipple that feeds a hose going to a manifold made of PVC pipe and tees holding several drinker cups. That side is the low pressure side as everything from the bucket out is gravity feed. The drinker cup manifold was just pressed together, without using any glue and set aside. The bucket already had a nipple screwed into a hole at the bottom when it was used as a reservoir in a past watering system. I just had to drill another hole near the top to attach the float valve. From here I made a table using a couple pieces of tubing and a dryer door as a table. The door had the tubes welded on one end and the other end was set on top of the fender, and welded to the side wall inside the van. With this table, I was able to set the bucket on top. I used angle braces secured to the legs with self tapping screws with which I zip tied the drinker cup manifold to in order to keep it stationary.
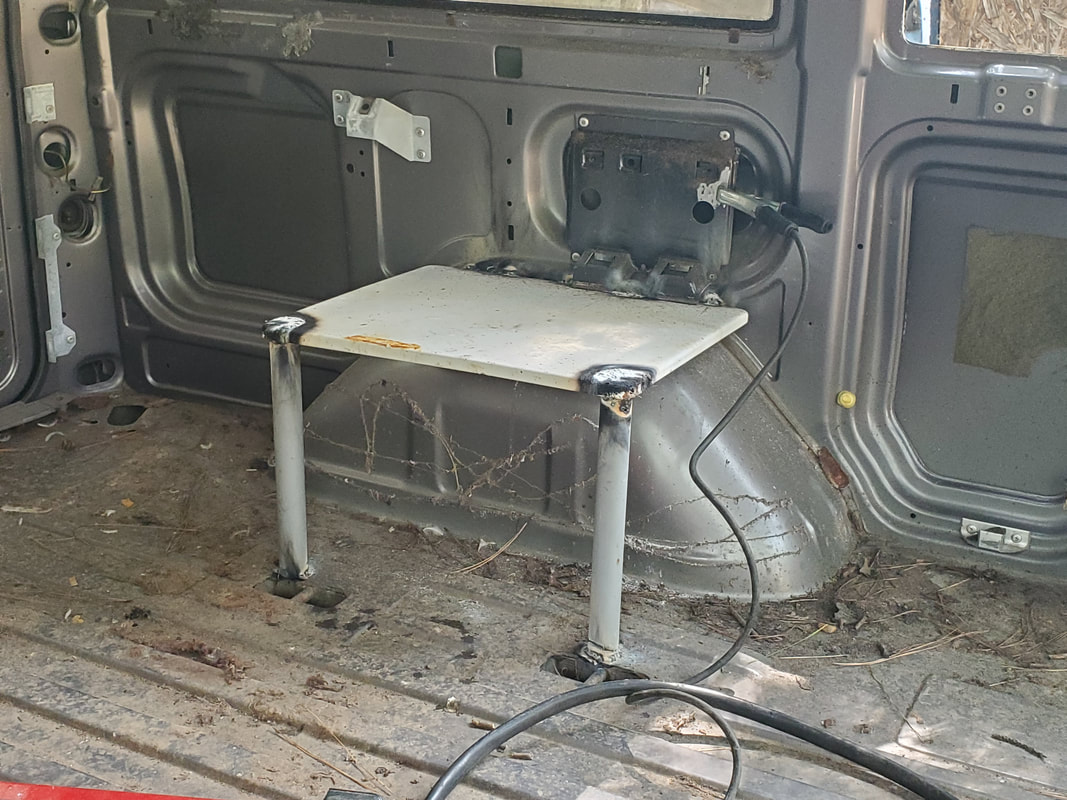
Two legged platform welded in place with the legs welded to the van's floor and the table portion welded to the side wall above the fender hump.
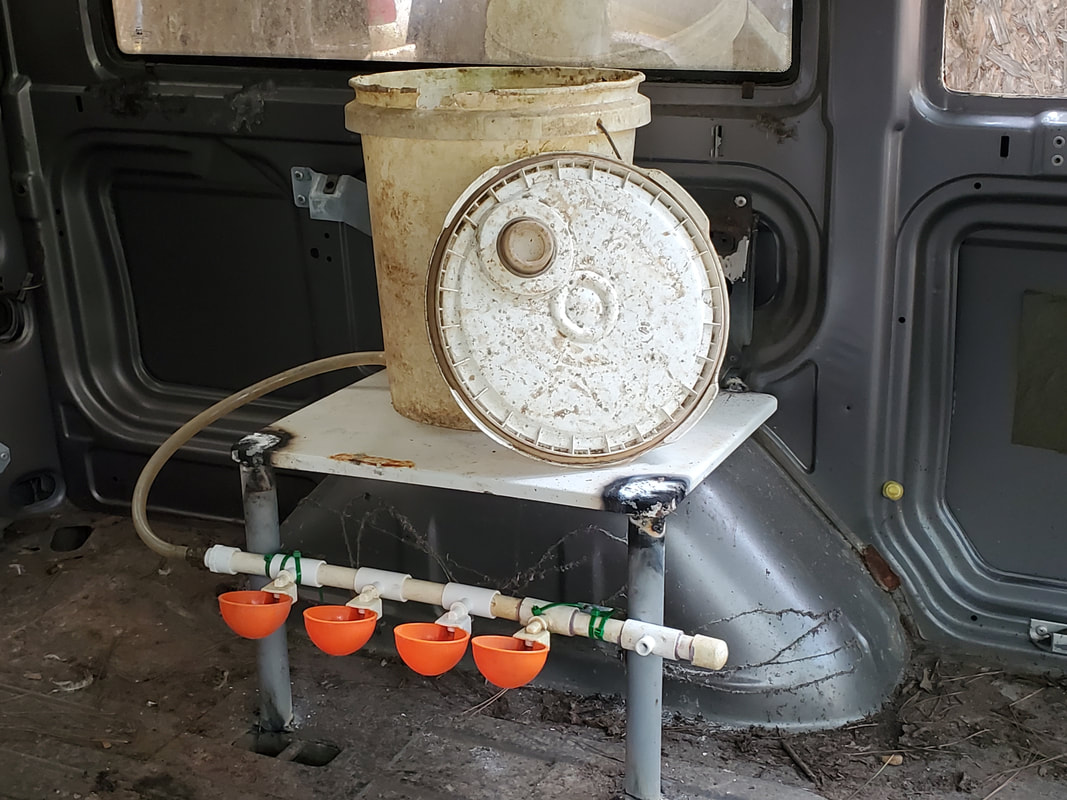
Bucket reservoir set on top of platform with hose connected to drinker cup manifold. Manifold is zip tied to angle braces to hold everything sturdy.
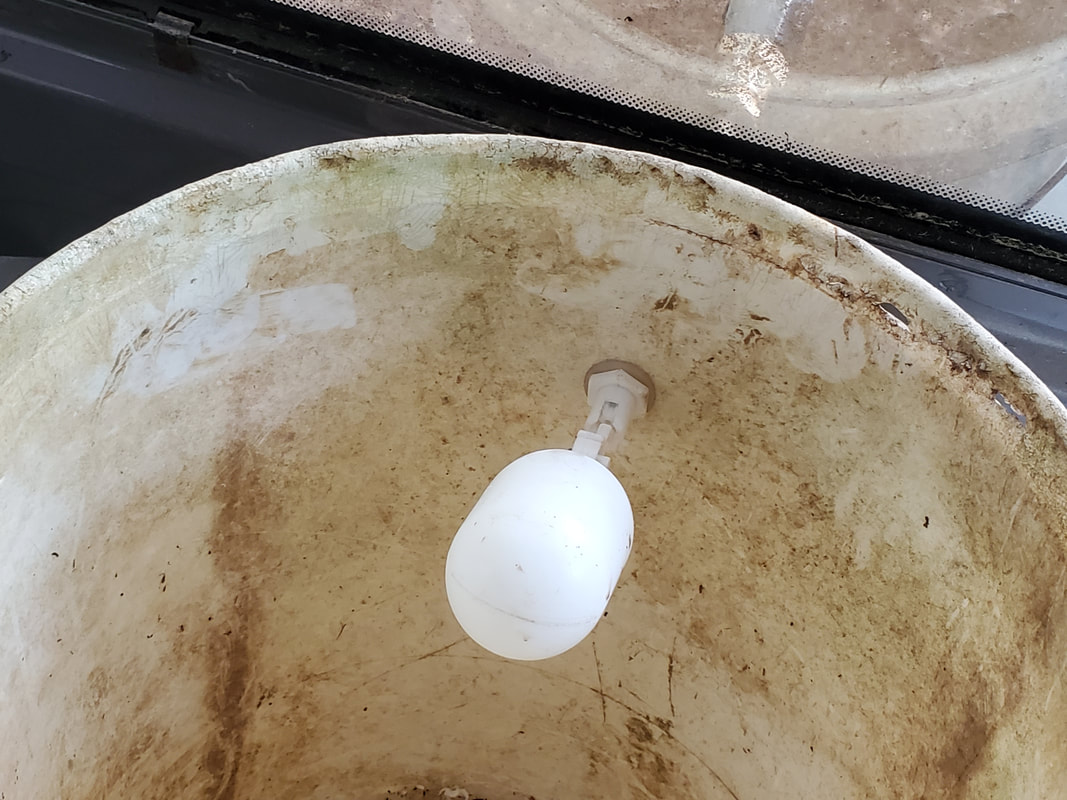
Float valve attached to hole drilled near top of bucket. Float valve has 1/8" female thread hole, which will be filled with a long nipple reaching through a hole in the side of the van to the outside.
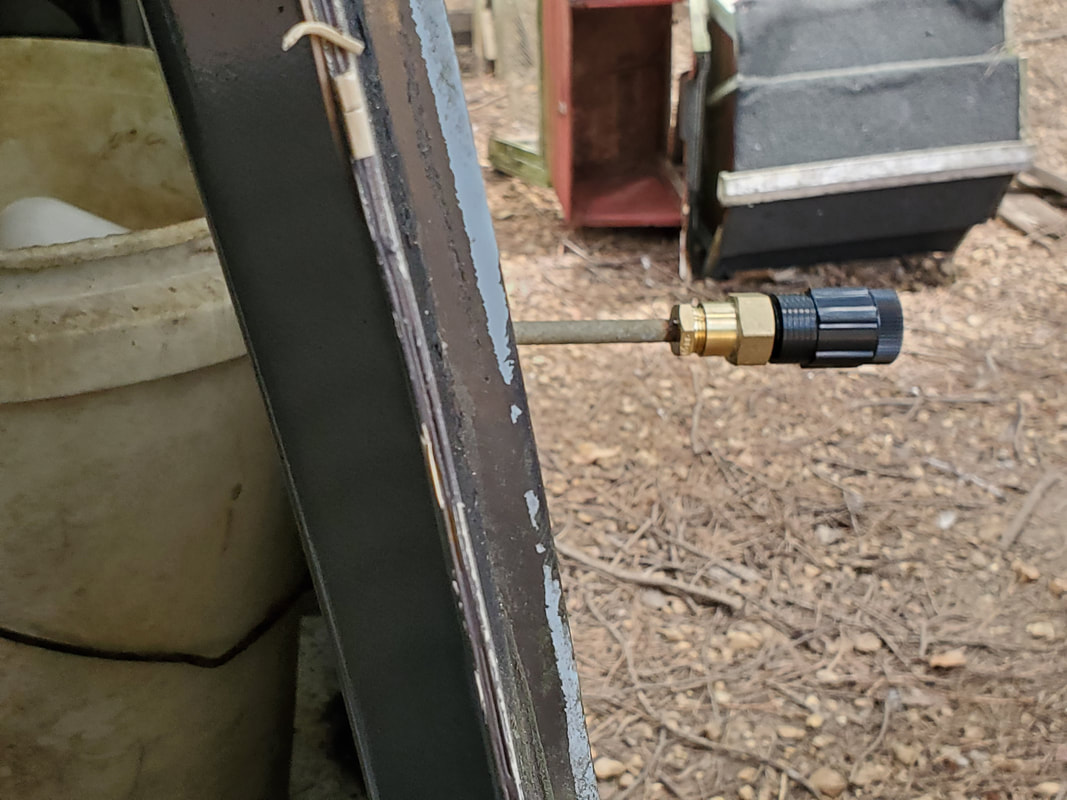
1/8" nipple screwed to float valve with adapter fittings in place to adapt up to the garden hose regulator that will cut pressure down to a reasonable pressure for the float valve. This angle shows how the nipple passes through the side of the van into the float valve/bucket.
|
|
|
|
|
|
|
|
|
|
|
|
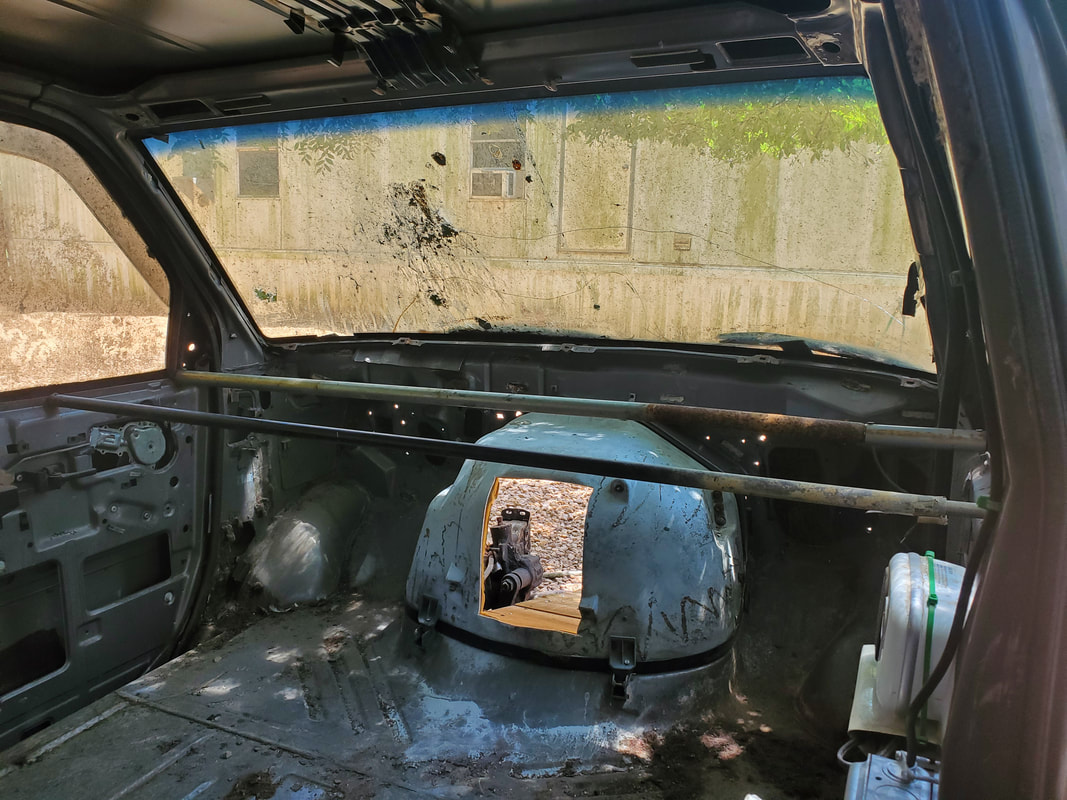
With the watering system done, the next order of business was the feeder. I already built the feeder using a dog food feeder and a bulk chicken feeder, coupling the two with an RV chimney shield that helps neck down the opening to the size of the chicken feeder. A hole was cut in the bottom of the dog food feeder and the shield was secured to both feeders with small nuts and bolts. I used more tubing to make a couple legs that angle horizontal and were welded to the side wall of the van as well as the floor. These two legs were not connected, so as to allow the feeder to be slid between the legs, with the weight of the hopper supported on the tops of the legs. I also drilled a couple holes, one on either side of the hopper to screw in eye bolts, then used a bungee cord to strap the hopper against the side wall of the van so if an overzealous chicken jumped on the top of the hopper, they wouldn't topple the feeder, especially when the unit is loaded with feed. The feeder has a lid to cover the contents, but needless to say, I will have to make some kind of cover for the window opening that the feeder is situated in front of.
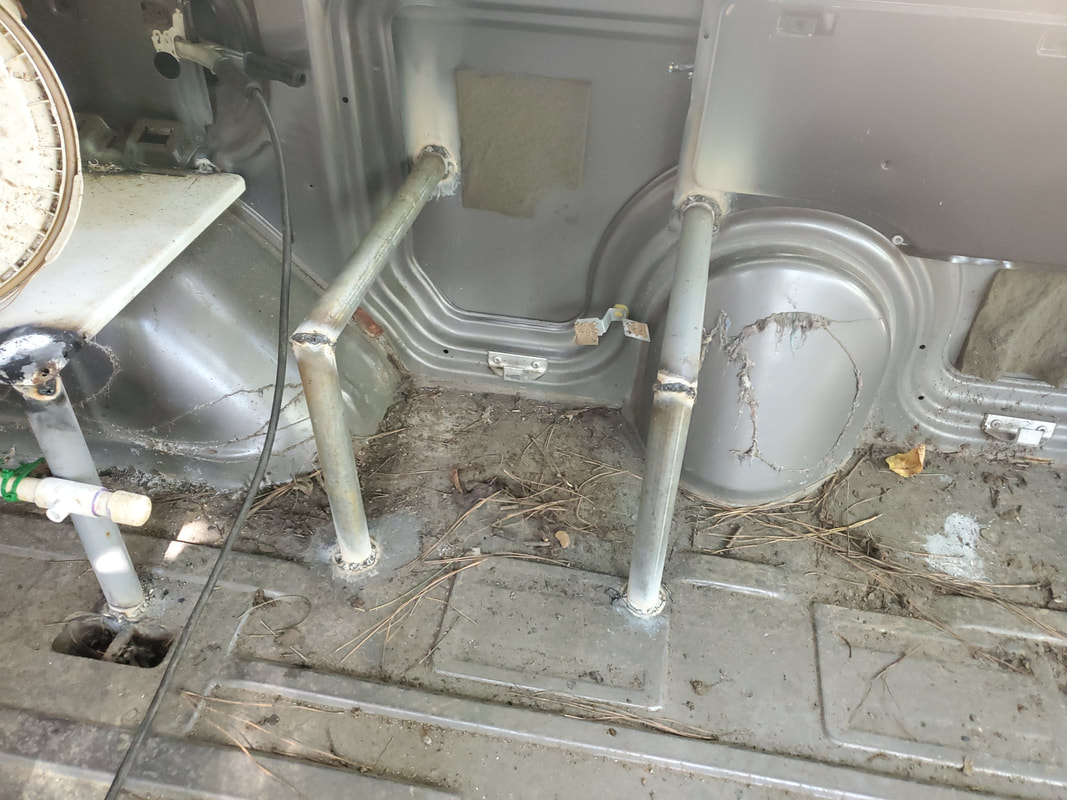
Both legs welded up to the side wall and floor, spaced to accommodate the bulk feeder. Height is measured to allow hopper to sit on top while chicken feeder touches the floor.
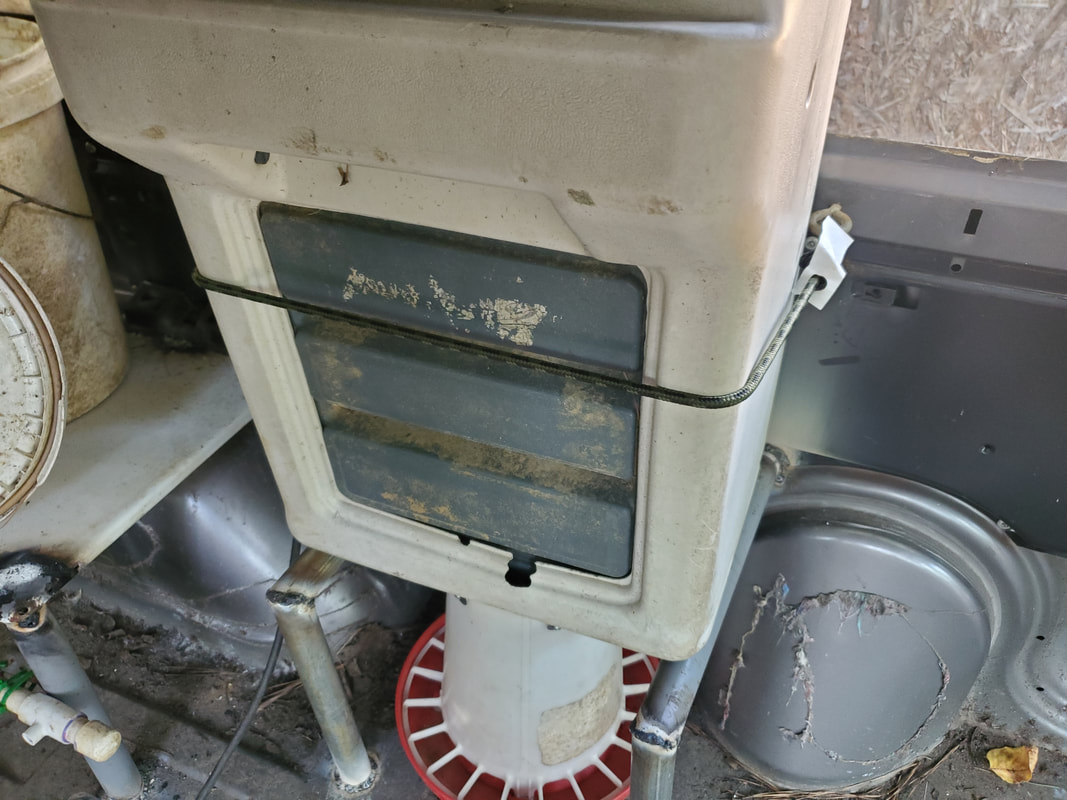
Bungee cord used to hold hopper against the side wall, with the help of the two eye bolts, one on either side of the hopper.
With the water and feed done, I moved on to the electrical system. This would be a rather simple system, with just a light socket, a box with an outlet and switch, and a main power cord going outside. I started with the light socket, installing an electrical box on a bar along the top of the ceiling, using self tapping screws. I added a cable to the box, attaching it to the light socket, and securing it to the box. The cable was secured to the bar with zip ties, running it to the right side where the cable turned forward and back down the door pillar to where I would install the square outlet box. I also popped out the key cylinder in the right door so when I screwed the box in place, I added the power cable, running it through the key hole to the box. I wired in the switch to the cable coming from the light socket and connected the power cable to both the outlet and switch. After buttoning everything up I then took a sheet metal platform I made to hold a small electric heater in an old dog house and screwed it to the right door, using the armrest platform to help hold it. I zip tied the electric heater to this platform, tucking the excess power cord inside the platform, using a zip tie to secure, then plugging the heater to the outlet. An LED bulb was screwed into the socket and the power cord plugged up to test, successfully.
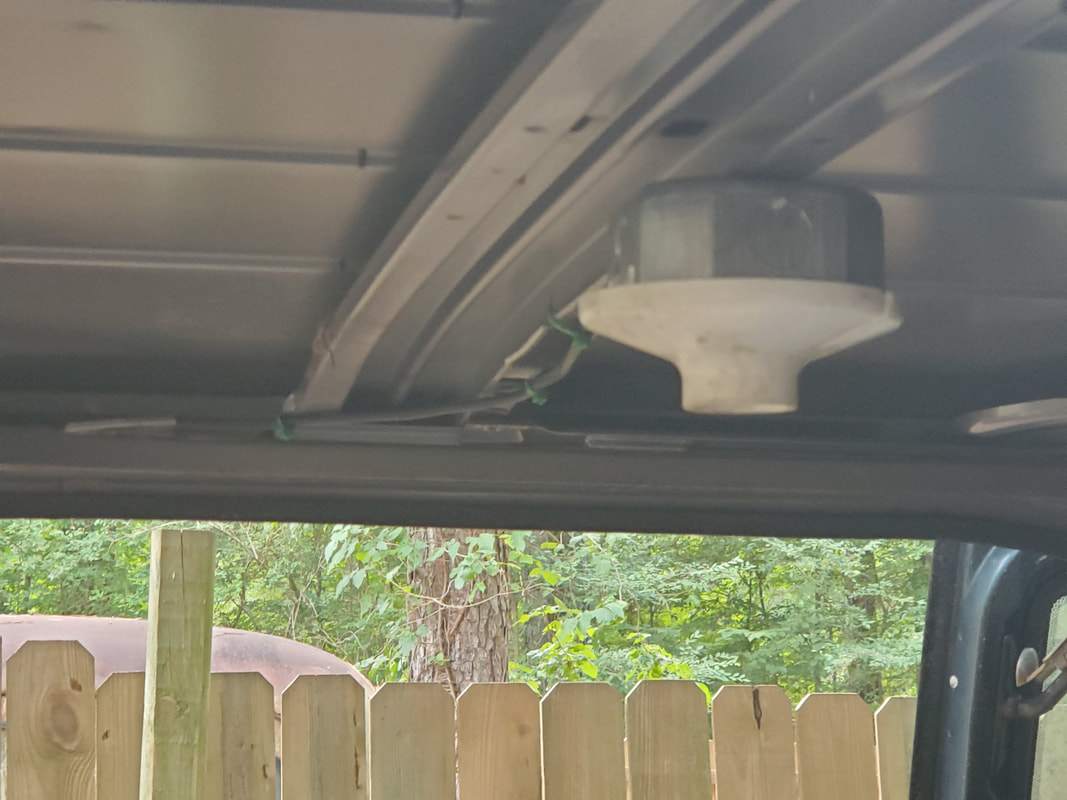
Light socket and junction box attached to ceiling of van with cable zip tied along bar going to right side.
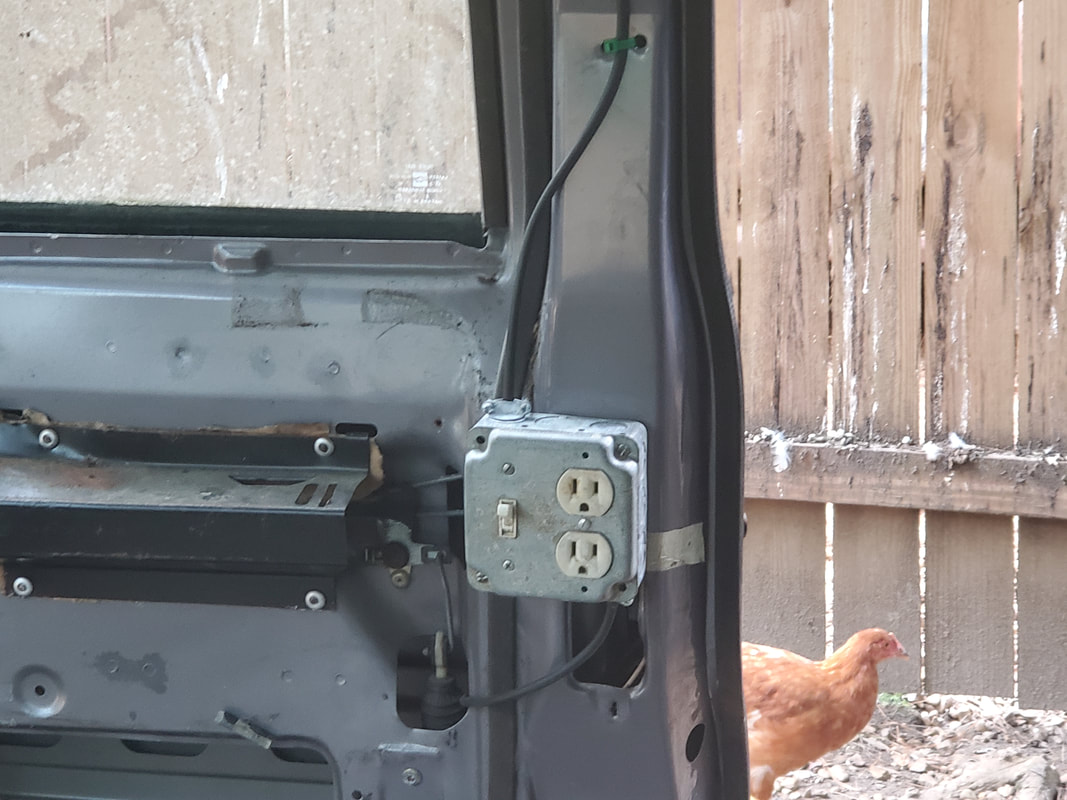
Square box with outlet and switch in place, wired up. Note cable running into the door, where it goes though keyhole going outside.
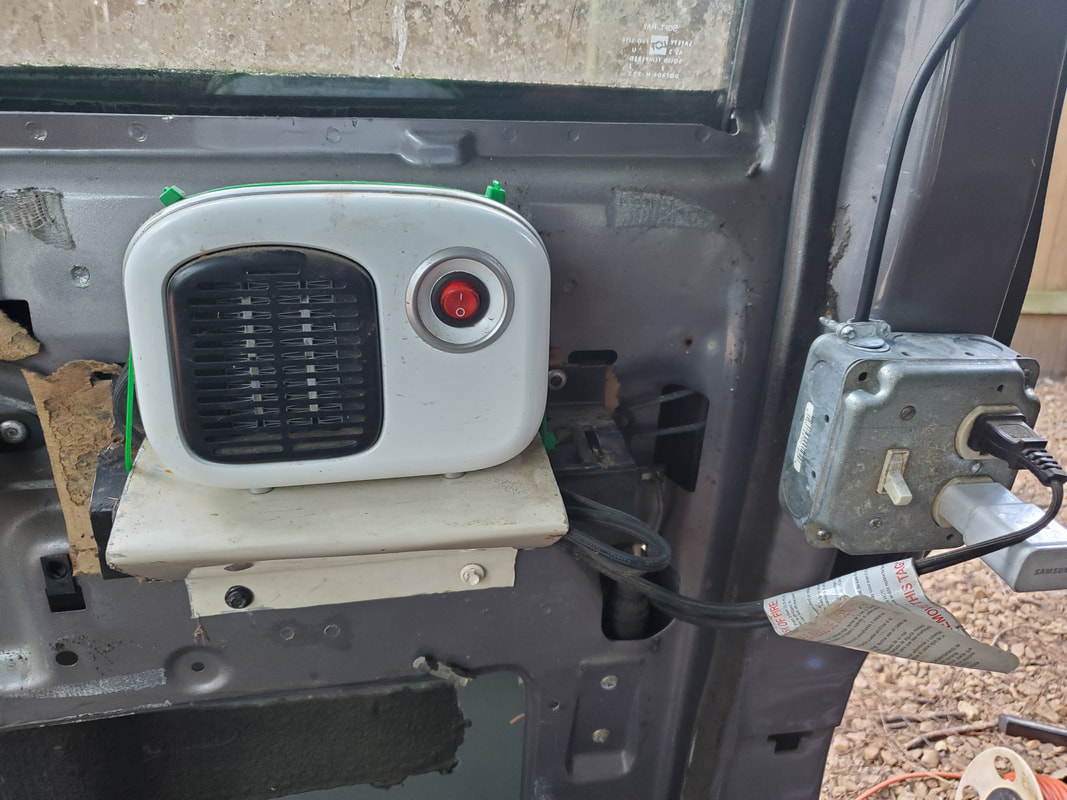
Sheet metal platform holding small electric heater, also zip tied to platform, power cable tucked inside. Note phone charger plugged up during testing.
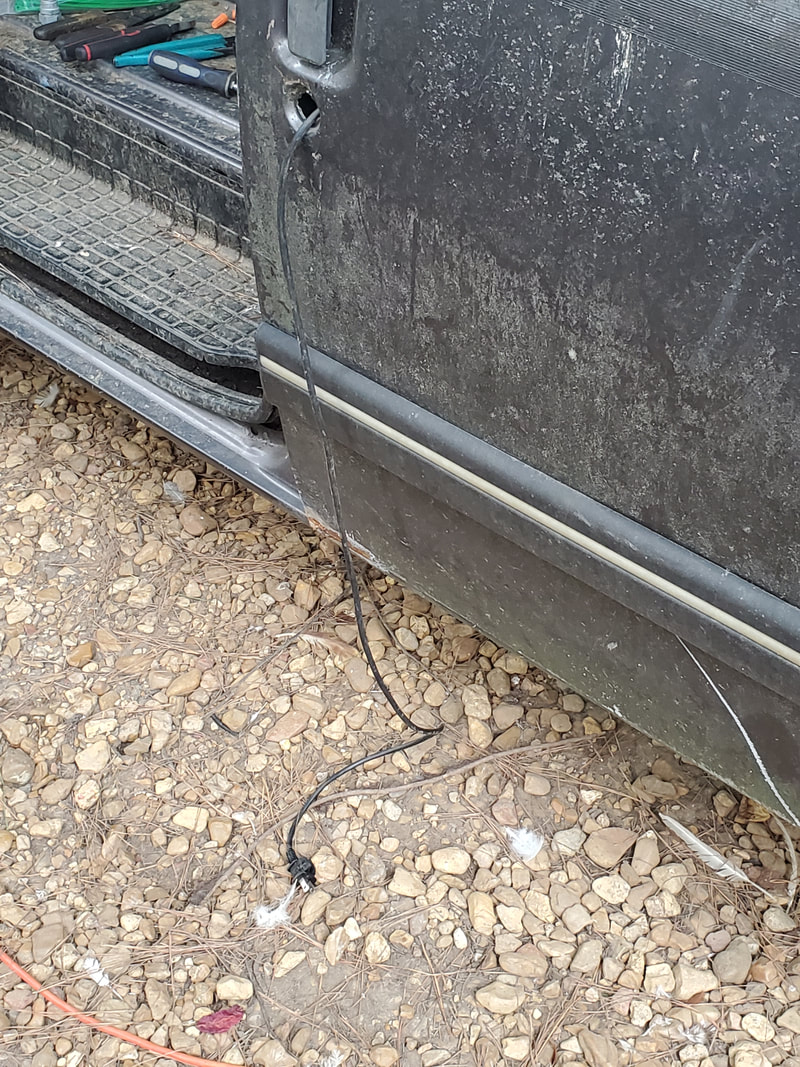
Power cable routed through key hole on door.
With the utilities taken care of on the coop, the next order of business was closing things up on the body. The firewall was full of holes, vacated by the equipment that was removed during the chopping of the van initially. These holes were closed in with pieces of sheet metal, secured in place with sheet metal screws, after drilling holes through the sheet metal and the firewall. Since I was running low on self tapping screws I didn't want to just exhaust them all too soon. After doing the firewall, I decided to close in the engine tunnel using the same turtle shell that I pulled from the van initially. I had to use sheet metal screws, drilled through the remnants of the retaining brackets at the bottom and into the floor to secure said screws. On the top, angle braces with sheet metal screws held the turtle shell in place. I cut a doggie door in the shell for the entry of the birds through this point. I moved on and bent a lip into the floor at the engine tunnel with which to screw down a couple pieces of conduit, which stretched out and laid upon the sway bar at the front of the van. I spaced the pipes evenly, then took some pressure treated boards I pulled from my wood pile, cutting them in half and securing each board to the pipes with four screws each, bolting the corners of each board down. I then cut the excess of the conduit where it extended past the sway bar and made another ramp, which the conduits sat between the conduits on the first half. This second half ramp was attached to the first half with three flat braces secured with more sheet metal screws. The ramp entrance to the coop was completed.
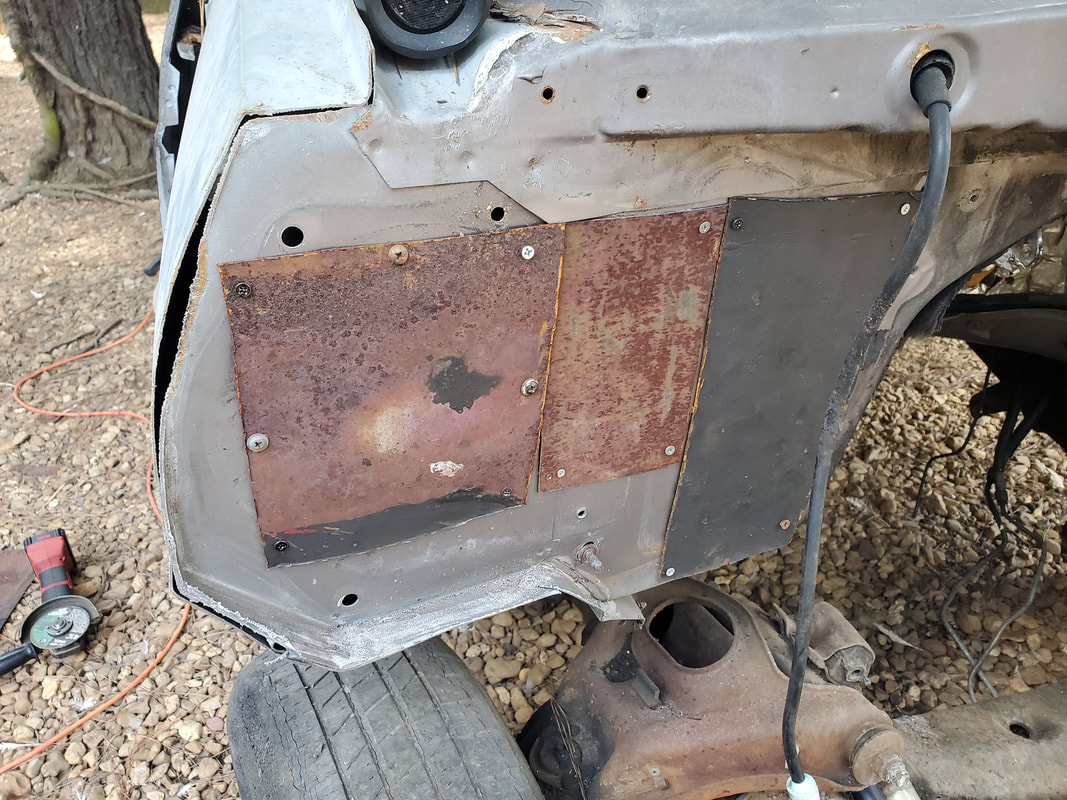
Large sheet metal panels screwed over holes on right side firewall.
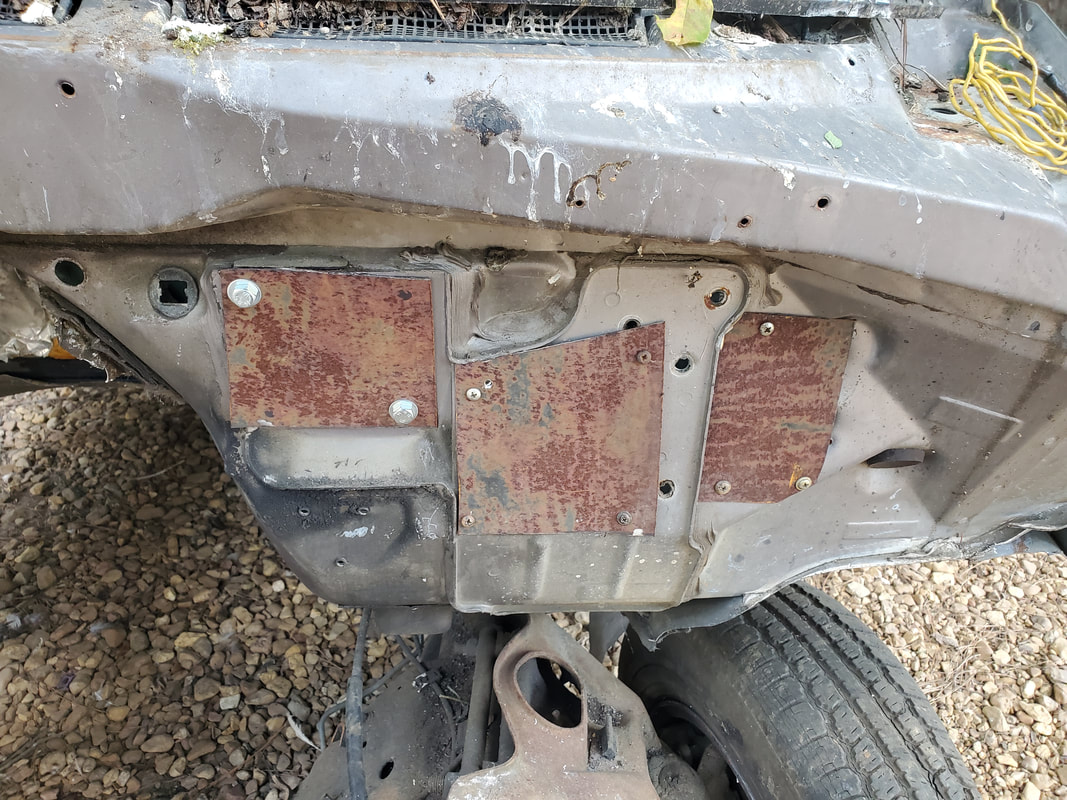
Smaller pieces of sheet metal secured over holes on left firewall. Panel over hole where master cylinder used to sit was held in place with nuts and bolts due to the large holes present.
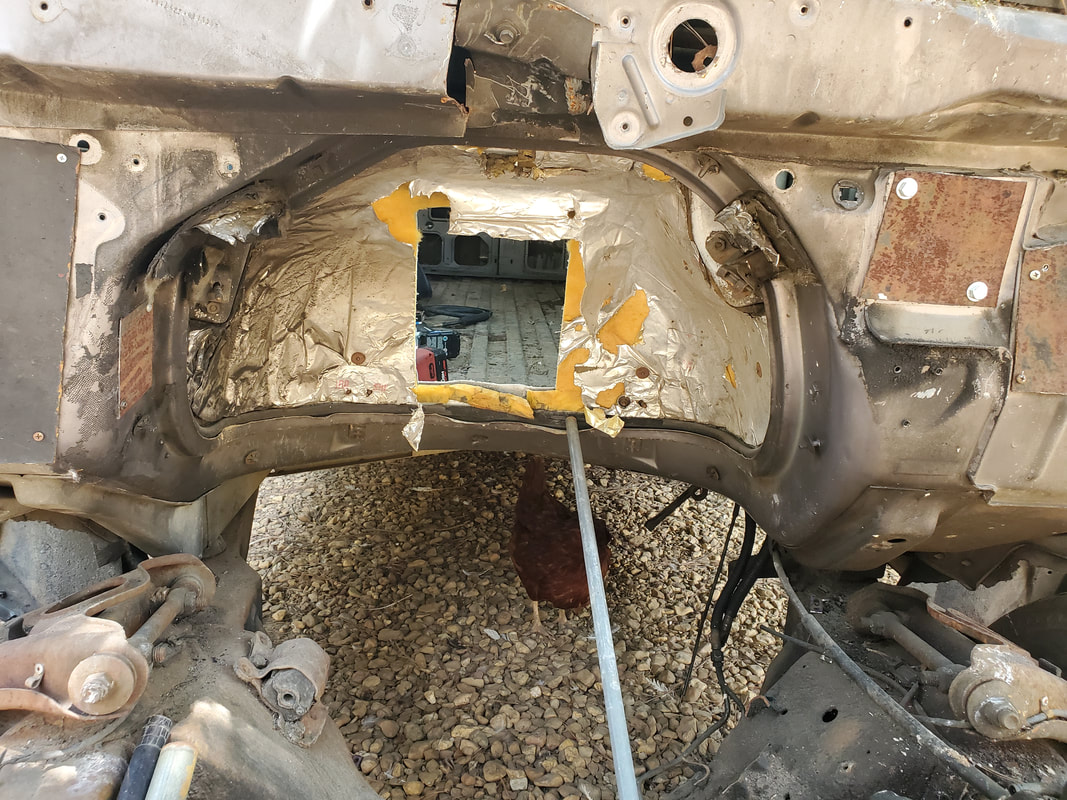
Turtle shell covering opening to engine tunnel. Sheet metal screws hold bottom via holes drilled through brackets and floor. Angle braces secure the top.
Doggie door is cut out of turtle shell.
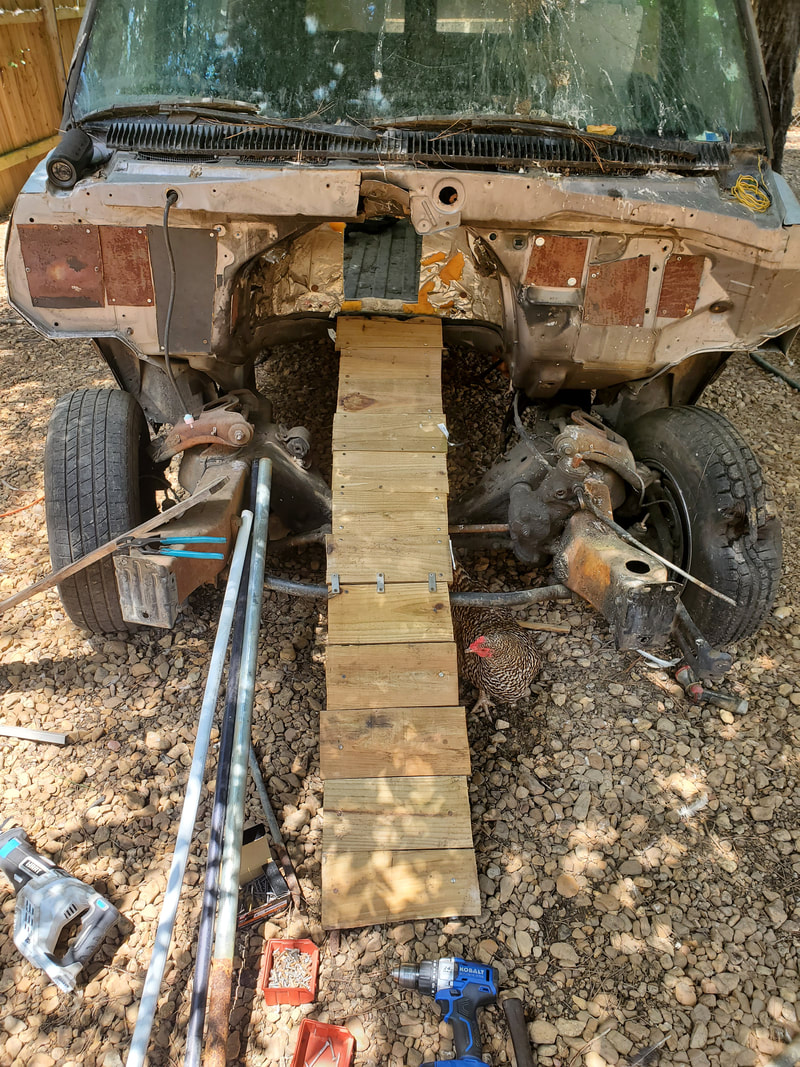
Lip bent into floor at back of engine tunnel holds two conduits via a single sheet metal screw per conduit. Both conduits lay on sway bar. Two more conduits were laid between the conduits of the first ramp, more boards secured to the conduits, making up the 2nd half. Three flat braces hold the 2nd half to the 1st half ramp. 2nd ramp goes from sway bar to ground.
I moved back into the van to make a couple roosting posts. These were made from a couple of long tubes that had to have a few inches extra tube added to cover the span between the two doors. More sheet metal screws held everything together and to the door bodies. The roosting posts were evenly spaced and situated over the turtle shell, near the heater, so birds roosting can take advantage of the heater in the winter or any breezes from outside coming up through the turtle shell doggie door. Next I had to fabricate a covering for the window opening where the feeder is. The feeder body extends out past the window opening so instead of being able to just put a piece of sheet metal over the opening, I would have to make some kind of extended body that reaches out from the side to facilitate a hatch that would rest over the extension and properly cover the feeder and the window opening. I did use a piece of appliance sheet metal to cover the 2/3 of the window opening that had nothing in front of it. The lip of the panel conveniently made up the extended body I would need. The portion I cut from this panel served as the other side of the extended body, secured to the right side of the window opening. I trimmed things down to be even, then added a square tube at the top to help provide a solid spot for the hatch that I would make from a piece of sheet metal salvaged from the Rustang's old hood.
Two roosting posts screwed in place between front door bodies. Both units evenly spaced to allow room for roosting birds.
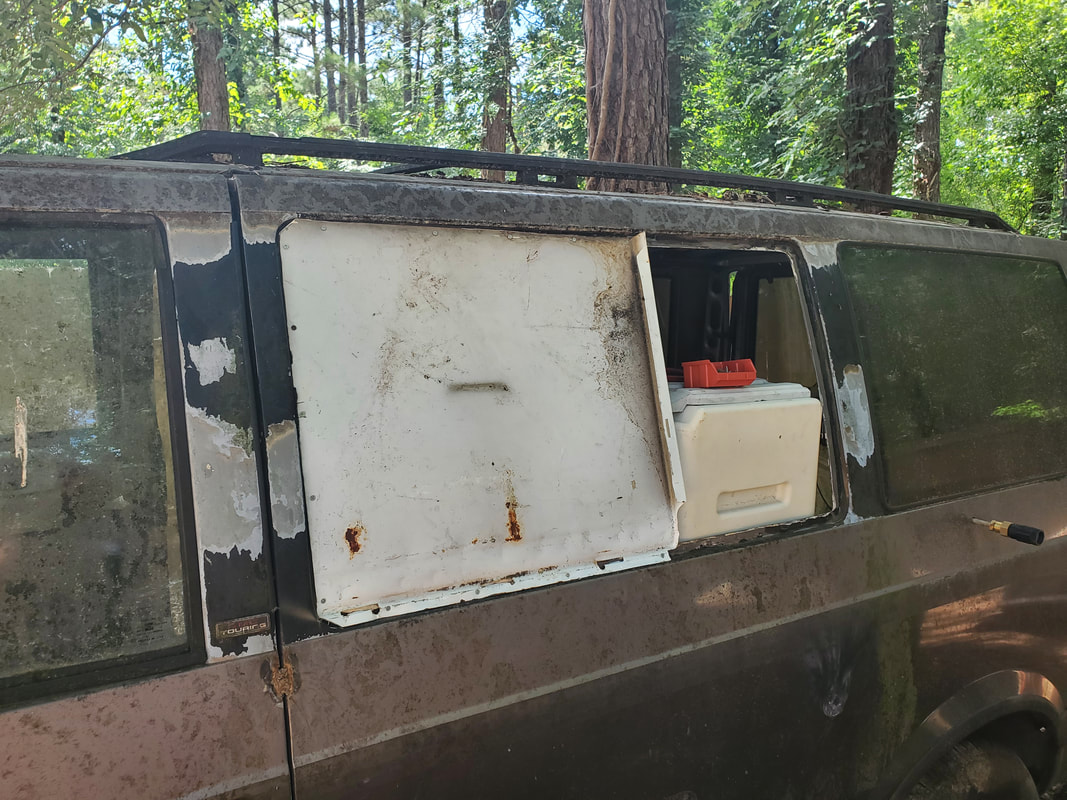
Metal panel screwed to open 2/3 of window opening. Note how lip reaches out from feeder.
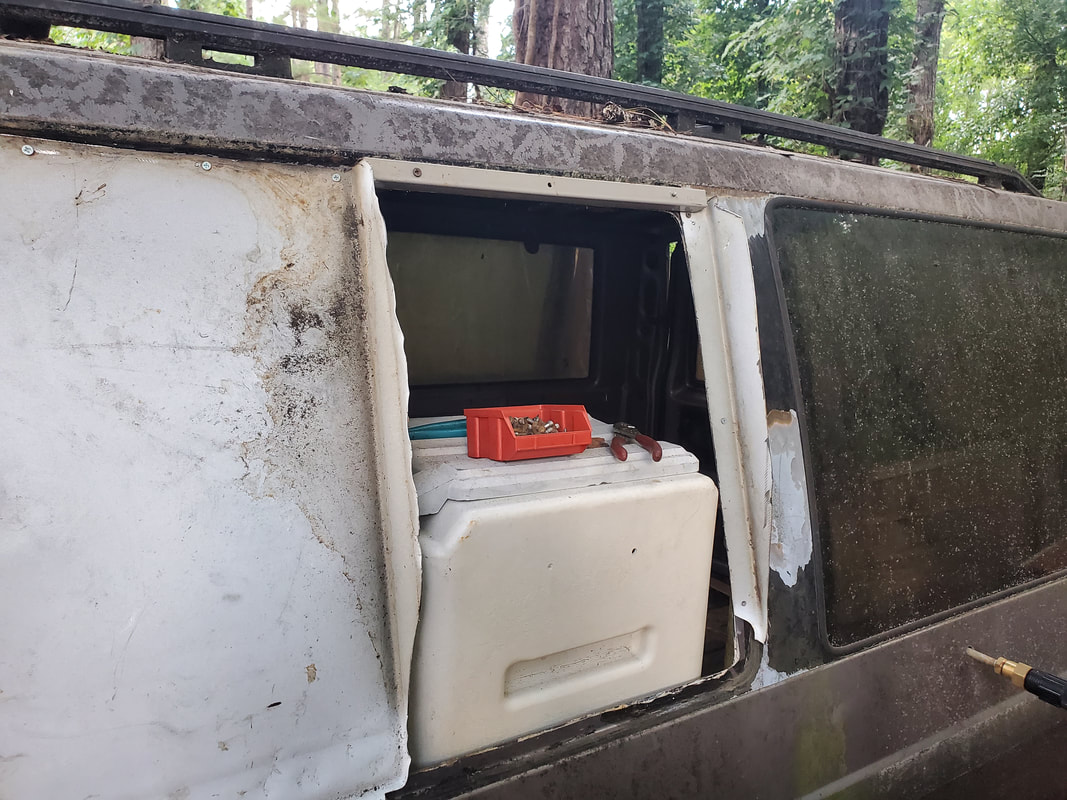
Cut piece of metal from panel screwed to right side of window opening to match up to lip on other side of feeder. Note how both lips were trimmed down in preparation for the hatch panel.
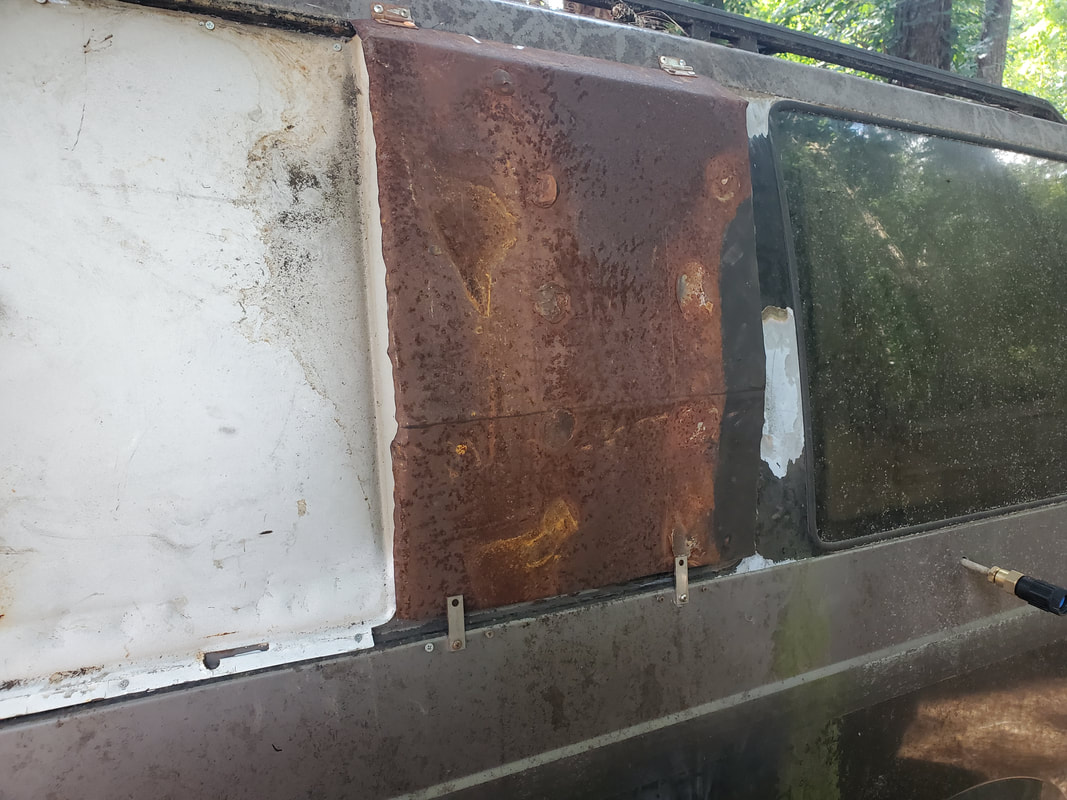
Old car hood provided sheet metal for this panel. Panel was bent at the angles necessary to allow for a "tight" fit over the extension opening around the feeder. Hatch panel is held with two hinges at the top. Sides of hatch were bent in to make lips that would overlap the sides to aid in shedding water better during rains. Also note the flat braces used at the bottom to help retain hatch and keep it from being able to be opened up in a wind. Screws on either side of each brace keep the braces from swinging straight down either way.
As for the utilities, the water would incorporate the use of a garden hose hooked up to the 4th tap on the 4 way fitting by the Mustang Chicken Coupe. It will be run under the car on the surface, then into a trench dug, starting at the other side of the Mustang and over to the Minivan, where it'll come up from the ground and over to the regulator input. I borrowed an old hose from the reel by the driveway. After removing the good section of hose, I took the old hose over to the yard where I'll cut a section free to use after adding a repair end to the cut end.
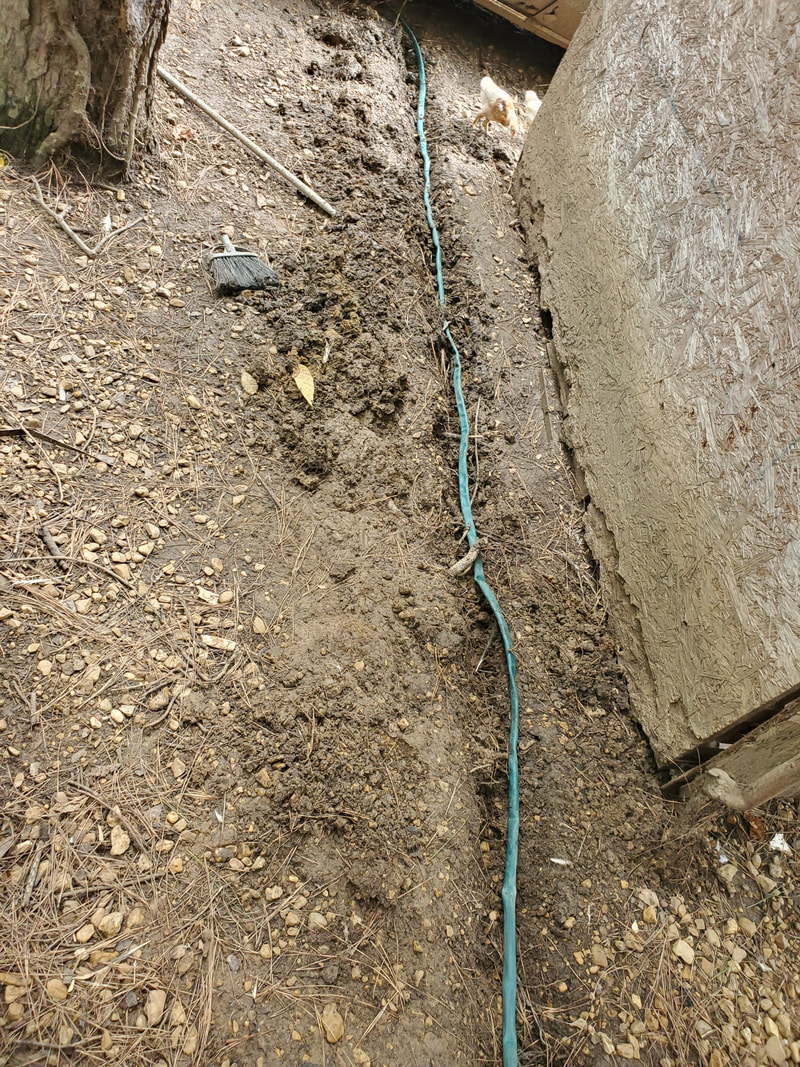
Trench dug from the right side of the Mustang Chicken Coupe over to the left side of the Minivan Chicken Coop to accommodate the garden hose. Old garden hose run in the trench. After hooking things up, I ended up having to cut the end off of the hose where it hooks into the 4 way and add a repair end as there was a leak there.
After first test, I had to cut the last few feet of this hose off and cut a new section that had a repair coupling already on it, and connect from that coupling to the shortened end of the supply hose. This took care of the leaks at this point.
Now for the electrical system. This also incorporated digging a trench, albeit a shorter one, from the fence line straight over to the right side of the Minivan Coop. There's an extension cord that was supplying power to some old Christmas lights strung around the fence line that has a plug end that was added to the cable. My plan involved removing this plug end, splicing another length of cable to this cable end, then tacking the cable in place on the lower 2x4 of the fence, over to the trench. From here the cable will be run down into and laid into the trench, then the plug will be added to the end of the new cable and plugged to the Minivan's power cable.
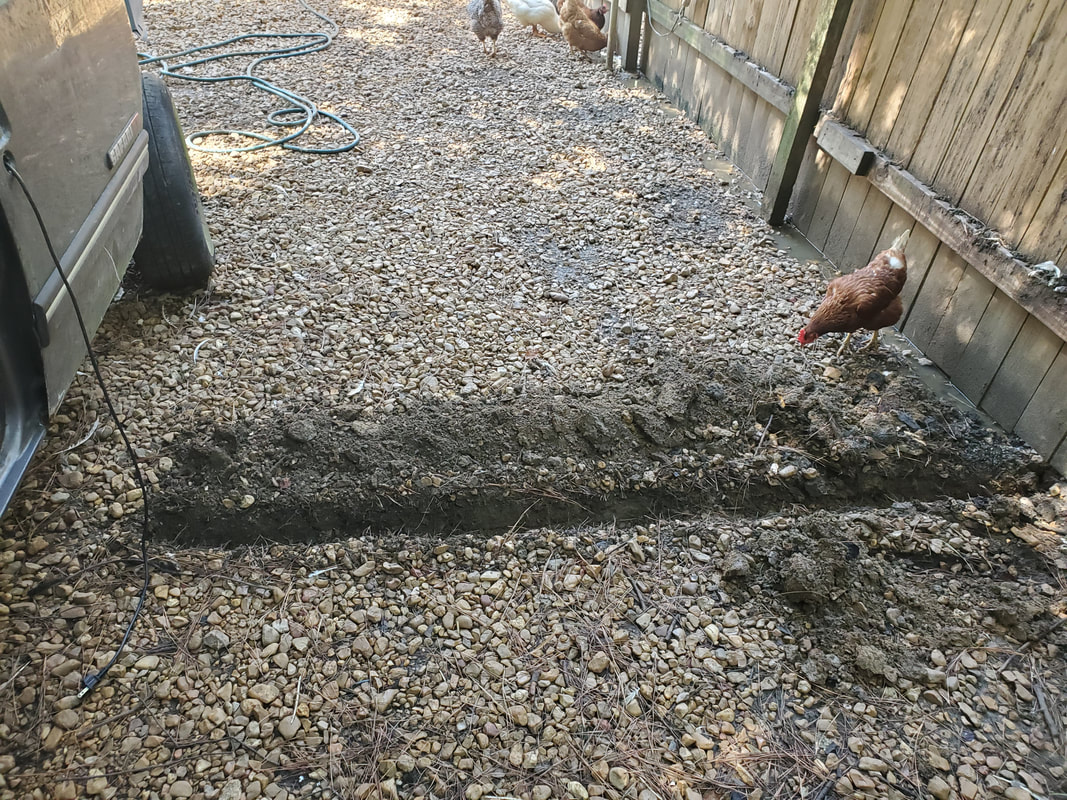
Trench dug from the fence line over to the right side of the Minivan Coop. Note the power cable to the left.
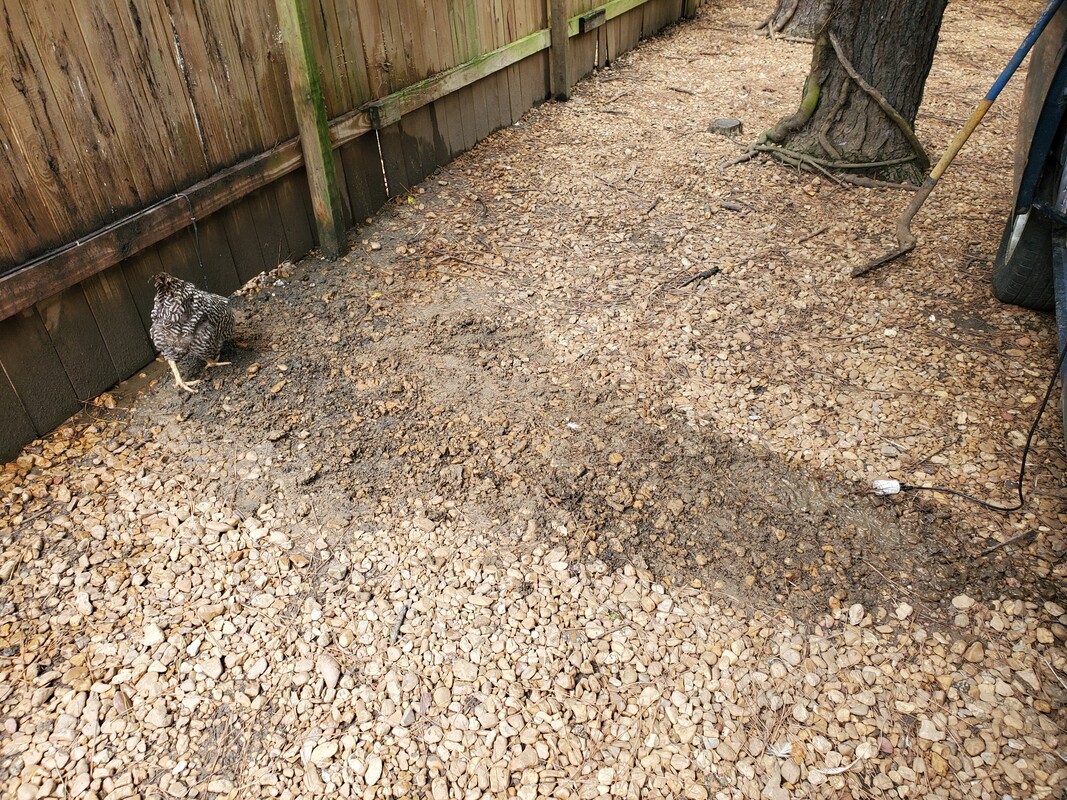
Trench filled in with dirt and gravel after adding plug to end of cable. Note power cable plugged up to the plug end where it comes up out of the ground. Note how cable is tacked along the 2x4 of the fence panel to the left.
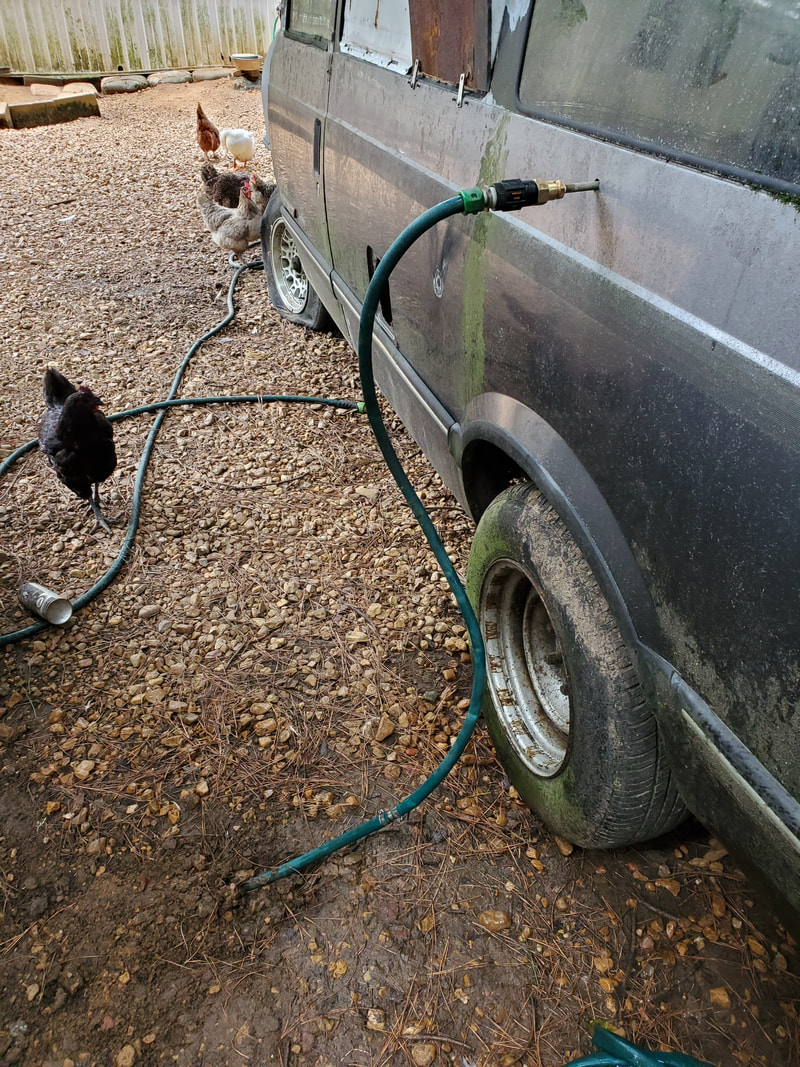
I had to fight the last bits of the water system before I got things to a point where I could consider everything done. The first thing I had to do was pound a fence post into the ground a couple feet from the side of the Minivan Coop in order to anchor the hose. Once that was done, I zip tied the section of hose above ground to the post, then moved on to the Mustang Chicken Coupe where I had added a new section of hose from the 4 way connector. I pulled this new hose under the car to the right side by the trench, but then had to cut the section of the old hose that was leaking from the rest of the hose. After connecting the old hose to the 4 way initially, it sprung a leak a few feet from the end, facilitating this repair. I took a press fit coupling and after cutting a foot of the end hose and the bad section, I was able to couple the end piece to the rest of the hose going into the trench. From there with that taken care of, I moved back into the Minivan Coop. I replaced the bucket reservoir due to the idea that the old bucket had hairline cracks in it that were slowly leaking when the bucket was full. I drilled new holes for the output nipple and the float valve. I did take the time to use hot glue to further seal the output nipple, even after using teflon tape to seal the threads. After reassembling the new bucket, everything was working as intended and no longer leaking inside the van.
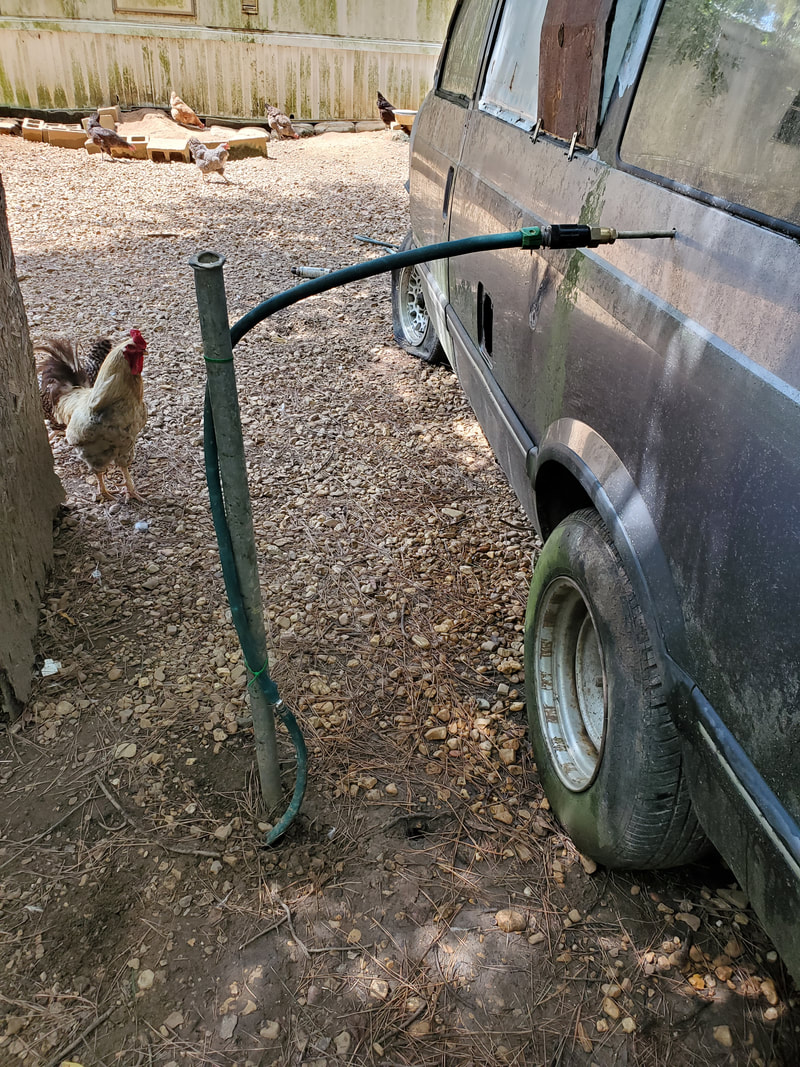
Fence post pounded into the ground a couple feet from the side of the Minivan Coop with the hose zip tied to the post to secure it.
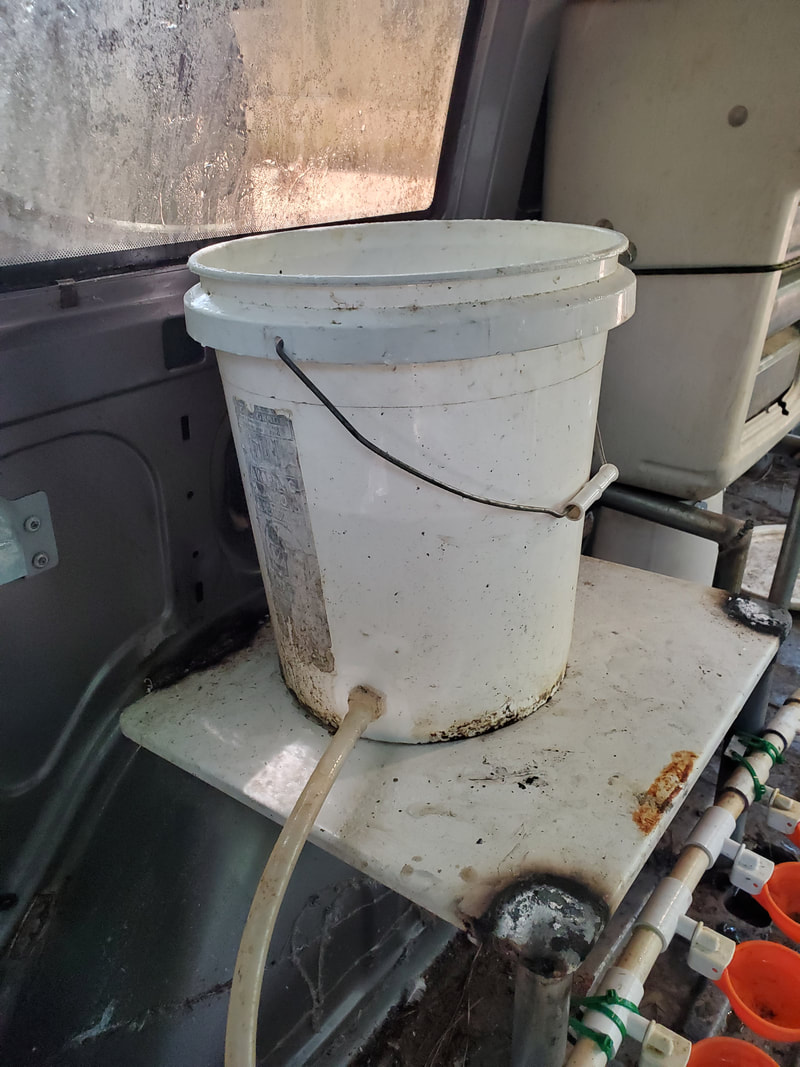
New bucket set up to serve as the reservoir after finding cracks in the old bucket. Teflon tape and hot glue sealed the output nipple on the bottom of the bucket.
With that, the Minivan Chicken Coop is pretty much completed. Everything is working as designed and other than adding shavings to the floor, there's nothing else to do to the coop. We still have to get a bag of feed to fill the bulk feeder and along with the shavings, the MCC is open for business. I'll try to figure out what I want to do with nesting boxes later on, but in the meantime, I'll just leave the birds to their own devices and move on to other things around the compound, such as adding more gravel to some sunk spots near the back of the yard.
