THE LED WALKWAY LIGHT ARRAY
With the success of the Storage Trailer area light, which utilized one of the 10w LED flood lamps I had laying around, I had to come up with another practical project to use the remaining LEDs for. The best thing I could come up with was an array of lamps to illuminate the walkway going from the main driveway to the house door. This practical idea would eliminate the need for a flashlight or headlight to light the way to the house. Since these LEDs are 12v, I would have to utilize a power supply for the four lamps that are being used. Unlike the trailer's lamp, the power supply I'll need has to be able to deliver 5 amps to power all four lamps. As before, a dusk/dawn sensor will be used to cycle power to an outlet that will power the power supply which will power the LEDs.
In order to start things off I would have to get an outlet set up. The easiest way for me to do this was to tap into an existing outdoor outlet box, in this case, the outlet box that is powering one of the security cameras. The other camera is hooked up to an outlet that is recessed in the wall so that unit won't help. With our outdoor outlet box, my plan was to link the old outlet box with a new box using threaded PVC pipe. The sensor would be hooked up to the new outlet box and cycle power to an outlet installed within. I pulled the old outlet box free to hook up the new box and linked the sensor's hot wire to the old outlet. The neutrals on both the sensor and new outlet went to the neutral on the old outlet and the load wire on the sensor went to the hot terminal on the new outlet. The new outlet box will have an outlet cover on it that allows the power supply to be plugged up with the outlet completely covered. With this done, the hard part was done, the work with high voltage, which was done live. Everything from this point on is with the low voltage side of things, namely hooking up the LEDs.
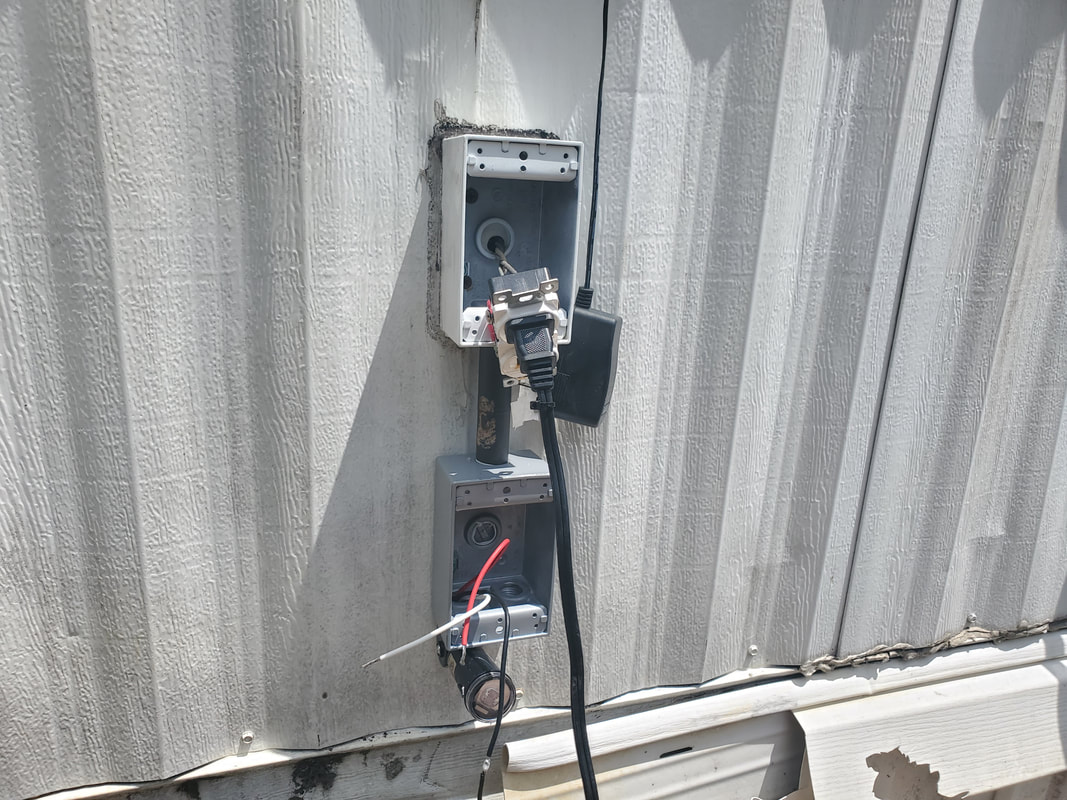
New outlet box linked up to old box with PVC pipe. Note the sensor installed on the new box and old outlet hanging loose to allow for old box to be pulled from wall to allow for the twisting of the new box in place and the wiring of the new components to the old outlet.
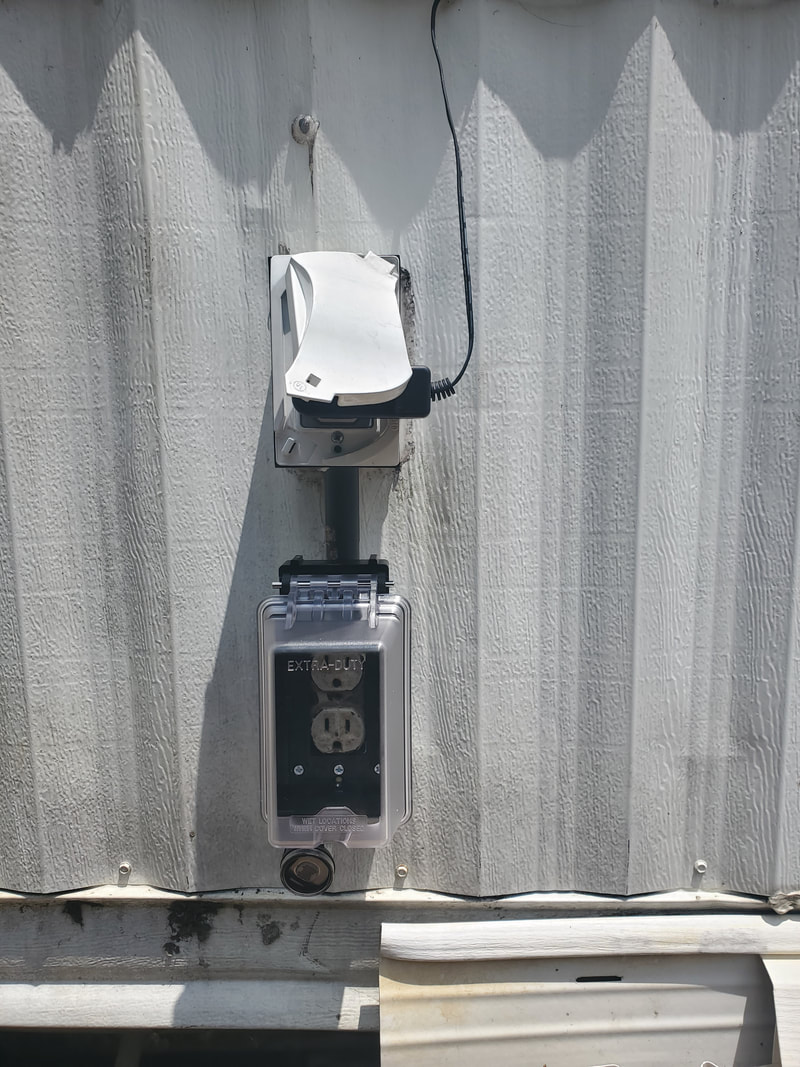
New outlet box fully installed under old outlet box. Old outlet box has cover reinstalled and new box has cover installed, which will allow for covered use. Note the dusk/dawn sensor installed under box.
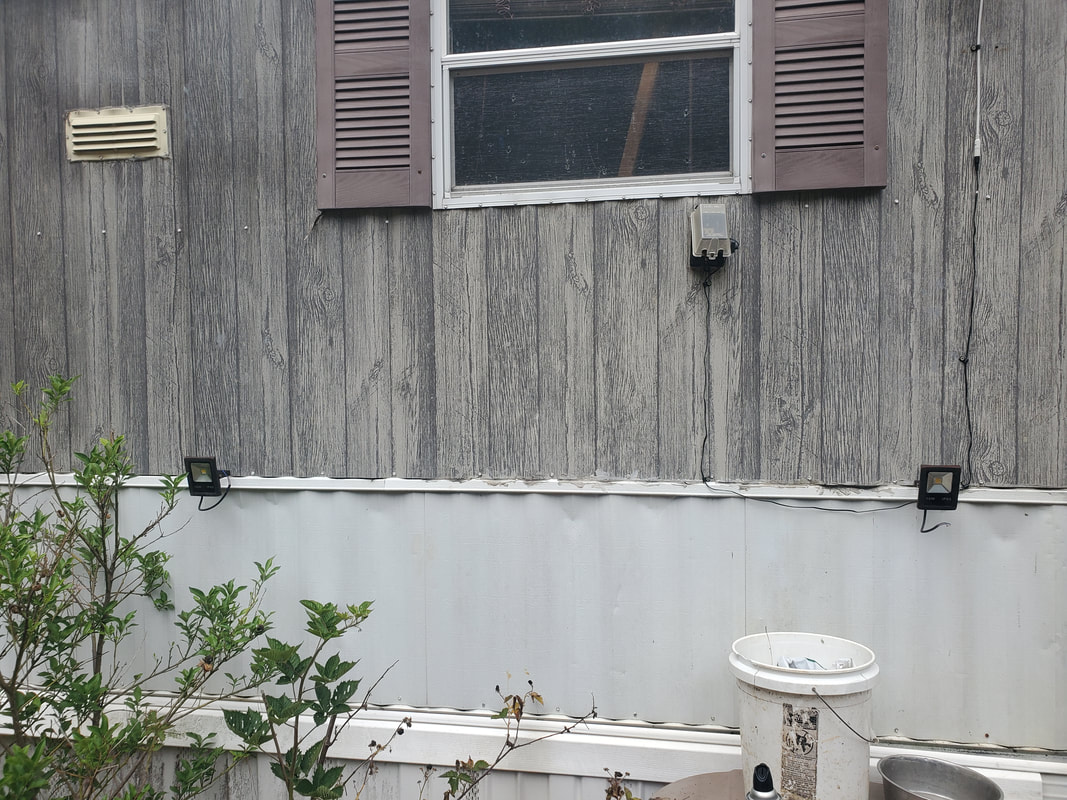
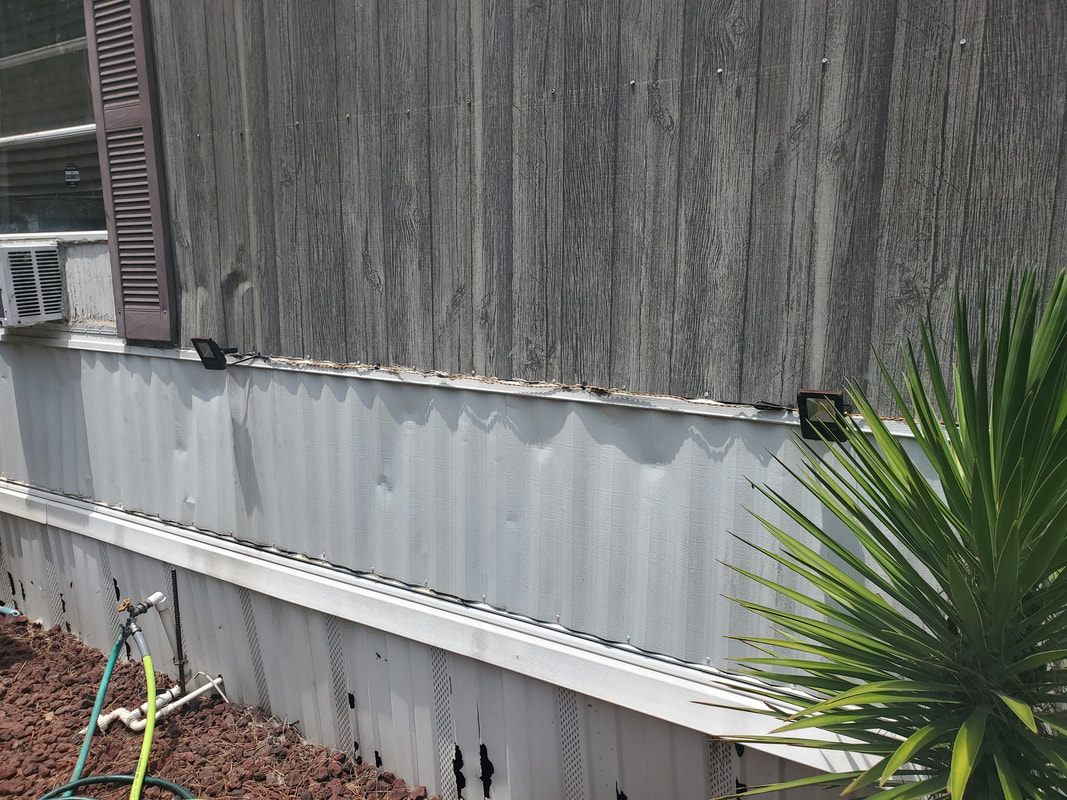
I installed the brackets for the LEDs to a point on the house's wall that had the foundation/floor joists. This point had solid wood all along the length of the house, giving me a good spot to anchor any of the components to this system. I wanted to space the four LEDs evenly along the length of the walkway to ensure good coverage of light. With the LED's mounted to their brackets, the next order of business was wiring. I had some red/yellow twisted pair wiring that I started off by soldering to the farthest LED, heat shrinking the joints. The next order of business was securing the twisted pair wiring with brackets to the wall, running the wires all the way to the next LED. I cut the wire pair then soldered the ends of the first pair of wires to the next length of twisted pair wiring as well as the ends of the LED wires. I heat shrinked these solder joints then continued with the wire run to the next LED and then the next, using wire brackets to hold the wire pair to the wall. Once at the last LED, I ran out of twisted pair wiring so I pulled out some lower gauge Romex cable that I hooked up to the last LED, then routed along the door frame down to the bottom of the house. The Romex would be routed along the bottom of the house over to a point just under the outlet boxes.
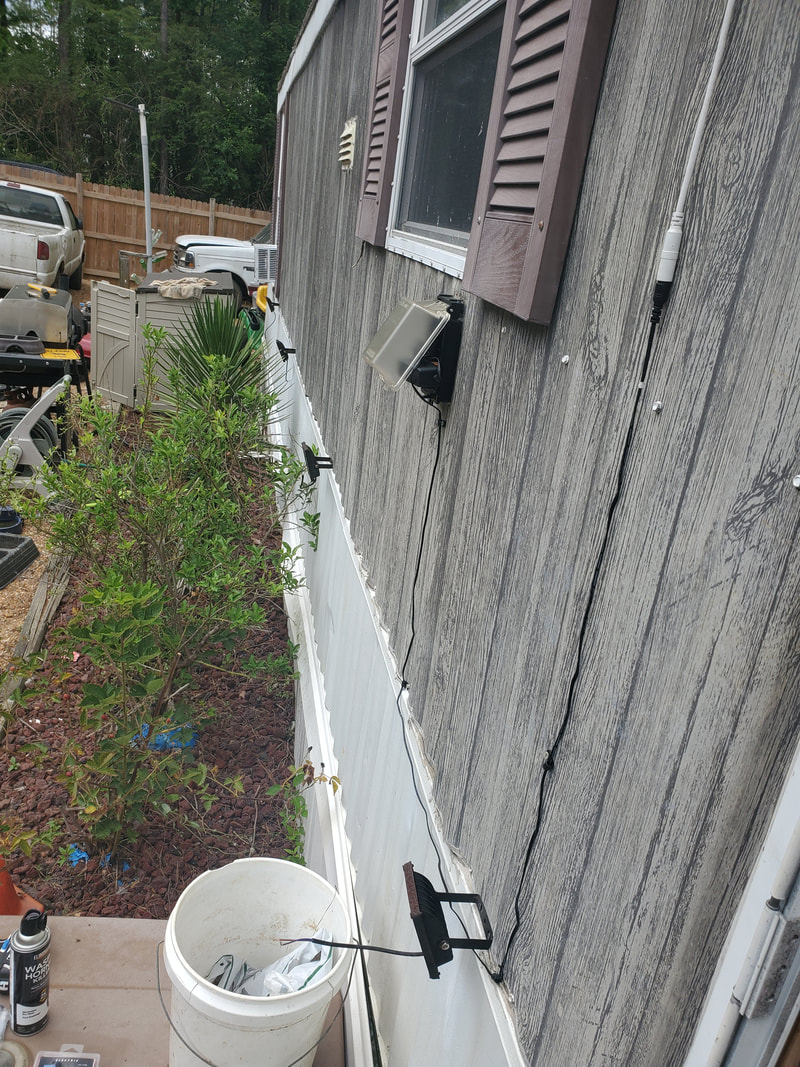
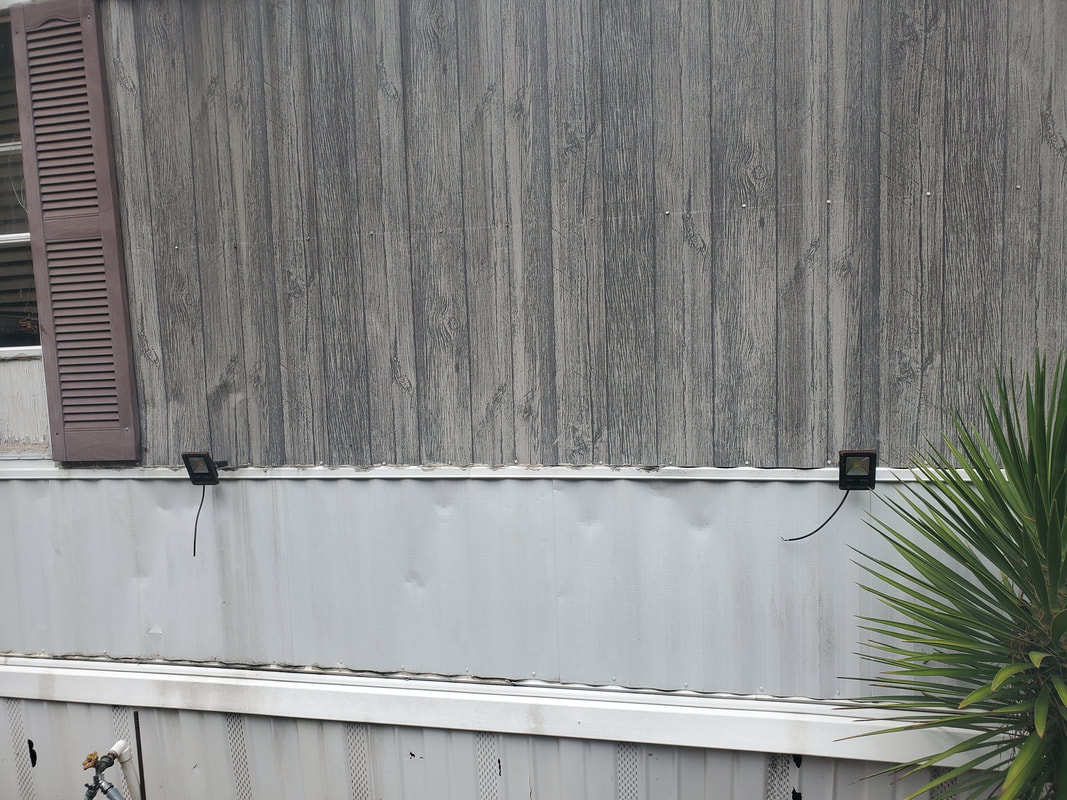
Linear view of set of LEDs running along bottom of house, evenly spaced.
View of farthest pair of LEDs mounted to wall with wire pigtails hanging down prior to hookup.
Other pair of LEDs mounted closest to door.
Farthest LEDs are wired up to the twisted pair wires, which are also secured to the wall of the house with brackets. Everything is soldered together to ensure proper connectivity.
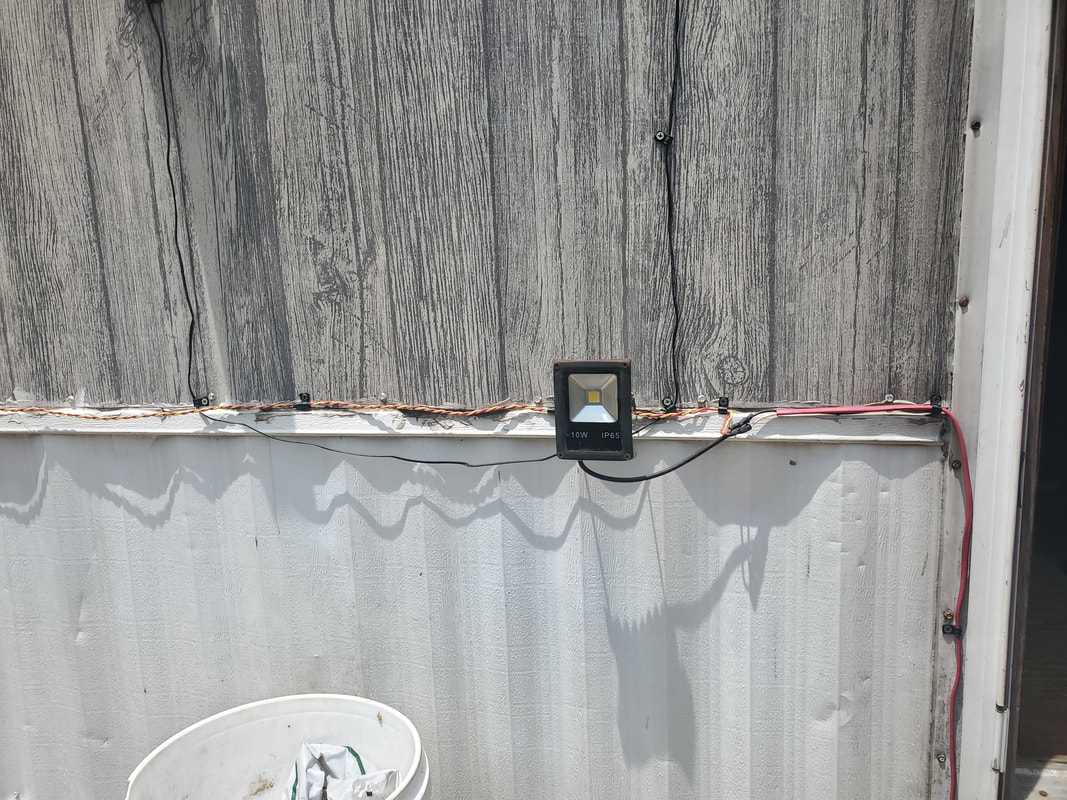
Closeup of the wire pair as it terminates at the last LED then converts over to the Romex cable which is routed down the door frame to the bottom of the house.
Since the power supply being used isn't exactly an outdoor safe unit, my plan was to mount the unit under the house where it would be out of the weather. I used an angle brace to secure the power supply body to the floor joist closest to the outlet boxes, then routed the 110v power cord out from under the house and up to the outlet box. I zip tied the excess cable together to keep things neat. The Romex was trimmed short and the wires were connected to the terminal block on the end of the 12v output cable on the power supply. I used one more wire bracket to hold the cable to the floor joist under the house to keep the cables from sagging. With the cables and wiring all done, I did a test by covering the sensor. After a couple minutes the sensor cycled on power to the lights, then after uncovering the sensor, the unit cycled off after a minute. The real test was to be at night when I can fully see if everything worked. We were pleasantly surprised to see the four LEDs light up the walkway rather well. We were able to move about the walkway without no need for other light.
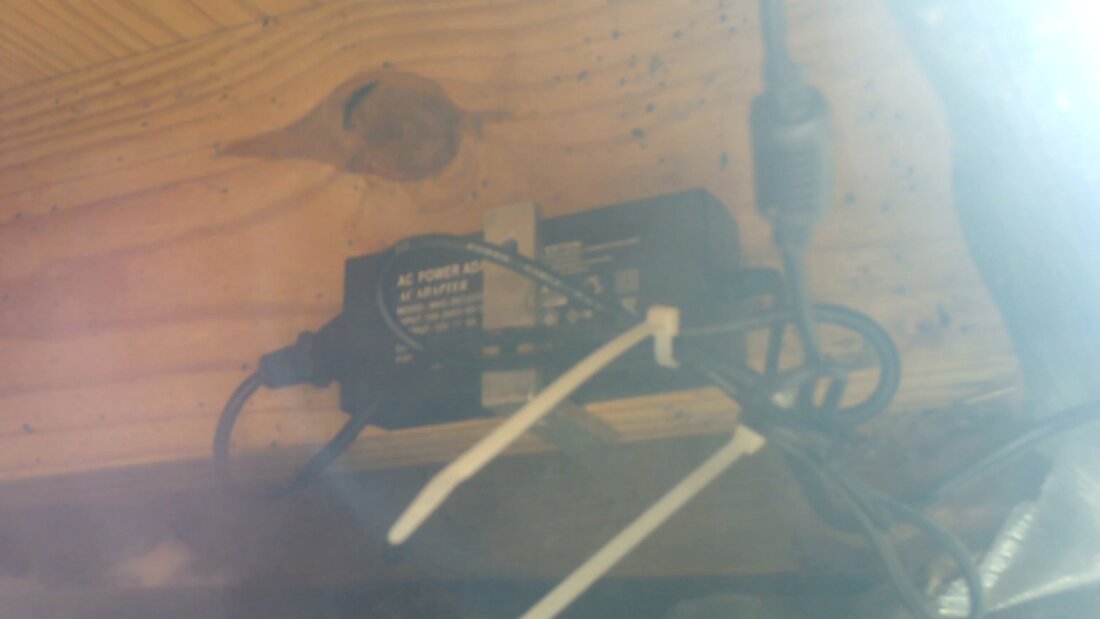
Power supply secured under floor joist with angle brace. Note the zip tied cables. Everything is out of the weather.
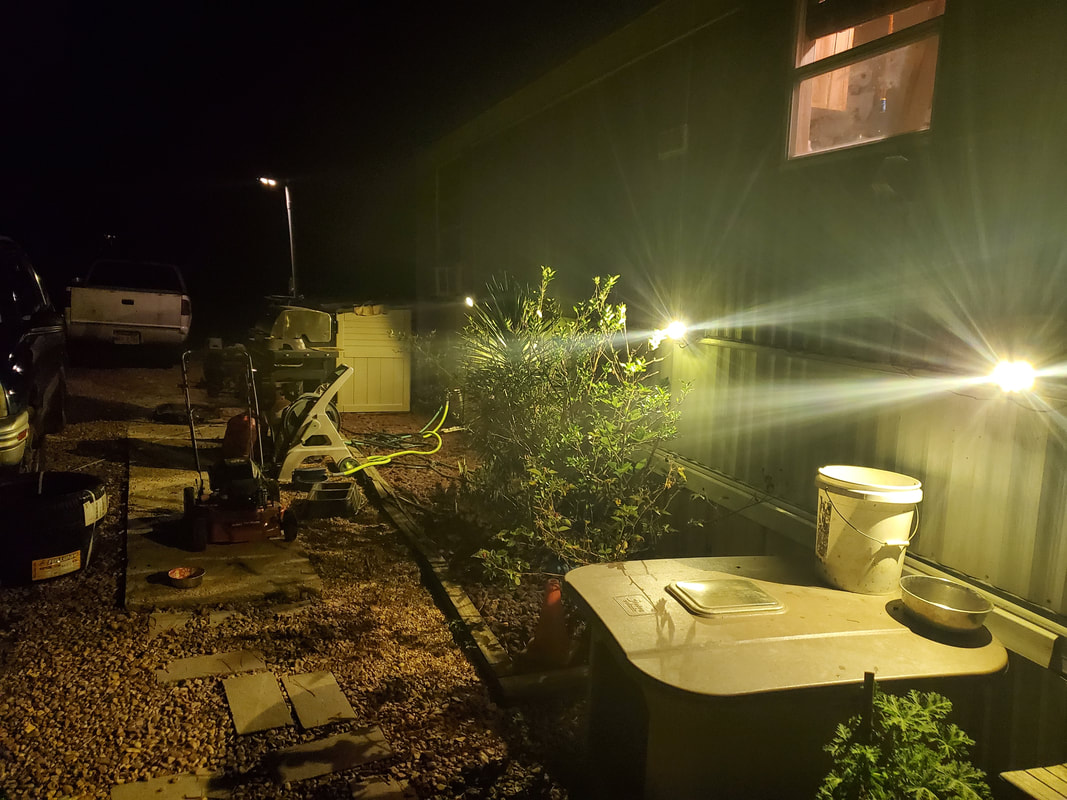
Walkway illuminated rather well at night. This level of light is without the motion sensor LED lights on the other side of the door. When that pair of lights are illuminated the walkway near the door is double illuminated.
With the success of this light project, now I'm enthused at the idea of installing more LED flood lights all about the compound. I want to really set up these lights in the chicken yard, where I can do away with the remaining string lights, which didn't last much at all. Since I already have power going to the chicken yard, all I would have to do is install a new dusk/dawn outlet to replace the old unit that is powering the string lights and find some wire connectors that would allow me to connect the LEDs to what would be a bus cable. I plan on using 110v LEDs instead of the 12v variety like the ones being used now so I would need something that is a little stronger to ensure that the high voltage connections don't fail. Whatever I do come up with, it will allow me to install these lights and effectively illuminate the chicken yard, as well as other high traffic areas of the compound, such as the area going past the Storage Trailer, or in the garden, or the side park leading up to the chicken yard. I would use a motion sensor for LEDs covering the firewood staging area since this area isn't as highly trafficked, except in the cases of wood gathering. When its all said and done, the compound is going to be lit up like a night time baseball stadium.
|
|
|
|
|
|
|
|
|
|
|
|
|
|
|
|
|
|
