Double Barrel Hydroponic Garden
Or
Hydroponic Garden Version#2 (HPGV#2)
I'm back at it in my quest to revamp my whole gardening layout around here. After completing one version of a hydroponic garden I immediately started working on a second version of homemade hydroponic garden. This is the double barreled hydroponic garden, since it uses two 6" PVC sewer pipes for the body of the unit. To keep things simple I coined the name and acronym, Hydroponic Garden Version #2 or HPGV#2.
As stated this garden setup utilizes two 4' lengths of 6" PVC pipe. These sections of pipe and their caps were actually used as the outriggers for my past Triyak project where I took my kayak and turned it into a trimaran sailboat. After dismantling the boat and salvaging the pipes, they now have a new lease in life as the basis of my next hydroponic garden.
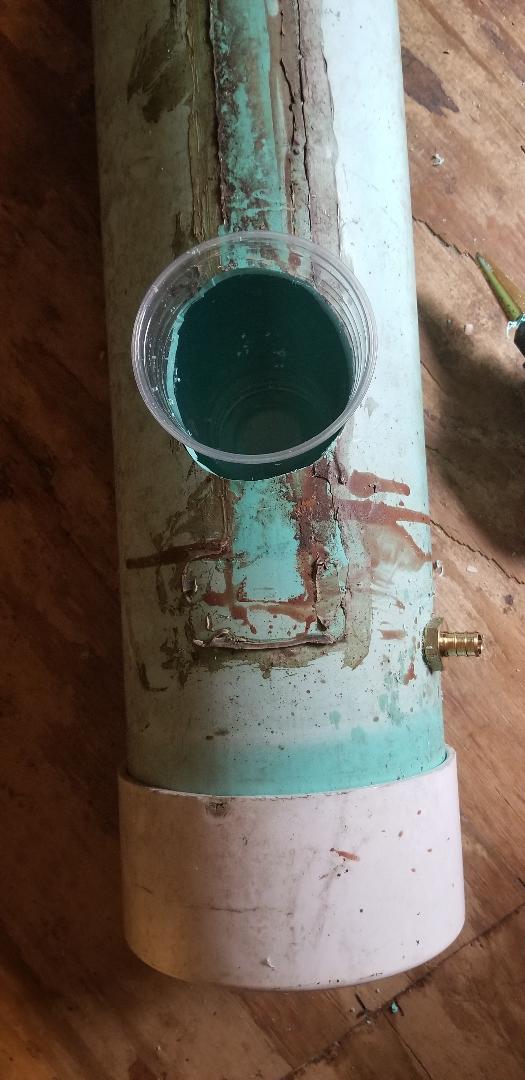
The first thing that I did was drill out the holes for the planters. This involved tracing five circles along the length of each pipe, evenly spaced, using the bottom of the cup that will be used as the planter in this garden. The hole saw that I have was only wide enough to drill out a hole that matched up to the bottom of the cup so after drilling out these pilot holes, I had to take my jigsaw to cut wider holes. I traced circles around the holes that were about a half inch out from the holes, making the new holes an inch wider than the pilot holes.
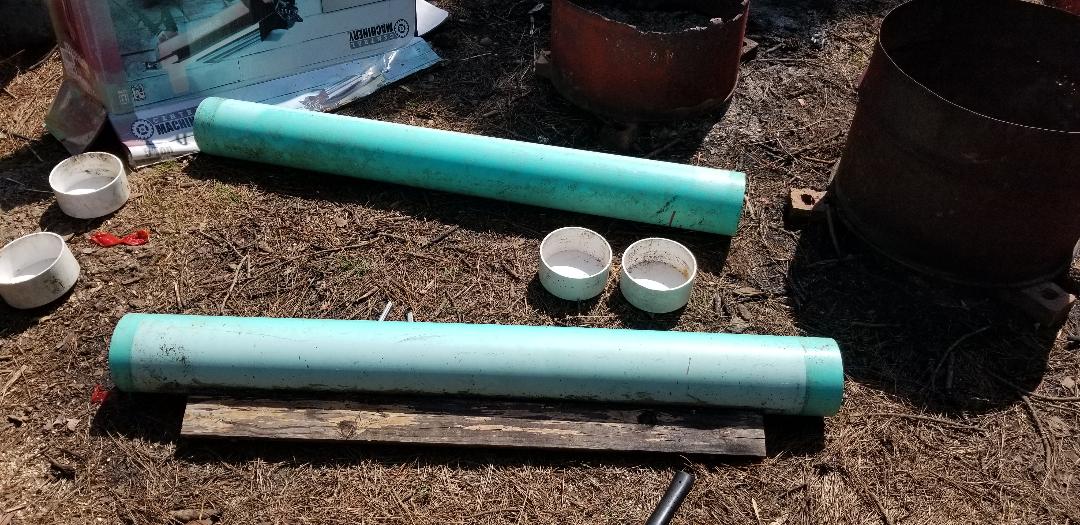
6" PVC sewer pipe to be used for the new hydroponic garden.

Holes cut into pipe and traced and cut to accept cups to be used as planters.
Another thing that I did was prepare the platform for the pipes to set on. Previously I made a table using an old pallet and some 2x4's to accommodate an old hydroponic garden pair I made almost 20 years ago. After the gardens fell apart and became more expensive to resurrect at this time, I decided to use the pallet table as the base for HPGV#2. In order to hold the pipes in place though I had to make some type of cradle for the top of the table. This was simple. I used a couple of foot long pieces of 2x10 boards that I situated along the middle of the table to act as spacers for the two pipes. I secured the boards with wood screws then set the pipes on either side of the boards. The next move was to take some foot long pieces of 2x4's and secure them on either side of the pipes along the outer edges of the table, again using wood screws. By doing this the pipes were effectively cradled in place between the outer boards and the middle spacer boards.
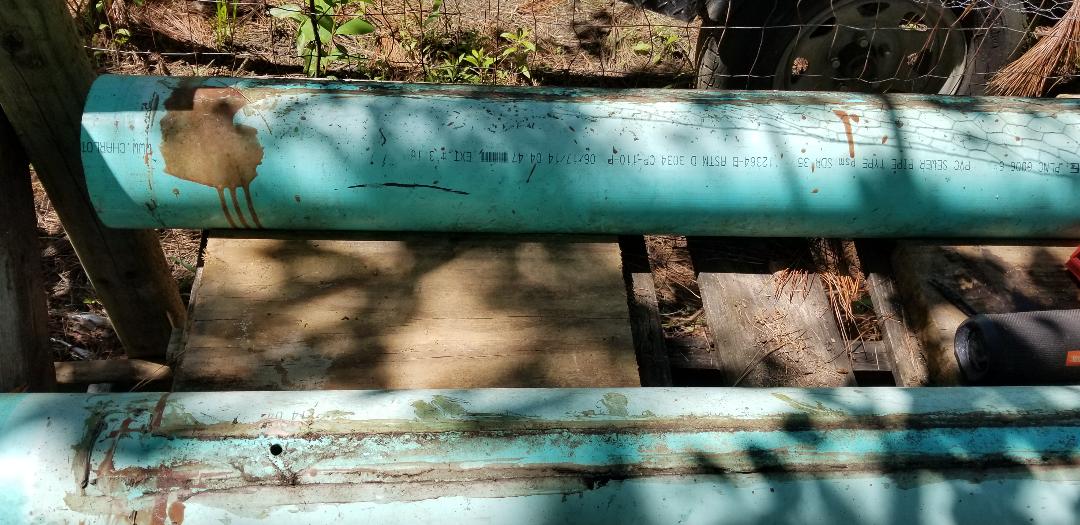
Spacer boards secured to pallet table top with pipes on either side of boards.
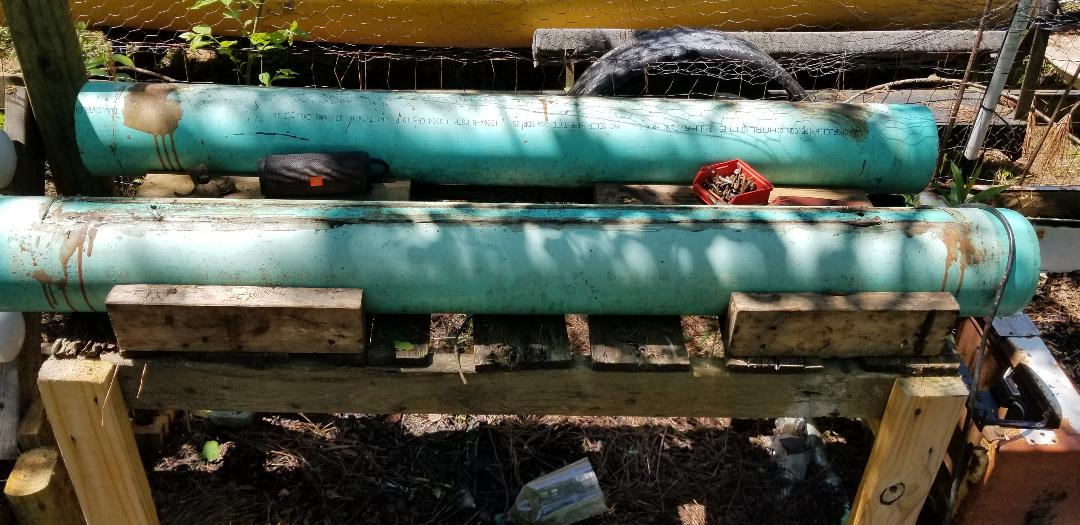
Completed cradling boards for pallet table to hold pipes in place.
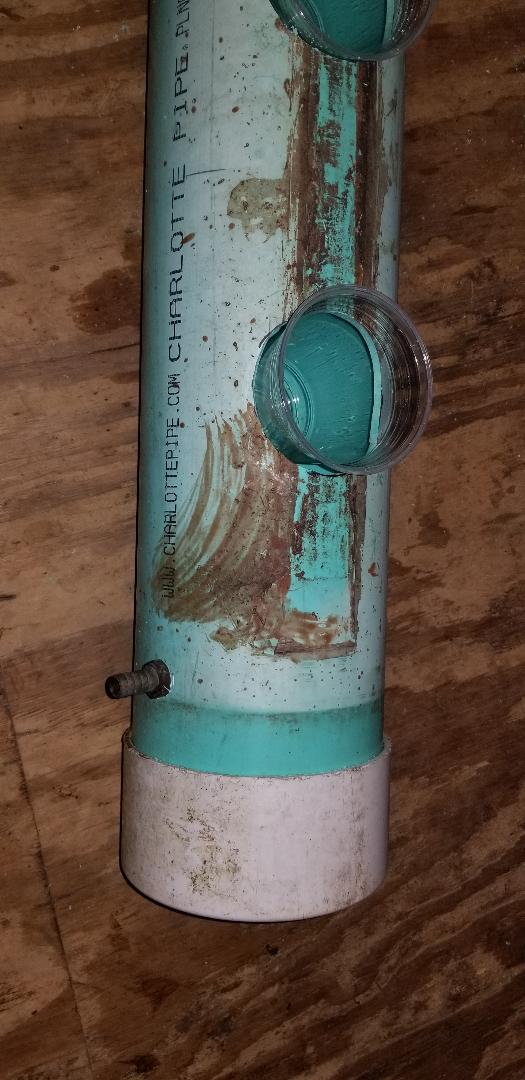
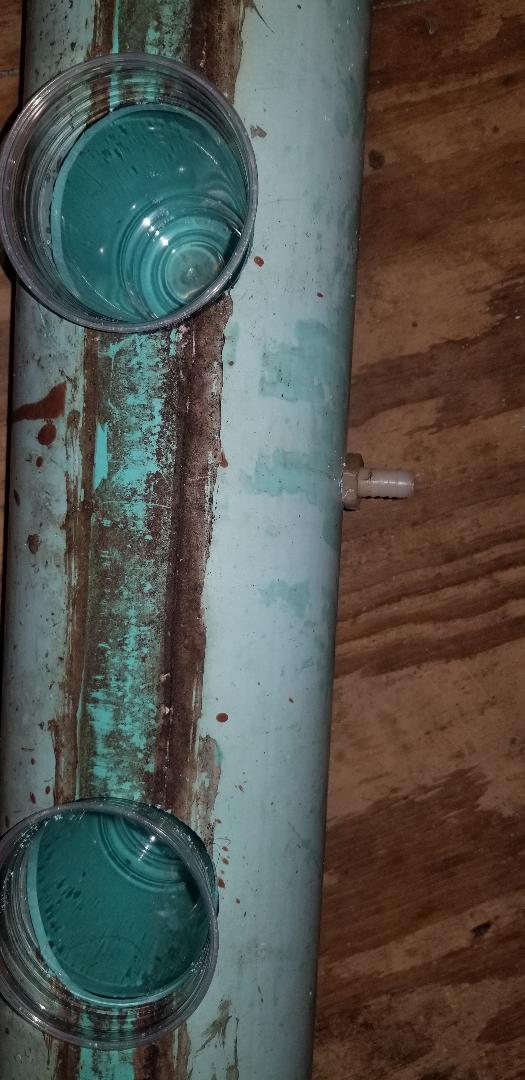
With the table done the next thing was to drill and tap the holes for the nipples in each pipe. The first pipe would have the input nipple placed in the pipe from the top on one end of the pipe and the output nipple on the opposite side but off to the side so the water level in the pipe will only go as high as that nipple is. The second pipe would have its input nipple be on the side, right across from the first pipe's output nipple so they can be bridged by a short piece of hose. The output nipple will be on the opposite side but in the middle of the pipe so the output hose can be routed right down into the reservoir with the shortest length of hose possible. I used a taper drill bit to drill the holes and a 1/2" NPT tap to cut the threads into each hole. Teflon tape on the threads of the nipples finished the preparation prior to screwing the nipples home.
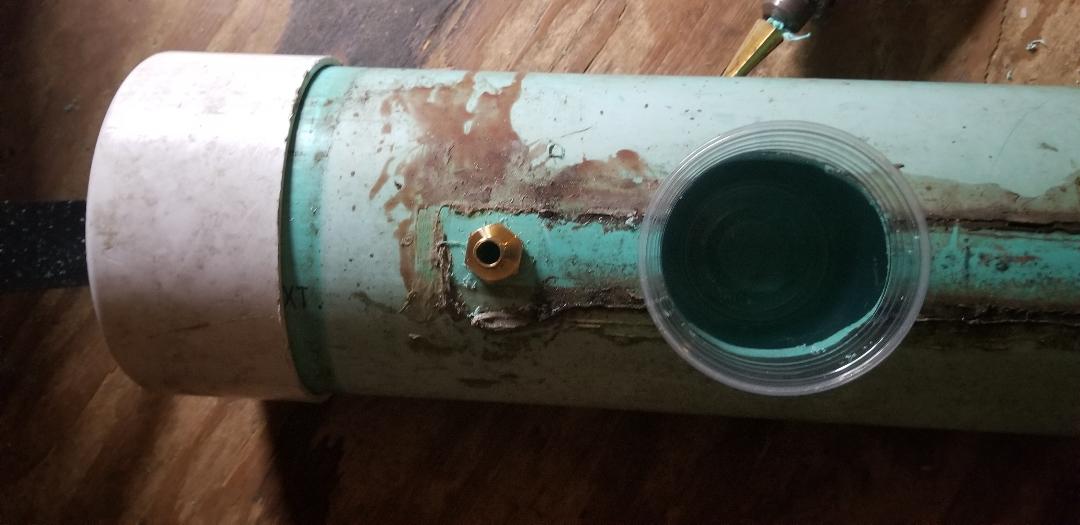
Input nipple in first pipe.
Side output nipple in first pipe.
Side input nipple in second pipe.
Side output nipple in middle of second pipe.
The next thing was preparing a reservoir for the fertilizer water. This ended up being a 25 gallon plastic drum that I had stored with some buckets and other drums. The drum when turned on its side sat nicely right under the pallet table. To make things more convenient I cut a square hole on the side of the drum, which will serve as the new top of the drum. This hole will allow me to insert or remove the pump easily. With the hole cut I put a fountain pump in place and cut some hose to go from the pump up onto the input nipple of the first pipe. I then bridged the gap between the output of the first pipe and the input of the 2nd pipe with another piece of hose. Lastly I cut the final piece of hose to go from the output on the 2nd pipe and routed it right down into the drum. I used some wire ties to help secure the stuff. I placed bricks on either side of the drum so it wouldn't roll around either way.
With the garden body done the next thing was to prepare the planter cups. This was done by stacking the ten cups together then drilling ten holes through all of the bottoms of the cups simultaneously. This would be to allow water to easily flood the cups when the pumps fill the pipes. I then put some perlite into the cups and placed the root balls of each plant into each cup. I chose pepper plants for the garden, some habanero and cayenne peppers, since I love that hot shit. I made sure that the root ball was low enough in each cup so after I put perlite into all the cups, the root balls were covered and there was still almost an inch to spare from the top of the cups. This was to keep perlite from overflowing out of the tops of the cups when they first fill with water.
With the planters all prepared I placed them into their respective holes then filled the drum with fertilizer and water. I plugged the pump on and let it start working. It didn't take long before the first pipe filled with water and started to overflow through the hose and into the 2nd pipe. It too filled with water rather fast and overflowed out and back into the reservoir. Two flaws that I did find was #1, the caps on either end of each pipe did not completely seal, causing a slight leak to make itself apparent when the pipes were full of water. The only real way to fix this would be to glue the pipes and I really don't wanna do that, in case I need to remove the caps for any reason. All I could do was make sure the caps were tamped on nice and tight to slow down the flow of leakage from the pipes. #2 problem was the idea that the first pipe was filling up too much, causing some of the water to overflow from the planter cup openings. I adjusted the flow rate of the pump to slow down the rate of water being pumped up into the pipes. After that the only other option is to drill a new hole for the output nipple at a lower point on the side of the pipe then plug the old hole. This way the water level in the first pipe will be lower than it is now, allowing water to still overflow into the 2nd pipe but not get too high in the first pipe. I had to run the garden assembly to find these flaws so its no big deal, I find the flaws, I correct the flaws. Also when I do hook up a timer to these hydroponic gardens, the pumps will only be on long enough to allow the pipes to flood and saturate the perlite in each planter cup before being cycled off for a while. The pumps won't be on long enough to allow leaks to deplete the water supply in any of these gardens that are suffering from leaks.
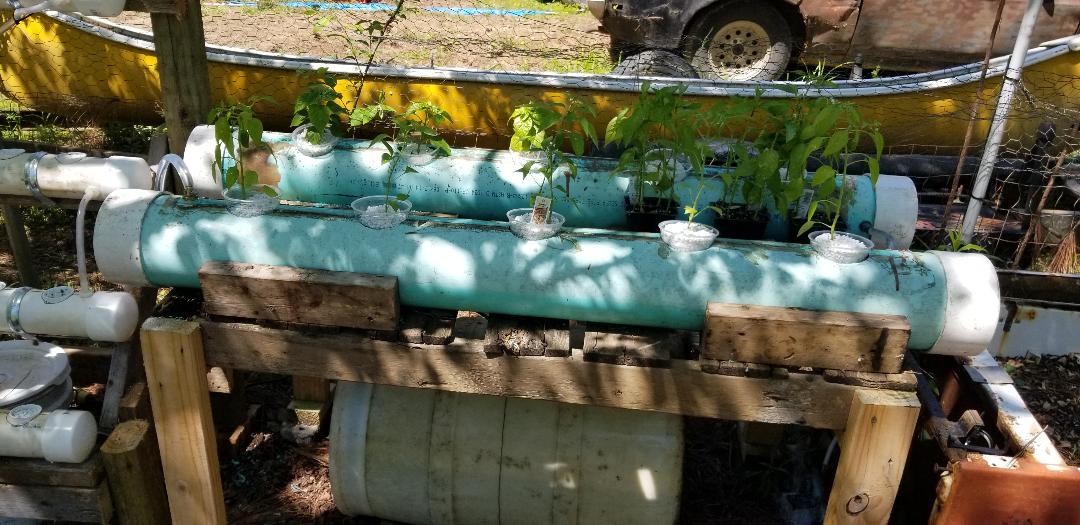
HPGV#2 with pepper plants in place in their planter cups.
After addressing the flaws in this garden I will then move on to another hydroponic garden design so I can keep these setups coming and hopefully before the year is done I will have an extensive garden full of hydroponic gardens, cranking out more veggie produce than I ever got with the regular planting methods. I will complement the hydroponic gardens with more true raised beds too, made from drums cut in half and secured in tables made of surplus 2x4's I have here. That'll put the garden beds at a high enough point so as to eliminate the need to have to bend over too much to maintain the units, plus it will eliminate weeds since the beds won't be making any dirt contact with the earth to allow for weeds to pop up through the beds. Again, this garden layout will be better than anything we had set up in the past.
|
|
|
|
|
|
|
|
|
|
|
|
UPDATE:
Since I last made the Double Barrel Hydroponic Garden, the wood pallet table has long since rotted away, causing the assembly to fall in on itself. The wood has been disposed of and the tubes salvaged. In the Dog Kennel Greenhouse, I had a couple PVC pipes that were not the 6" pipes I thought they were, and because the caps that would fit these slightly larger pipes will probably cost more than it would for me to get a 10' length of sewer pipe and caps, I decided to scrap those pipes and recycle the old DBHPG pipes for use in the greenhouse. The pipes would have to be cut down to allow them to fit in the open space on the shelf in the greenhouse, taking away one planting spot on each pipe. I was able to salvage two of the end caps from one pipe, but the other caps were glued in place. I just cut these away, having to use some spare caps for that pipe. I cut the pipes down and lined everything up, making note of where the pipes would need to go on the pipes, compared to how they were on the old pipes. I drilled new holes, tapping them with a 1/2" NPT tap, threading in the PVC fittings, allowing me to couple the pipes together where one pipe empties into the other pipe. The input and output pipes were adjusted, having to trim some of the pipe to allow the pipes and fittings to connect to the new pipes and the fittings. With the new setup done, I still need to get a submersible pump on the drum to feed the entirety of the hydroponic system, including the Double Barrel HPG system.
Since I last made the Double Barrel Hydroponic Garden, the wood pallet table has long since rotted away, causing the assembly to fall in on itself. The wood has been disposed of and the tubes salvaged. In the Dog Kennel Greenhouse, I had a couple PVC pipes that were not the 6" pipes I thought they were, and because the caps that would fit these slightly larger pipes will probably cost more than it would for me to get a 10' length of sewer pipe and caps, I decided to scrap those pipes and recycle the old DBHPG pipes for use in the greenhouse. The pipes would have to be cut down to allow them to fit in the open space on the shelf in the greenhouse, taking away one planting spot on each pipe. I was able to salvage two of the end caps from one pipe, but the other caps were glued in place. I just cut these away, having to use some spare caps for that pipe. I cut the pipes down and lined everything up, making note of where the pipes would need to go on the pipes, compared to how they were on the old pipes. I drilled new holes, tapping them with a 1/2" NPT tap, threading in the PVC fittings, allowing me to couple the pipes together where one pipe empties into the other pipe. The input and output pipes were adjusted, having to trim some of the pipe to allow the pipes and fittings to connect to the new pipes and the fittings. With the new setup done, I still need to get a submersible pump on the drum to feed the entirety of the hydroponic system, including the Double Barrel HPG system.
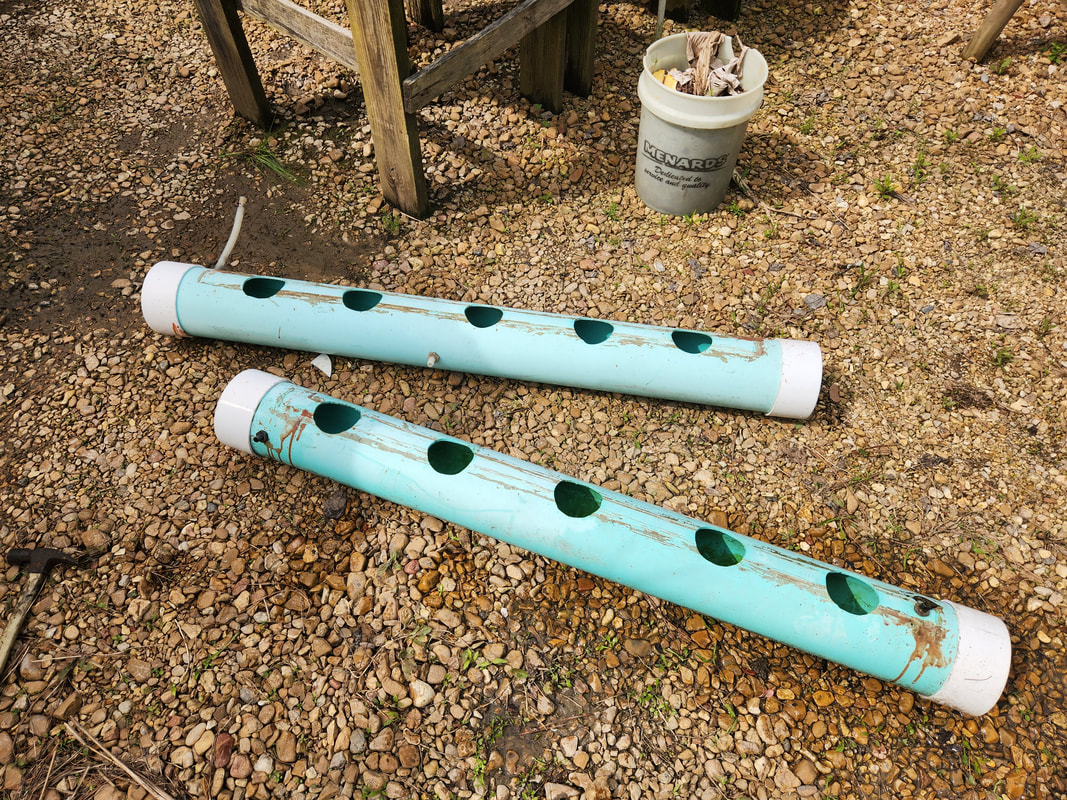
The old Double Barrel Hydroponic Garden pipes salvaged from the old assembly.

After removing the caps on one pipe, I cut down the pipes to make them short enough to fit in the open spot on the shelf on the greenhouse.
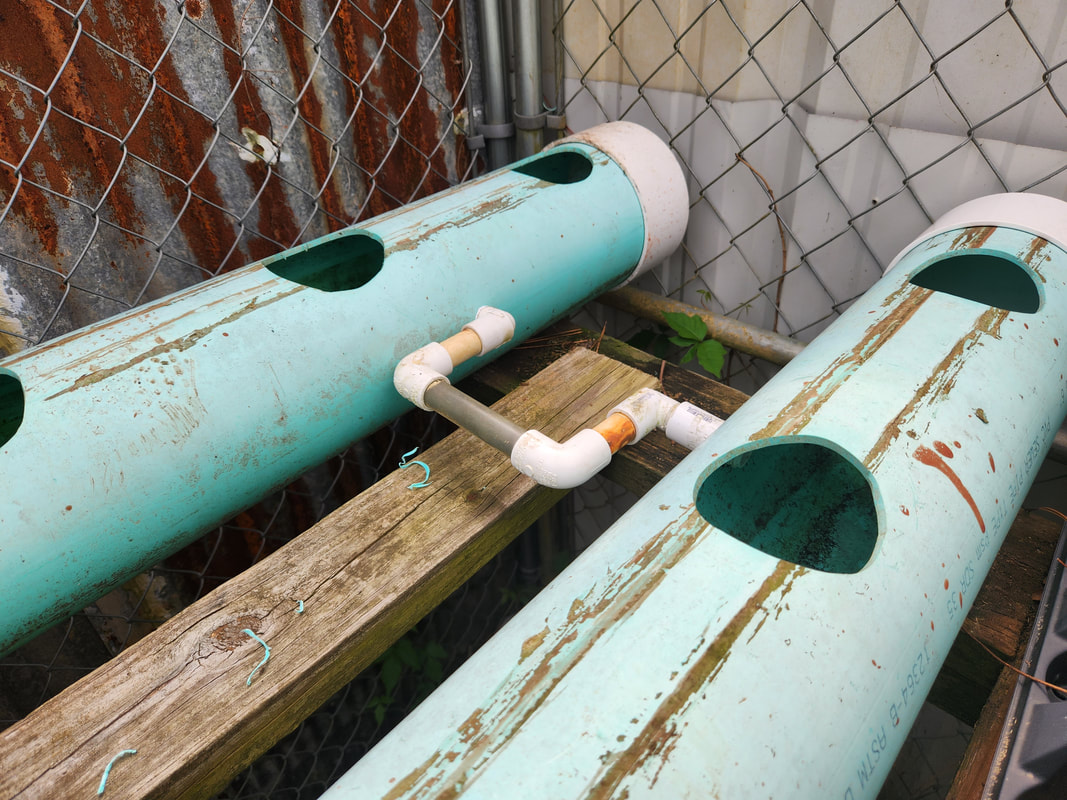
The "new" pipes with holes drilled and tapped and the PVC pipes placed to couple the pipes together. One pipe empties into the other pipe.
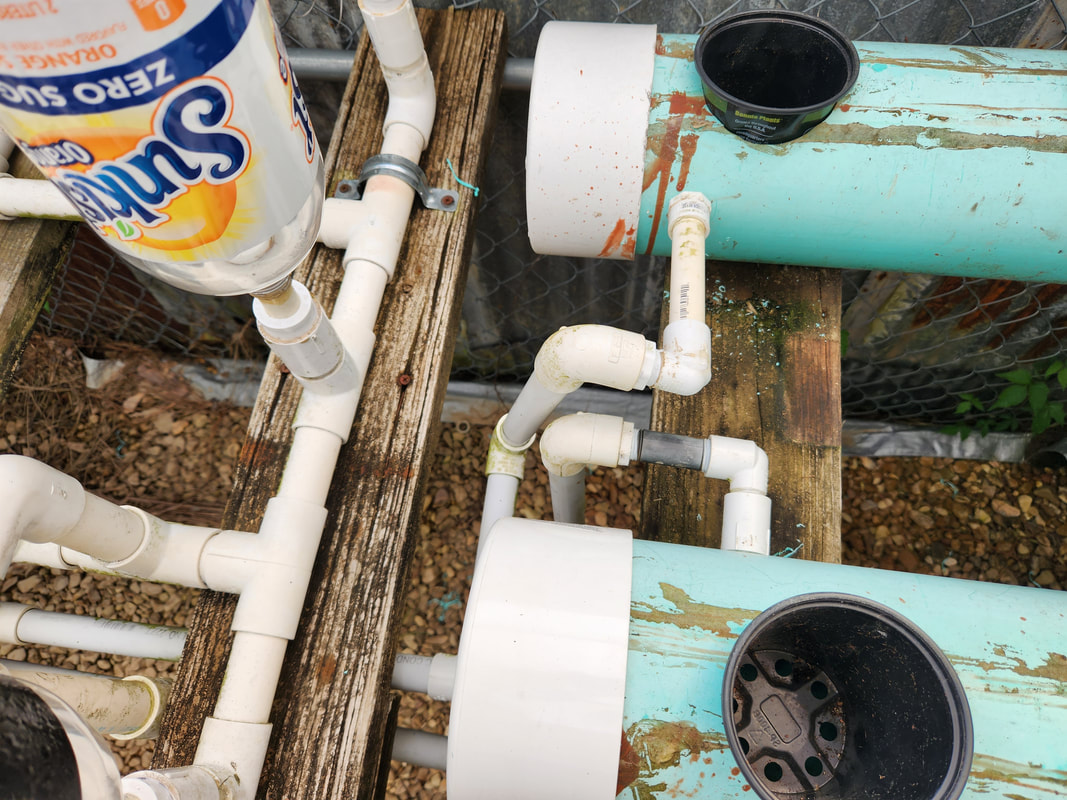
The input pipe on the greater system had to be trimmed down and adjusted to couple to the fittings screwed into the "new" pipes. I'll probably add some fittings and pipe to straighten these out so they at least look a little better.
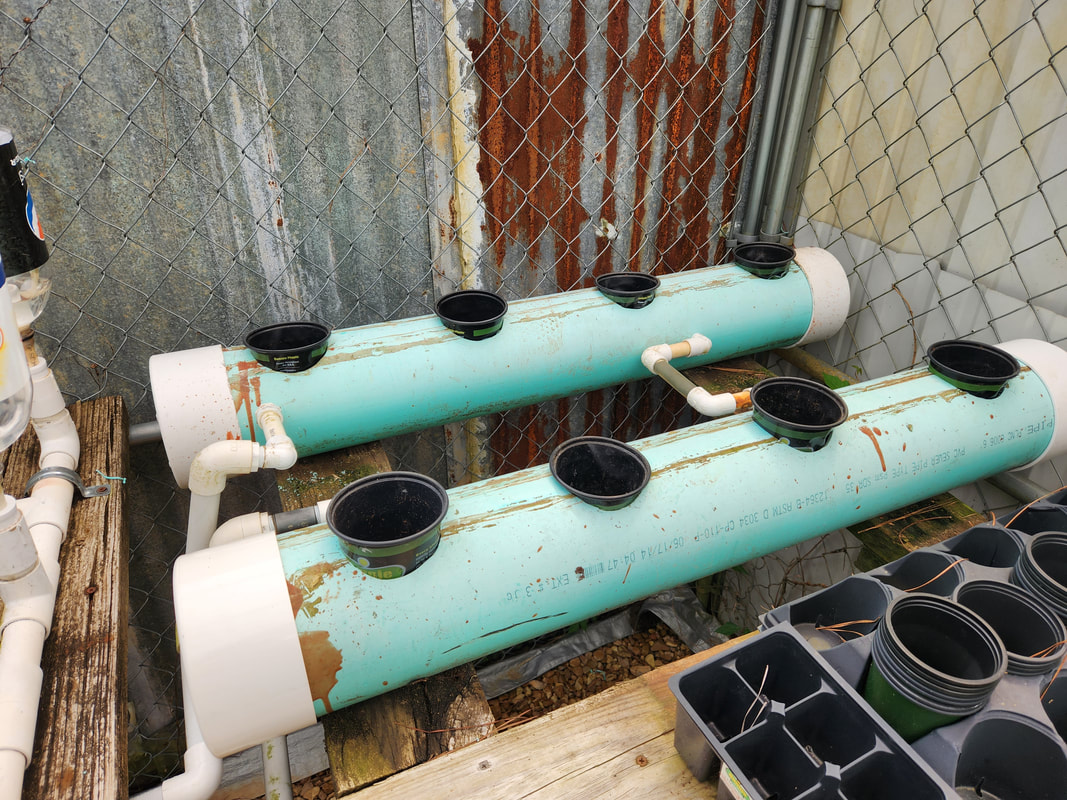
The Double Barrel Hydroponic Garden assembly reborn in the Dog Kennel Greenhouse with the plumbing hooked up and some planter cups placed in the holes. I will have to trim a couple of the holes a little bigger in order to get the cups placed better and deeper in the holes to ensure the water level reaches the plants' roots.
