CHEVY LUV VERSION #3, THE ELECTRIC LUV TRUCK
This truck has been around for many many years. It started off as a donor for a diesel conversion I worked on some 12 years ago. When that didn't pan out I swapped out that powertrain, which was a complete bastardization of machinery, for a 2.8L V6 powertrain that is documented in another LUV post on here. When that didn't really pan out I ended up rebuilding a 2.3L ford powertrain I pulled from an 88 Mustang that was wrecked and installing this unit in the LUV. After playing around with this and not really being satisfied with its overall operation I decided to go a whole other route.
I had started an overhaul of the whole truck. I pulled the bed off and started doing body work on the panels on the cab. My intent was going to be to do a V8 swap on the truck and restore it to make a nice clean show quality truck that was as much a hot rod as it was a classic. I got as far as getting the cab and the frame painted before I had another change of heart. After really running the costs to bring this project to completion I decided to go another route. That was to convert this truck into an electric truck. There were two reasons for this. One, the 88 Mustang Robo-car was in a serious state of decay. The wood bed was rotted and it needed batteries and it wasn't even in a full state of completion itself. I wasn't fully satisfied with this car either since it had flaws from when the car was wrecked and no matter what I did to it, it would never be in a state it needs to be to be a viable car, electric or not. With that I pulled the EV hardware from the 88 Mustang wreck and scrapped it. I took the EV hardware and swapped it into the LUV body, since it was sans powertrain.
This was pretty easy since the EV unit is using a C4 transmission, similar to the transmission that was on the 2.3 engine that was in the LUV previously. The transmission mounts were the same so the only thing I had to do was add some metal to make a complete motor mount setup to accommodate the electric motor mounts. The EV unit also had the contactors and motor controller mounted on a platform that was attached to the motor mounting assembly I made for the electric motor as well. The whole unit was a quick swap out with the only things I had to do was a driveshaft to get the full powertrain completed.
I did take the time to rewire the whole truck as well. I pulled all the old wiring out and added an aftermarket fuse box, isolating each circuit and routing cables cleanly, like I did on the Dodge a while back. Well really the rewiring on this truck happened shortly after finishing the rewiring on the Dodge so it was still fresh in my mind how to get the whole job done fast. Part of rewiring the truck was adding whatever circuits to make the truck ready for being electric. This included adding gauges and and the capacitive battery charger as well as wiring up the contactors and relays to the electrical system.
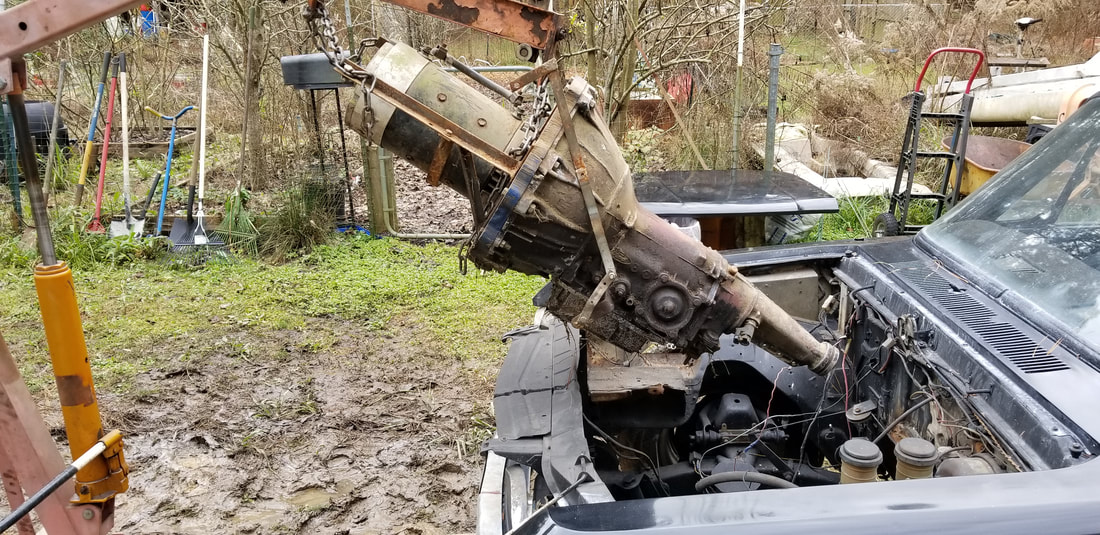
EV powertrain going into LUV body.
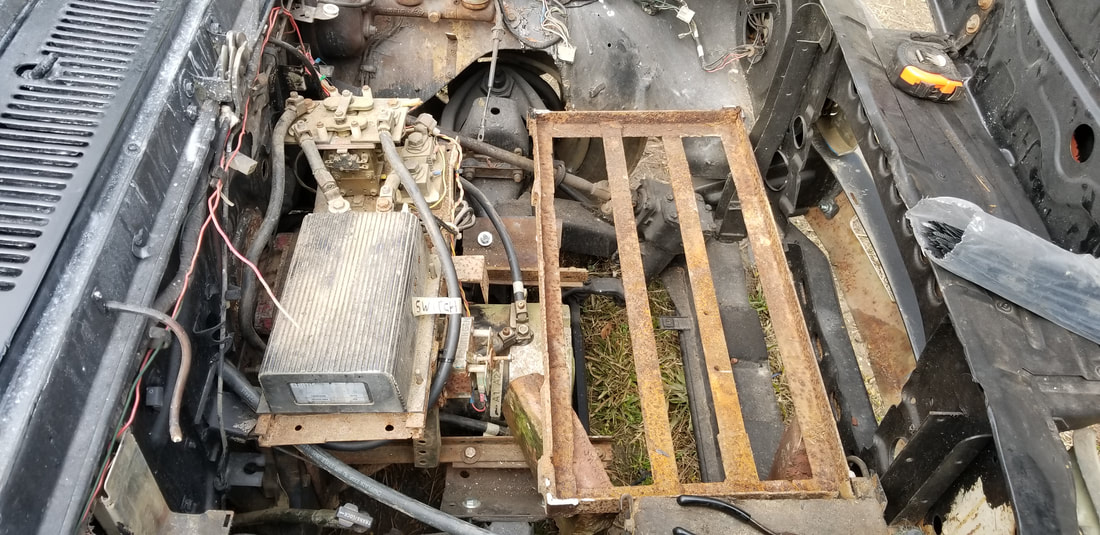
Complete electric powertrain in place with controller assembly in place as well.
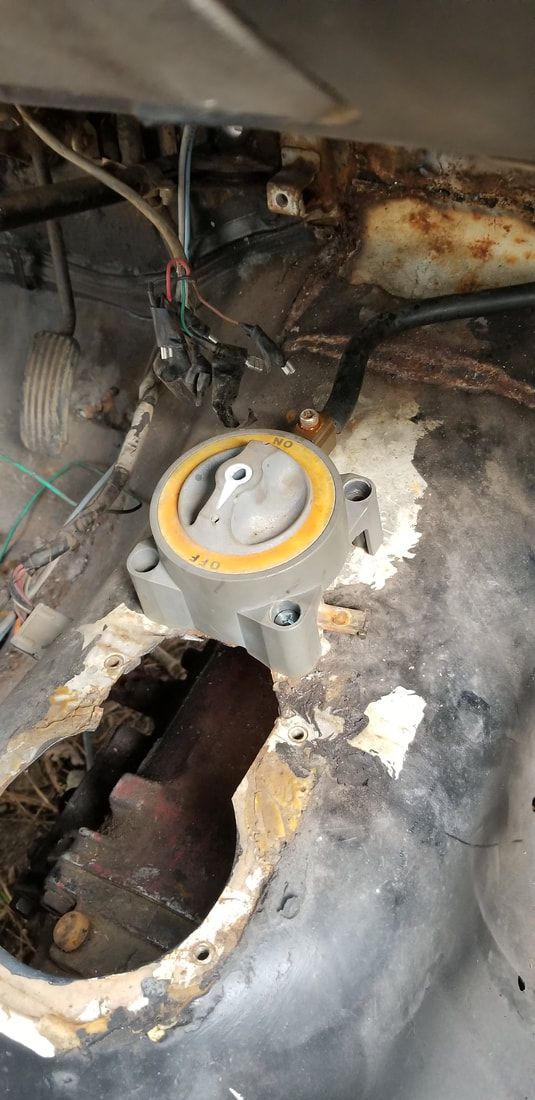
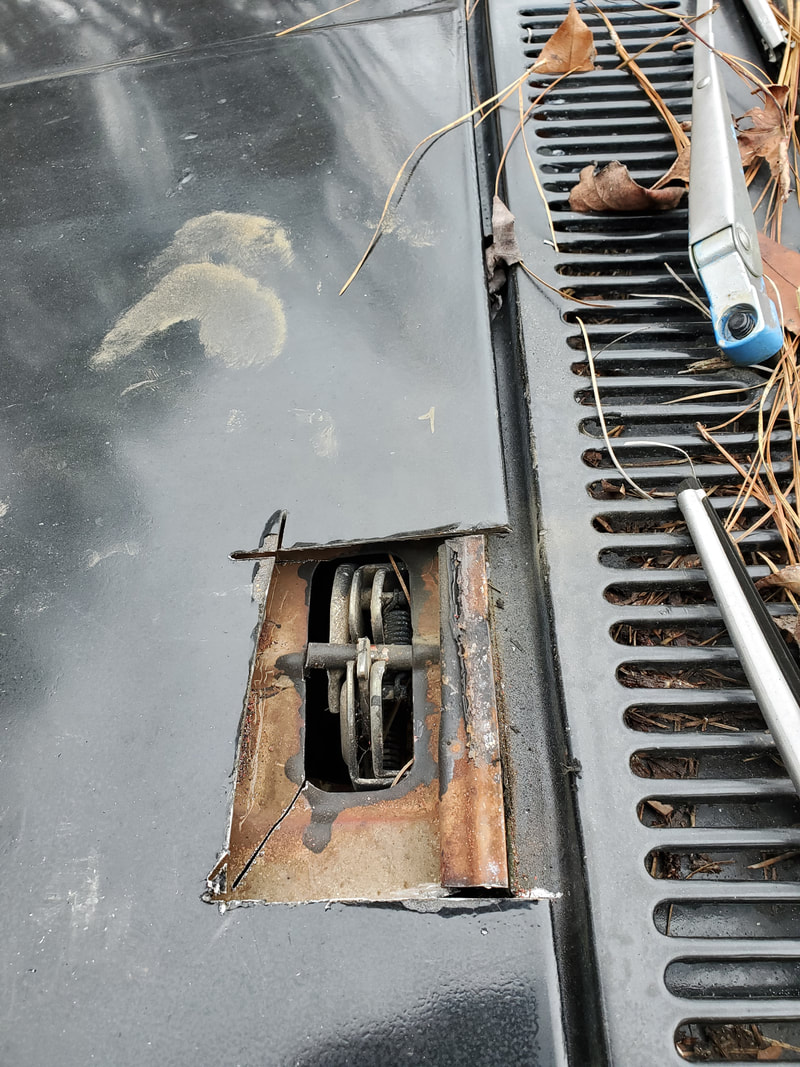
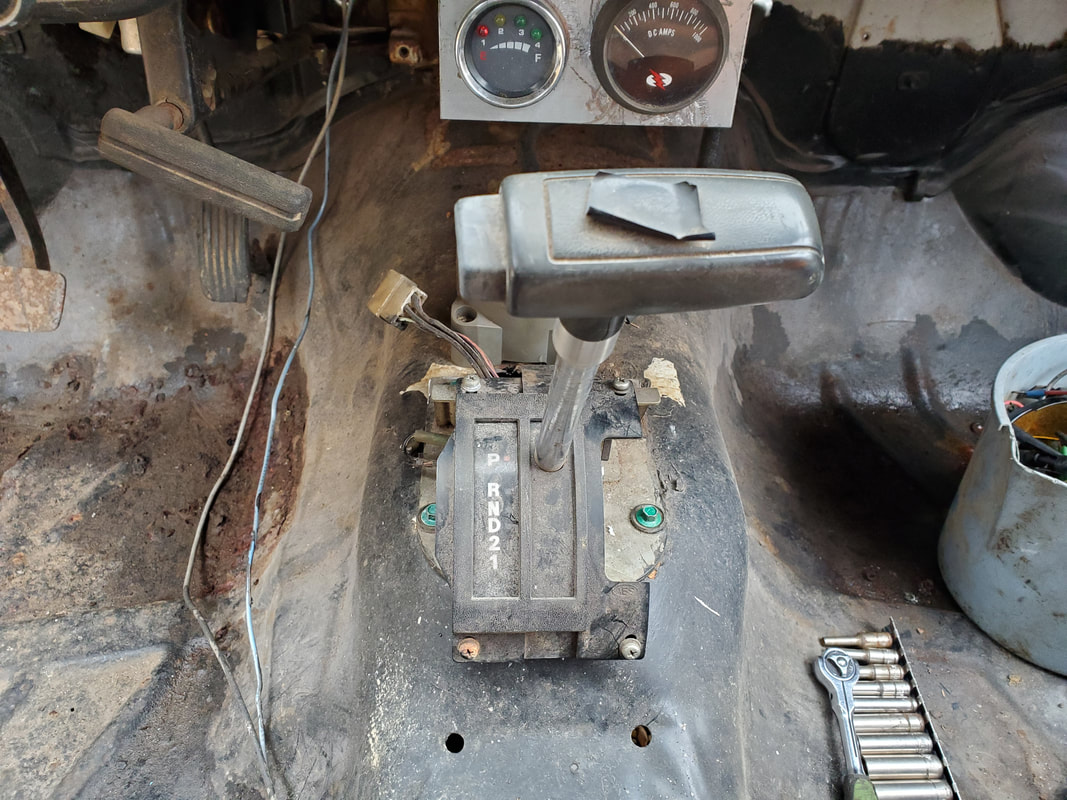
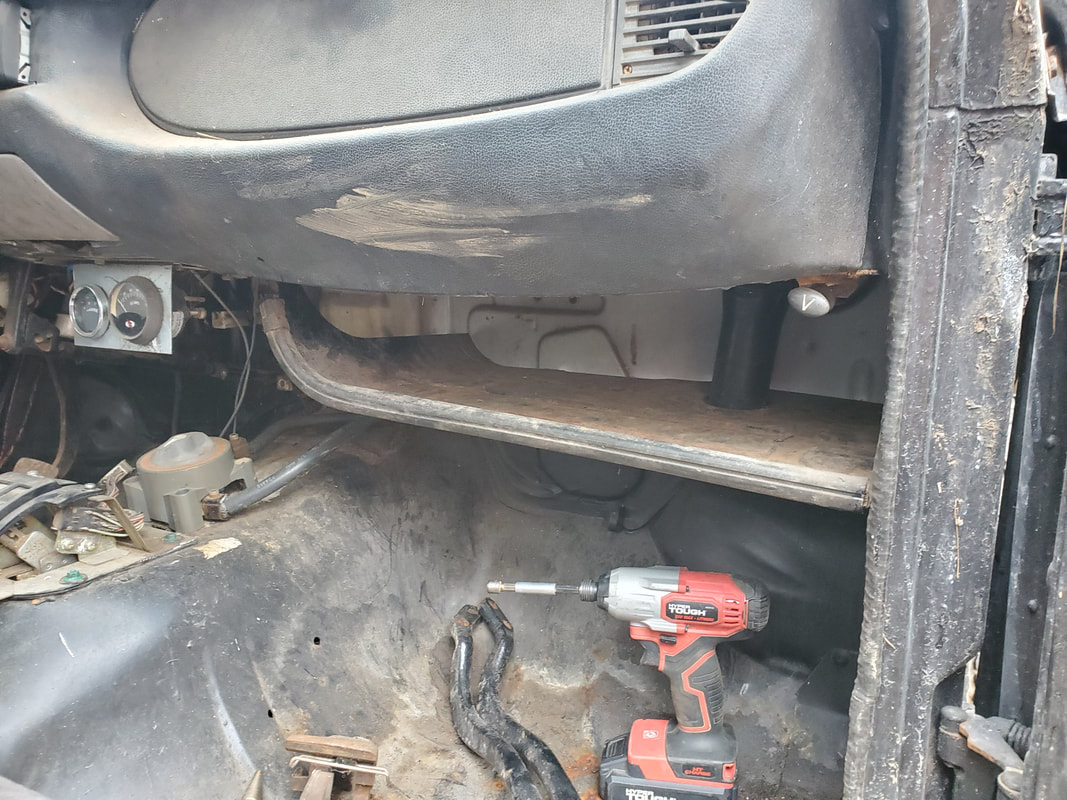
Main cut off switch installed on transmission hump inside cab of truck. Note transmission tail through shifter hole in floor.
After putting the EV stuff into the LUV, the truck sat parked for a while. The cab was painted and sanded and buffed down, I had to do the bed next but even then i was dragging my feet since I would have to do a sizable amount of work to get the bed finished the way it needed to be prior to installation. Plus there were other projects I had to tend to so this one ended up on the back burner.
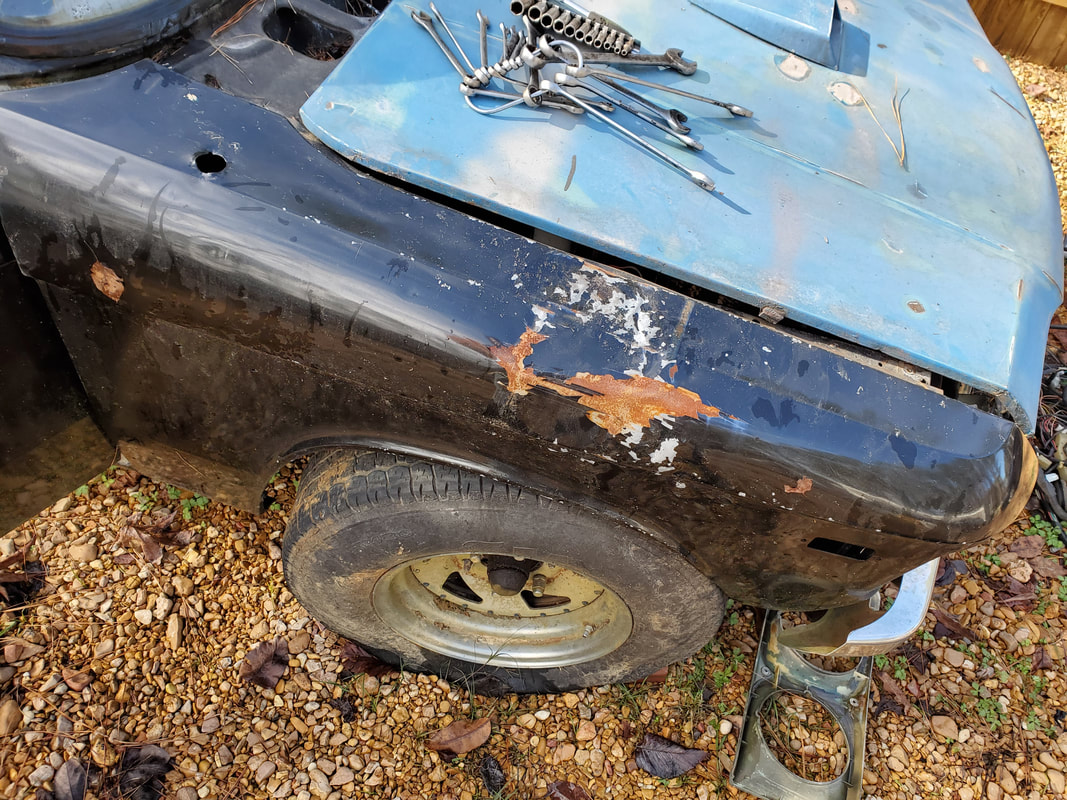
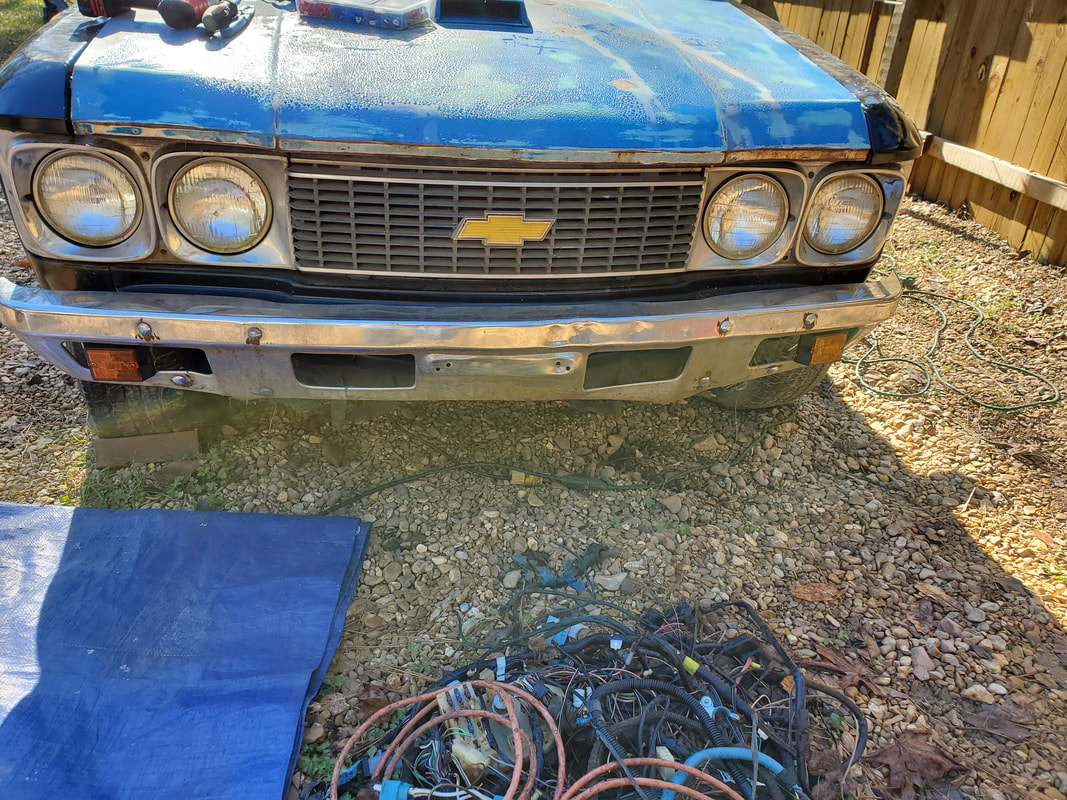
Then back in March 2020 a crazy wind storm came through, knocking down several pine trees over a few of the cars in the fleet. The 73 Mustang that ended up becoming the Mustang Chicken Coupe, the old Chevy Tracker, the S10 truck and this truck were all hit by trees. This truck had a tree come down over the right fender and hood, damaging both pretty hard. The left fender had some light denting as well. The windshield was cracked up pretty good too but not broken out at least. At this point, the nice paint finish on the cab was pretty much ruined since the panels were messed up.
Then back in March 2020 a crazy wind storm came through, knocking down several pine trees over a few of the cars in the fleet. The 73 Mustang that ended up becoming the Mustang Chicken Coupe, the old Chevy Tracker, the S10 truck and this truck were all hit by trees. This truck had a tree come down over the right fender and hood, damaging both pretty hard. The left fender had some light denting as well. The windshield was cracked up pretty good too but not broken out at least. At this point, the nice paint finish on the cab was pretty much ruined since the panels were messed up.
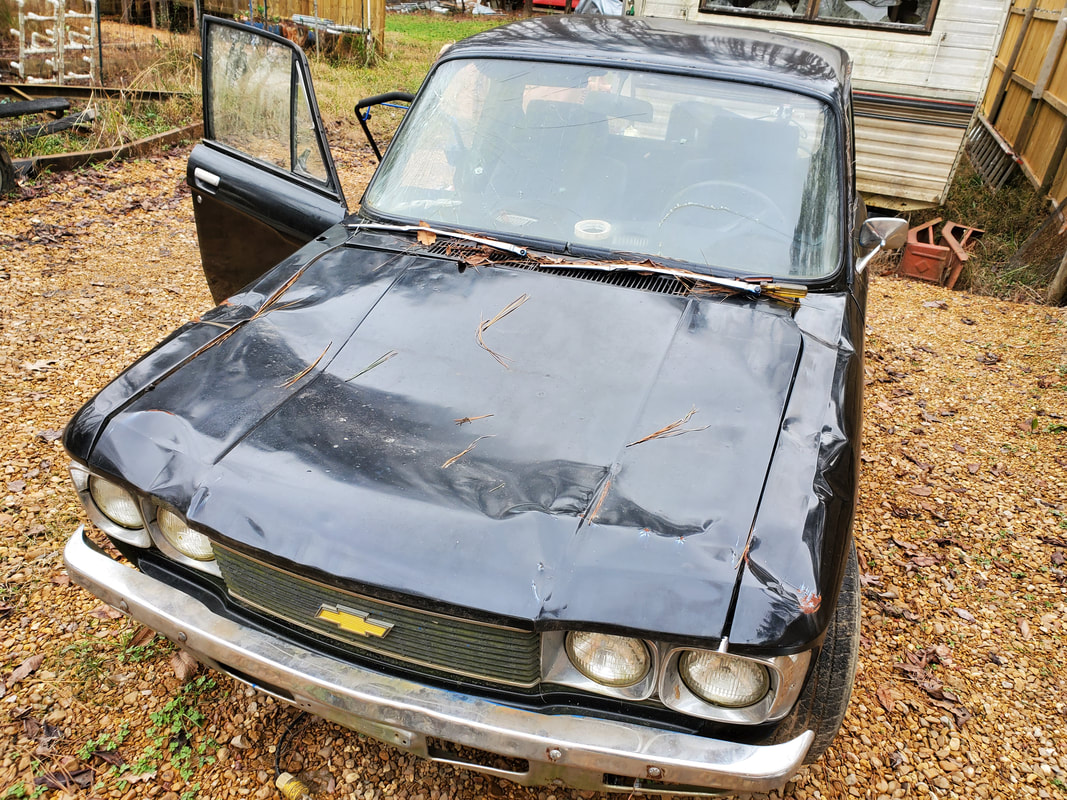
Body damage is apparent on the truck from the fallen tree.
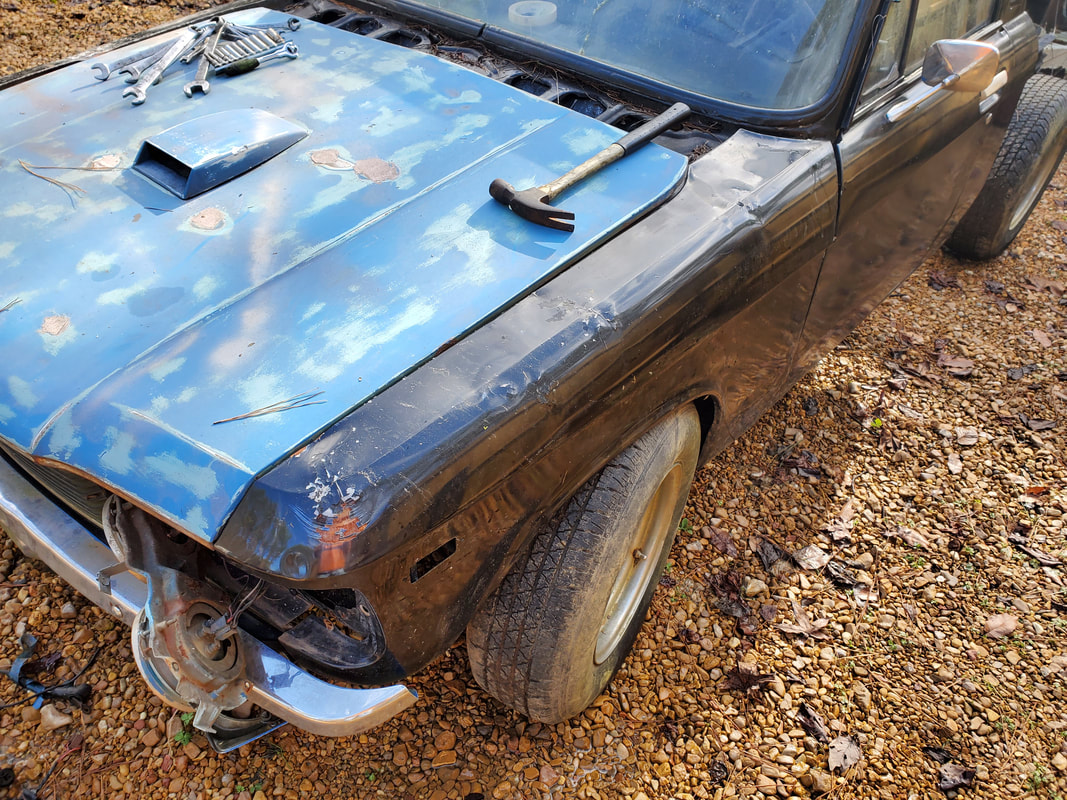
When the tree hit the hood it made the latch engage. Only problem is the cable is broken so there was no way to release the hood latch. I would end up having to cut the hood free. This would involve cutting around where the lug that is hooked on the hood so I can expose that portion and cut it free then removing the remains of the lug from the latch. To do this the die grinder came into play. I cut a large rectangle from the area then cut through the lug, allowing me to open the hood and remove it. I would have to repair the latch release cable before setting the hood up to be able to be latched when closed. At least I still had the old hood from this truck which had a fake hood scoop on it. At this point I don't have any other choice but to use the old hood as the current hood is beyond repair.
Rectangular piece of sheet metal cut from hood and lug cut free to allow opening of hood independent of the latch assembly.
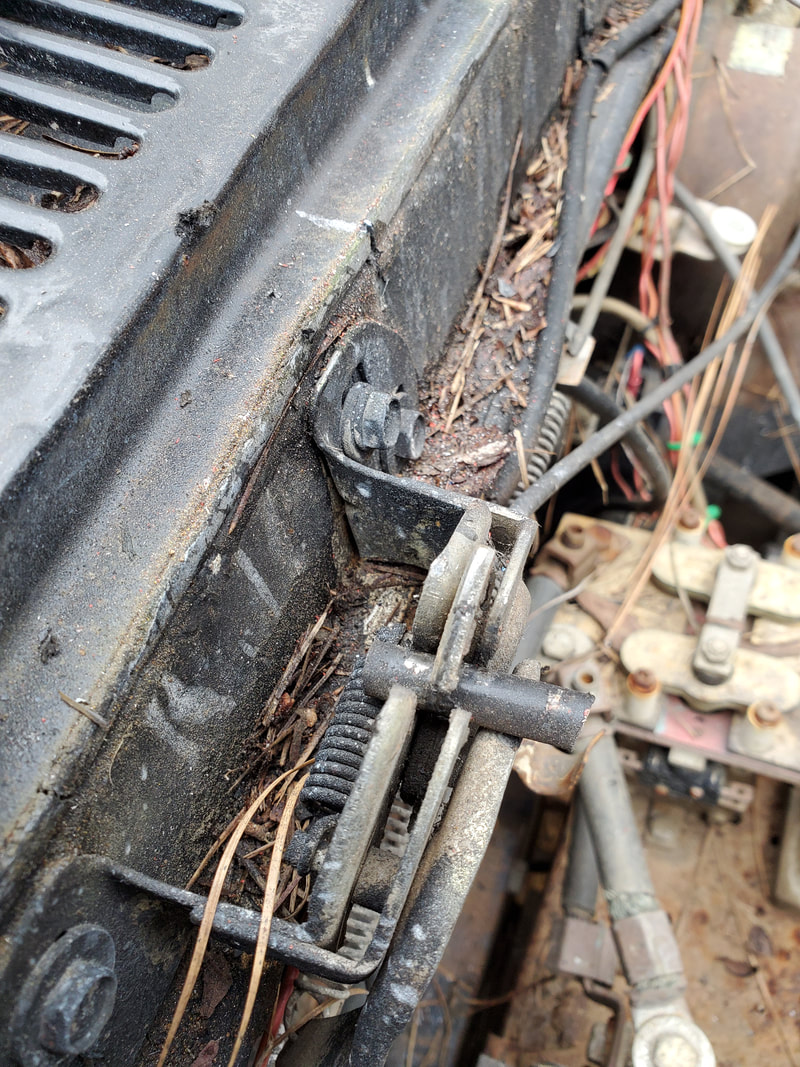
Lug cut from hood still in latch assembly.
I installed the hood back on the truck, taking time to realign the hinges so the hood would line up properly when in the closed position. Whenever I do get around to refinishing the body I will have to sand down the old bondo spots and get a layer of high build primer on this panel so as to cover the flaws in the panel before I consider repainting everything. The next thing is the fenders.
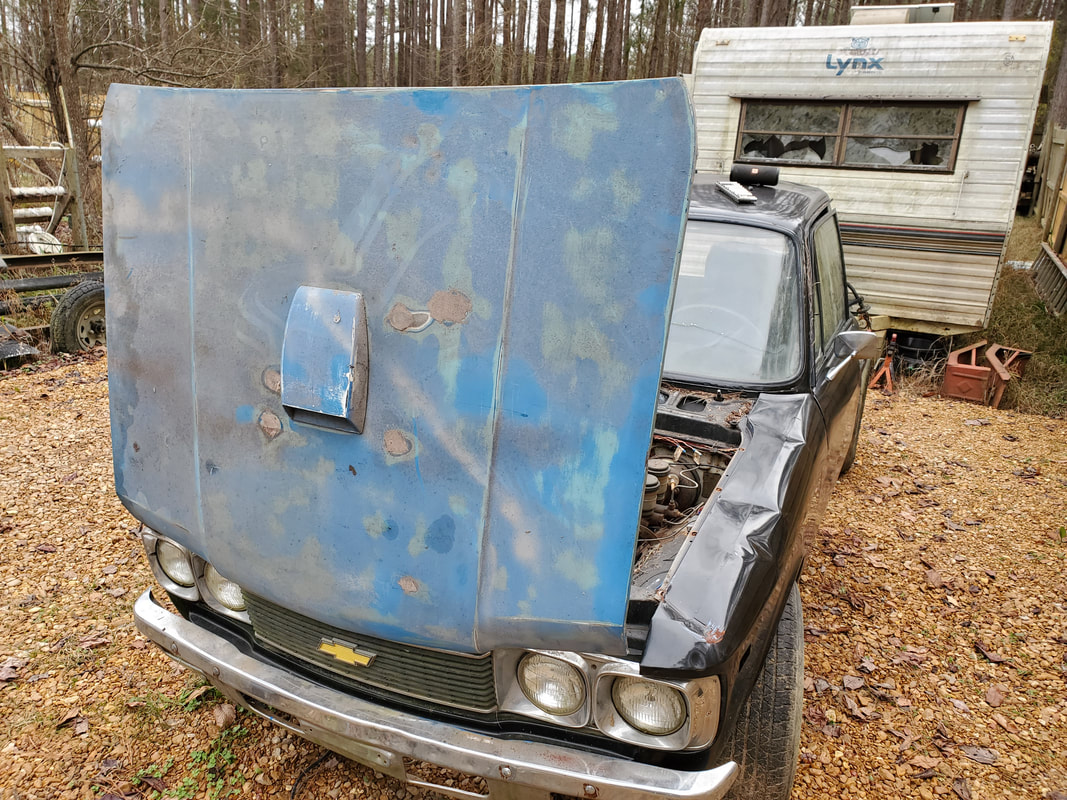
New old hood installed back on the truck.
With the hood open I was able to remove all the bolts along the top of the fenders to be able to remove the panels. I had to remove bolts at the bottom of each fender by the rocker panels and one at the top by the door hinges as well. I also had to remove the wiper panel in order to reach a bolt on each fender. Lastly I had to disassemble the headlight bucket assemblies to reach a few more bolts at the fronts of the fenders to allow me to get the fenders out. With the fenders out I got to work knocking out the dents. I started with the left fender since it was the least damaged between the two.
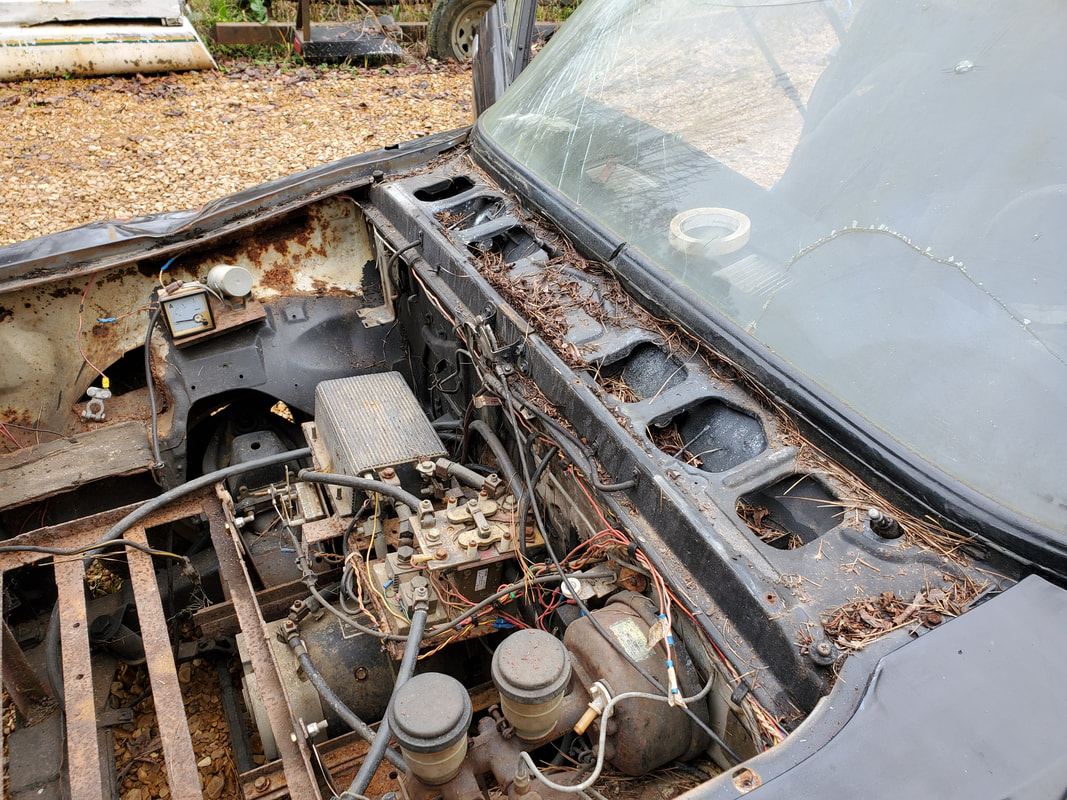
Wiper panel removed prior to removal of the fenders.
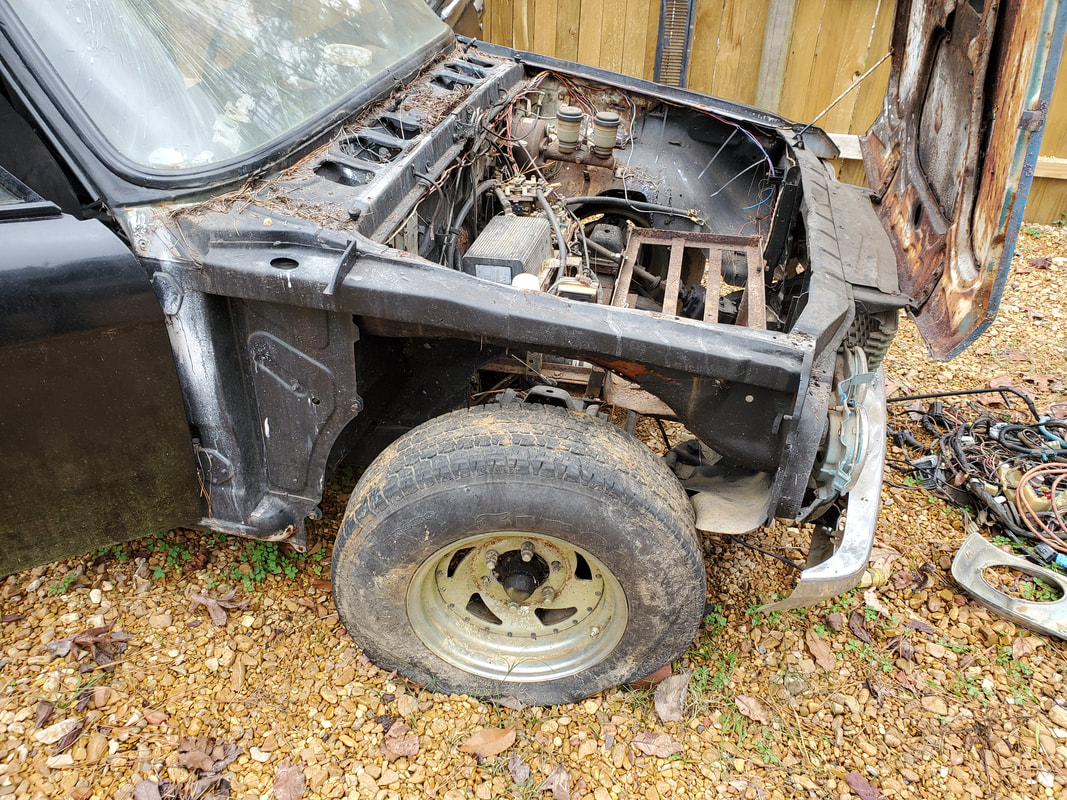
Right side after removing fender.
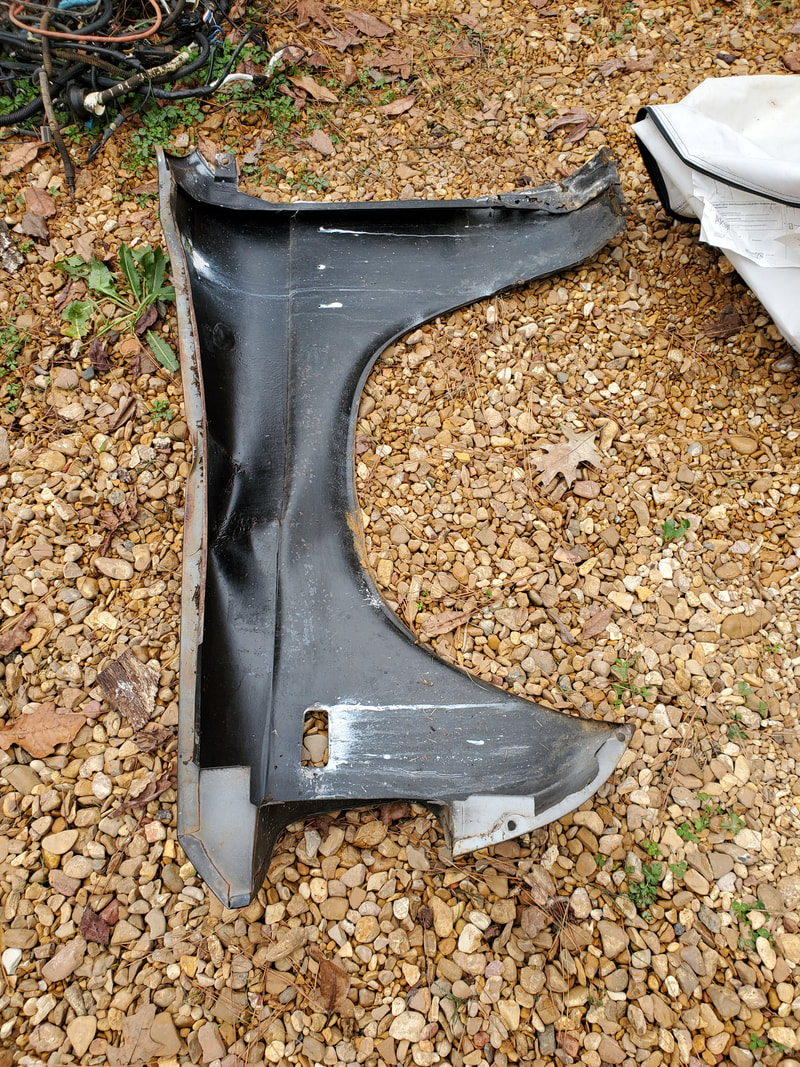
Out came the hammers. Using mallets and a baby sledge hammer I started pounding on the panel, hitting in spots to try and knock out the dents a little at a time. I didn't wanna hit too much in the same spot otherwise I might invert the dent outwards then I'm back to square one in reverse, so I just hit in different spots, working the dent out as best as I could without distorting the panel. I got the left panel's dents knocked out fairly well. There's still evidence of the damage but its not as pronounced where I could get away with a minimum of bondo to get the panel leveled off.
Left fender just before pounding out the dents.
Fender after dents were knocked out. Fender is remounted and lining up with the hood.
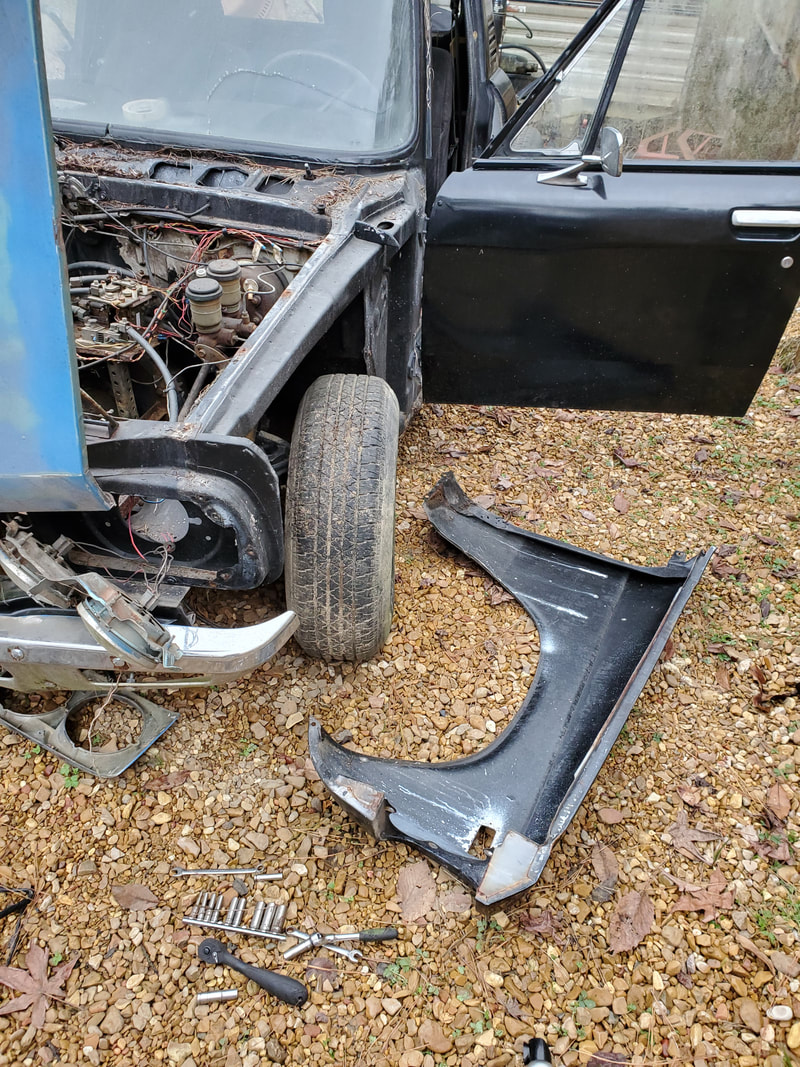
The right fender on the other hand would be a bit of a hand full. It was dented up way more than the left side so it ended up taking a lot more careful pounding to get the dents knocked out to a level where the panel would be somewhat straight, but nowhere near as close at the left side was. It was bent up where the sheet metal angled downwards then back out where it bolts to the fender apron. This area would take careful pounding to try to straighten it out as best as I could while pounding out the flat surfaces as best as I could. In the end the panel was still dented and will end up requiring more bondo than the left fender will. At this point though I really didn't have much of a choice. Finding a replacement panel would be next to impossible.
Right fender after removal, note dents in structural point along mounting line.
Right fender after pounding out dents, as can be seen, the panel is nowhere near perfect.
The next order of business was installing the shifter. I ended up using the LUV's old shifter since there was no point in spending any ridiculous money on an aftermarket shifter when this one was more than usable. There are already mounting holes in place so obviously installation was fast. The other thing too was since the shifter was set up to hook up to the C3 transmission that was on the 2.3L engine, the shifter linkage was able to hook right up to the C4. I ended up not having to really do much of anything to complete this little task.
LUV's old shifter installed back in its old home.
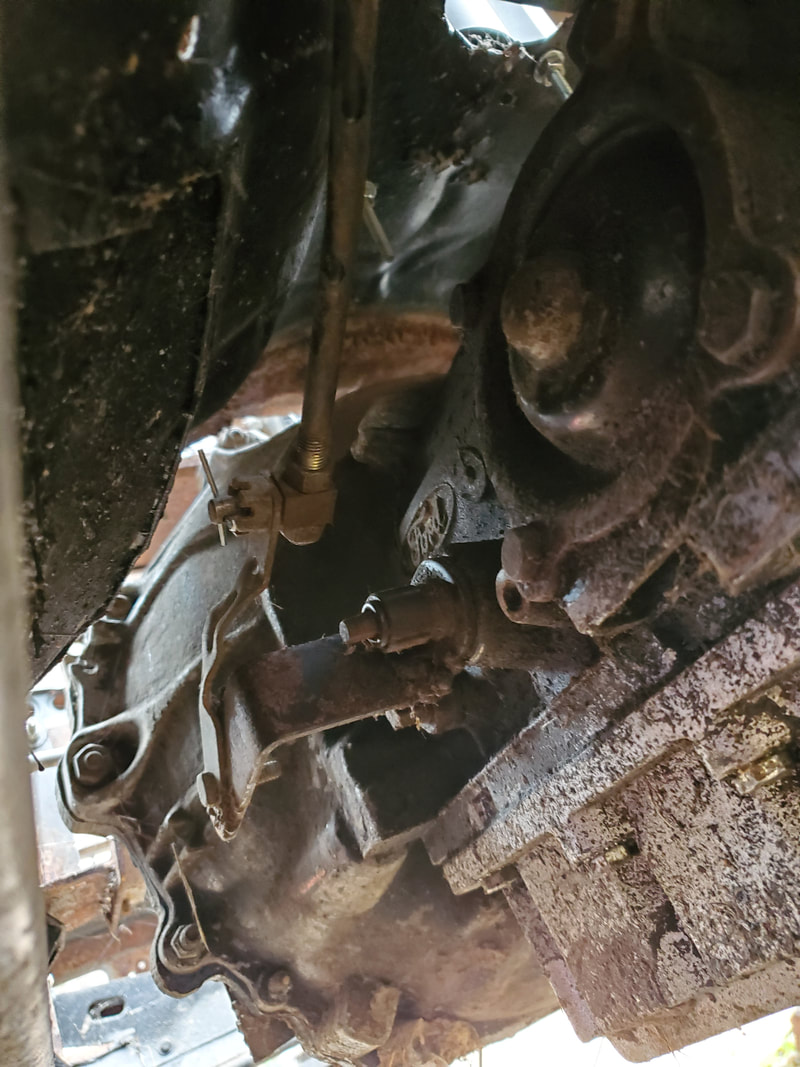
Shifter hooked up to transmission shift lever.
Now the next order of business is the installation of the back window. I pulled the window out in the process of prepping the cab for repainting since the window rubber covered the edge of the window frame. Of course the rubber is a weird type of window rubber that had two channels on it, one channel for the window frame and one for the window assembly itself. This type of rubber gasket would be very difficult to find. I ended up deciding to do something that would be considered bootleg by probably everybody. I would secure the window with some brackets at the top and bottom then fill the whole frame with roofing tar, making the whole seal nice and even and smooth all around. The brackets would do most of the work while the tar would seal everything.
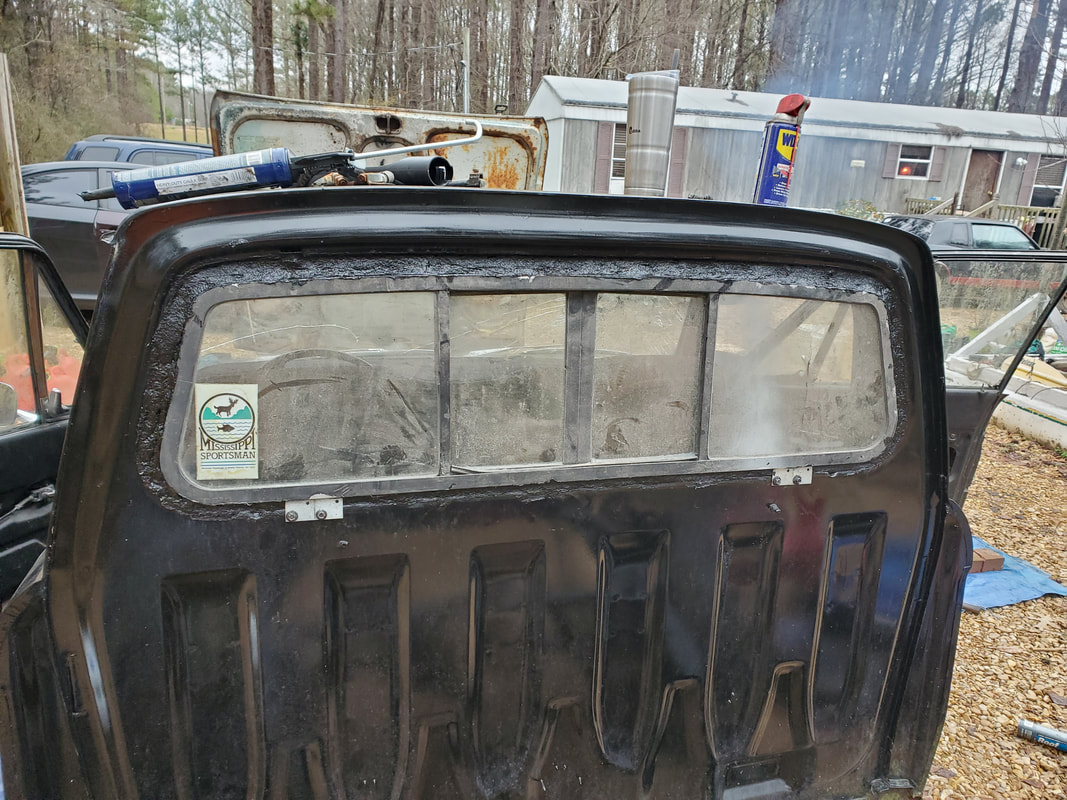
Window mounted in place with brackets and roofing tar sealing the whole window.
I used self tapping screws to secure the brackets to their respective spots around the window. I tarred up the top good enough that the top brackets were completely covered where one would have to know where to look and be looking up close to see that there are two brackets at the top of the window. Again, despite this being a bootleg way of making a fix, at this point, this truck is not really intended to be a show truck or even a pretty daily driver. The EV conversion is for utilitarian purposes and to create a test platform for possibly trying out alternative batteries such as lithium batteries that are available either from salvaged EV's or homemade from the components that are typically used for making EV battery packs. Installing a back window with some brackets and roofing tar is hardly a concern of mine when it comes to getting things put back together on this thing to get it ready to actually be usable once again.
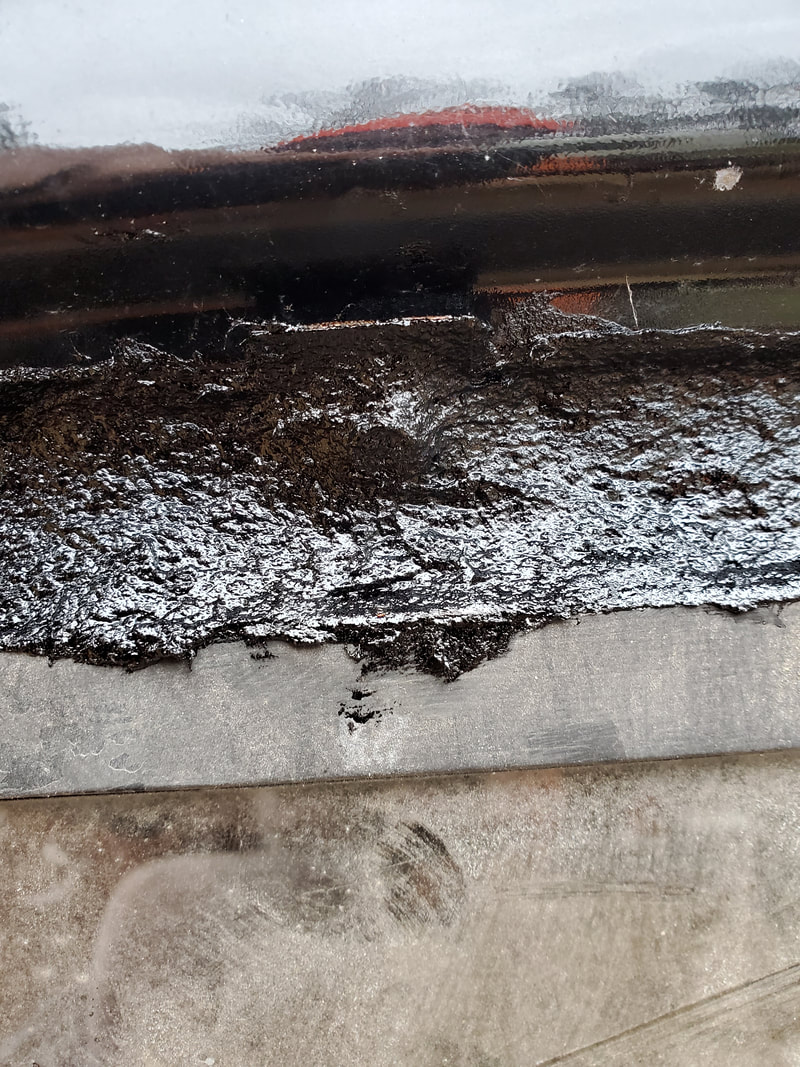
Top bracket covered by roofing tar, hardly noticeable unless one is looking for it.
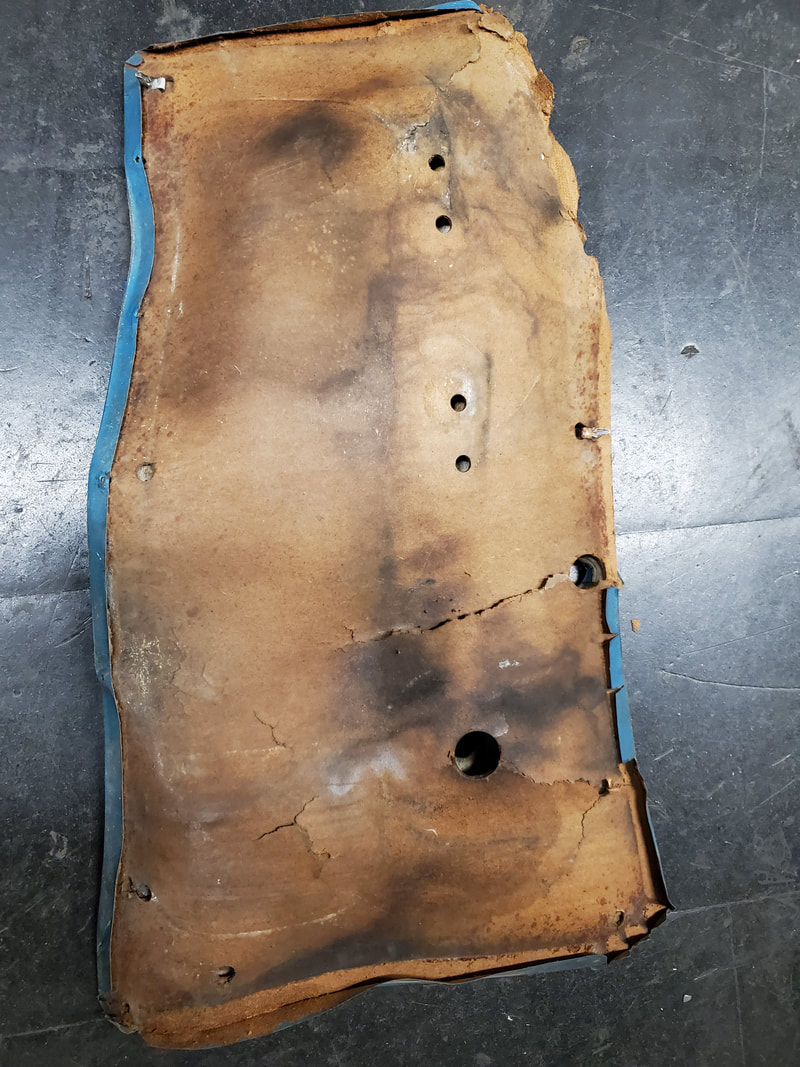
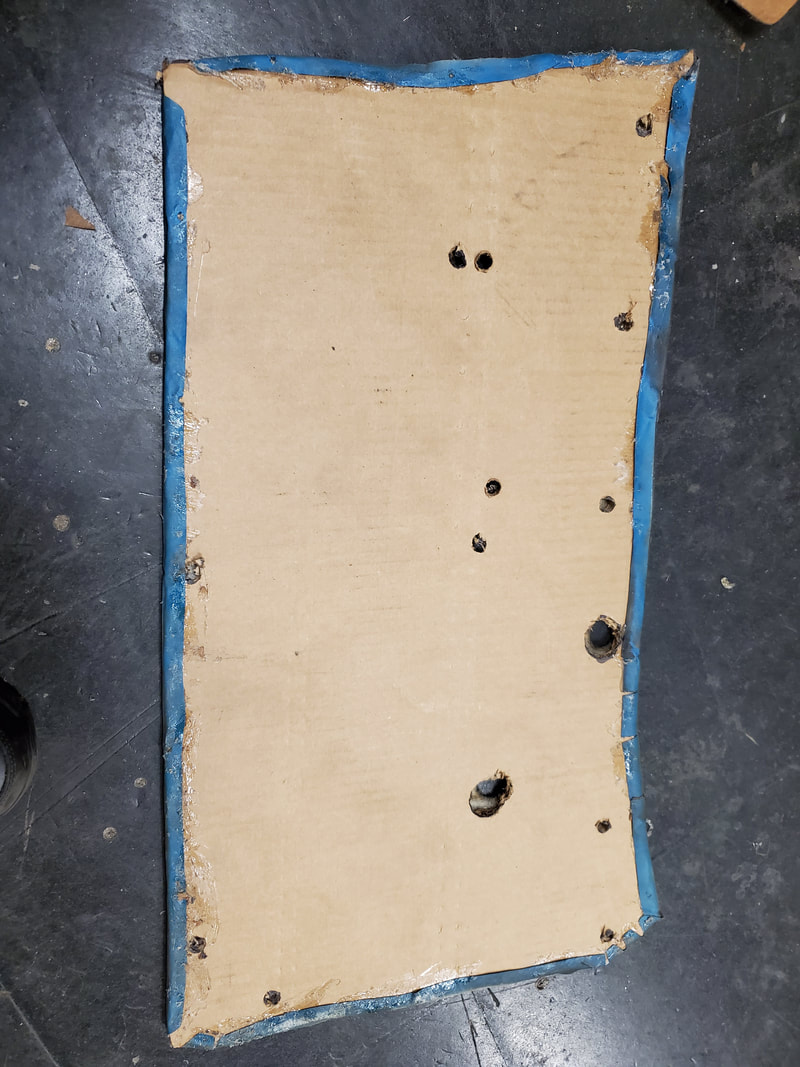
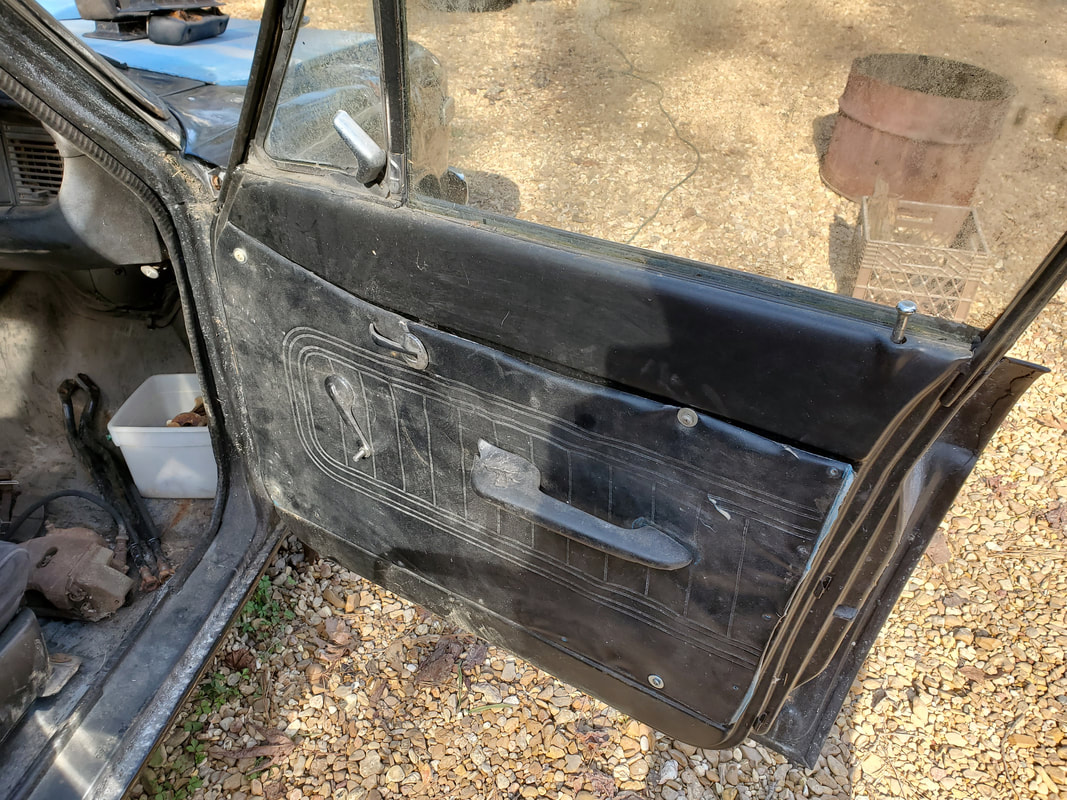
The next thing to be homemade is the interior door panels. These panels were in a really bad state of degradation but the skins were still in decent shape. I ended up thinking that I can just go ahead and make replacement base panels then glue the skins to the new panels and reinstall the remade panels to the doors. I peeled the skin off from the old panels then ended up using some heavy duty cardboard to trace out the new panels using the old ones as best as I could. I also had to trace out the holes for the window crank and door levers as well as the pegs that were used to hold the panels to the doors. There were only a few pegs left but I would try to see if I can manage to reuse these features in the doors versus reattaching the panels using washers and sheet metal screws to hold the panels at the corners to holes already drilled in the doors for achieving this same goal in the past.
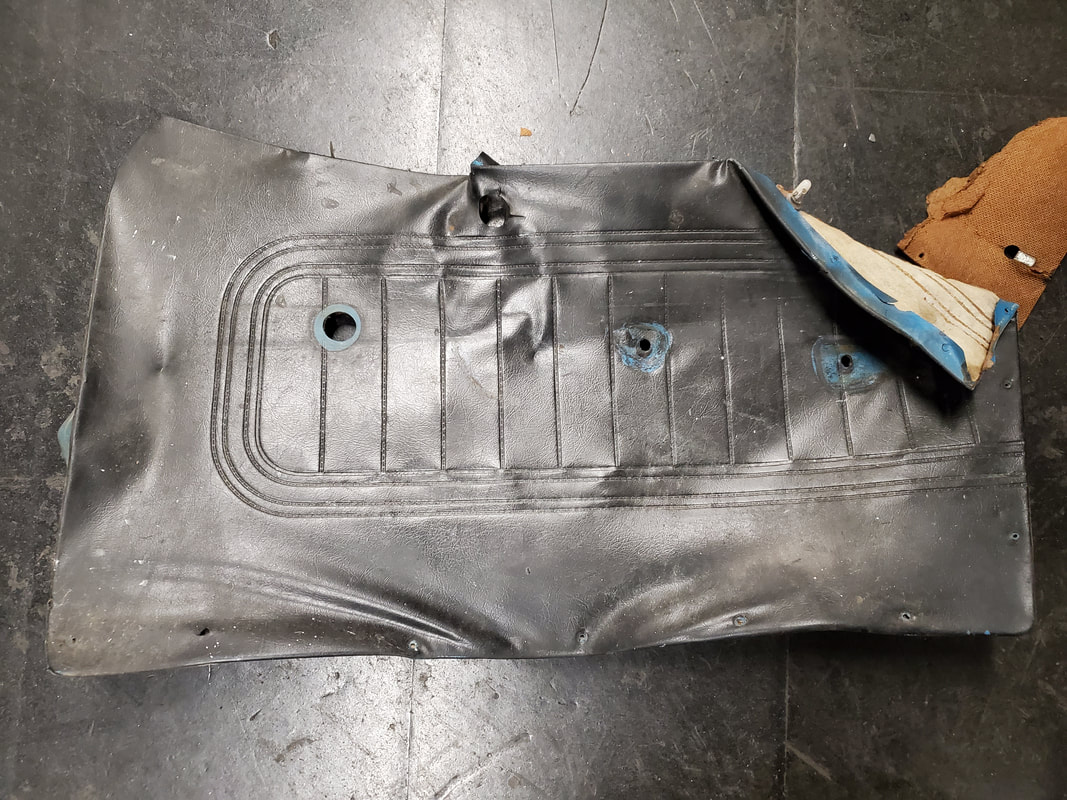
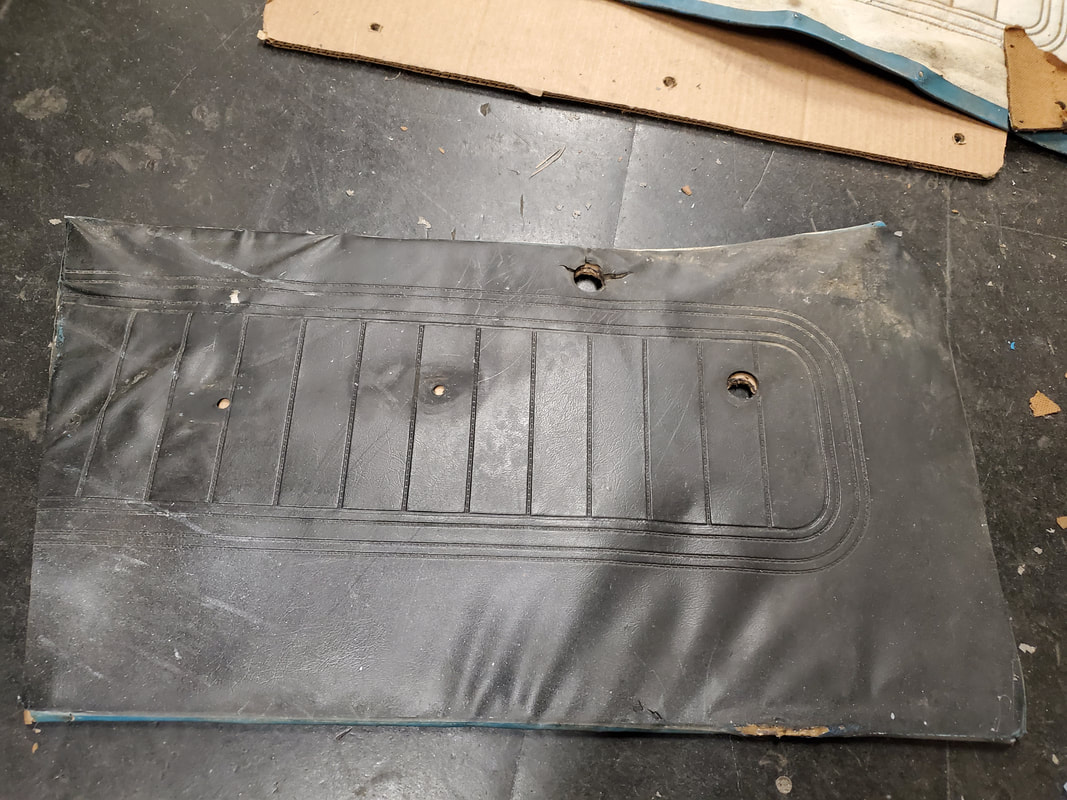
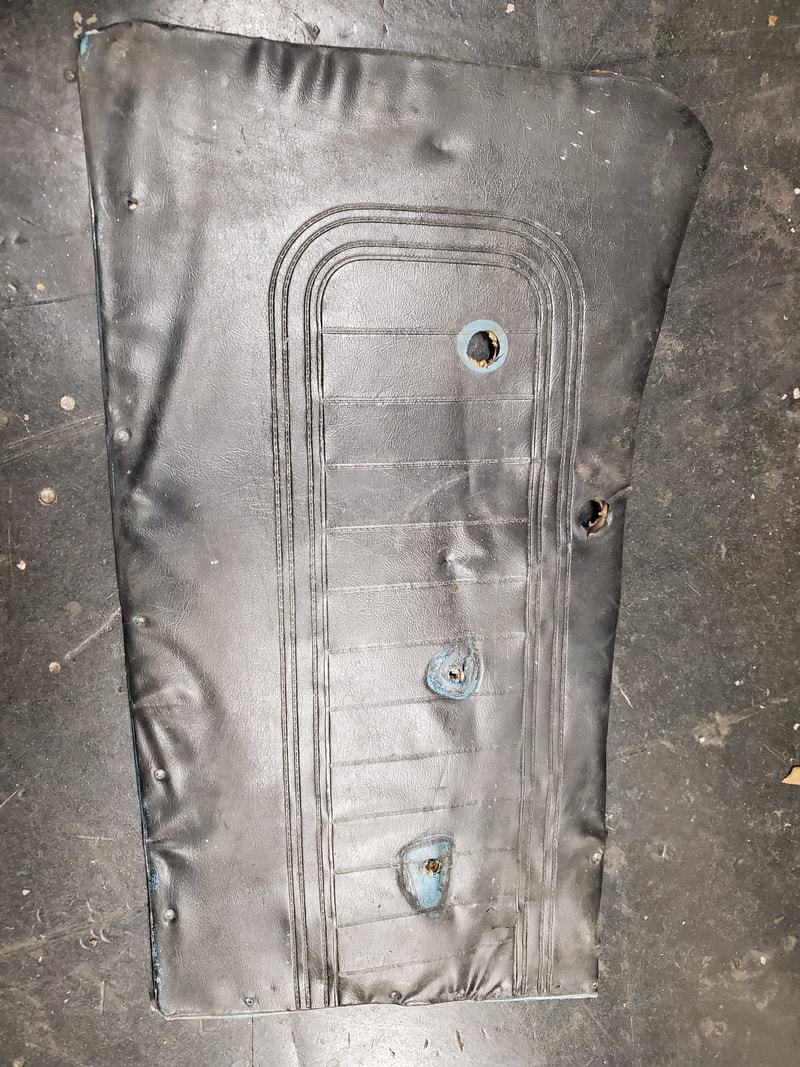
Old door panel showing sad state of base panel but pretty decent condition of skin.
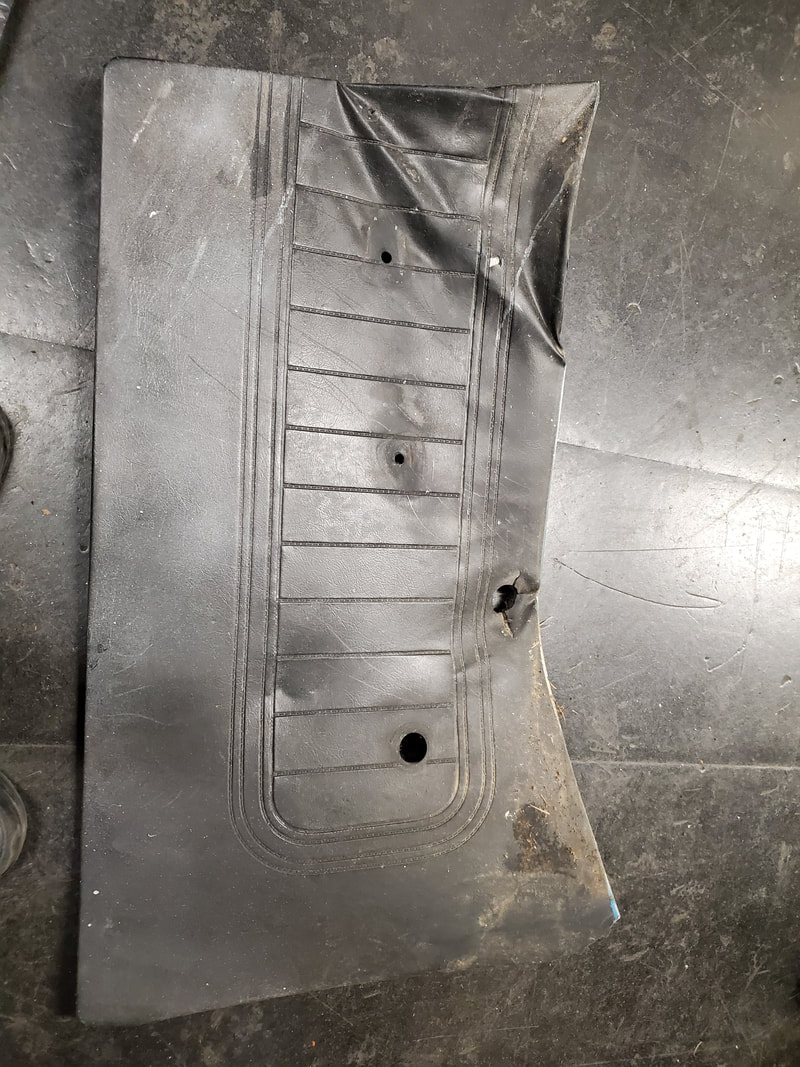
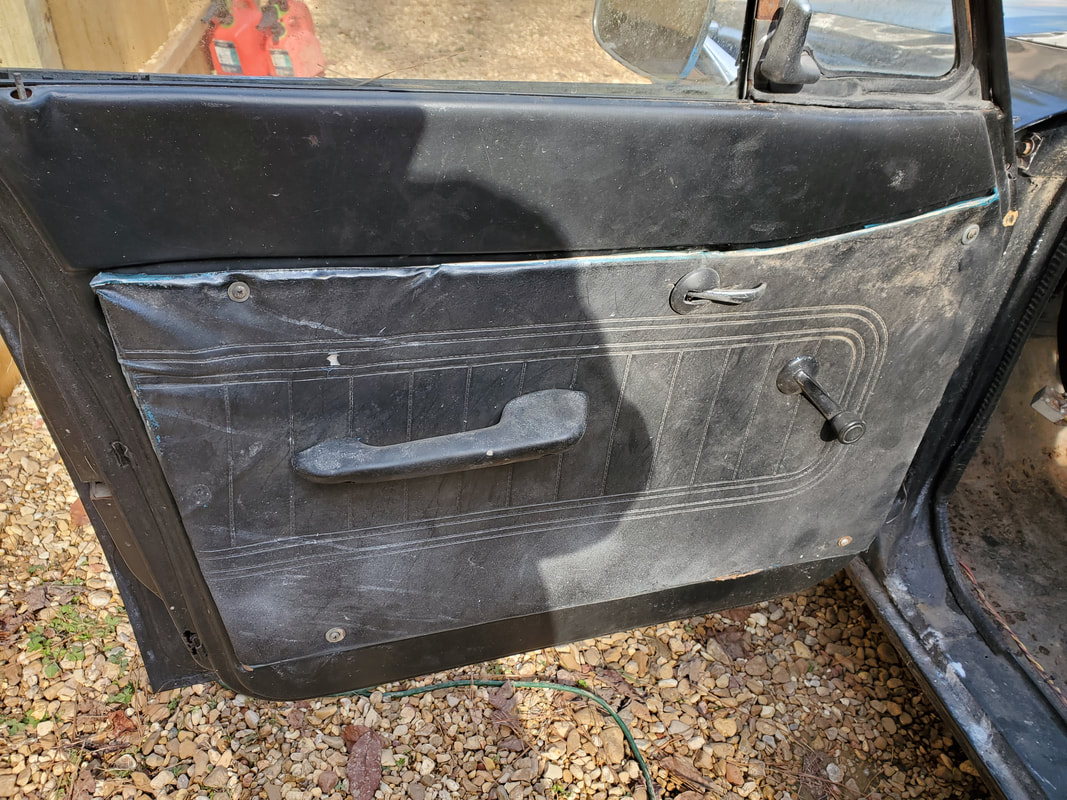
This panel is in the same shape....
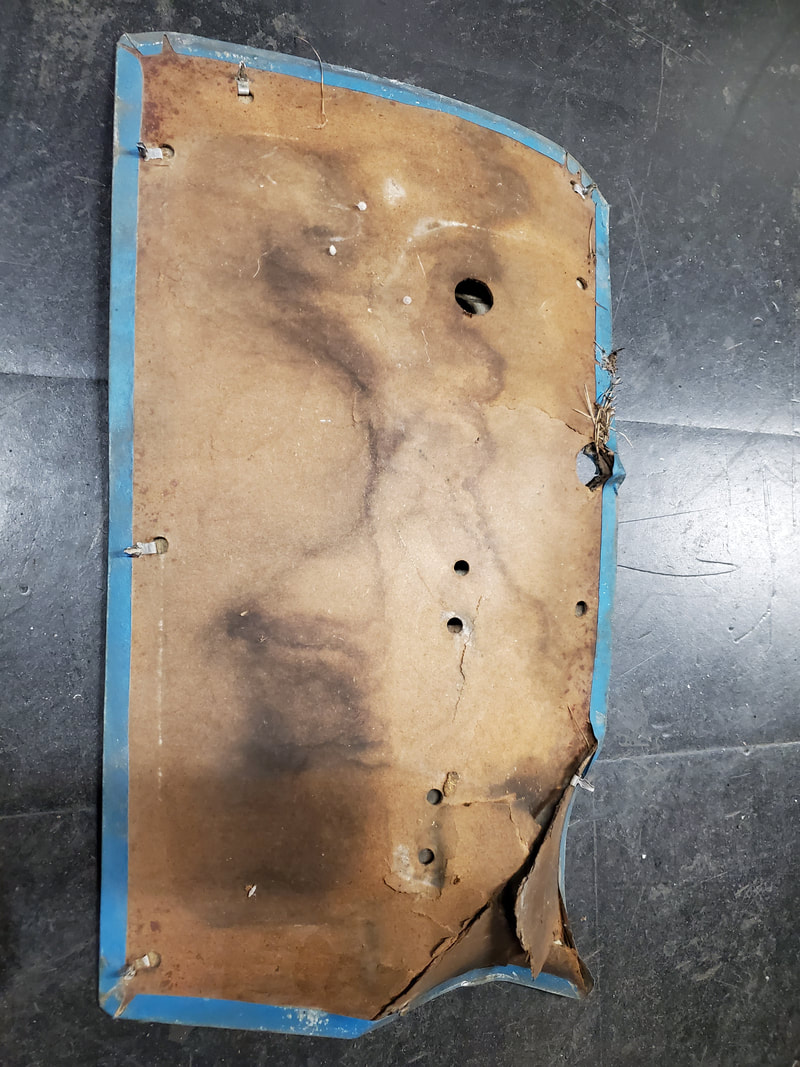
Back of old panel showing degradation.
This panel's even worse.
After tracing out the panels and cutting them out then cutting out the holes I went on to glue the skins to the cardboard. This was done using a hot glue gun and carefully gluing short lengths of skin on to the corners, taking as much care as possible to glue the folded edge to the cardboard. I had to fight some of the material as it just seemed like things were off but I was kind of fearful that I wouldn't get things lined up since the old panels were so distorted and jacked up. Eventually I got the skins glued back on with the main holes that I needed lining up with the holes on the panels.
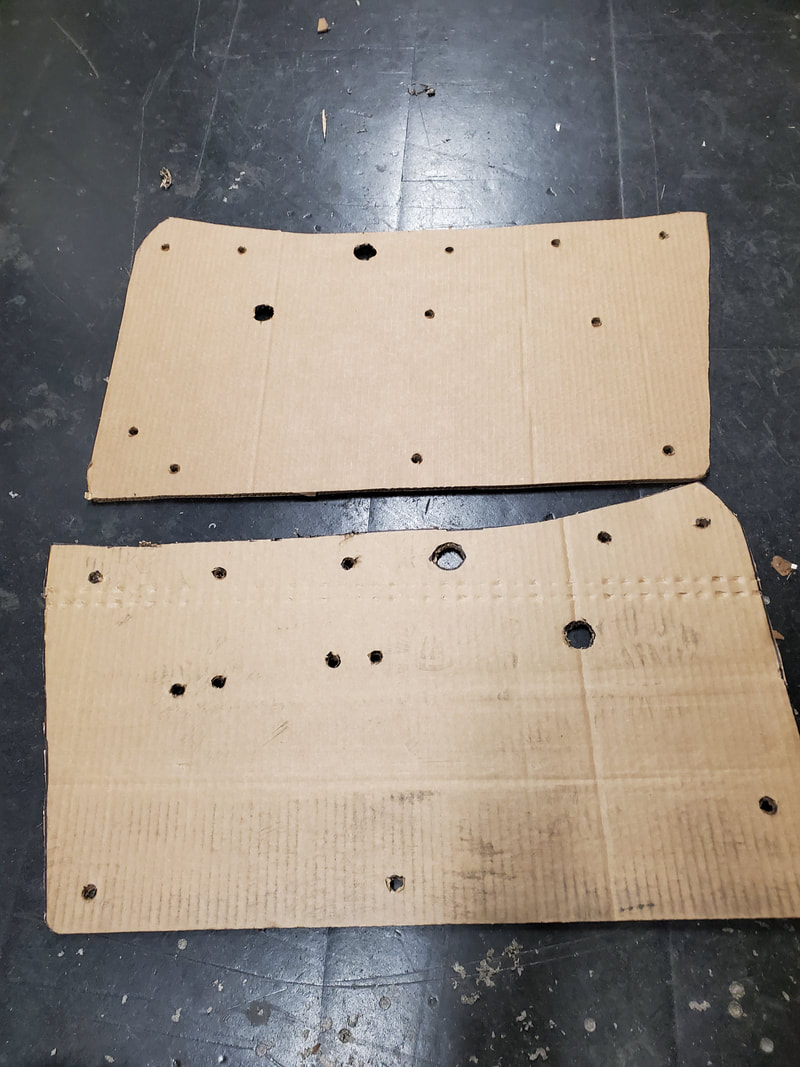
New cardboard panels cut out.
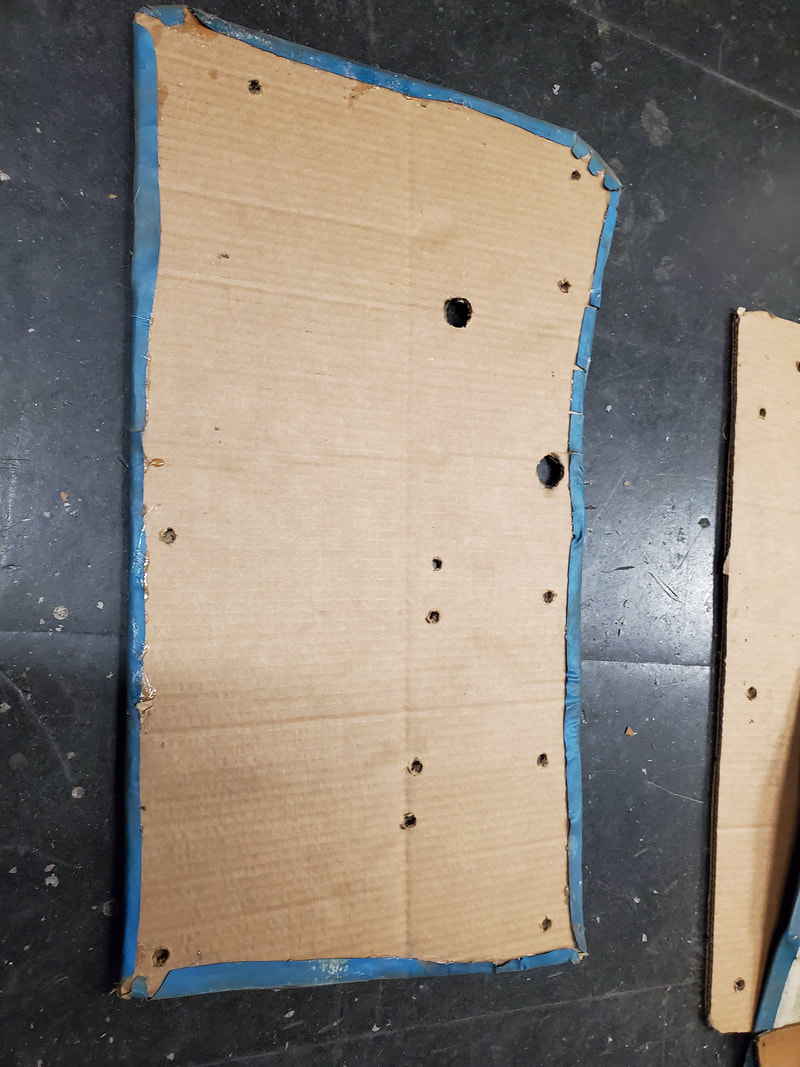
Cardboard panel with skin glued in place.
Outside of panel.
This panel came out pretty good as well.
Skin came out good.
Attempting to put these panels on ended up in me having to use the washer and screw method since none of the peg holes lined up with the holes in the doors. I wasn't about to try to line up and cut new holes for the pegs and risk damaging the skin and/or the panel so I just pulled out the hardware and secured everything as it was before. It isn't too bad, hell if I paint the washers and screws one won't really make note of the fact that the panels are held in place with washers and screws. Again, since this is not going to be a show truck we're kinda threw the rule book in the trash when it came to the rules of etiquette with regard to doing a proper build of a classic car/truck.
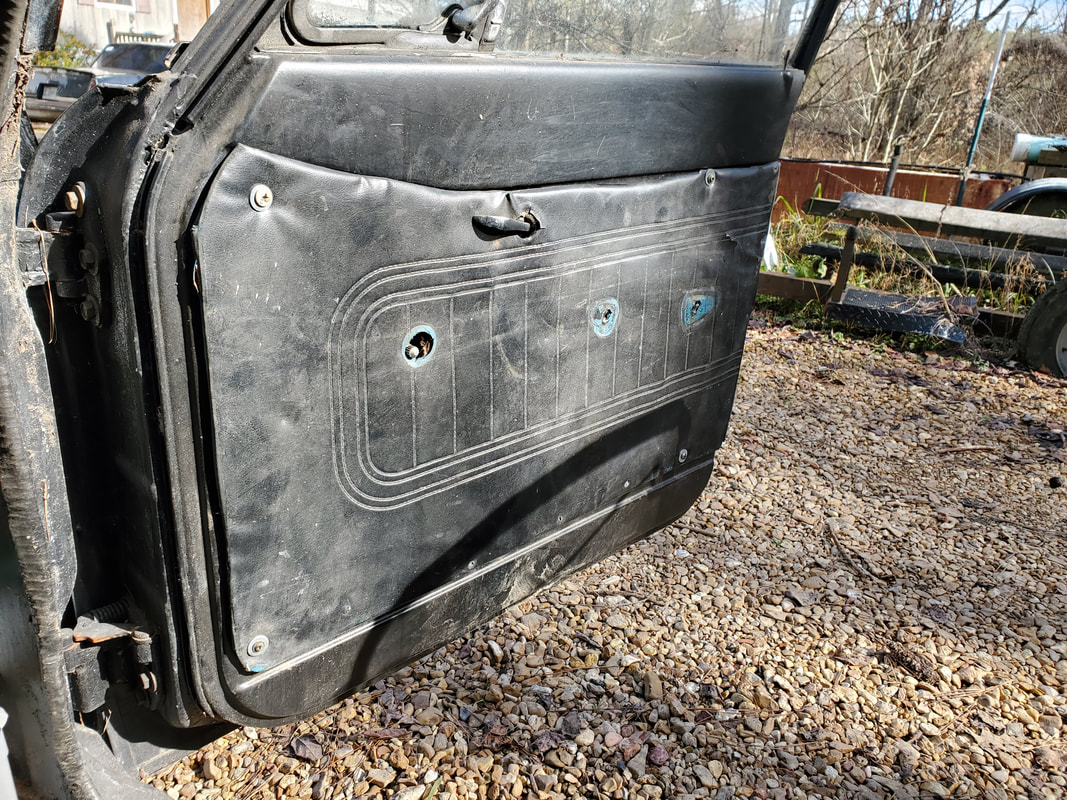
Right door panel in place, note washers and screws near corners of panel.
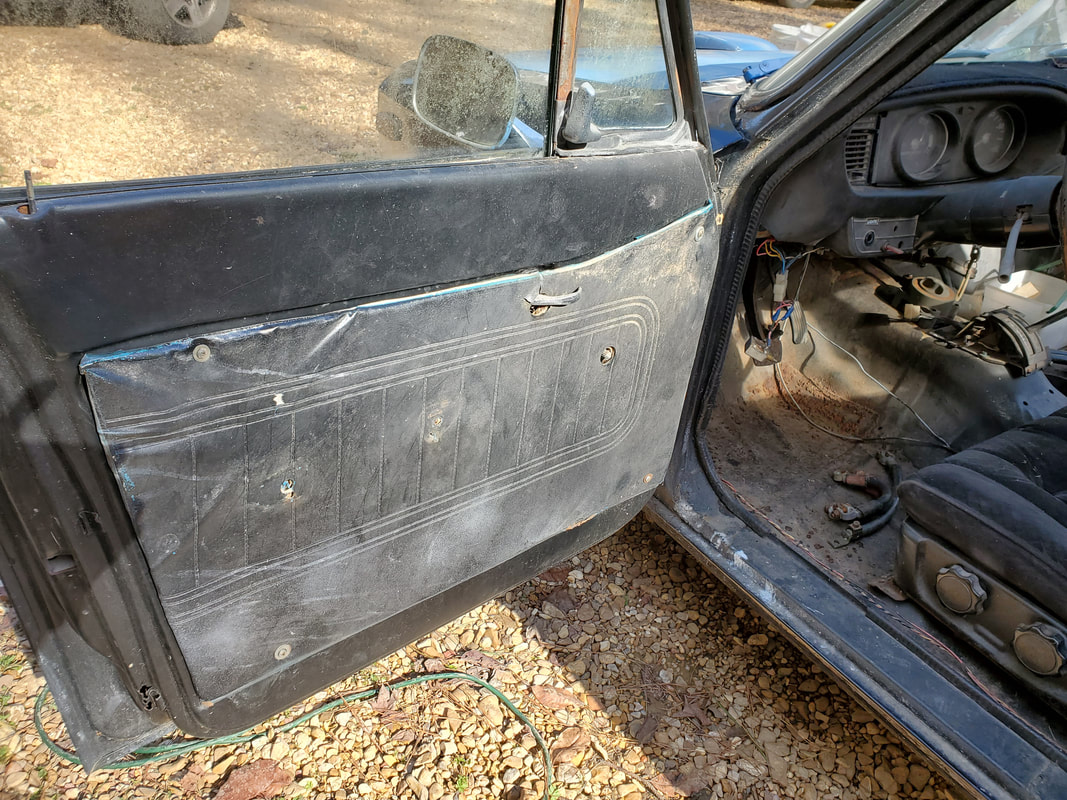
Left panel secured to door.
With the panels on I just had to install the window cranks and arm rests/door handles. This was pretty fast as the holes for the window cranks were lined up properly so the knobs were already exposed and since the panels are cardboard, screws would easily punch through the cardboard to meet up with the holes in the door in order to hold the arm rests up.
Window crank and arm rest back in place on door.
This door is ready to go just as well.
Bouncing around, I went ahead and installed the amber marker lights I got specifically to use as turn signals in the front. Since the old light housings were broken and replacements were nonexistent, I just got some generic trailer marker lights so I can hook up turn signals. The front bumper has holes on either side to accommodate the old signal lights so these little lights would work just fine. I ended up using angle braces to hold these lights up. I used a sheet metal screw force driven into the plastic housing of the light and a mounting point on the top of the holes in the bumper that were used to mount the old lights. When I rewired the truck I took the time to run wires to these holes in the bumper so I can immediately hook up the turn signal lights when I did get replacements. This little job didn't take long either because of the prior preparation.
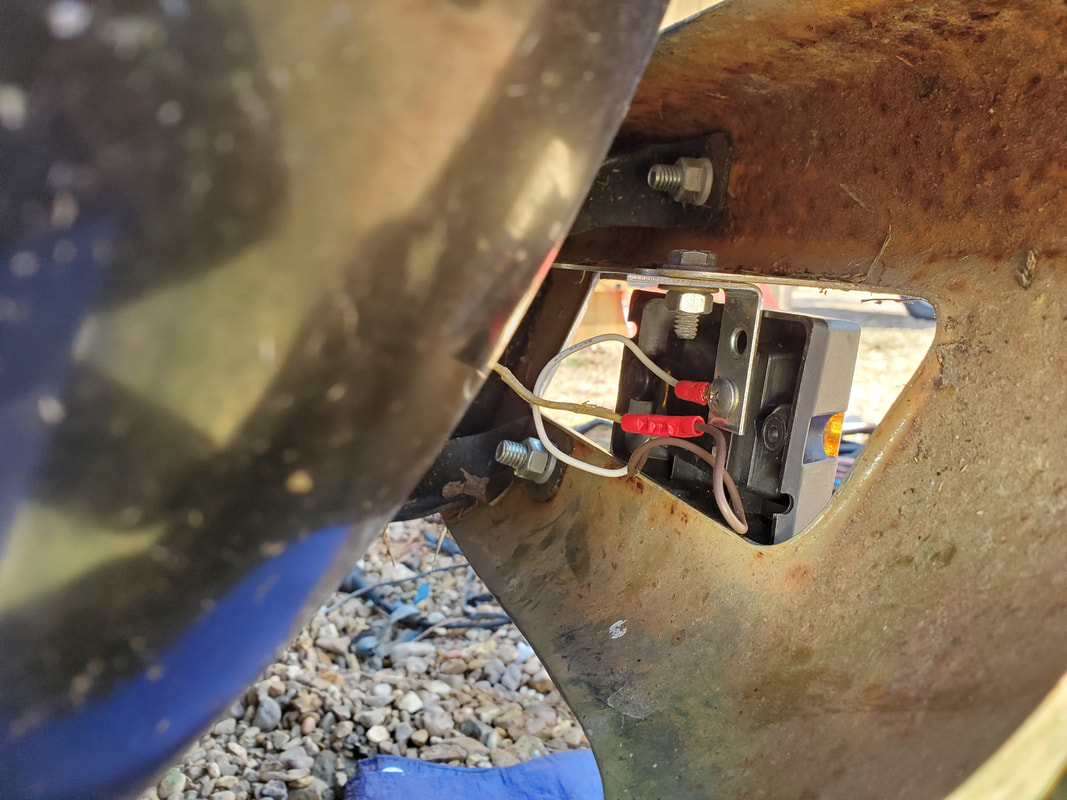
Shot behind bumper showing angle brace and light fixture secured in place.
Shot of bumper showing lights in place, relatively low profile, still a little bootleg but will get the job done.
Previously I mentioned needing to make a driveshaft after swapping in the EV powertrain. Now since it's been a while between when I had gotten a driveshaft and when I recently got a shaft made for the Dodge, I come to find out that the cost to make a driveshaft is way more than I paid back then. Since the EV powertrain all in all is going to be a lower power setup than any gas engine that was in this truck I decided to take a stab at making my own driveshaft. Its not necessarily making one, more so remaking one. This involved cutting the rear U-joint mount from the tube of the driveshaft then doing some rough measurements to see how much of the tube I needed to cut off. After getting these measurements down and getting the tube cut, I prepped the unit for the reattachment of the rear U-joint. I found a heavy tube that had an outer diameter that was almost the same as the inner diameter of the shaft's tube. I cut a tube about 6" and ground it down some to lessen the overall diameter of the tube. I inserted the tube into the driveshaft's tube then dropped the shaft on the floor on the tube side to hammer the inner pipe in deep enough to leave only a half inch of tube exposed. I then ground the end of the tube at a taper so when I mate the U-joint plate the taper would leave a deep cavity going all around the tube. This cavity would allow for a thick bead of welding slag that should hopefully hold the whole driveshaft together. I did weld the U-joint place really well, ensuring that enough weld slag was smoothly fed into the plasma, filling in the cavity and bonding the metal together nicely. When I went to test fit the new driveshaft, the unit went in with enough to spare to allow for the unit to be pulled free from the rear end for removal if need be. With that I secured the shaft to the rear end, writing off that part of the project.
Now most would say, "What about balancing?" I saw an old technique the old schoolers use to balance "modified" or homemade driveshafts. They would take a couple of large worm clamps and secure them around the shaft near the rear U-joint and put the car on jackstands, drive wheels up so they can test run the car. If the car has excessive vibration coming from the driveshaft, you would move the worm clamps just a little and try again. The large part of the clamps that holds the body and the adjusting screw would serve as a weight and rotating the clamps around the driveshaft would act as a form of balancing. If need be I will do this in order to get the shaft balanced and then mark everything so if the clamps get thrown off somehow, I can readjust them to get back to a proper balancing.

Driveshaft in place, note weld around end of tube at U-joint plate.
Now after doing all of this I finally decided to make a big move. That is moving the bed from the garage where the whole restoration project started, back down to where the truck is currently sitting and re-install the bed. This feat I was able to take on by myself with the help of my 2 whee dolly. I slowly wheeled the bed down slope on the driveway to our driveway and with the ole lady's help, was able to get the bed moved over and onto the LUV's frame. From there I secured eight bolts along both frame rails to ensure the bed was solidly mounted.
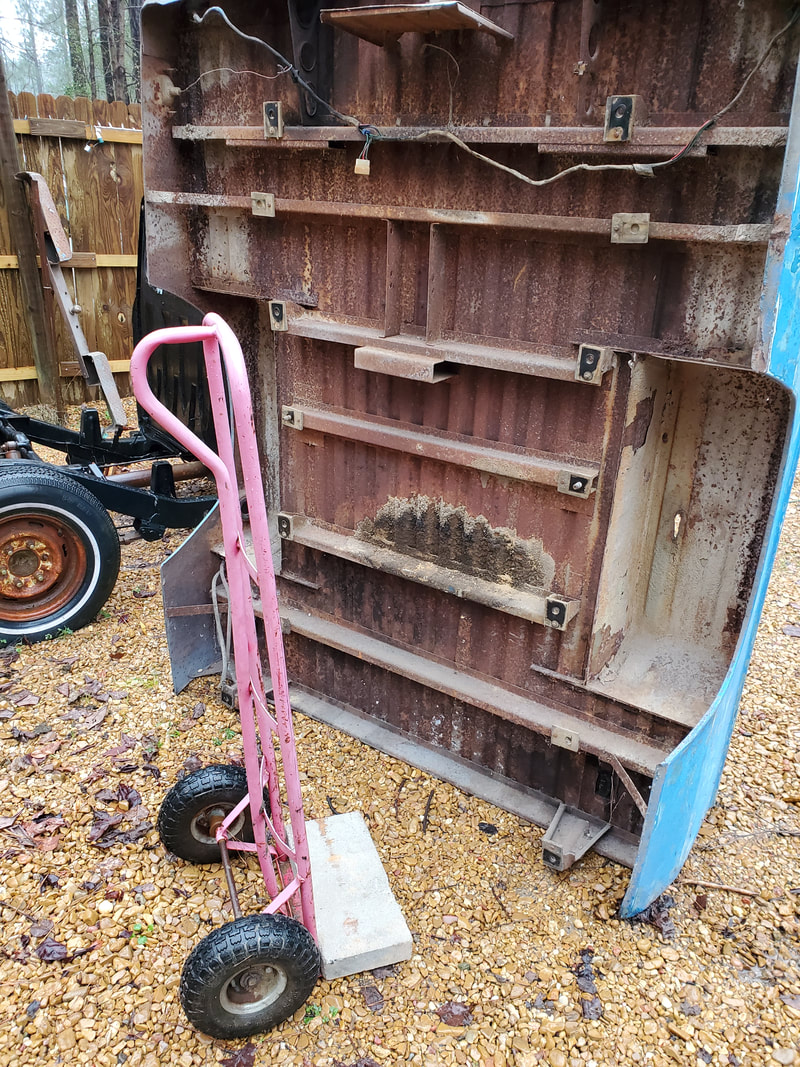
Bed staged next to LUV after bringing it down via 2 wheel dolly.
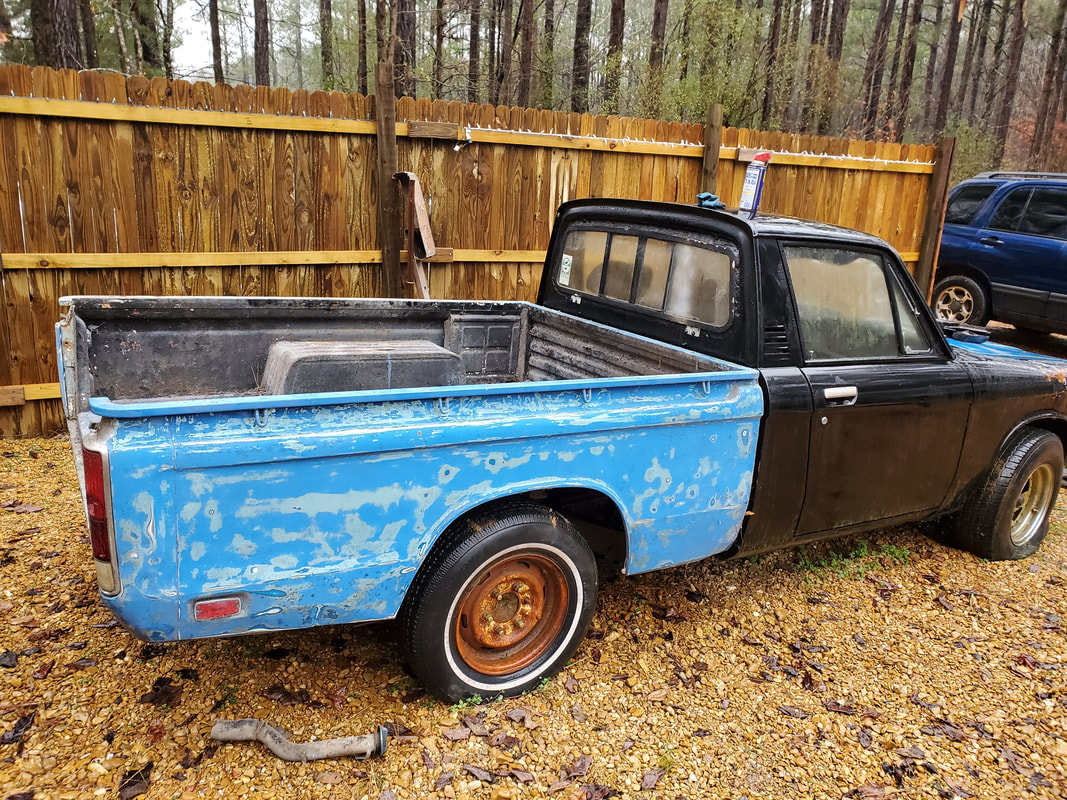
Bed mounted on LUV's frame once agan.
With the bed on I moved on to the tailgate. I bolted the hinges up, making sure everything was lined up so the tailgate would close up between the sides of the bed without any binding. From there in installed the latching hardware on either side that is used to hold the tailgate closed. These latches are held in place via two bolts to the tailgate itself and when the latches are closed they latch up to two lugs on the sides of the bed.
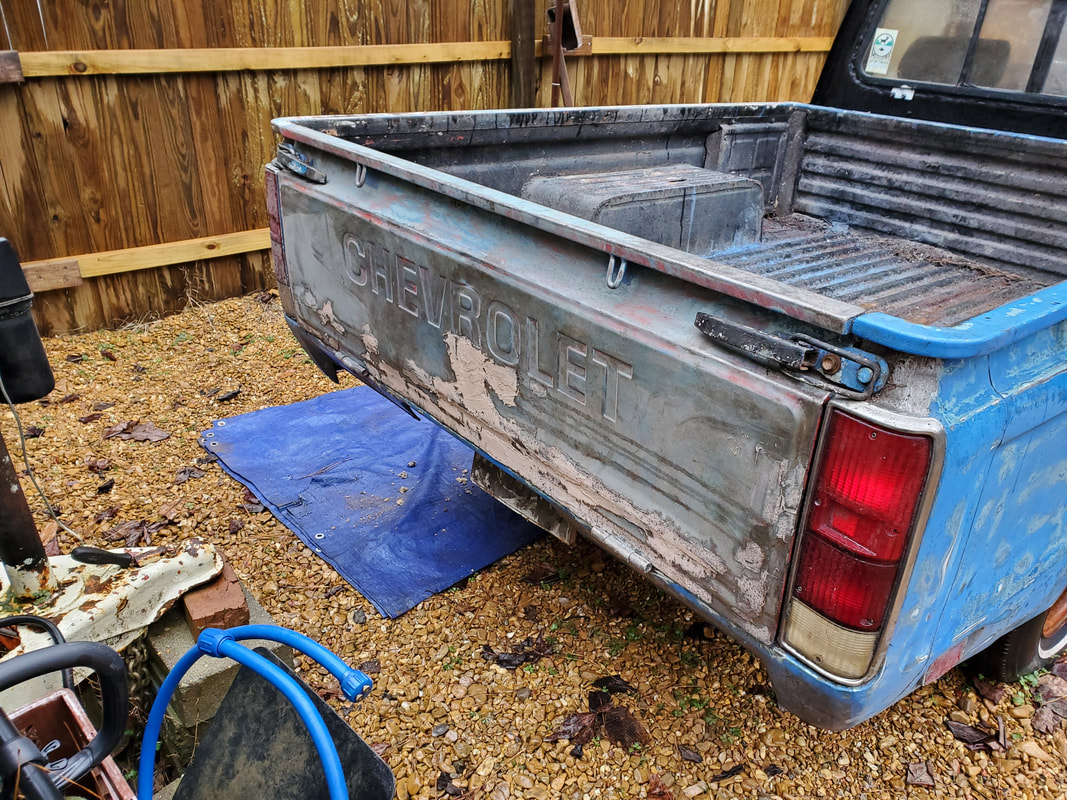
Tailgate latches installed and latched up holding the tailgate closed. Note amount of bondo on gate that still needed sanding down.
From there I mounted the brackets that held the rear bumper. These brackets were bolted to the ends of the frame rails using three nuts and bolts for each one. With the brackets in place I remounted the bumper, using four nut/bolt sets for each bracket. With all of these large nuts and bolts I was able to get the bumper hung back up.
I also too the time to bolt up an interior shelf that rests on the passenger side under the glove box. The original bolt holes that held this shelf in place are filled with the studs from the bolts I broke trying to remove the shelf. I ended up using self tapping screws to mount the panel just below where the old bolt holes were. The other side of the shelf I was able to use a nut/bolt combo in its hole to get it secured on that end. Even with the slight deviation down, the shelf is still pretty level.
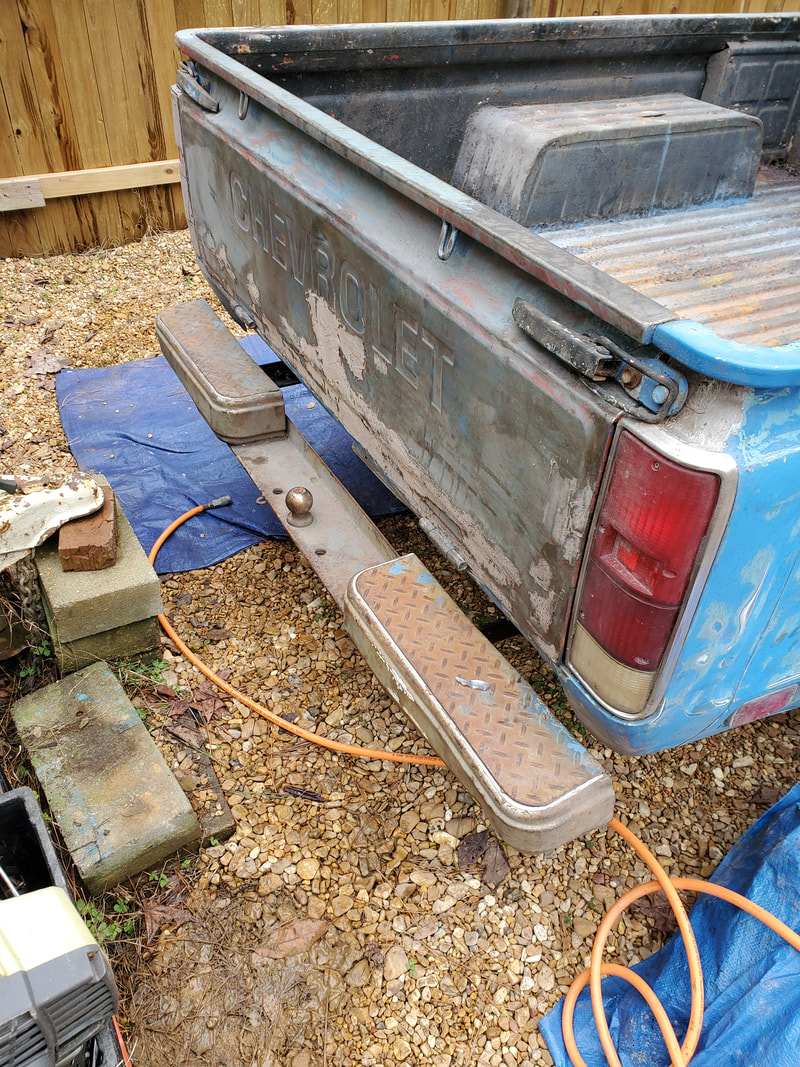
Rear bumper secured in place on its associated brackets.
Interior shelf secured in place under dash.
