1984 FORD F150 DONOR TRUCK
We picked up yet another truck after being told about it by our neighbor. The purpose of getting this truck is a little different than other vehicle purchases however. This one was picked up with the intent of getting its powertrain for use in the Rustang, the 1969 Mustang that currently has a 200ci I-6 engine in its engine bay. The truck's powertrain is a 351W HO engine with a C6 automatic transmission. This powerplant is as close to the original rig as we can get without actually finding the original hardware. The original rig was a 351W with an FMX automatic, which was the older version of the C6 transmission. Anyway, the basis for the previous owner wanting to part with this truck is the idea that during an attempt to bleed the brakes after replacing the master cylinder and brake booster, the float bowl gasket on the Holley carb leaked out enough gas to trigger a fire on top of the engine. The guy was able to put the fire out quickly enough that it didn't damage anything like the distributor or wires, but the carb was a little cooked. Obviously the carb would need replacing, even without the fire damage. Besides, I'm not a Holley fan anyway. My intent was to get the truck running and driving to test the powerplant prior to removing it to prove that it's ready to go before transplanting it into the Rustang. I don't want to have any issues with the system when its installed in the car, I want to be able to hook everything up and be able to drive the car immediately.
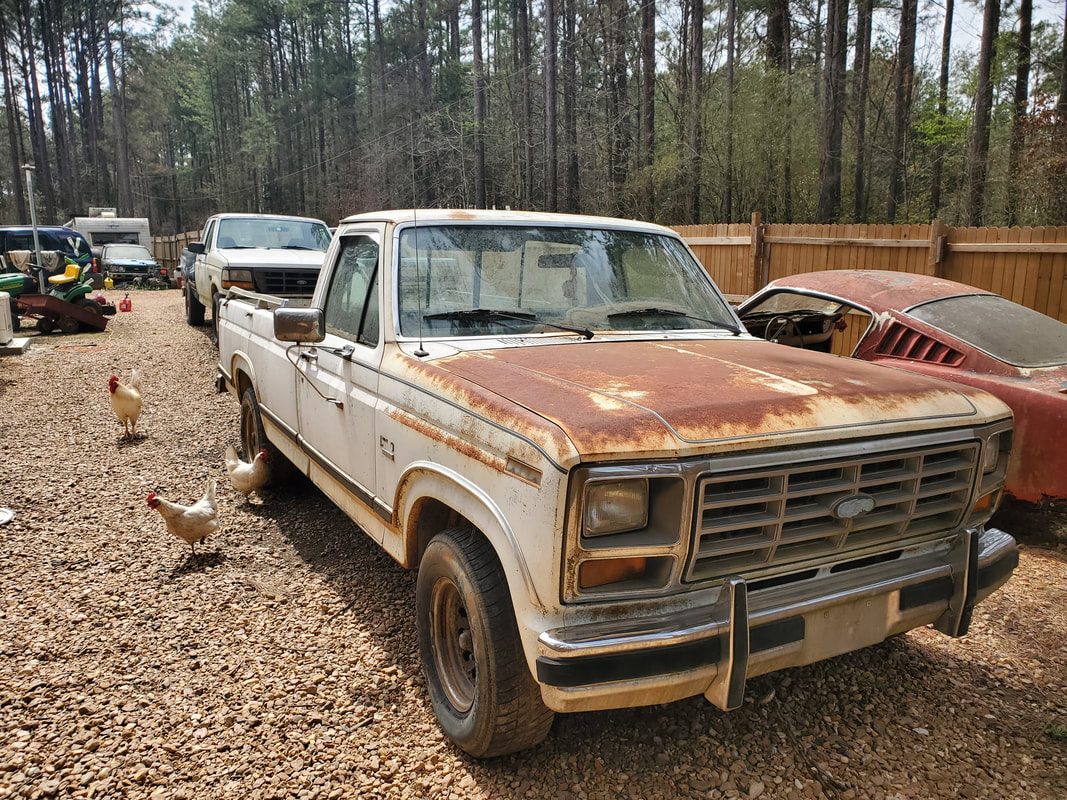
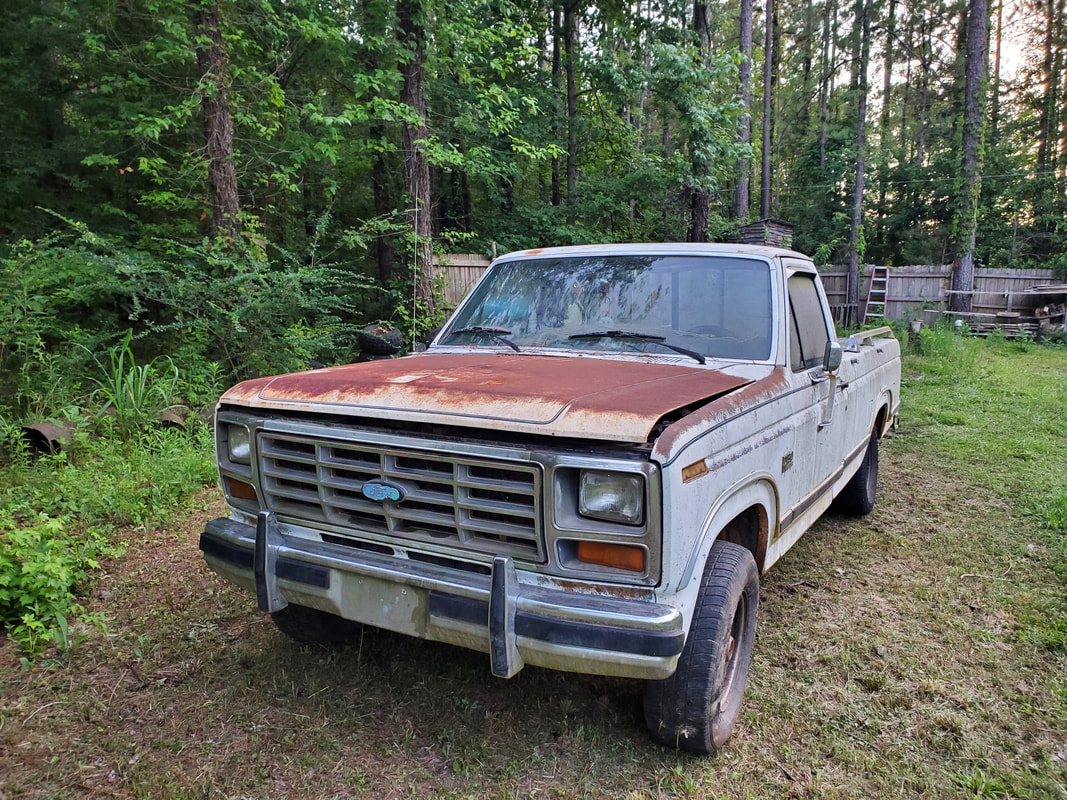
The 84 F150 after bringing it home and parking it in an empty spot in the compound.
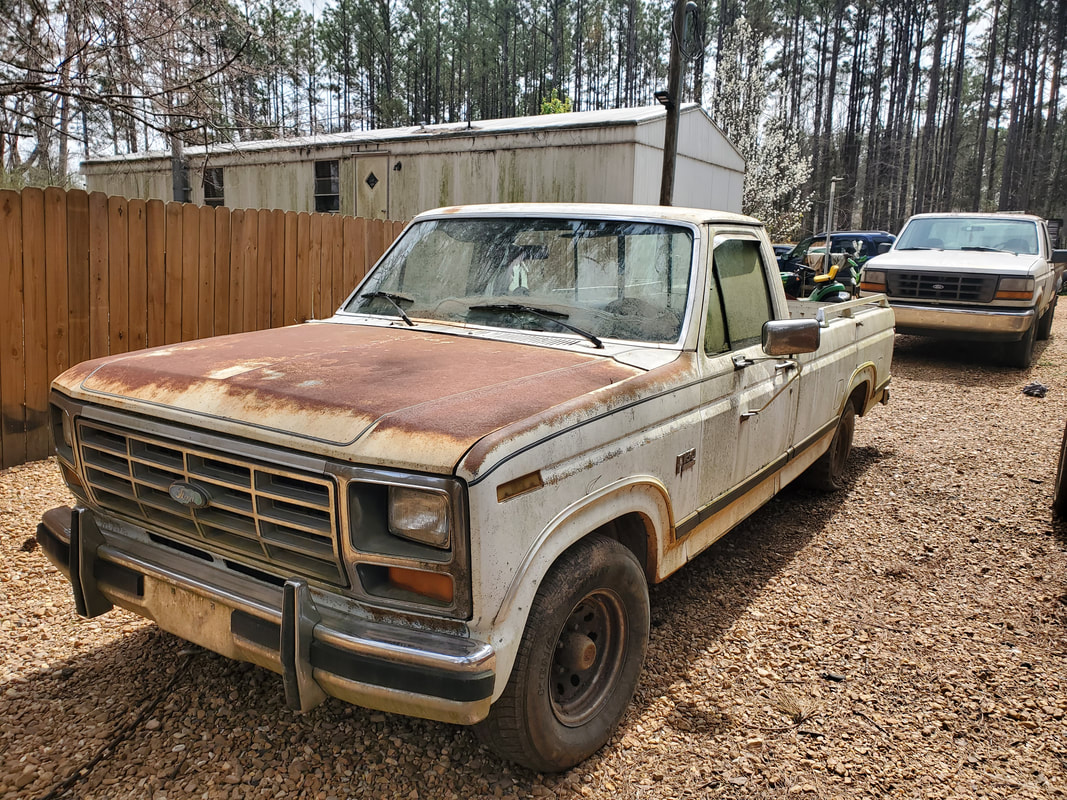
Another angle to the truck, body isn't really in that bad a shape.
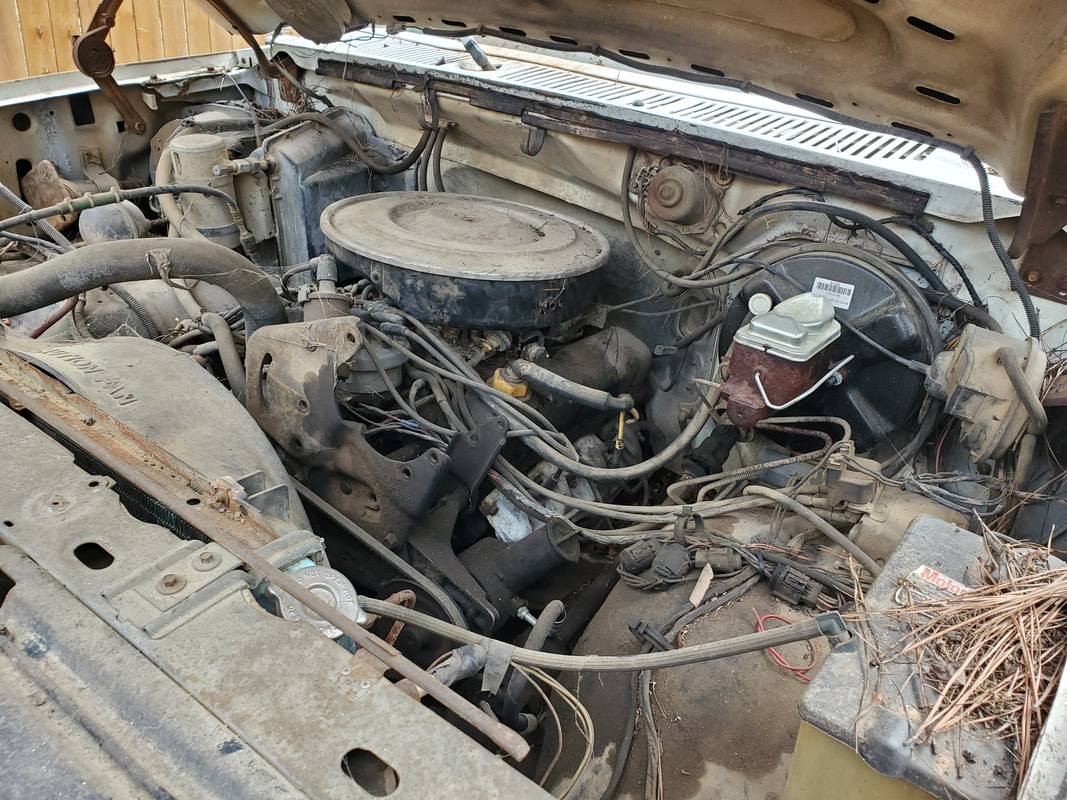
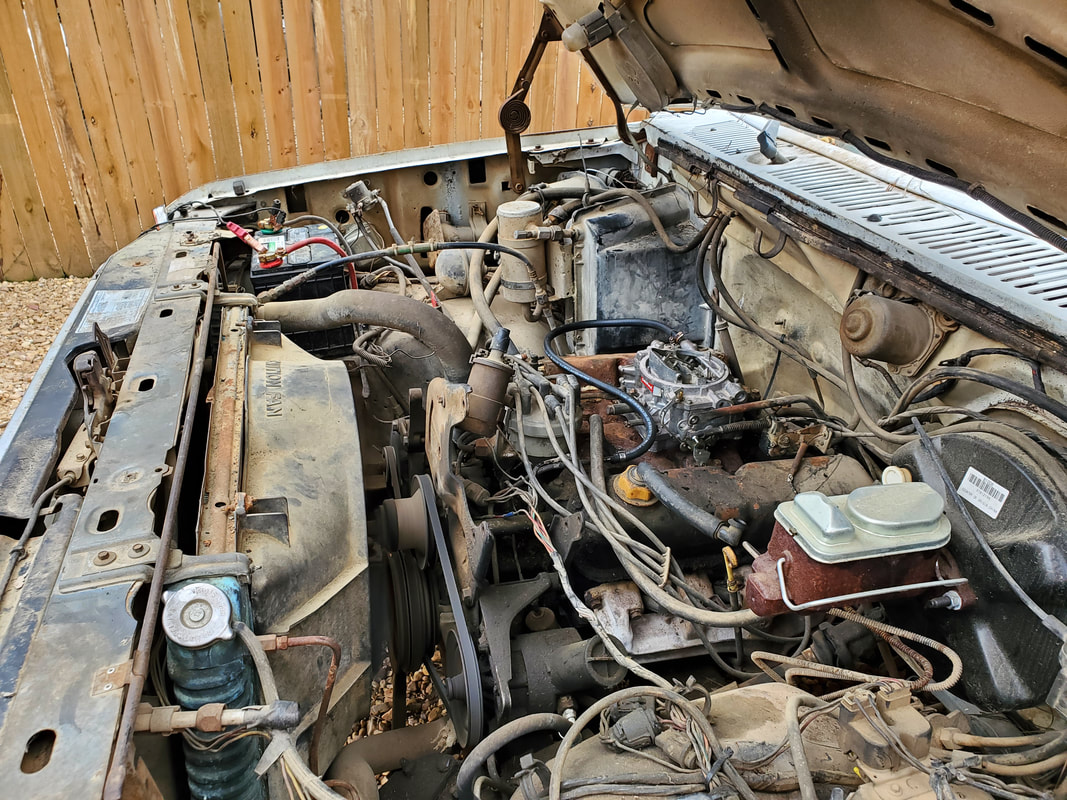
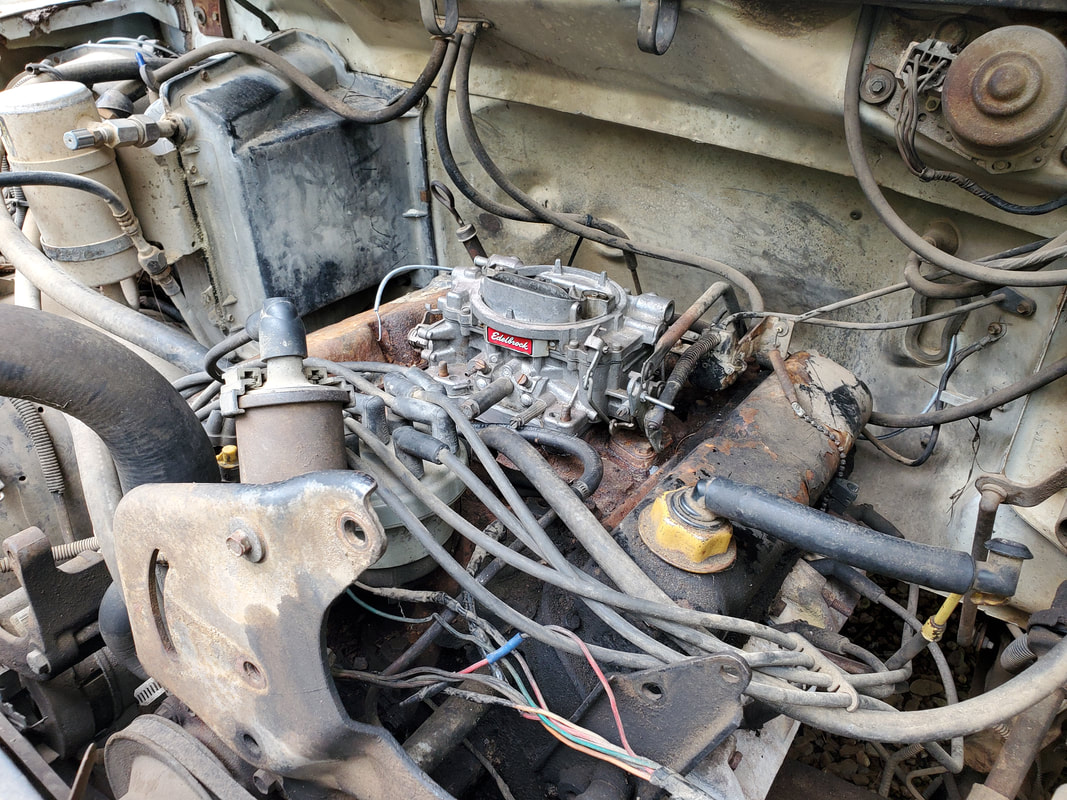
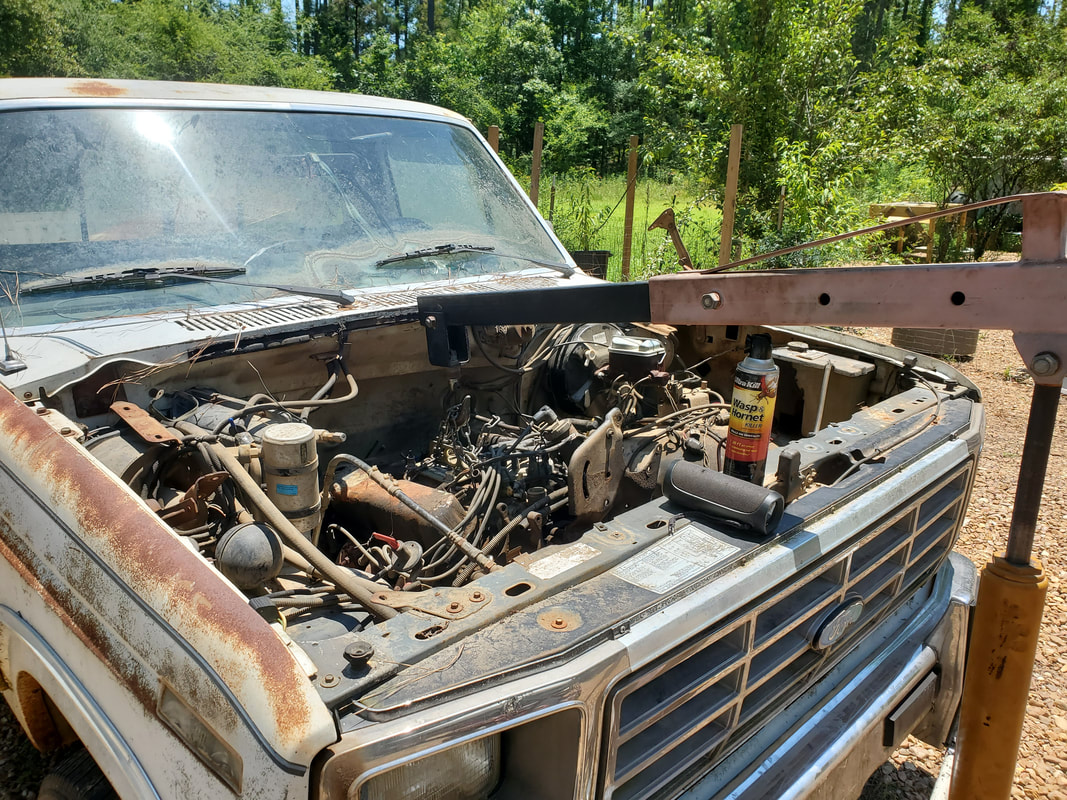
The 351W powerplant as it came with the original air cleaner.
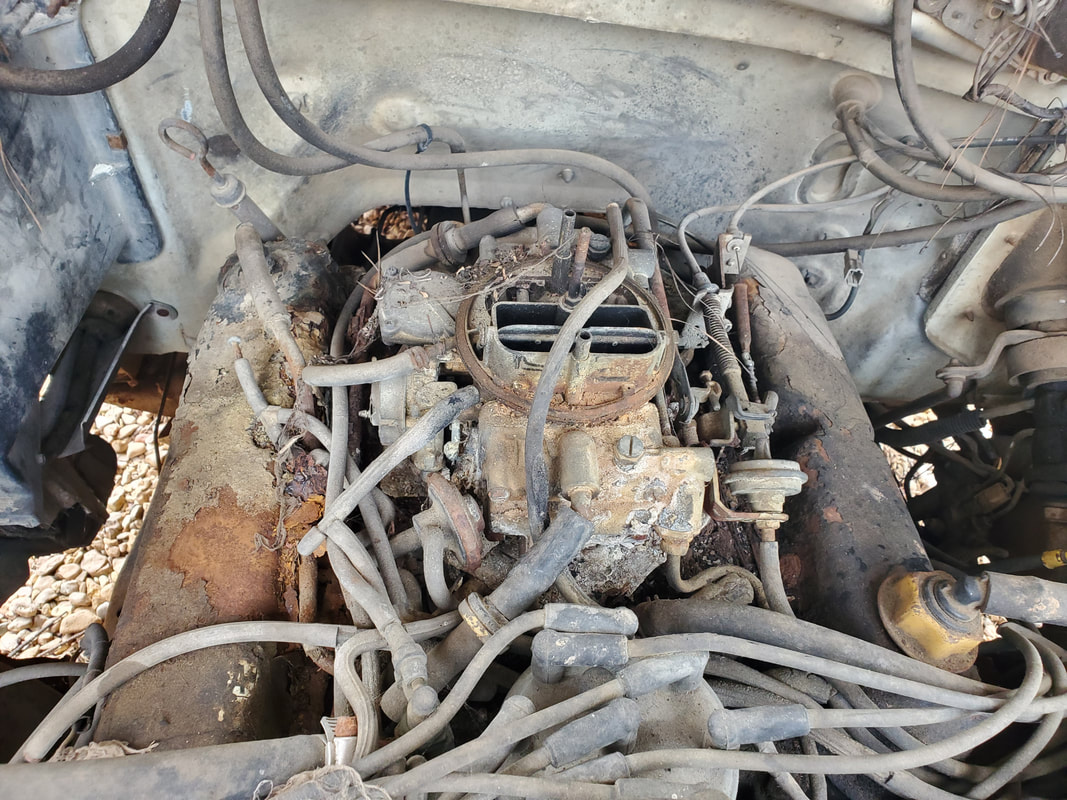
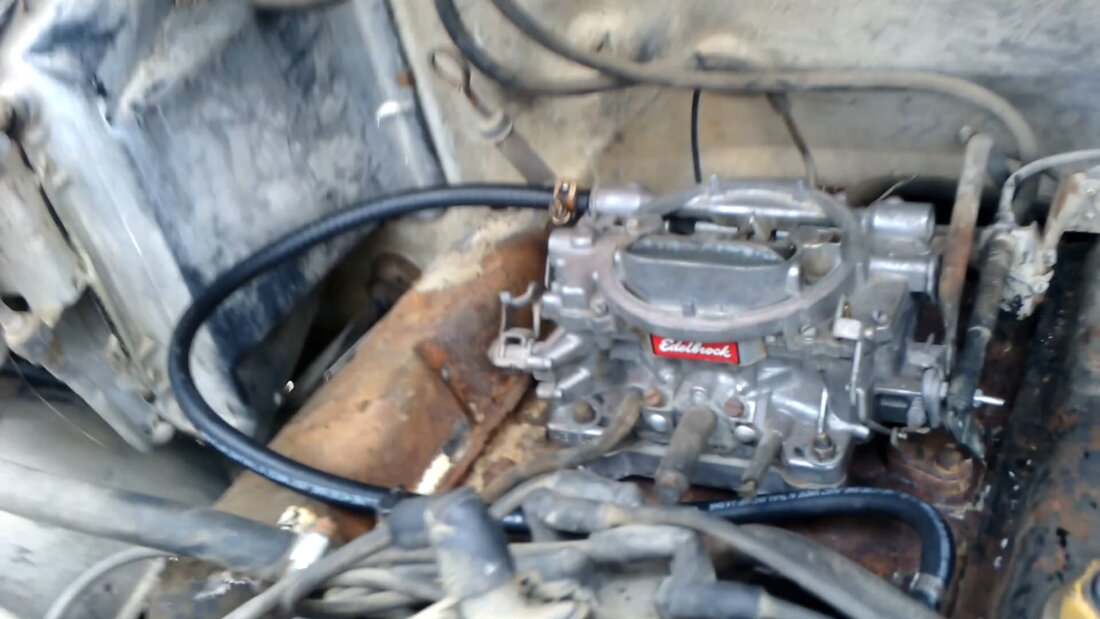
The BBQ'ed Holley carburetor that will soon be removed to be replaced with an Edelbrock unit.
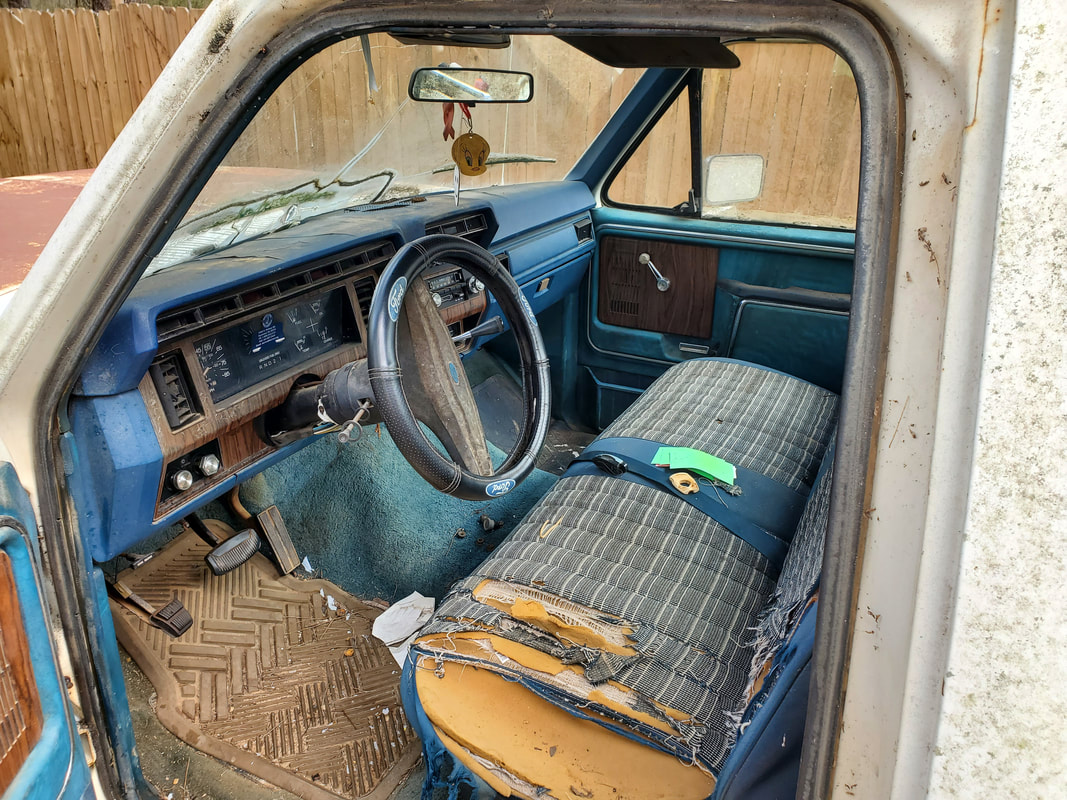
The ratty interior of the truck, well worn but complete.
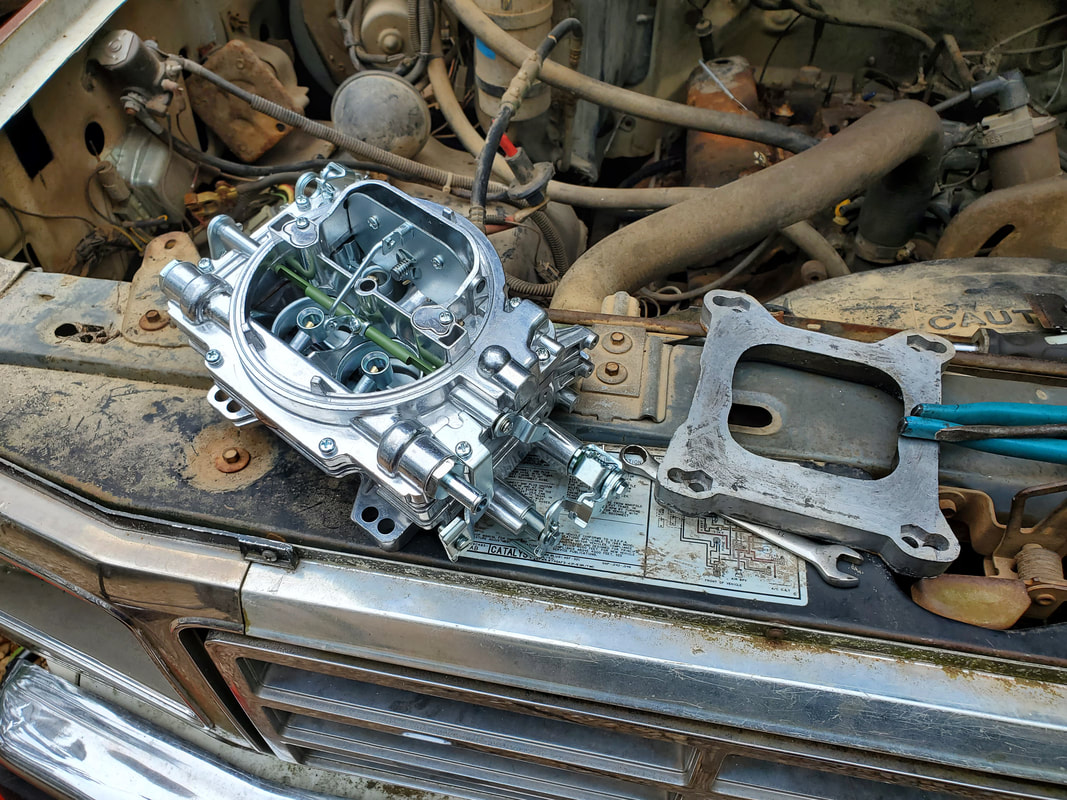
Because of the truck sitting for some time, a lot of dirt and crap ended up on the top of the engine. Crap from varmints always finds its way on top of engines and this one was no exception. After vacuuming all this trash from the top of the engine I pulled the carb off then vacuumed some more to clean everything up. I scraped the remaining gasket from the base of the intake then fished out a spare Edelbrock carb, which happened to have a spacer already glued to it. I would need a spacer since the carb's throttle would not have free movement if it was mounted directly on the intake base. Another thing I did was clean up the myriad vacuum lines that were hooked up to the old carb and the emissions shit that was in place. The Edelbrock would not have any of the vacuum lines hooked up other than the distributor. The transmission and brake booster were hooked up to manifolds on the intake so they would have no hookups to the carb. Another thing I had to address was a weird valve assembly on the intake that was right under where the carb throttle would move. I removed this valve assembly and cut off the vacuum diaphragm and the stem to the valve then replaced the base to the valve assembly to cover the hole on the intake.
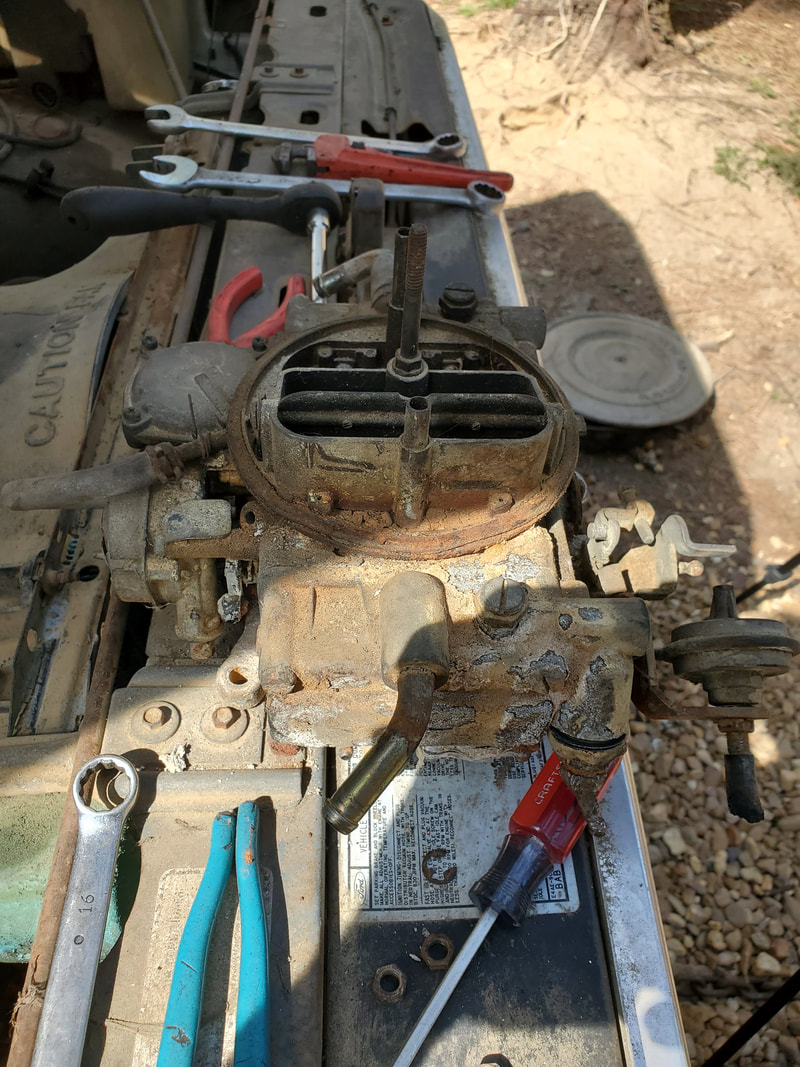
Old Holley carb removed from intake, note the burn damage on body.
Carb spacer and thick gasket that was under old carb. Note the weird sheet metal plate that was also under the carb. All this will be removed.
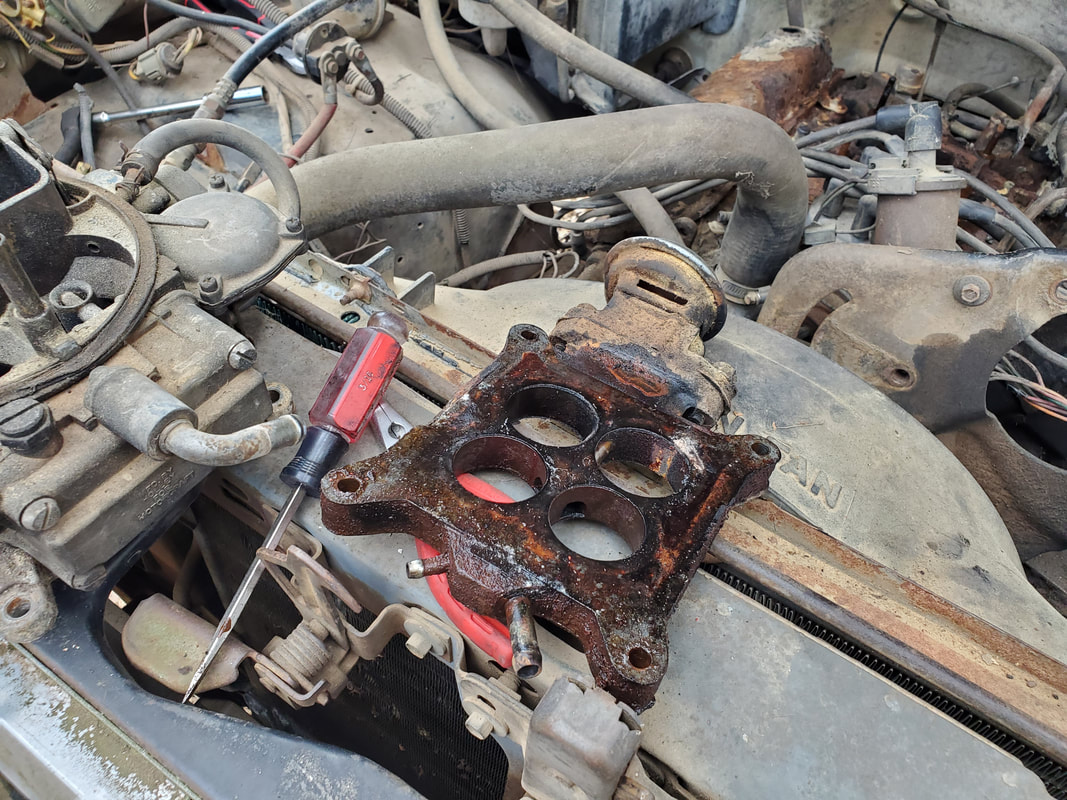
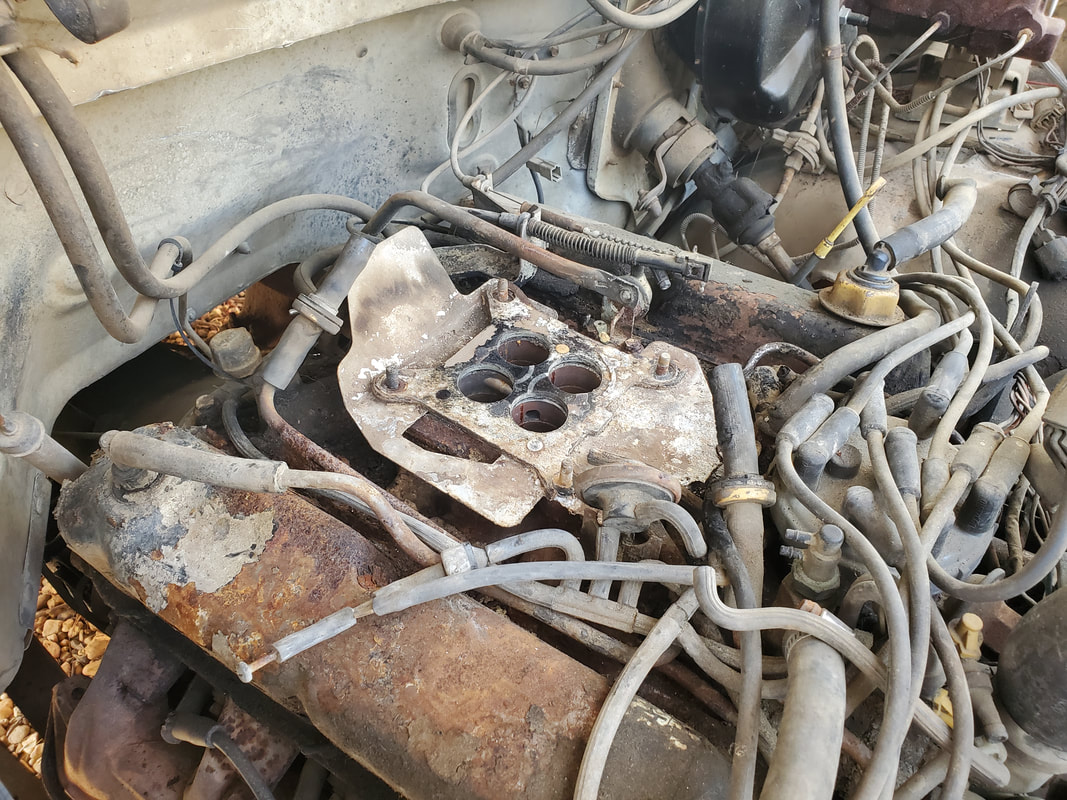
Old carb spacer, which also includes the EGR valve, removed from intake.
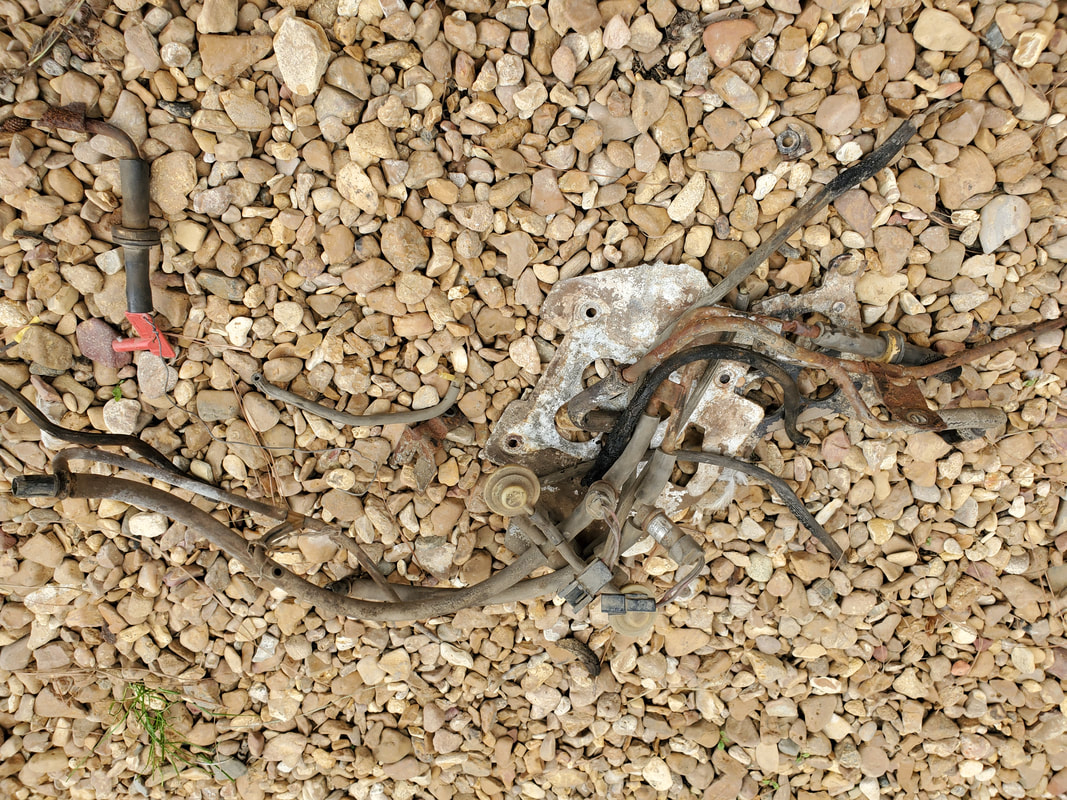
Vacuum lines and other associated hardware removed from top of engine after pulling old carb off.
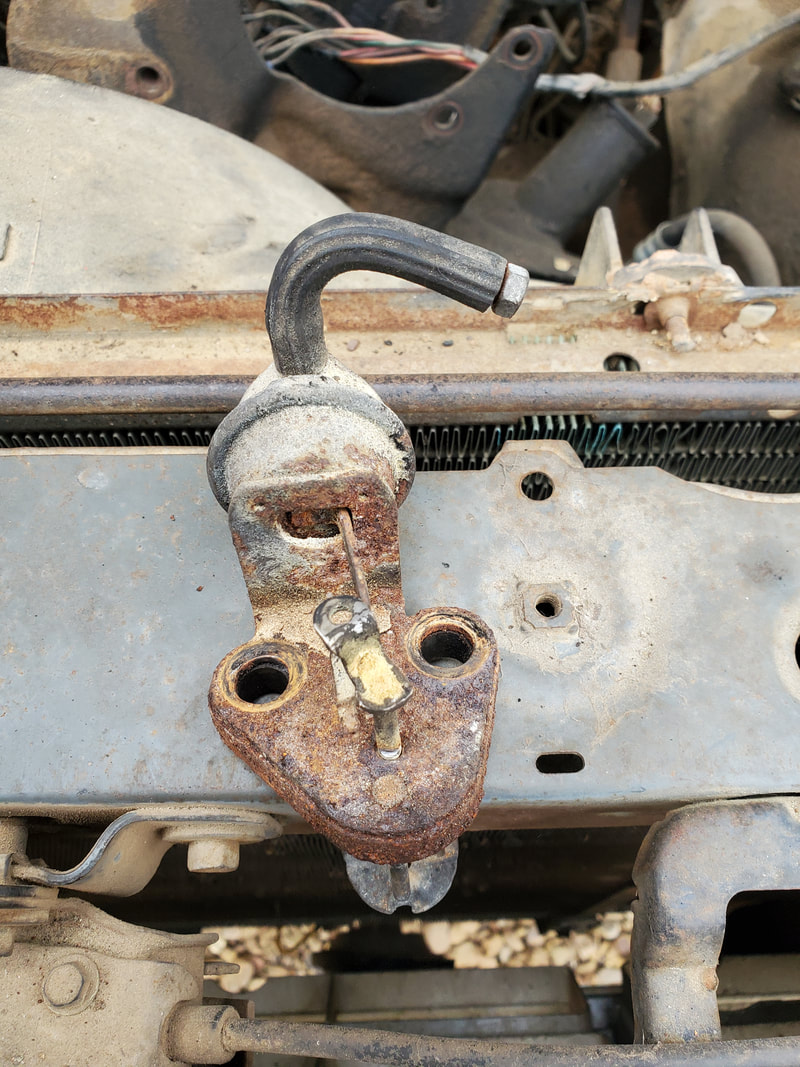
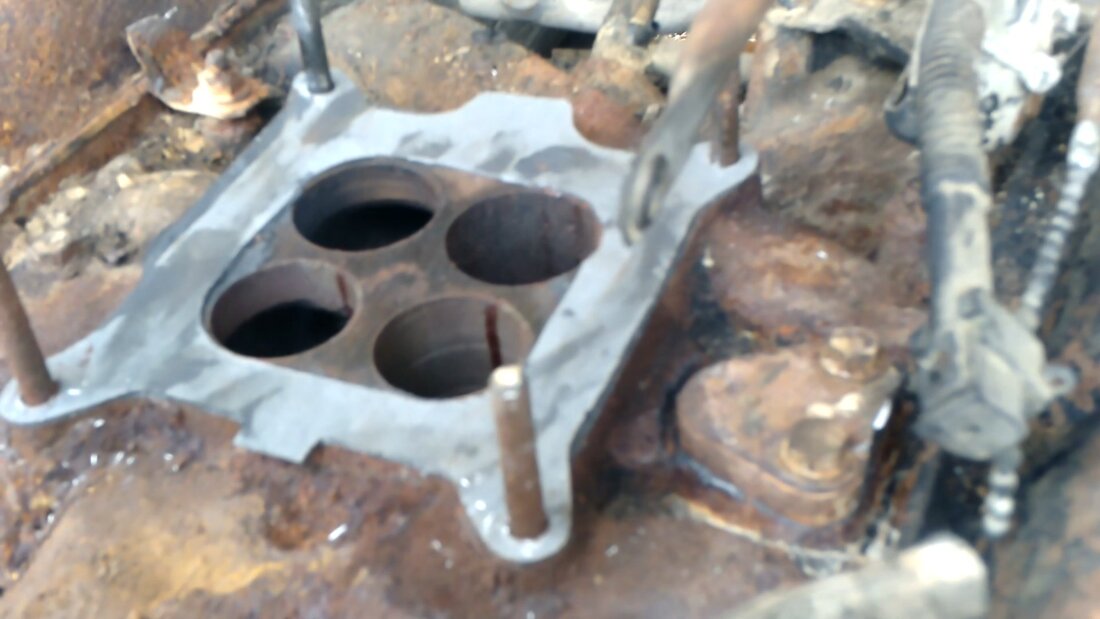
Weird valve assembly removed from intake under where carb throttle would be at.
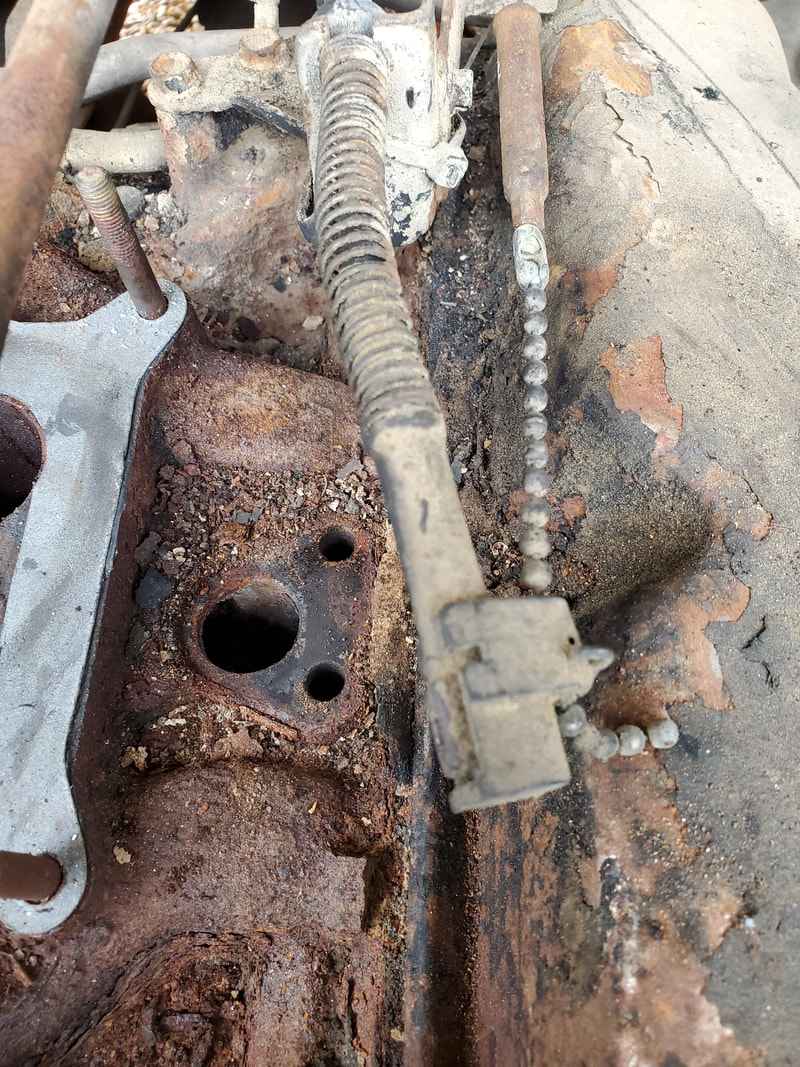
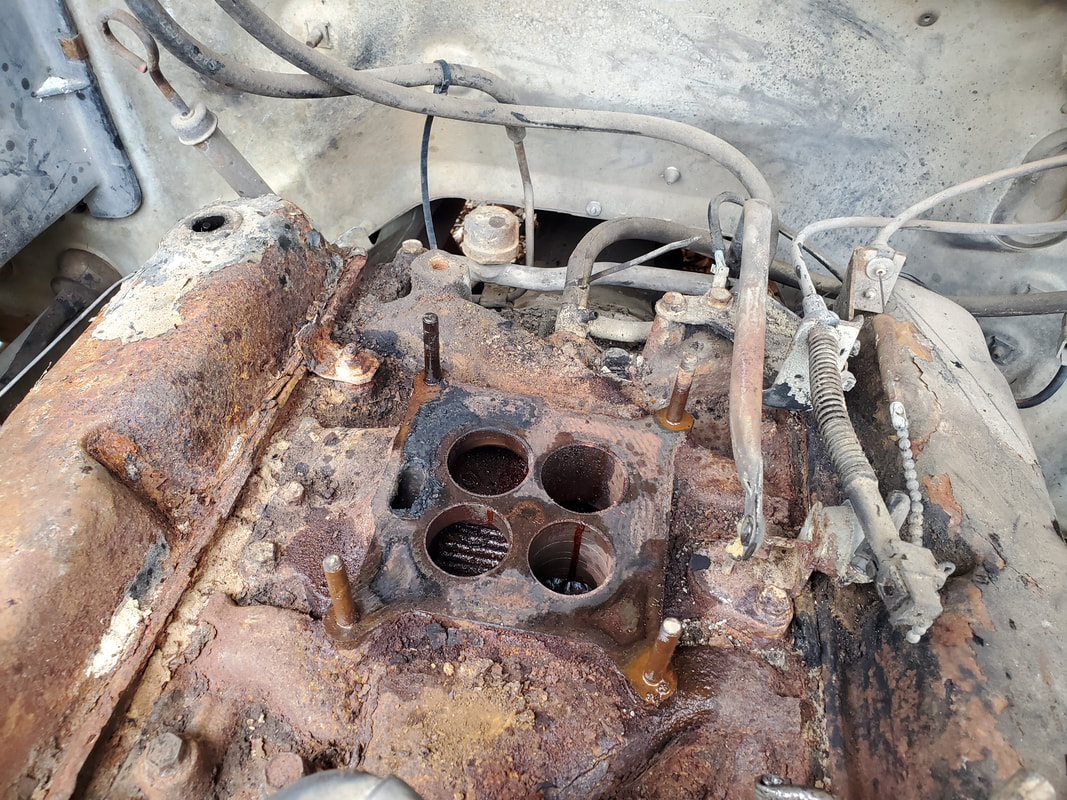
Open space on intake where valve assembly was located.
Valve assembly base reinstalled on intake after trimming off diaphragm and valve stem. Also note fresh base gasket on intake.
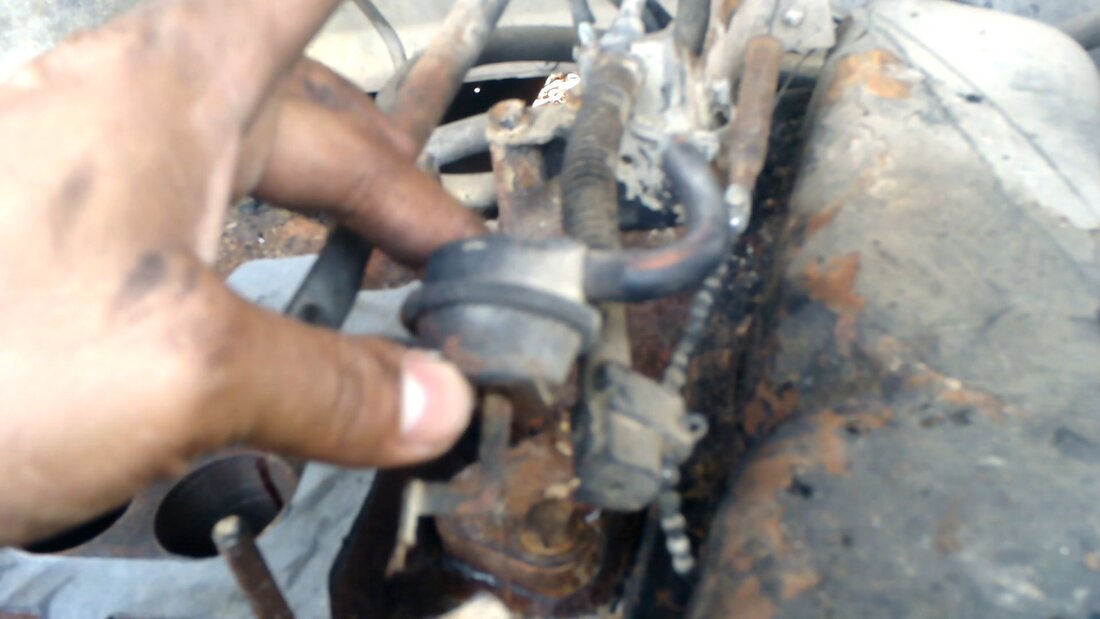
Valve vacuum diaphragm that was removed from valve assembly.
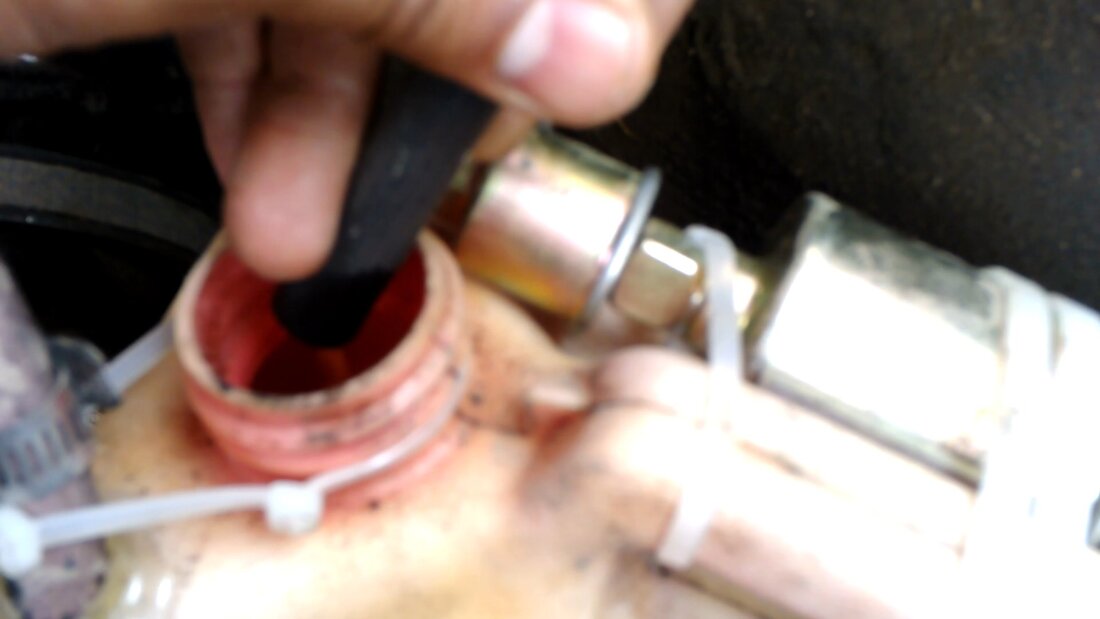
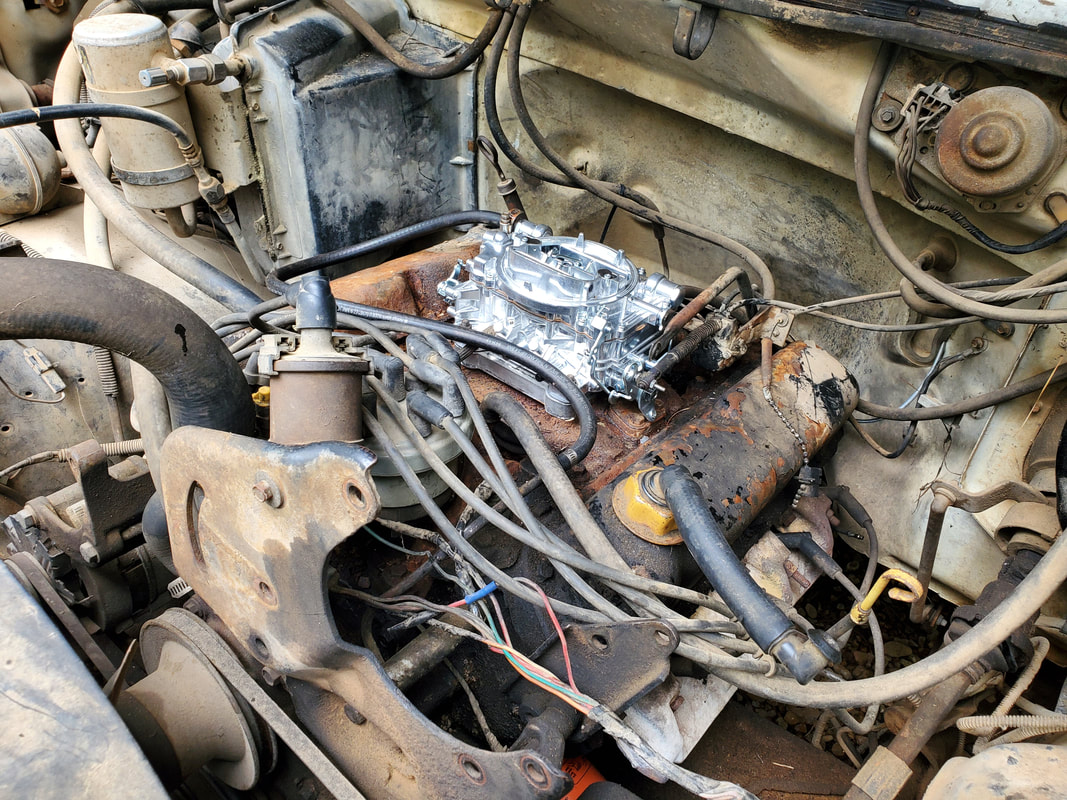
With the top of the intake prepped, I applied gasket maker and bolted the carb and its spacer down onto the intake base. With the carb down I installed a long bolt on the throttle then drilled a small hole in the base of the throttle cable and secured the base to the end of the bolt with a nut to complete the linkage to the carb. From there I added a couple vacuum caps to cap off a couple metal lines where vacuum hoses once were. I also had to cut a couple short pieces of hose to bridge a couple pairs of nipples on a vacuum manifold so those leak points would be sealed as well. The next thing I did was add a piece of rubber hose to the nipple on the Edelbrock carb. The metal fuel line that was going to the Holley was twisted and broken upon removal so I had to cut off the twisted end of the metal tube before I could place the other end of the rubber hose to that line. Before locking everything down I did hook the rubber hose from the metal tube, which was coming from the fuel pump, to our Portable Fuel System's fuel pump to attempt to draw fuel from the truck's fuel tank. This would tell me if there's any fuel in the tank prior to moving forward. I added a short piece of hose to the output of the fuel pump and placed the hose in the fuel can of the unit to deposit any pumped up fuel into the can. After hooking up the fuel pump and running it a short time, fuel started coming out, letting me know there was still fuel in the tank. Of course the fuel was old, but it was volatile enough that it should still run the engine. From there I replaced the rubber hose on the carb, the borrowed a battery from the DOB truck and got things set up to attempt a start up.
The Edelbrock carb bolted down onto intake. Note the long bolt holding the throttle cable onto the throttle.
Rubber hose hooked up to metal tube from fuel pump and routed over to Portable Fuel System for testing.
Fuel being pumped from metal tube showing there was fuel in the tank.
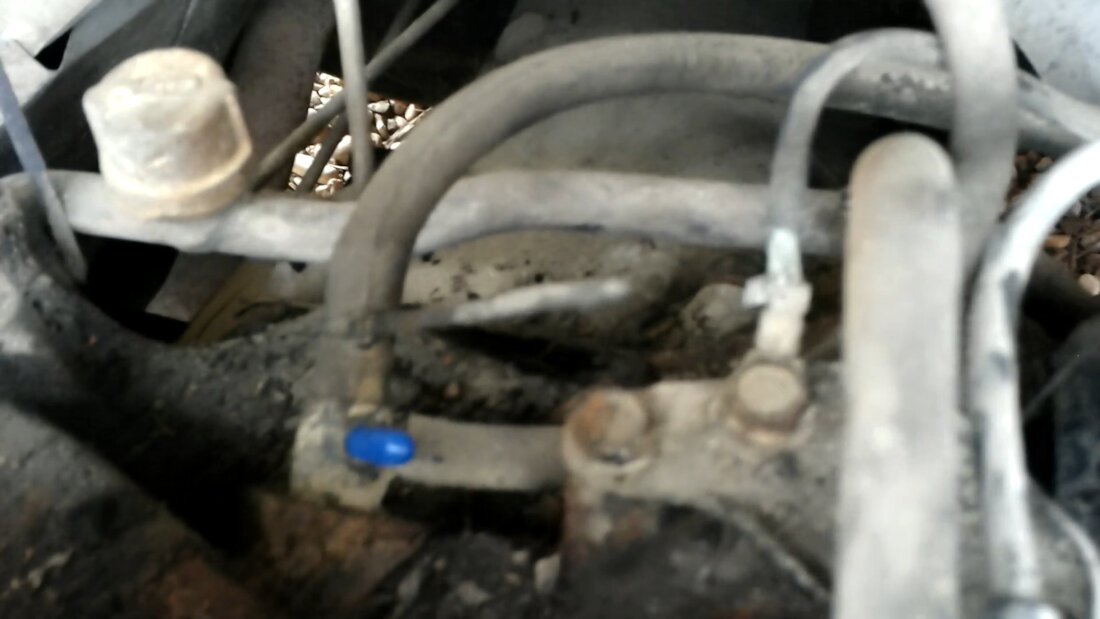
Blue cap placed on metal nipple where vacuum hose was once plugged up.
Vacuum manifold with two short hoses used to cap off two pairs of nipples. Note rubber hose hooked up to metal tube at bottom right of pic.
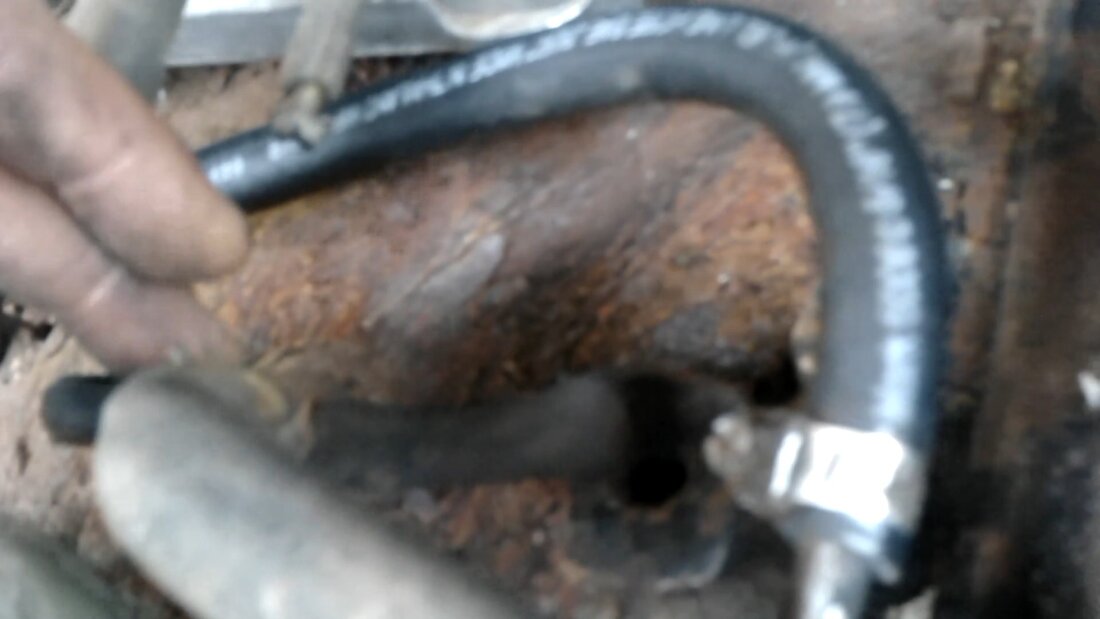
Rubber hose hooked up between carb and metal tube.
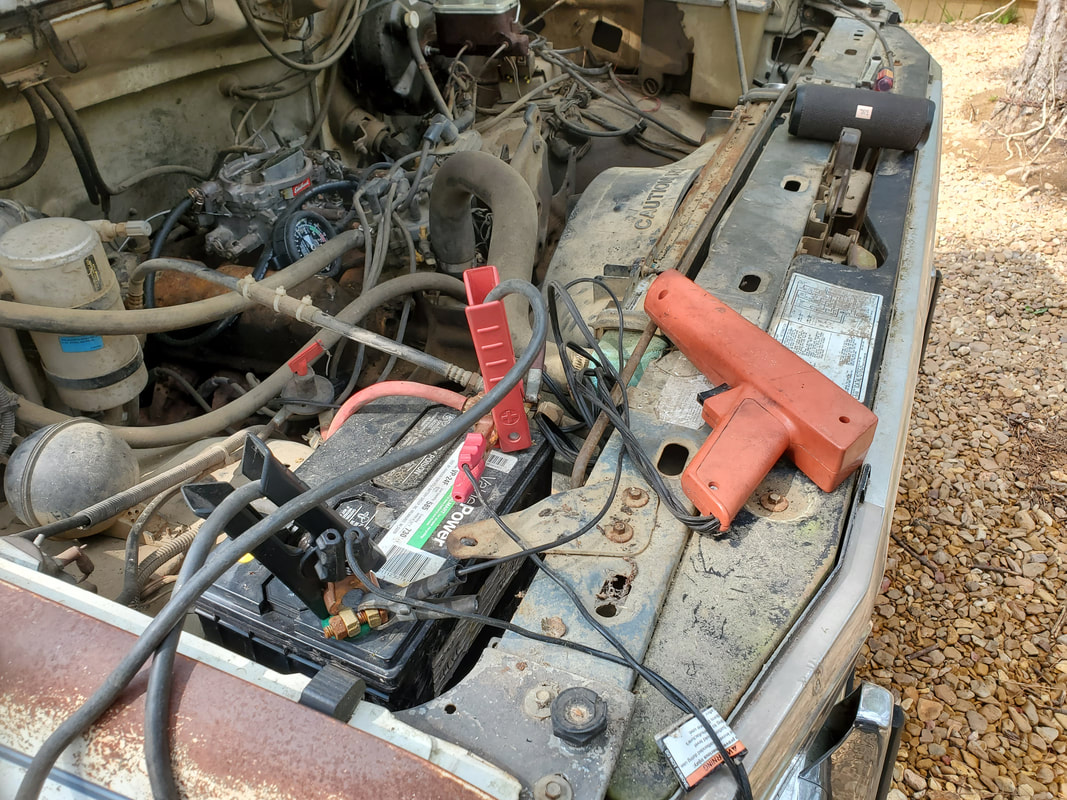
Battery, rubber hose, and everything else associated with engine hooked up, rendering the truck ready to start up.
I shot starting fluid into the carb to crank it, getting a sputtering response. From there I added some fuel to the carb's float chambers, but not enough. I then ended up filling the Portable Fuel System and hooking it up to the rubber line feeding the carb in order to fill it up with fresh fuel. From there I propped open the choke and attempted a start up. I ended up successfully getting the engine started, but had to play with it to get it where it would idle, around 800 rpm give or take, with the choke partially open. I tweaked the idle and air/fuel adjustments to see if I could get the engine to run with an open choke to no avail. The fuel being fed to the carb is old so I'll probably have to run this fuel out and add fresh fuel and maybe even add a manual choke cable temporarily to try and tune the engine where it will run properly under all circumstances. I was able to let the engine run at a somewhat high idle for some time before finally shutting it down and during this time the engine ran smooth with only a little smoke from the shitty gas it was drinking. I even put the transmission in gear to test, but the brakes appear to be seized, not allowing the truck to move. I do want to address the brake issues so once I replace the one bad tire on the truck and tune the engine, I can test drive this thing. I want to verify that the powertrain is working properly so when I pull it and install it in the Rustang, I'll know that the car will be immediately able to drive once everything is hooked up.
With the failure to move the truck, the next thing I had to do was jack the rear of the truck up to look at the brakes. I checked the parking brake cables and pedal and confirmed that hardware was fine. After pulling off the flat tire on the left side, I tried to turn the drum to no avail. Next the baby sledgehammer came out but surprisingly the drum came off rather fast after some beating, quicker than a frozen drum typically does. An inspection showed that the internals were in rather good shape for a truck that's been sitting for a couple years in a moist environment. Luckily I have a spare tire/rim that holds some air so I won't have to worry about replacing the flat tire for the most part. As far as tire longevity, that I don't know. Next I moved to the right side. The rim on the right side was a little ugly, with the center cap section being rusty to the point that it looked like the center could break off with minimum effort. I inspected the inside of the rim to confirm the lug section was still intact enough that the threat of the whole center hub breaking off was minimal. Even then, I will still be exercising caution when testing this truck. Unfortunately the drum on this side wasn't a pushover. After beating the shit out of the drum I ended up breaking the outer lip from the drum with a clean break all around. Pissed, I hit the center of the drum a couple times hoping it would just shatter but to my surprise the drum popped off intact like nothing was wrong. Inspecting the drum to see that it was still intact, minus the outer lip, I set it aside and checked out the internals, seeing that this side too was in good shape. I reinstalled the lip-less drum and the rusty tire/rim and secured everything. I will still need to bleed the brakes all around, luckily the wheel cylinders were in good shape and the bleeder valves opened up with no problem. I have a manual choke kit en route as well for the carb so we will probably have this truck rolling more sooner than later.
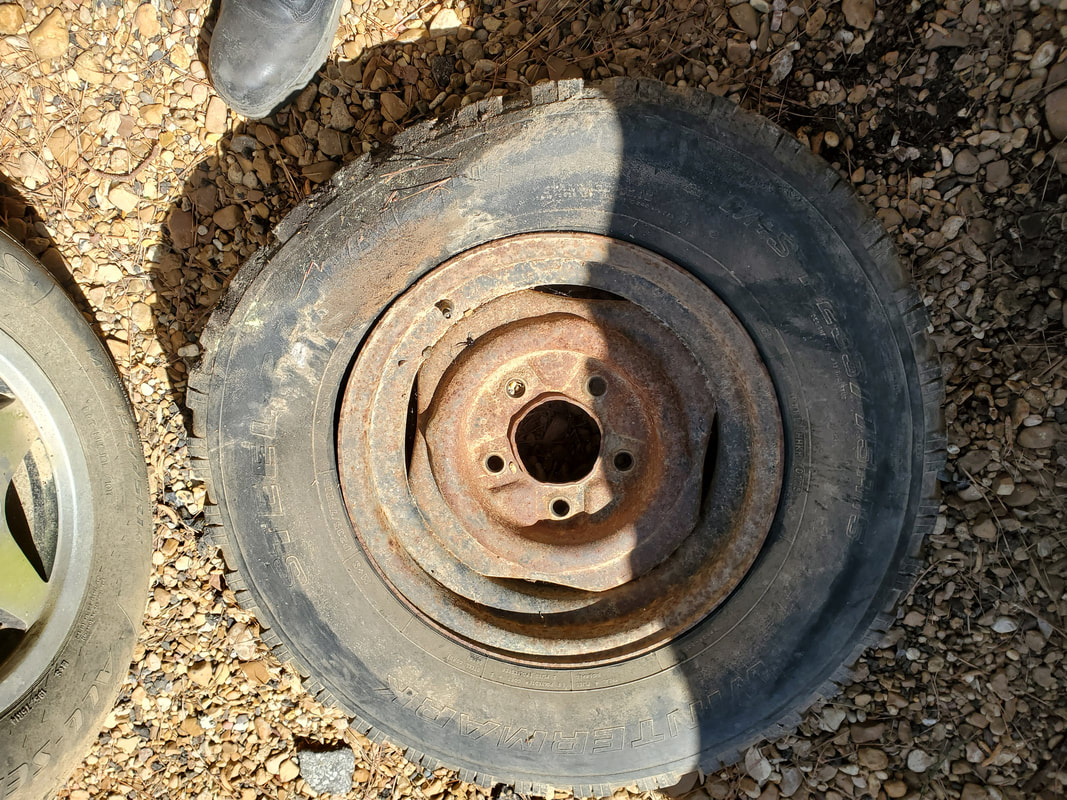
Left rear rim/tire with flat tire that won't hold air, this tire will most likely need replacing, but at least the rim is in good shape.
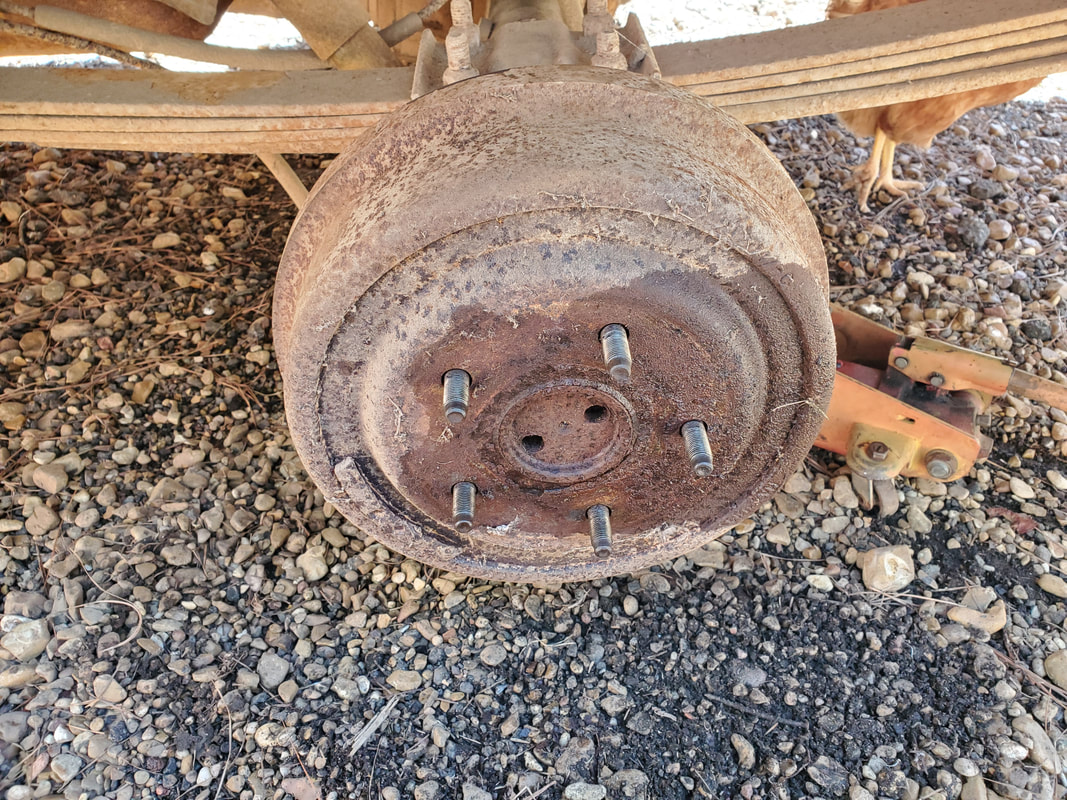
The left drum after reinstalling post inspection. Everything on the left side checked out ok.
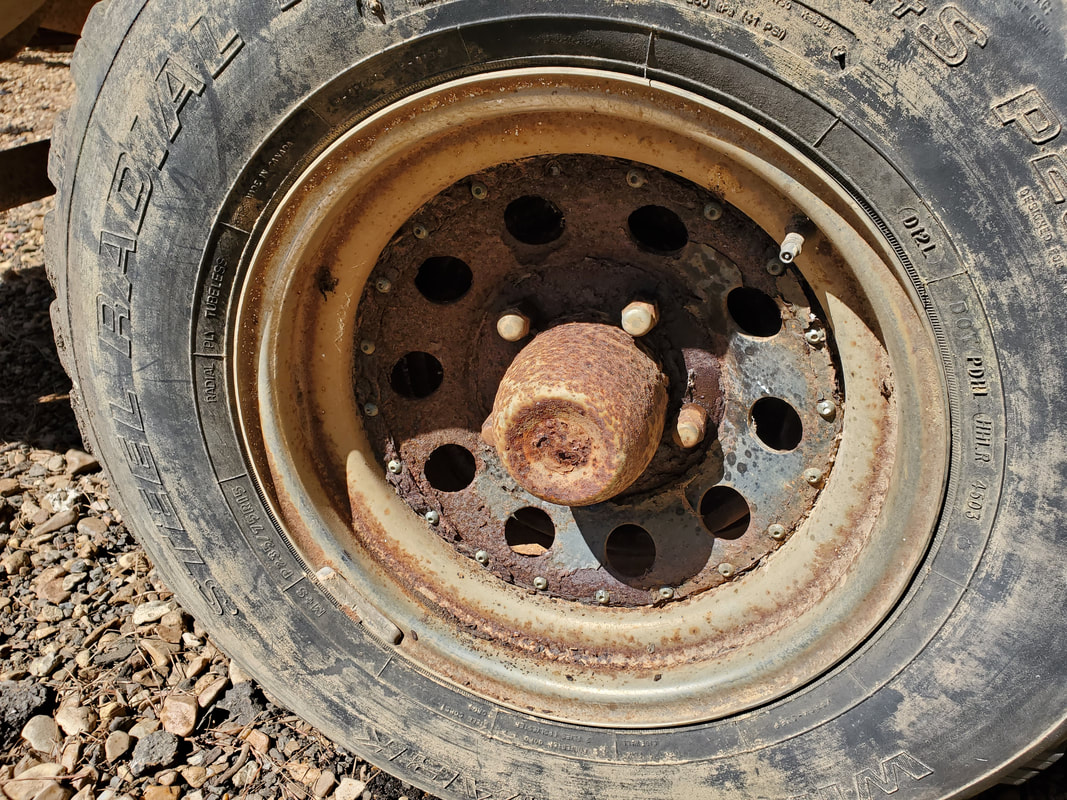
Right rear rim with rusty center cap section, this rim looks rather rough, but the tire holds air fine.
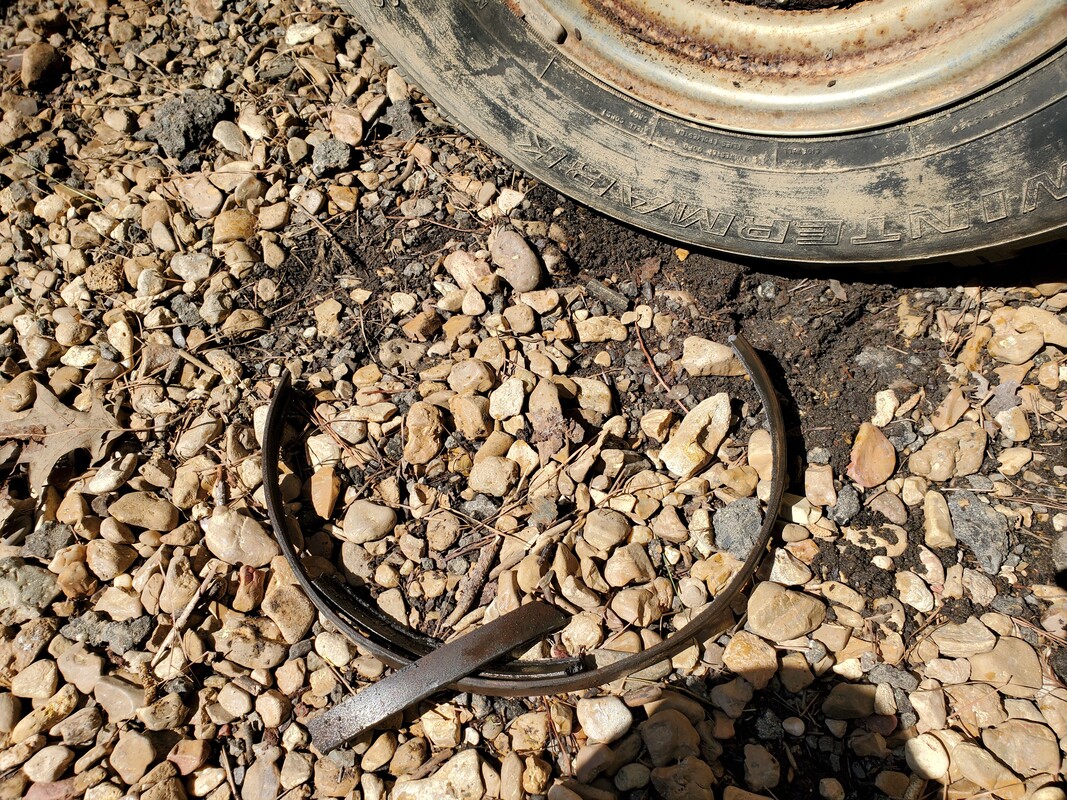
Outer lip of drum that was knocked off after repeated beating of the drum to facilitate its removal.
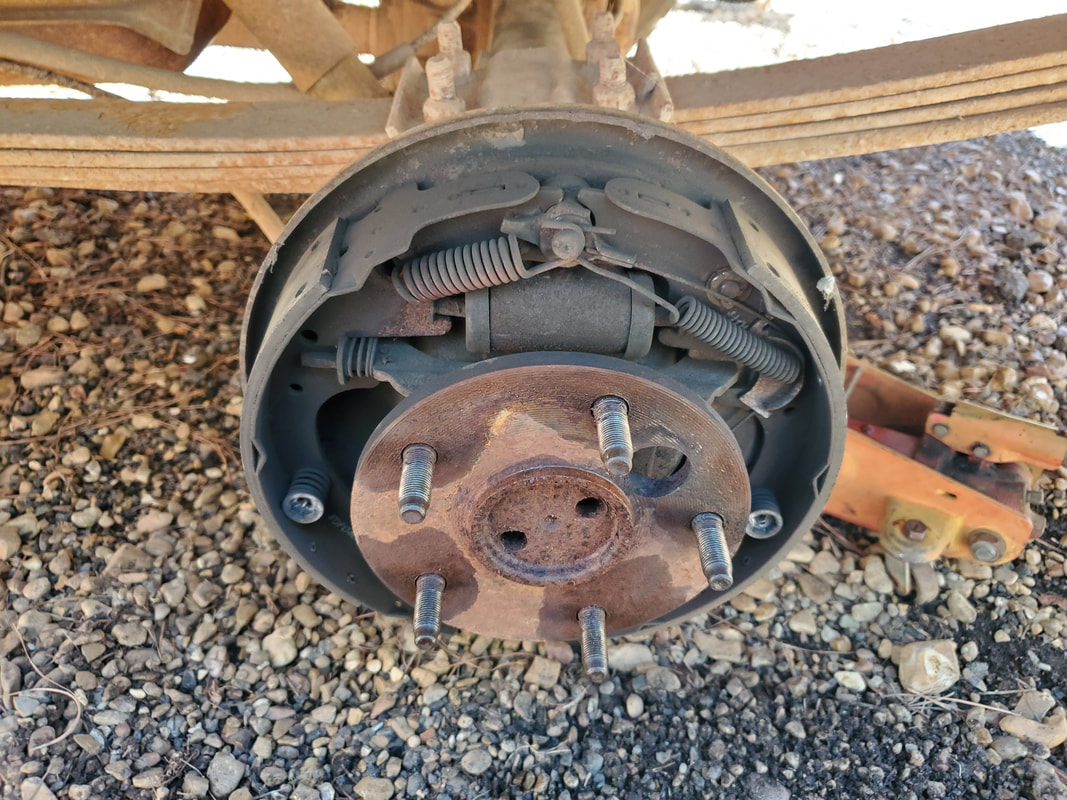
Brake pads and drum brake internals, all in good shape. Brakes just need to be bled and we're ready to roll.
After getting the brake issue resolved, I moved on to the choke cable kit. This aftermarket kit which can be had from most auto parts stores, comes with the necessary brackets and pieces to hook up a manual choke setup to most carburetors, even those with electric or heat chokes. Luckily the carb I'm currently using has a bracket for clamping a choke cable so half the battle is won on this one. All I had to do was route the cable through the firewall to hook it up to the carb and secure the knob end under the dash. I ended up routing the cable through a rubber cap in the firewall, prying it away just enough to run the cable through without actually removing it. I routed the cable behind the engine and over to the carburetor, securing it to the bracket and the choke lever on the carb. Inside the cab the bracket on the knob end was secured under the dash with one of the existing screws, holding that end of the choke cable in place in an inconspicuous spot. Tests showed me that the choke worked as intended. I was able to manipulate the choke inside the cab while trying to crank the engine and see if I can get it to idle. I still couldn't get the thing to idle at any less than around 1000 rpm. This was especially so when it came to putting the engine in gear. I had to have the choke mostly closed and at a high idle in order to allow the truck to stay running whether in gear or in park. Of course the brakes held enough to not let the truck roll away when in gear and I was able to move the truck with the power to let me know the transmission should be good. I'll still have to get things tuned enough to try a road test to confirm 100% that the transmission will shift as intended. I will have to put the timing light and vacuum gauge on the engine to adjust timing and the carb with some level of precision and make one more check to make sure I didn't miss a vacuum port somewhere that can be having the truck running in a super lean condition. In the meantime I cleaned out the bed, removing the larger stuff to the burn pile or outgoing trash while raking out the pine mulch to be relocated to the burn pile. After hosing and sweeping out the remnants, I finally got the bed cleaned out enough to be worthy of a picture.

Choke cable end attached to lever on carburetor, also note new fuel hose attached to carb, routed to end of metal fuel line that was broken from old carburetor. Also note how choke cable is routed down to the rear of the engine.
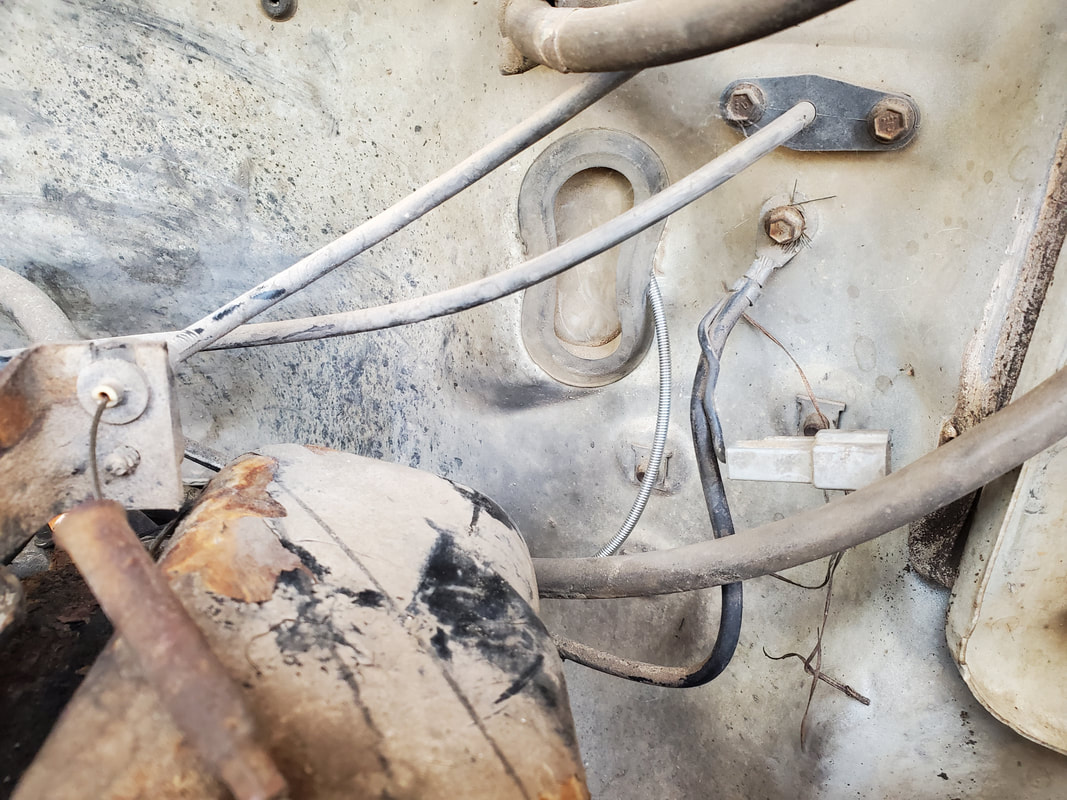
Choke cable routed around the rear of the engine and through the rubber cap in the firewall.
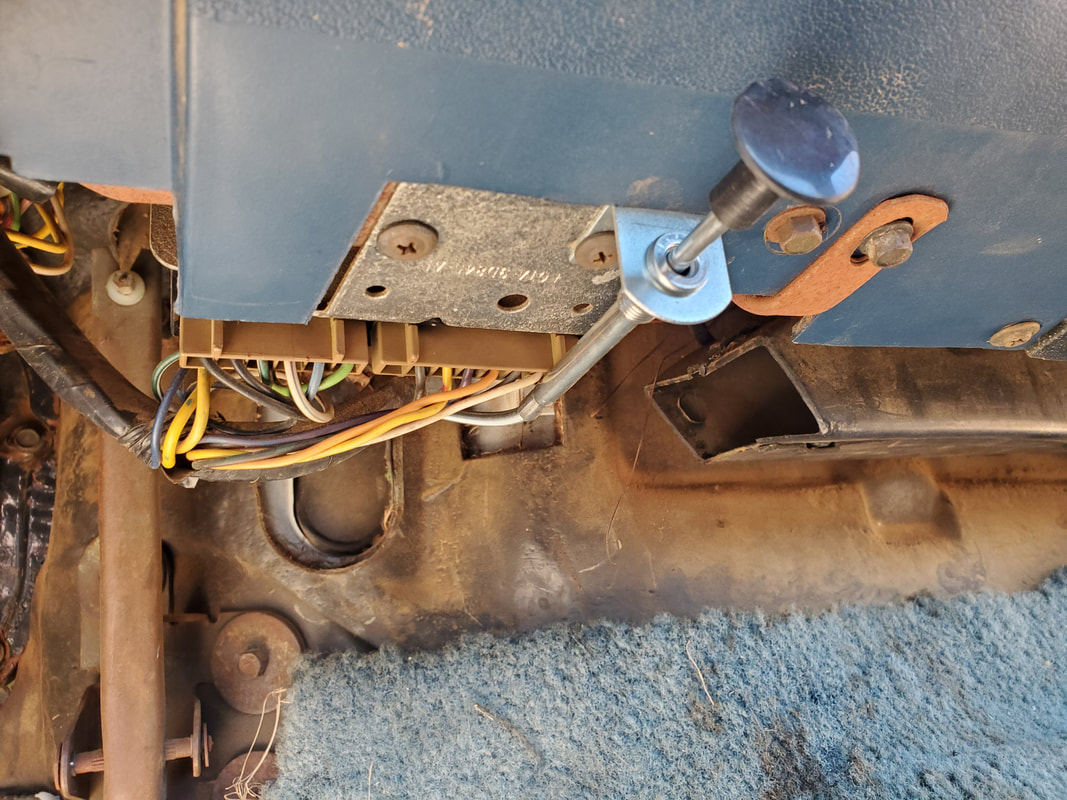
Choke cable knob end with bracket securing cable under dash using an existing screw.
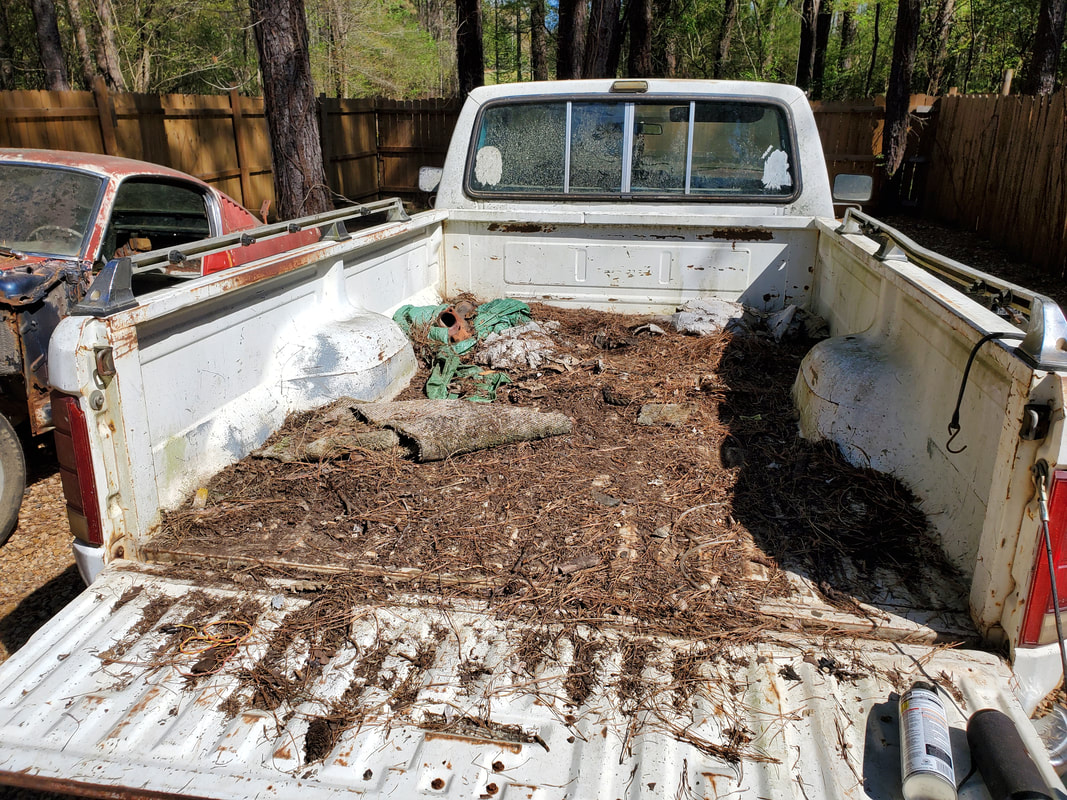
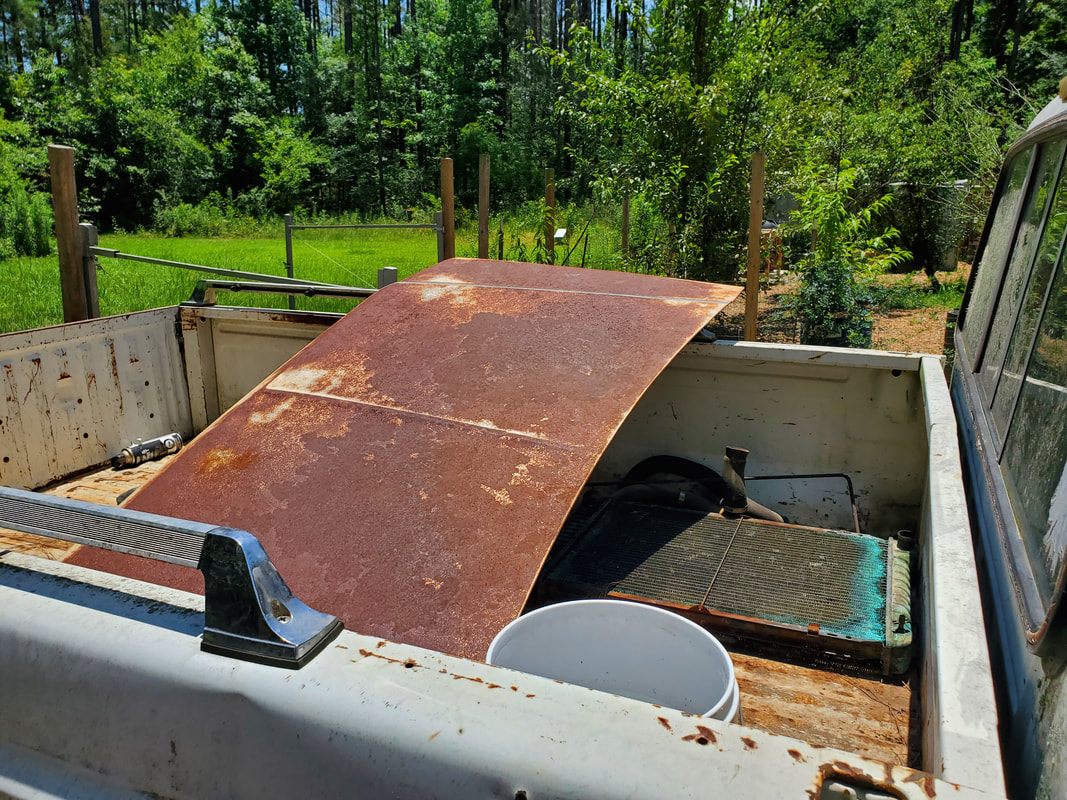
Truck's bed full of pine mulch and other large trash that was sitting in the bed for who knows how long.
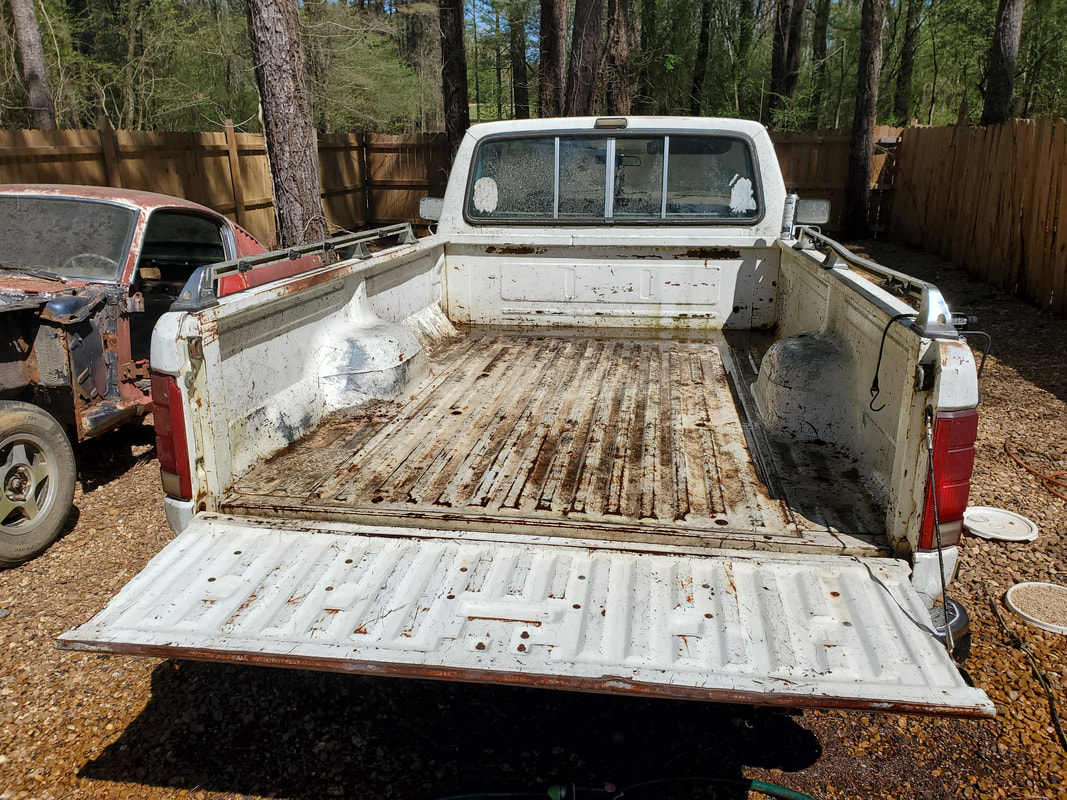
The cleaned out bed, looking better than it probably ever did, making the truck look more pleasing to the eye and more pleasing to a potential buyer, even after I pull the engine/transmission out.
With the engine prepped up and able to start up easily with the choke, it's time to try and tune things. This involves putting a timing light on the engine, clamping the inductive head on plug wire #1 and checking for timing, then installing a vacuum gauge on an engine side vacuum port to measure vacuum while the engine is idling then try to adjust the air/fuel screws on the carburetor to get maximum idle vacuum. Looking at the timing marks on the balancer, I ended up having to mark them with a black marker due to my being unable to see the marks even with the strobe on the timing light. On the carburetor, I really didn't get much of a reaction on the vacuum and idle when I adjusted the screws, one screw barely made a change while the other was no action. Whether I have something up with the carb as far as an air/fuel passage being clogged or something else on the intake side (since this is an aftermarket carb and spacer going on a stock intake), I couldn't get any real reactions with the air/fuel screws. At the same time I started getting what sounded like a rod knock, if it is that, its only one, because it sounds like one thing tapping versus multiple rods rattling. Because of this sound, I decided to try changing the oil, replacing it with 20w oil and adding some oil treatment to see if this would quiet things down. Even though it didn't, I proceeded forward. I ended up having to replace the starter since I was having episodes of starter binding during cranking, especially with the advanced timing. It was more pronounced when the engine was hot but after several cold start bind ups, I finally decided to change out the starter.
Luckily I had several spares, due to the fact that all the Mustangs and other V8 Fords I've messed with, car and truck alike that were pre-EFI, shared the same starter. After replacing the starter and getting a good cranking, I went ahead and took the truck for a short test drive up and down the driveway to verify that the transmission was shifting properly as well as grabbing good so I can at least rest easy in knowing I won't have to rebuild the transmission. After getting things adjusted and tweaked good enough to allow the engine to stay idling while in gear, we hopped in and ran up and down the driveway a couple times, then up and down the main gravel road going to the main road. Even though it seems like the tranny was shifting, it was doing it rather softly. I even manually shifted the rig from 1st to 2nd to verify upshift, then revved up to a speed that was well above the normal 2-3 shift and shifted up to verify the shift up, then downshifted to verify RPM change and back up again. Either this transmission is set up with a soft shifting valve body set up, or the bands need tightening so the drums inside can be grabbed more firm during shifts or its just worn enough that it still shifts but does so softly. Worst case will be me putting a reverse manual valve body in the transmission to shift the thing manually like I did with the C4 that was behind the 351 that was in the Rustang and later behind the 200 6 cyl in the same care. Because I would prefer to install an actual manual tranny in the car later, I will do what I can to avoid being tempted to perform this action with the transmission.
Inductive timing light, a rather old unit, hooked up to the battery and #1 plug wire pending the timing check.
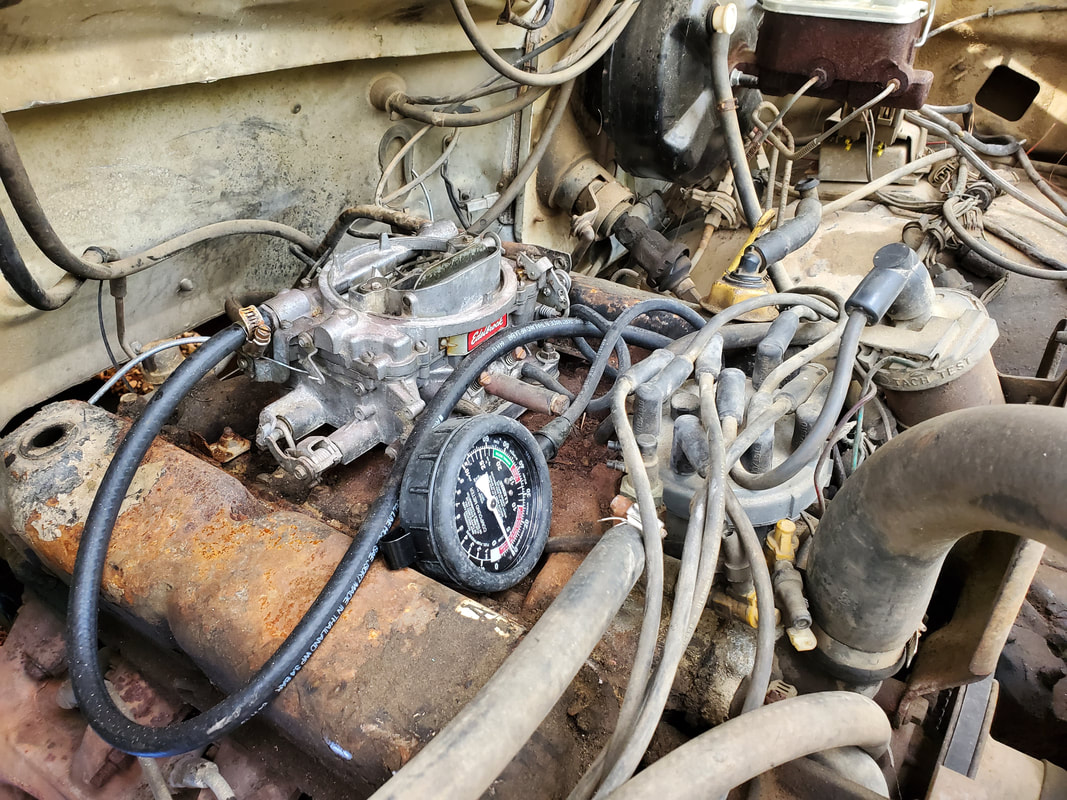
Vacuum gauge hooked up to engine side port on carburetor, this is the port that feeds the vacuum advance diaphragm on the distributor.
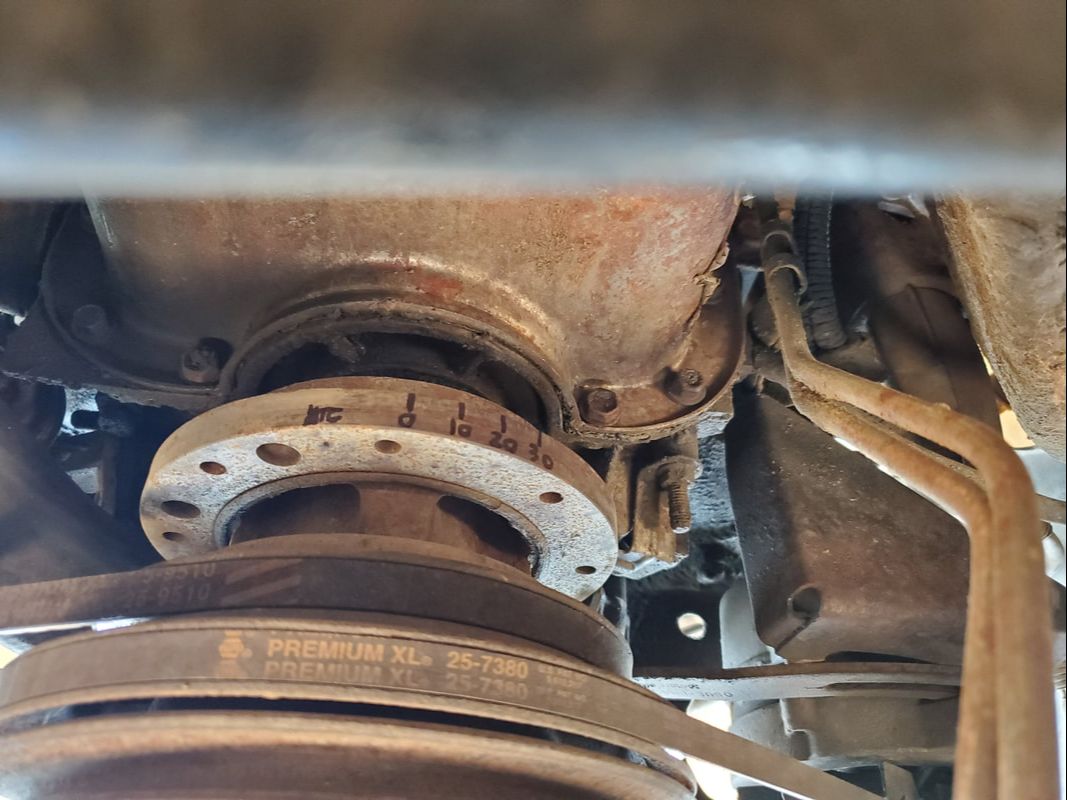
Timing marks on the harmonic balancer marked in black marker to make them more noticeable through the eye loop on the timing cover.
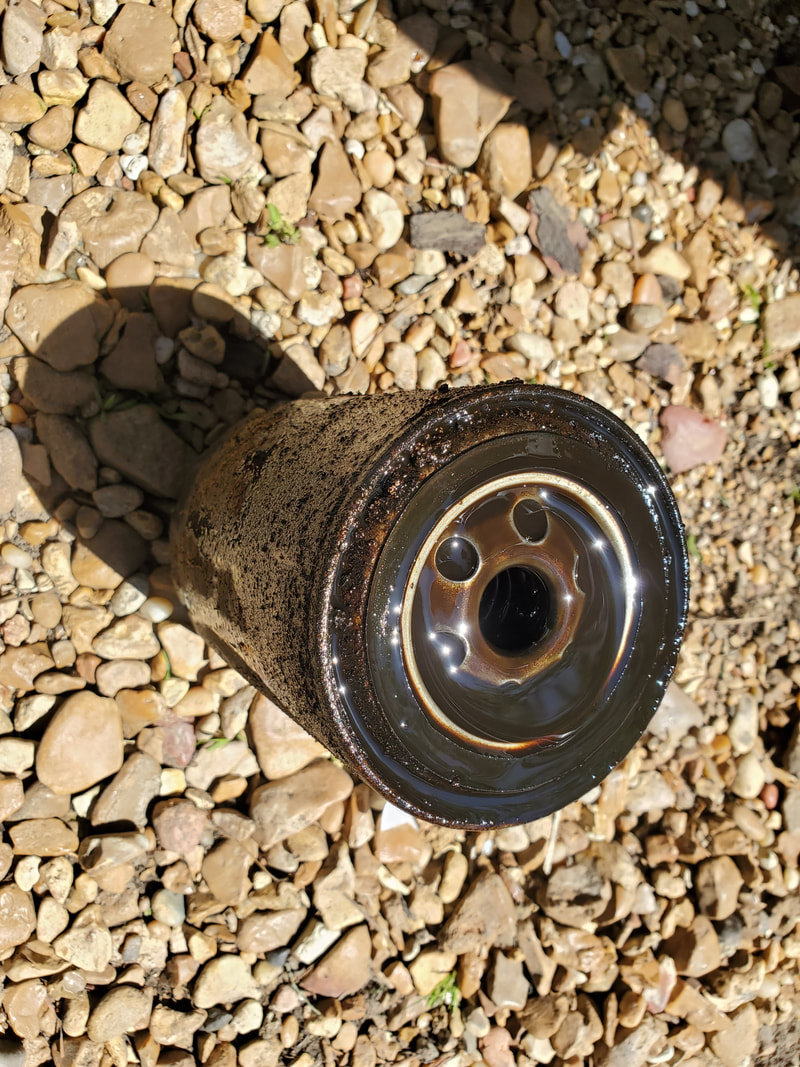
Old oil filter pulled from engine, along with the crude that was passing off as motor oil.
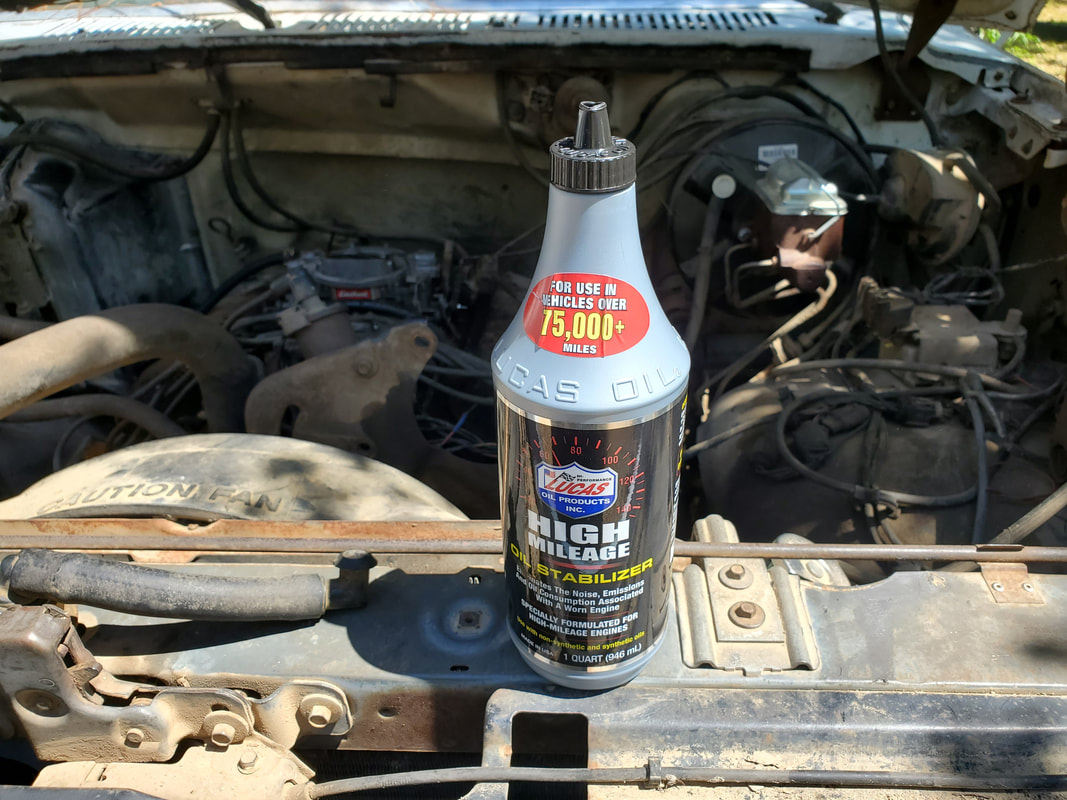
Along with the heavy 20w motor oil, this oil treatment, which outside of any additives, is essentially gear oil in a bottle would hopefully quiet the engine down, it didn't.
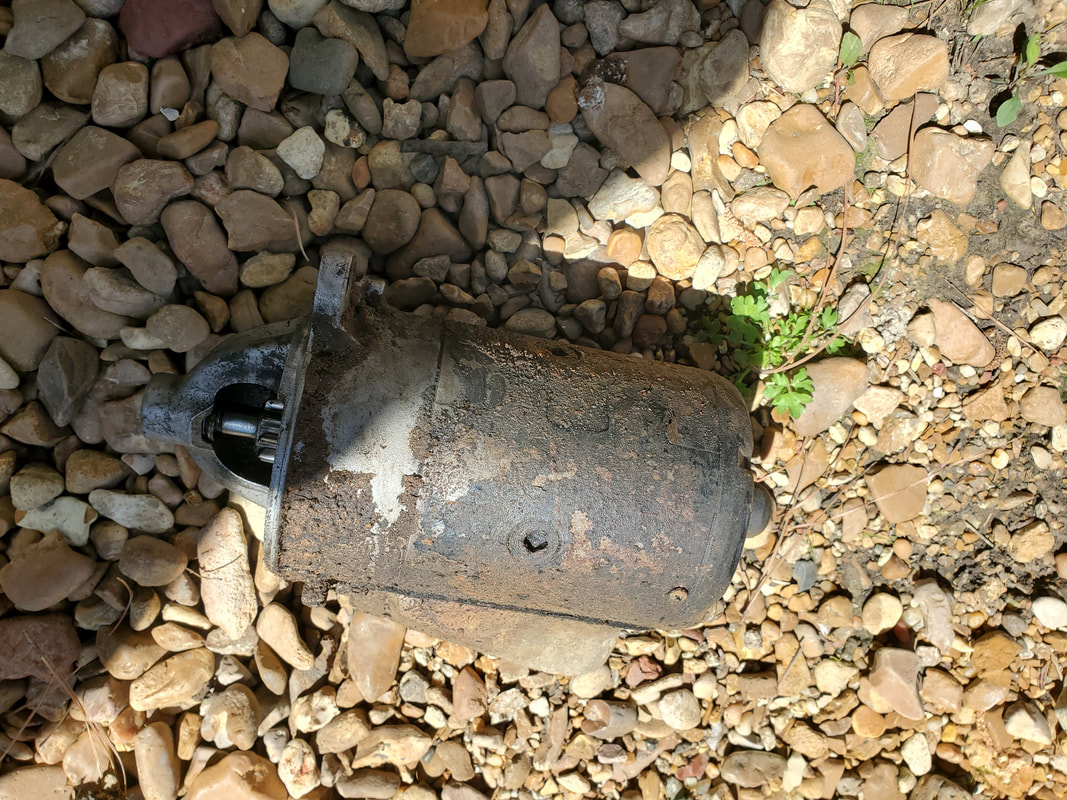
Old starter removed from engine. Even when trying to start the engine cold, this starter still got rather hot, it was bad.
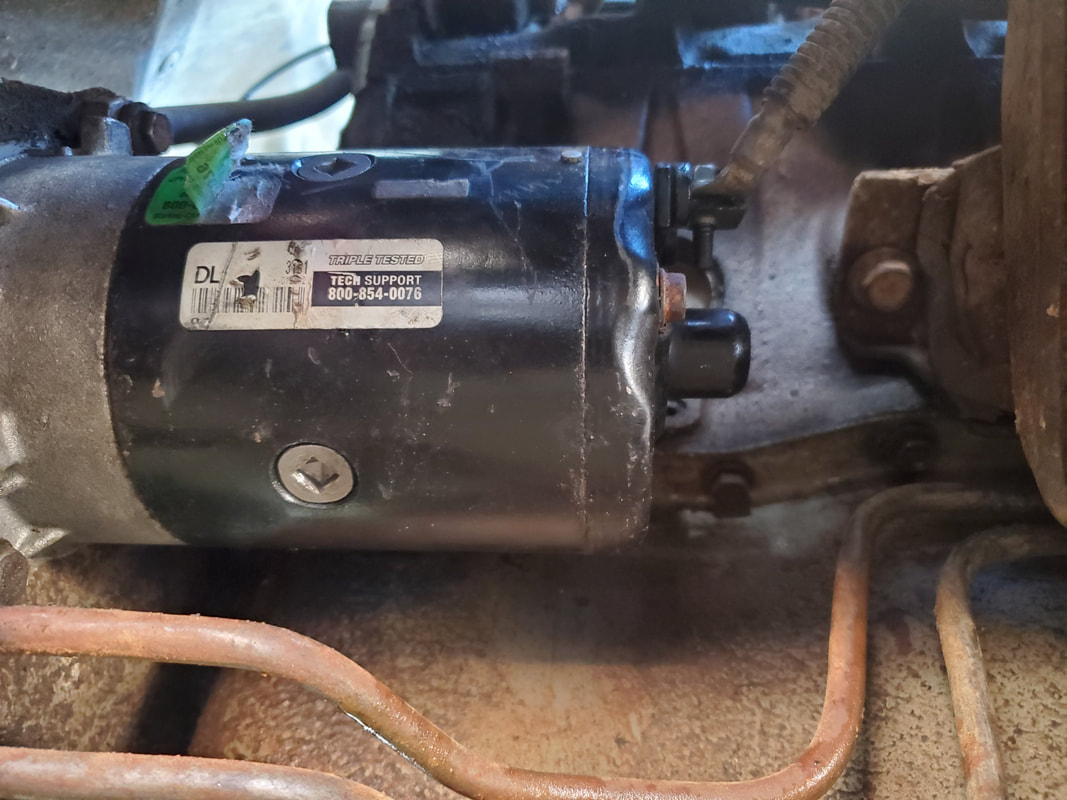
The nice slightly used spare starter I had in the storage trailer from my previous exploits with SBF V8's, this starter spun the engine around like a top.
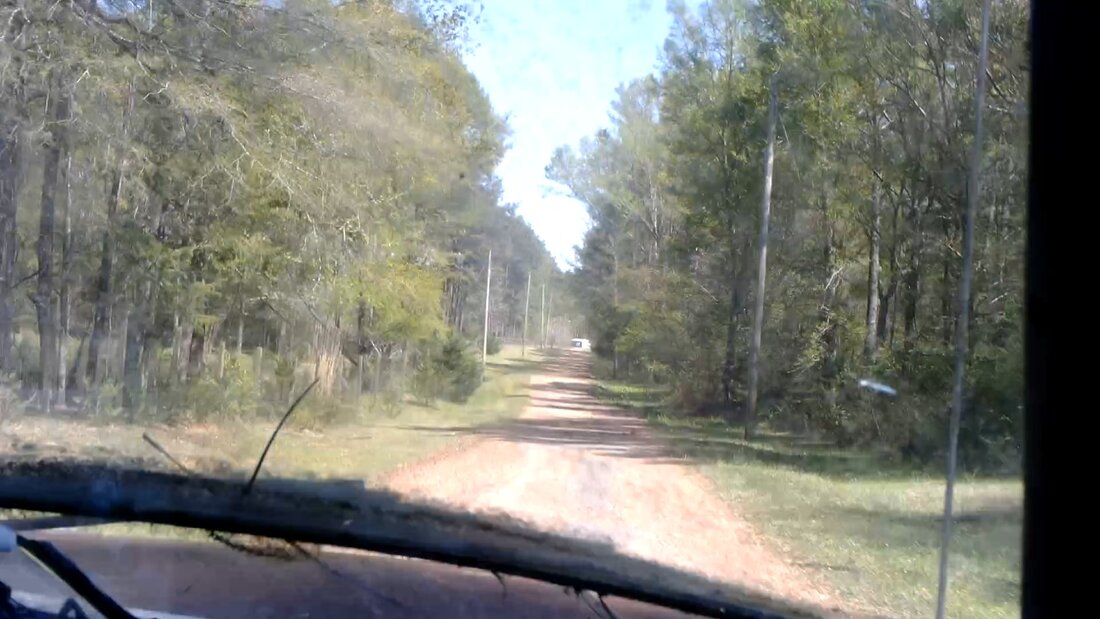
Test driving the truck down the gravel road leading to our driveway.
|
|
|
|
|
|
|
|
|
|
|
|
|
|
|
|
|
|
|
|
|
Since the old Edelbrock was a backyard rebuild, which is nothing but replacing gaskets and the other small pieces that come in the kit, it couldn't be expected to work perfectly compared to a carb that underwent a complete cleaning with the body as well as parts replacement. This is also the same problem that we have with the Edelbrock in the FMT, another backyard rebuild that didn't exactly work out to our expectations. Because of this I decided to take advantage of a generic Edelbrock carb I got online for $225. Just after I grabbed this thing the price went up to near $300. My plan here is to put this carb on the 84's engine to see how the engine runs with a new air/fuel delivery system. Any problems after that would be ignition related, barring any catastrophic failures internally with the engine. I want to be able to determine what the condition of this engine is before removing the powertrain from the truck so hopefully this new carb will allow me to better tune the engine and do another test drive of the truck before the powertrain removal. I also want to check out the weird tapping sound I heard coming from the engine the last time I ran the thing. The last time I had this kind of noise was on the 69 Mustang when it still had a 351W. The sound turned out to be a warped flywheel that had a couple torque converter bolts hitting the back of the engine block as the flywheel spun around. Either way, whether I need to rebuild this engine or can move right to getting ready to drop it in the 69 Mustang, this engine is going to be coming out of this truck more sooner than later.
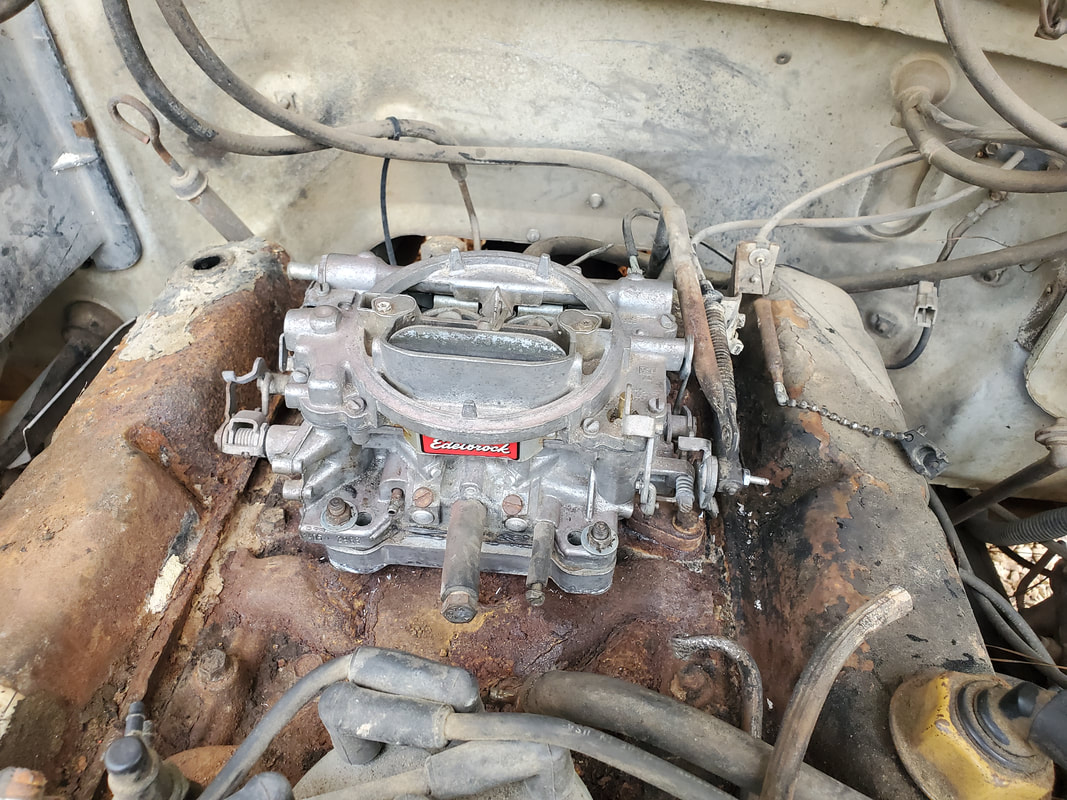
The old Edelbrock that was used to test this engine out, it needs to be swapped out and this unit sent off for a professional rebuild.
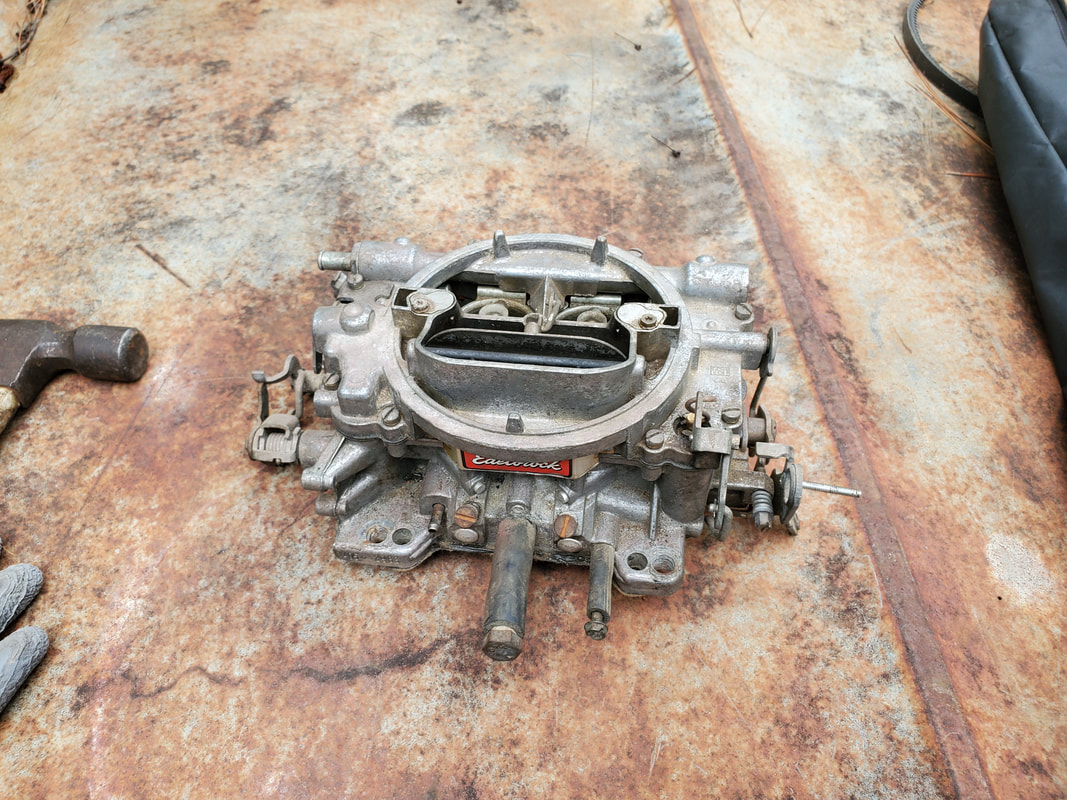
The old Edelbrock after removal. After disconnecting everything I had to pry the carb free since the spacer and carb were all glued together and glued to the intake.
The new faux Edelbrock with the spacer after removing it from the old carb and scraping all the old gasket material from it and the intake surface.
The new faux Edelbrock mounted in place on the intake with fresh gaskets, not glued down.
After putting the new carb on and attempting to crank the engine, I ran into a problem where the starter was skipping on the flywheel. Every once in a while, the drive gear would grab the flywheel enough to spin the engine over but at some spots the thing would miss, and I'd just get the grinding that is evident of either a warped or partially stripped flywheel. Just to be sure it wasn't a starter problem, I swapped out the old starter with another one and pretty much had the same results. Because of this roadblock, I finally just said screw it and pulled the carb off, especially since I was also trying to bring the FMT back online with this carb. Of course the new carb worked wonders on the FMT with it running and driving nicely. As for our donor truck, we finally come to the point where the engine and transmission might as well come out, especially since I would have to pull things apart anyway to replace the flywheel. With that, the process was started to get things disconnected so I can get the crane staged and hooked up to pull the powertrain out.
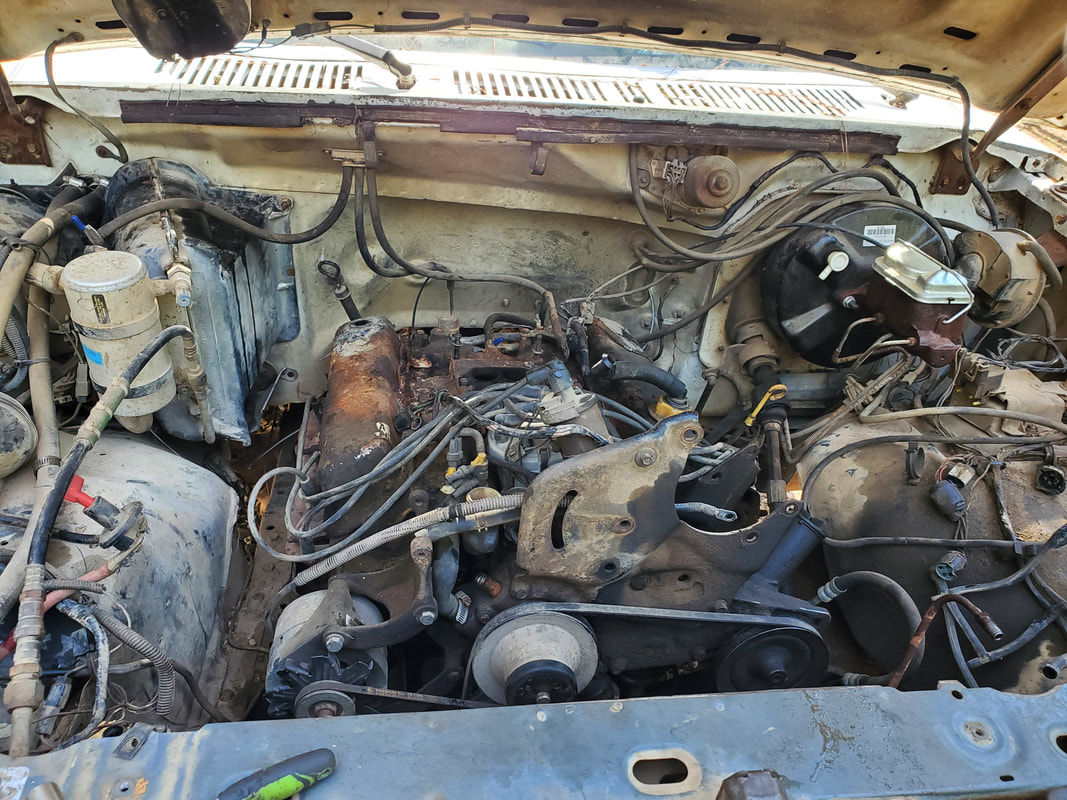
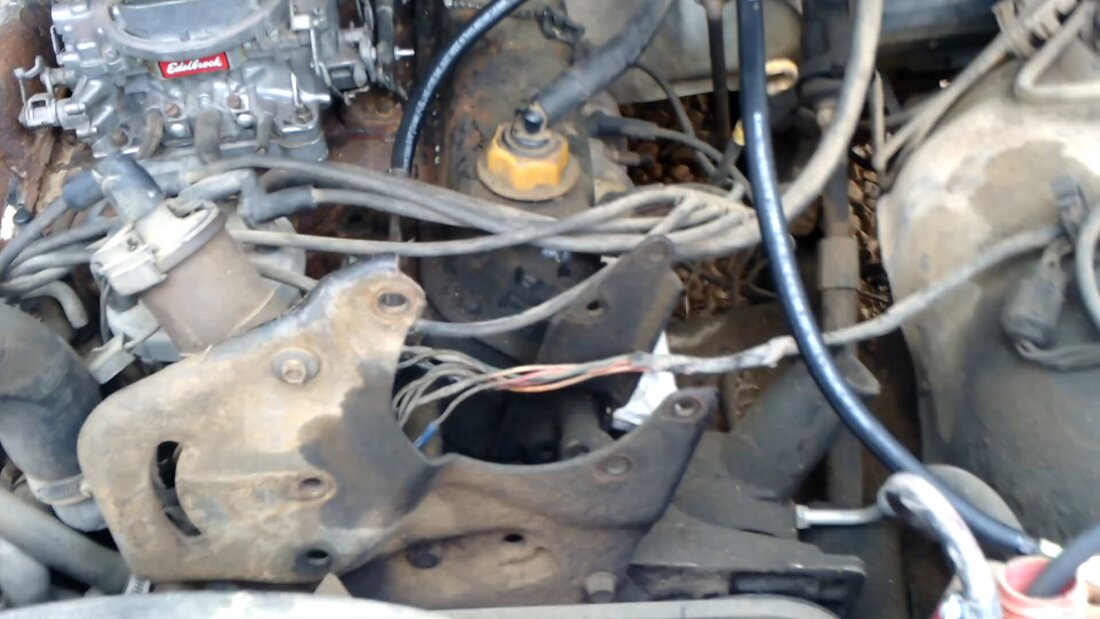
The engine after removing the carb and radiator, fan, shroud and hoses.
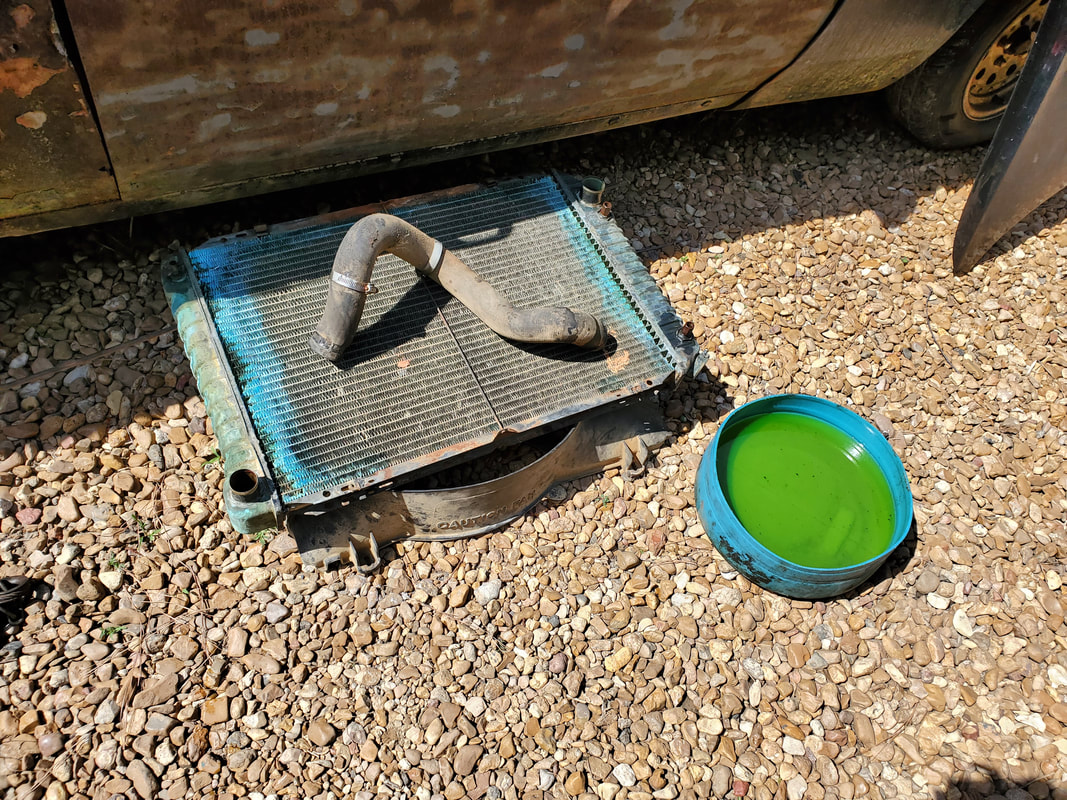
Radiator and parts, along with drained coolant, using my plastic barrel catch pan.
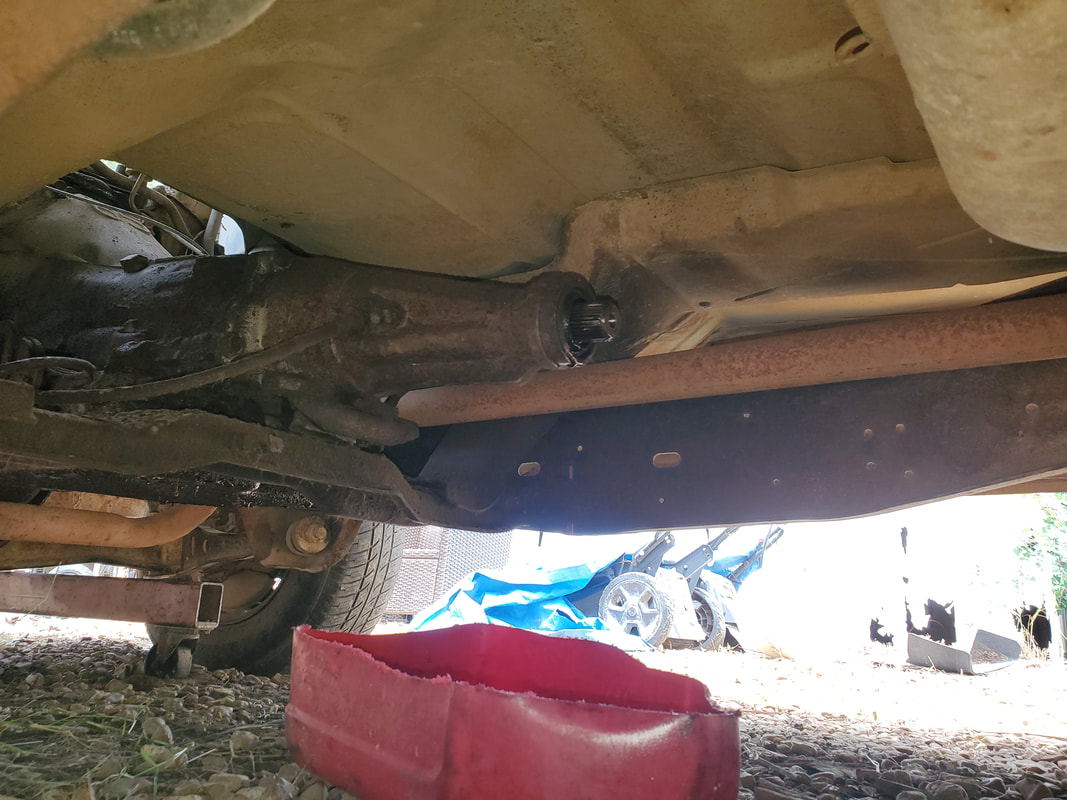
Transmission draining oil after pulling driveshaft, using gas can catch pan. Shifter linkages and oil lines are disconnected as is the crossmember mount. I'll have to jack up the tail on the transmission for the mount to clear as we extract the powertrain.
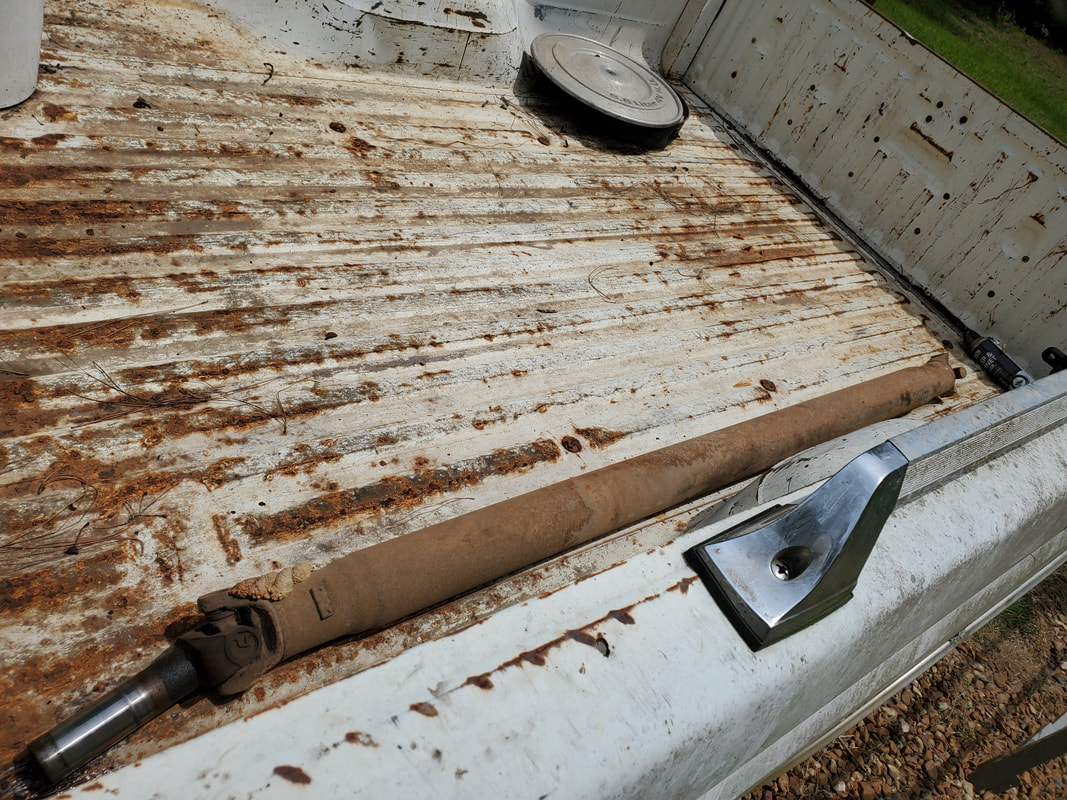
Driveshaft stored in bed of truck. All the other parts will end up here as well since the truck body will be for sale as a complete unit minus the engine/transmission. If you have those two components, you can get this truck back online. Even the exhaust system will be left behind as I'll be using headers on the engine in the Rustang.
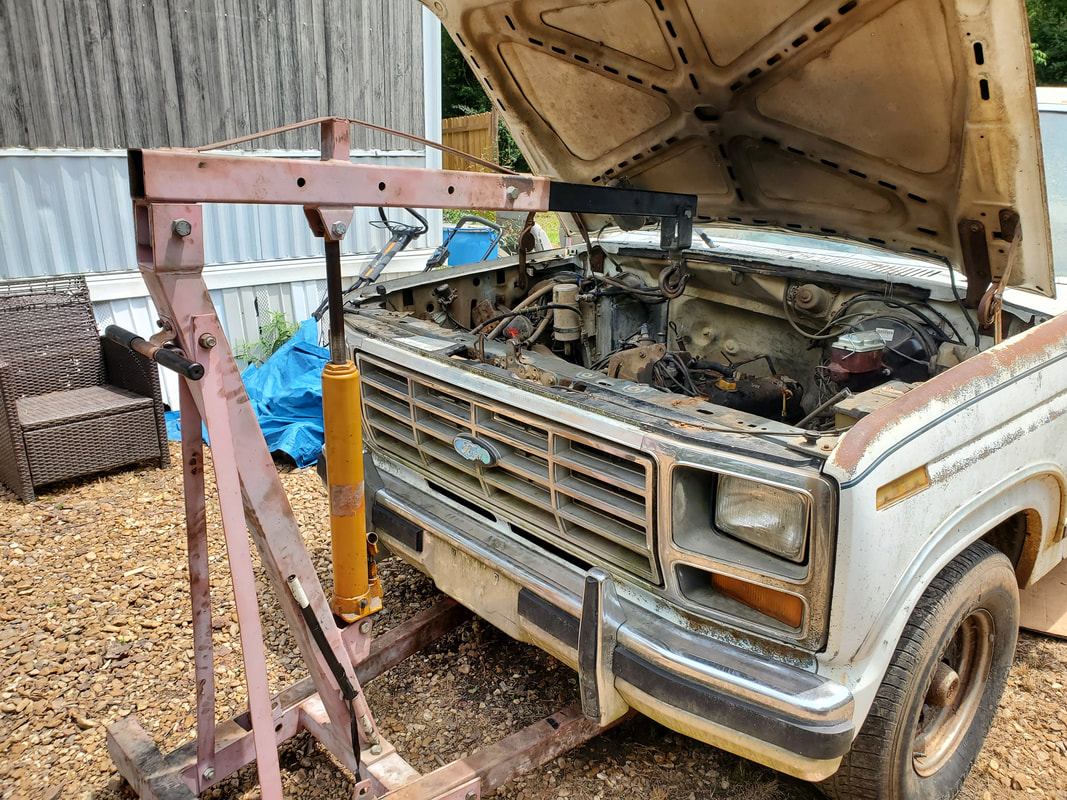
Engine crane staged over the truck. Next thing will be to remove the hood and get a truck or tractor behind this truck to pull the body back as we pull the powertrain out.
With the crane set up the next order of business was to hook up the carb plate. The studs on the intake are long so to be able to secure the base I had to use nuts to serve as bushings to cover the shafts of the studs to allow the small nuts to hold things down. I was nervous as to whether the studs would hold up to the weight of the engine and transmission upon them. Anyway, from there the hood came off and along with the other loose parts pulled from the truck, the hood went into the bed for storage since this truck will be put up for sale after the powertrain is removed. The last thing I had to do was stage the S10 behind the F150 so I could use it as an anchor to pull the truck back against while extracting the engine. With the powered winch we use, I wouldn't even have to power the S10 to pull the truck backward from the engine crane. With everything in place, I started jacking the engine up to get it cleared from the mounts on the truck. The soft ground under the crane started swallowing the legs of the crane as the weight was completely on the crane. As I pulled the truck back, once the engine's oil pan was clear of the radiator support, I rotated the transmission tail shaft to get the transmission oil pan resting on the top of the body as well. Once the powertrain was completely clear, I was able to pull the truck all the way back, free from the engine crane and powertrain. I pulled the F150 out into the yard enough to allow me to back the S10 up to the engine crane to load the powertrain into the bed, along with the engine crane. With the dismantled crane and powertrain in the bed, I took everything up to the garage and offloaded everything, putting the powertrain in the back of the garage to get it out of the way of the main door and the surrounding area. With that, I can now pull the engine from the transmission so I can go through things on both units and fix whatever may need fixing in order to make things ready for the installation of the powertrain into the Rustang later in the future.
Truck with crane hooked up via carb plate. Hood is removed to allow for clearance. Even with the spacer nuts on the carb studs, hopefully the studs hold up to the weight of the engine on them.
Hood, along with other parts pulled from the engine bay, stashed in the bed of the truck. These parts will obviously go with the truck when its sold.
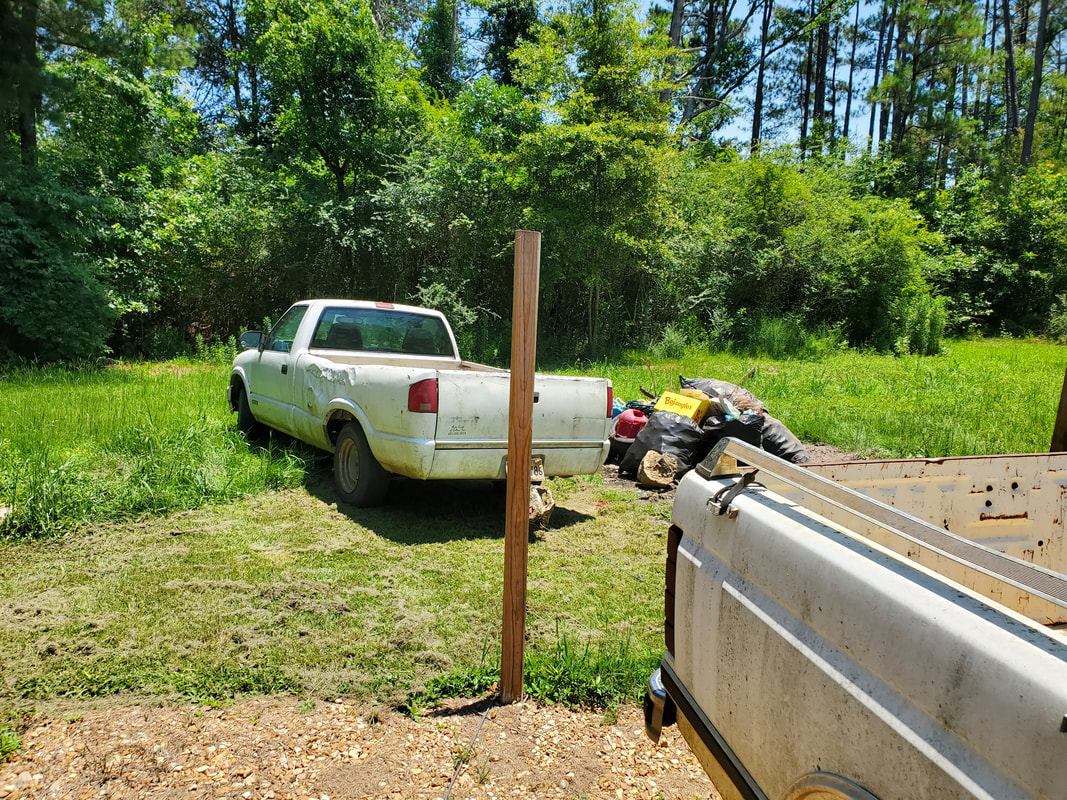
S10 staged behind F150 with winch and chain hooked up between the two. Even though S10 is parked at an angle to clear the garbage pile, the power winch will allow me to pull the truck straight back between the fence posts.
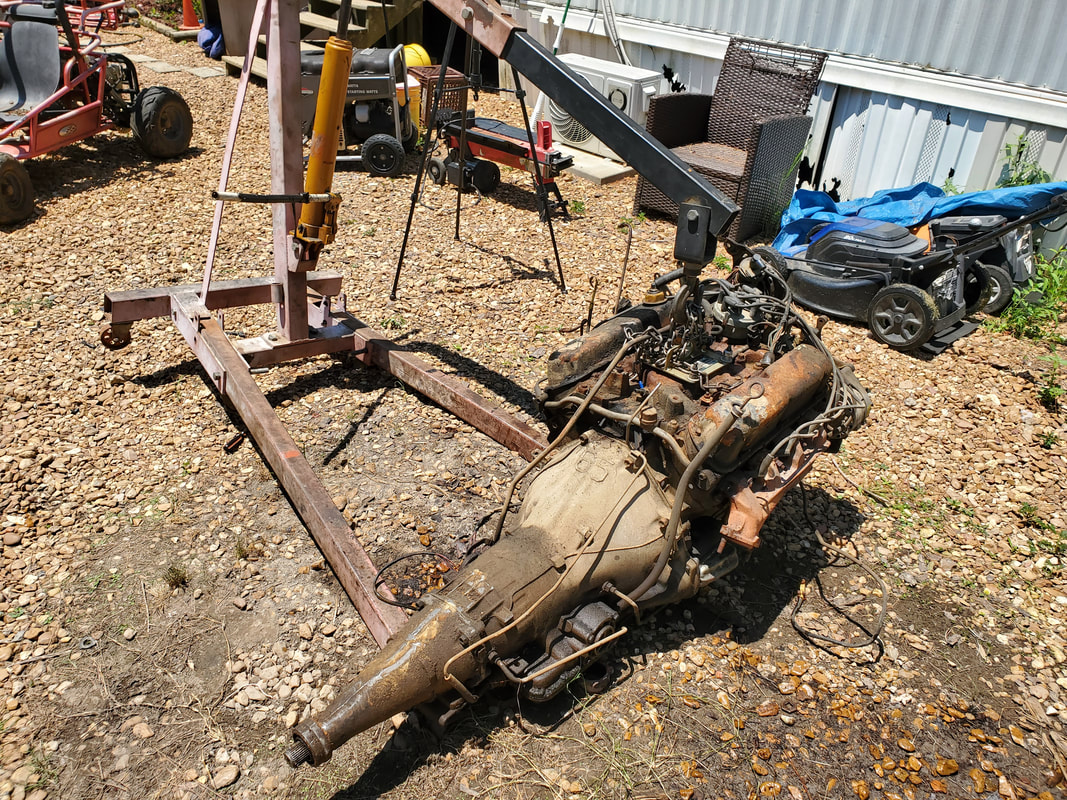
Engine and transmission freed from the engine bay of the truck. Truck is pulled well into the yard to allow me to back the S10 up to the crane to load the powertrain into the bed. Note the way the legs of the crane have sunk into the soft ground.
With the truck now void of its powertrain, the last thing I had to do was move it to a new parking spot so it can be out of the way while I await a buyer to take the body off my hands. I had to enlist the neighbor's tractor once again to pull the truck around to the other end of the compound, near the scrap pile and auto parts area. Since this truck has a self-correcting steering, I had to constantly get out and steer the truck to where it was lined up for a final approach to the parking spot, where I was able to pull straight, going the length of the yard to the parking spot. Once the truck was parked in its new spot I placed the hood back on the body to protect the engine bay from rain since the ignition and other good components could be rusted out from excess moisture. With that all said and done, the truck's short service with us is concluded.
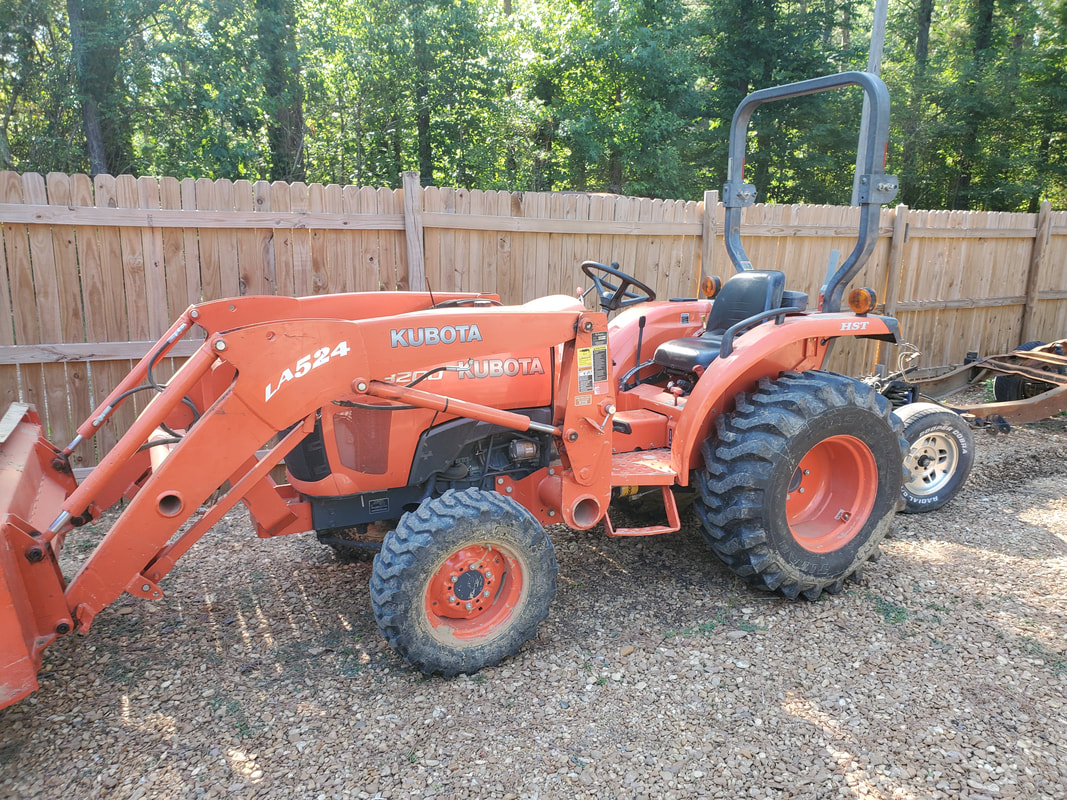
The trusty dusty Kubota tractor, courtesy of the neighbor, that has pulled us out of a jam plenty of times, and is about to do it again.
The truck body, pulled over to new parking spot to stage while I attempt to sell the body.
